The Kore.ai AgentAssist application is available in the Genesys AppFoundry. Work with your Genesys Account Executive to purchase the Kore.ai AgentAssist app and get it enabled in your Genesys Cloud instance. After logging into the Genesys Cloud CX account, you can install the application from the AppFoundry catalog.
Prerequisites
Before you begin the installation, perform the following tasks:
- Sign up for AgentAssist and create a bot. AgentAssist login needs to be unique on the Kore.ai platform. The XO Platform automatically creates a workspace using the login you signed up with. (An Enterprise Plan is preferred for production usage as it provides the necessary resources, tools, and support to ensure a successful and efficient chatbot implementation.)
- Work with your Genesys account executive along with Kore.ai to procure and enable Kore.ai Premium Client applications in your instance. By leveraging the full capabilities of the Cloud platform with administrative access, you can optimize and enhance your contact center operations, improving customer engagement and support.
- If you are using a Genesys Sandbox instance, ensure that at least one slot is available for an AudioHook installation, as Genesys Sandbox instances are limited to only two AudioHook installations.
- Familiarity with creating a queue in Genesys.
Create a Queue
- Sign in to Genesys Pure Cloud.
- Go to Admin > Contact Center > Queues, or enter “queues” in the search bar under the Admin section and press the Enter key.
- Click Create Queue. An empty page to create a new queue appears on the right side of the page.
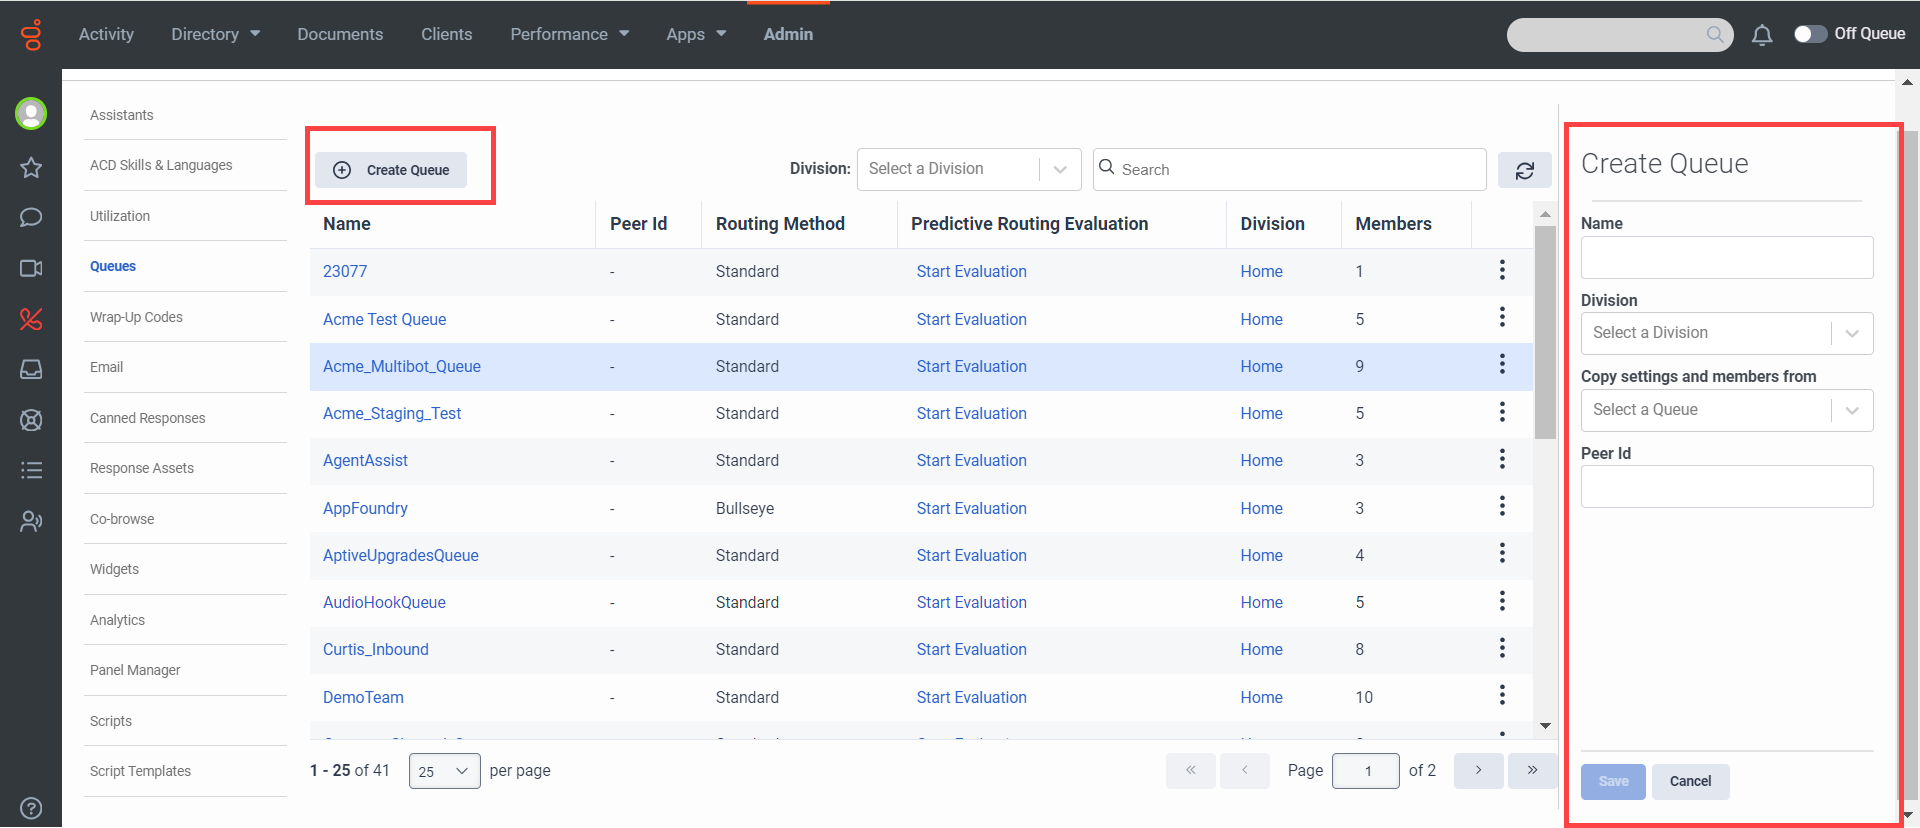
- Enter/select the following details in the Create Queue page:
- Name: Enter a unique name for the new queue.
- Division: Select a division in which you want to place this queue.
- Copy settings and members from (Optional): Select an existing queue name, if you want to copy the settings and members from it.
- Peer Id (Optional) : Enter a unique ID that can be used to identify the queue from an external platform.
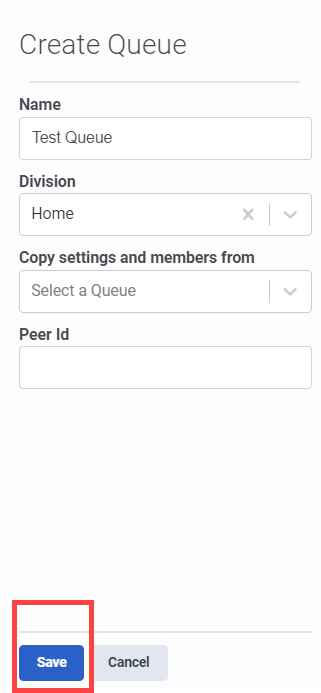
- Click Save.
Enabling the Audio Monitoring toggle
To stream audio to third-party services, follow the below steps:
- Sign in to Genesys Pure Cloud.
- Go to Admin > Contact Center > Queues, or enter “queues” in the search bar under the Admin section and press the Enter key.
- Click the intended queue name.
- Click the Voice tab.
- Enable the Audio Monitoring toggle.
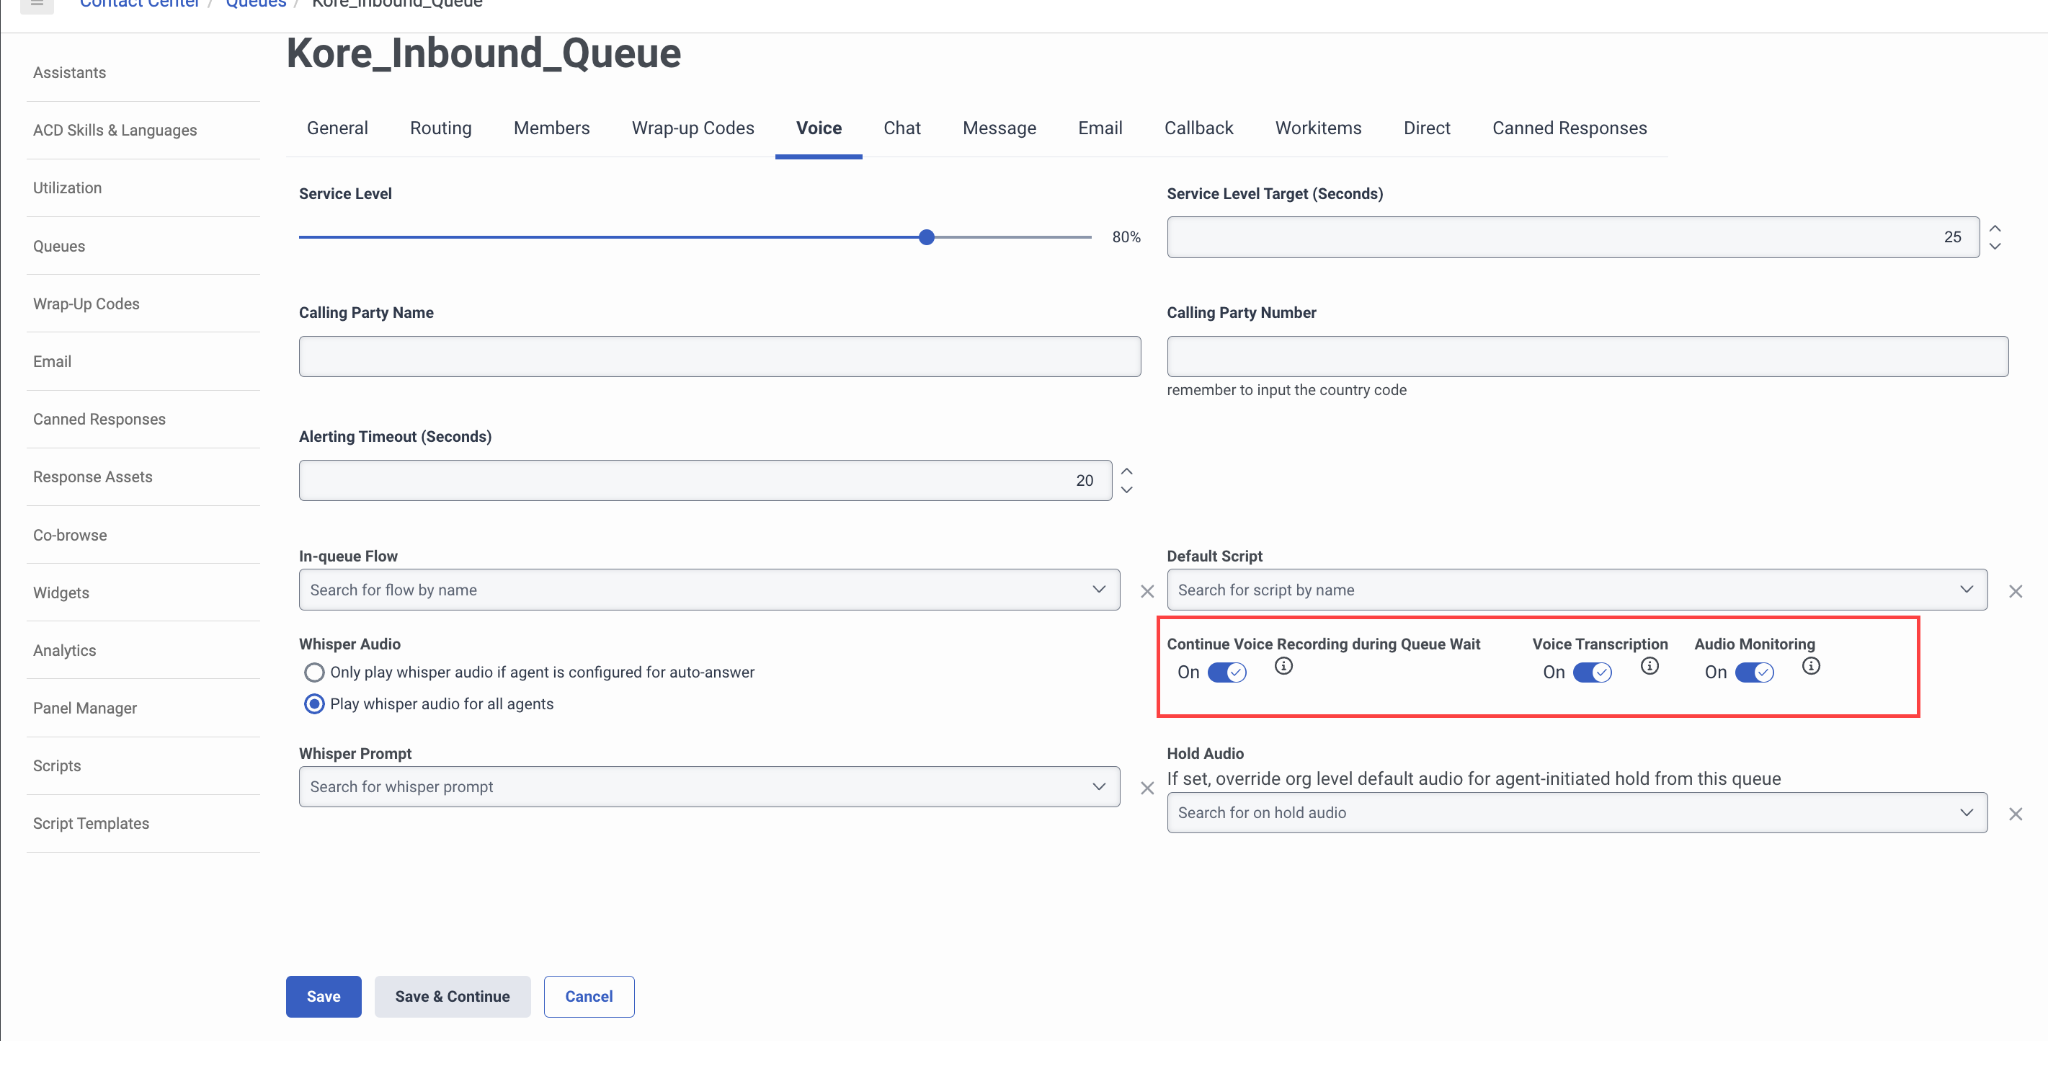
Audio Monitoring: Voice settings on a Queue now have an additional Audio Monitoring option, separate from Voice Transcription. This allows granularity in what you turn on. The Audio Monitoring will be enabled in the queue, if Audiohook Monitor is enabled by the organization.
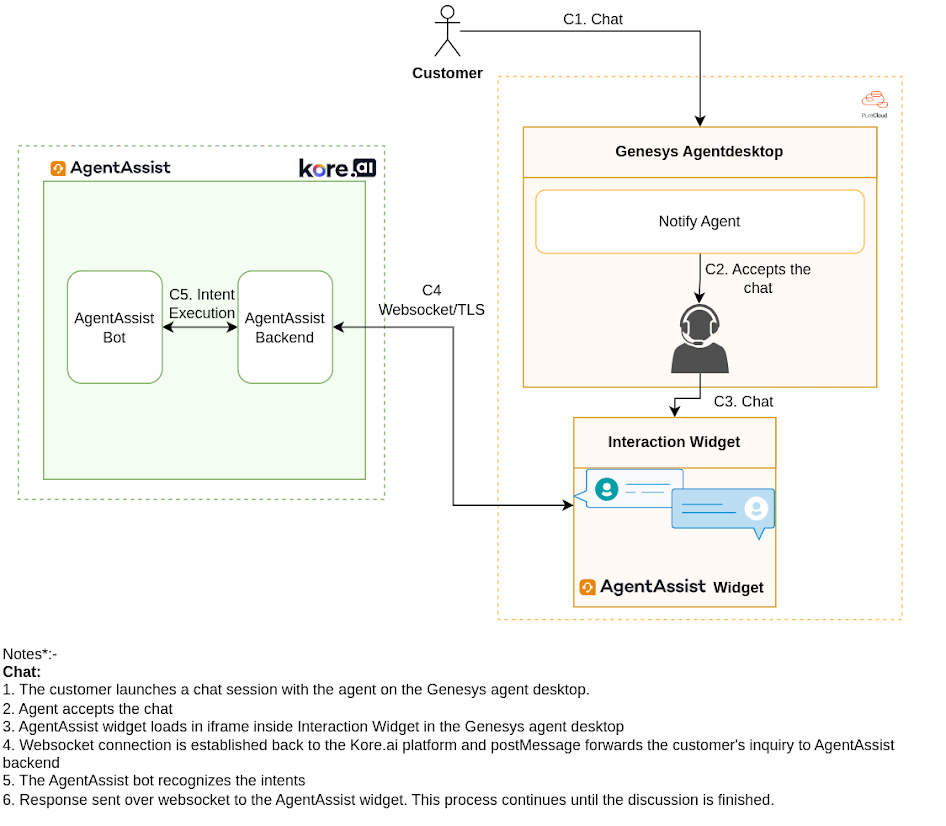
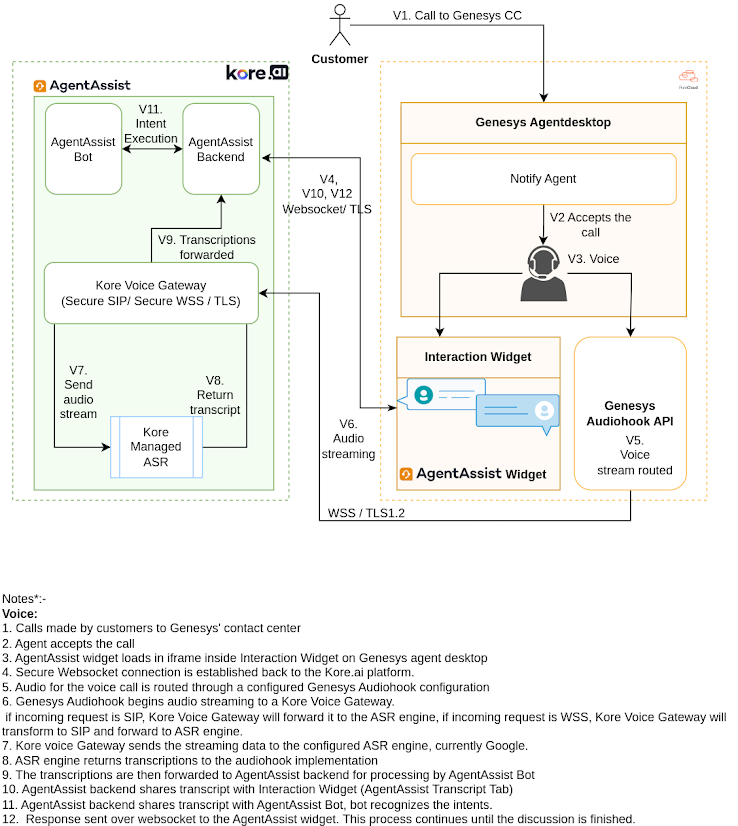
Interaction between Genesys Cloud and Kore.ai AgentAssist
Chat
Voice
Installing AgentAssist Application for Genesys
After you have fulfilled all the prerequisites, you can install the Kore.ai AgentAssist application for Genesys.
- Sign in to the Admin Console for Genesys Cloud CX.
- Install the Kore.ai AgentAssist application by visiting the AppFoundry in the Bots and Automation category. (You can also search for “Kore.ai AgentAssist” in the AppFoundry.)
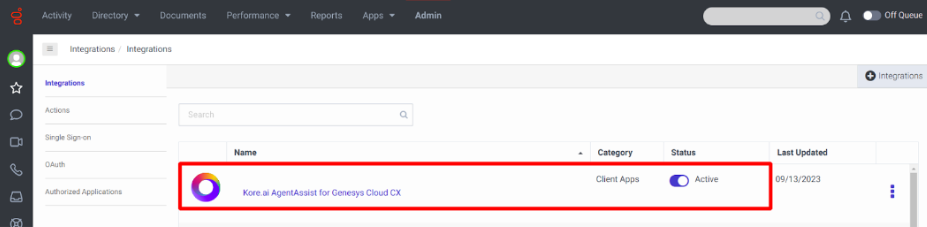
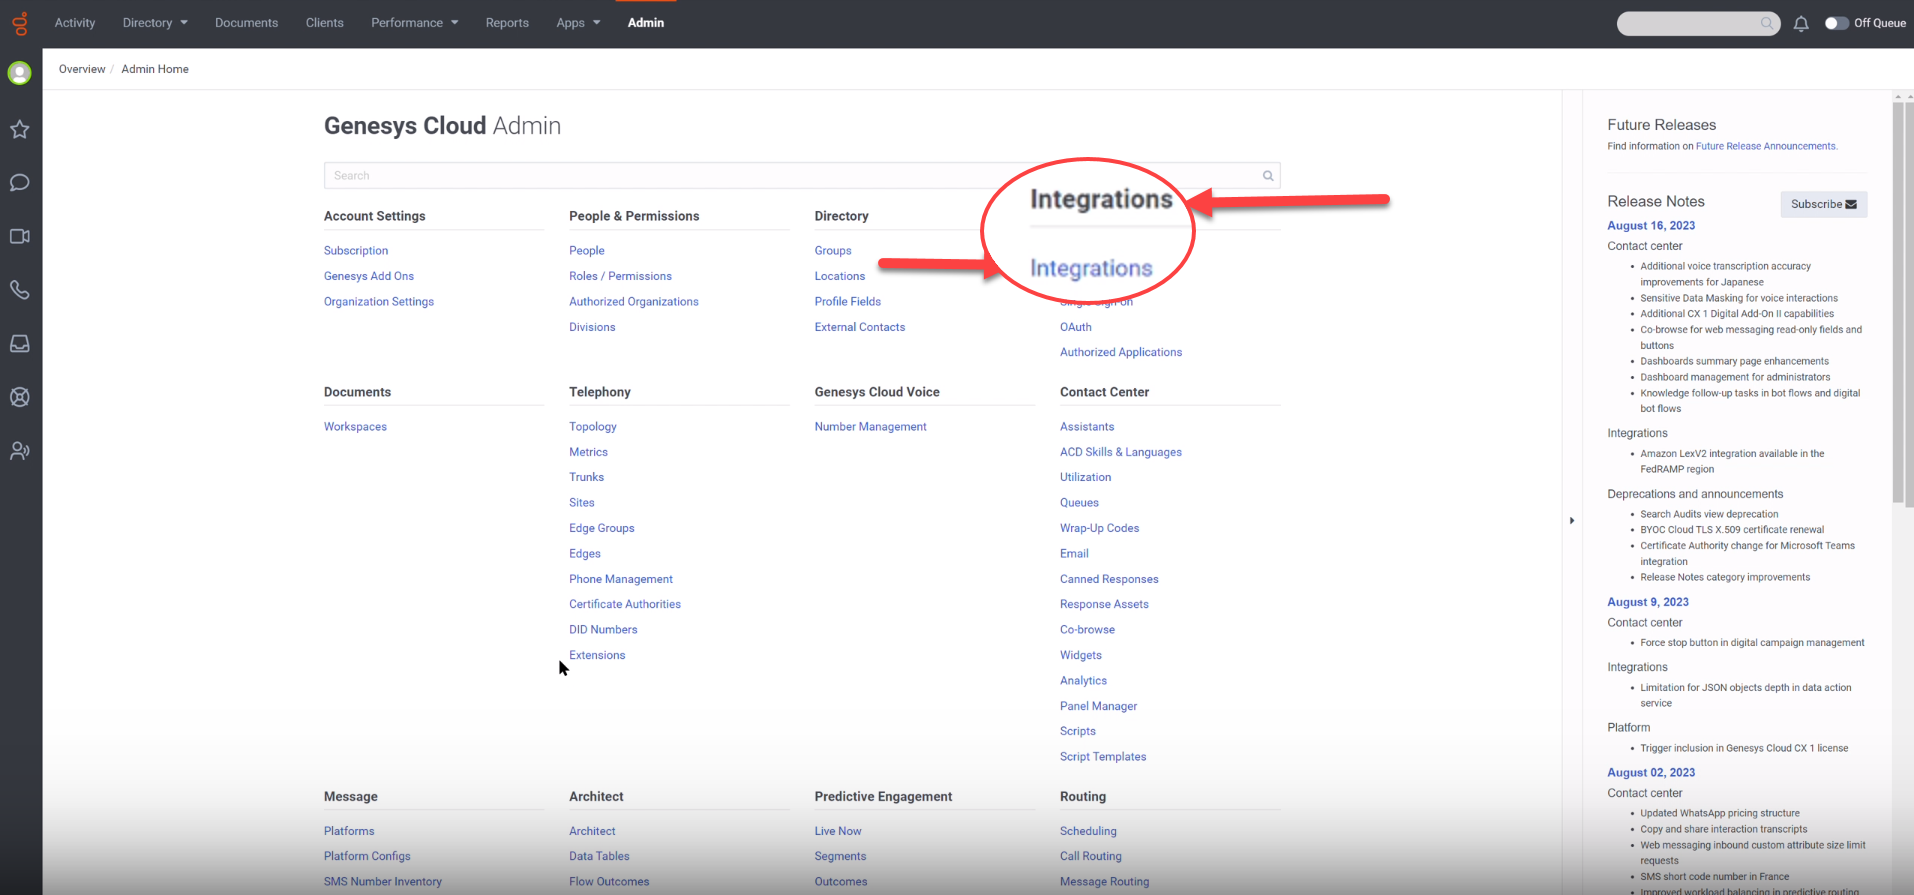
- Go to Admin > Integrations > Integrations and turn the Status toggle to Active.
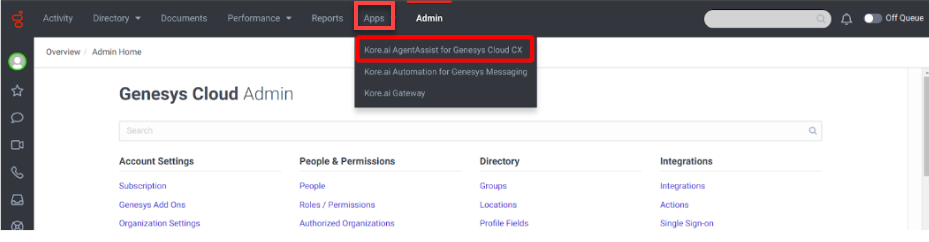
- Click the installed app from the Apps list.
- When you begin the installation, the start page is displayed, as shown below. Click Start.

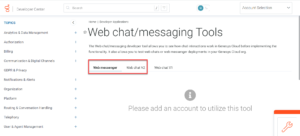
- Before you proceed, get the required Chatbot details information from AgentAssist > Configuration > System Setup > Channels > Chat. See Finding Chatbot Details.
Note: You must provide channel configuration information to run a bot on the channel. Most channels require that a bot should have an account on the channel. To create an AgentAssist account, refer Sign up for AgentAssist. - On the next page, provide AgentAssist configuration details. Enter the following information in the fields: AgentAssist URL, Bot ID, Client ID, Client Secret, and Language.
Note: In the AgentAssist URL field, enter https://agentassist.kore.ai to access AgentAssist Widget V2. For AgentAssist Widget V3, enter the Widget URL copied from Configuration > System Setup > Channels > Chat page of AgentAssist.

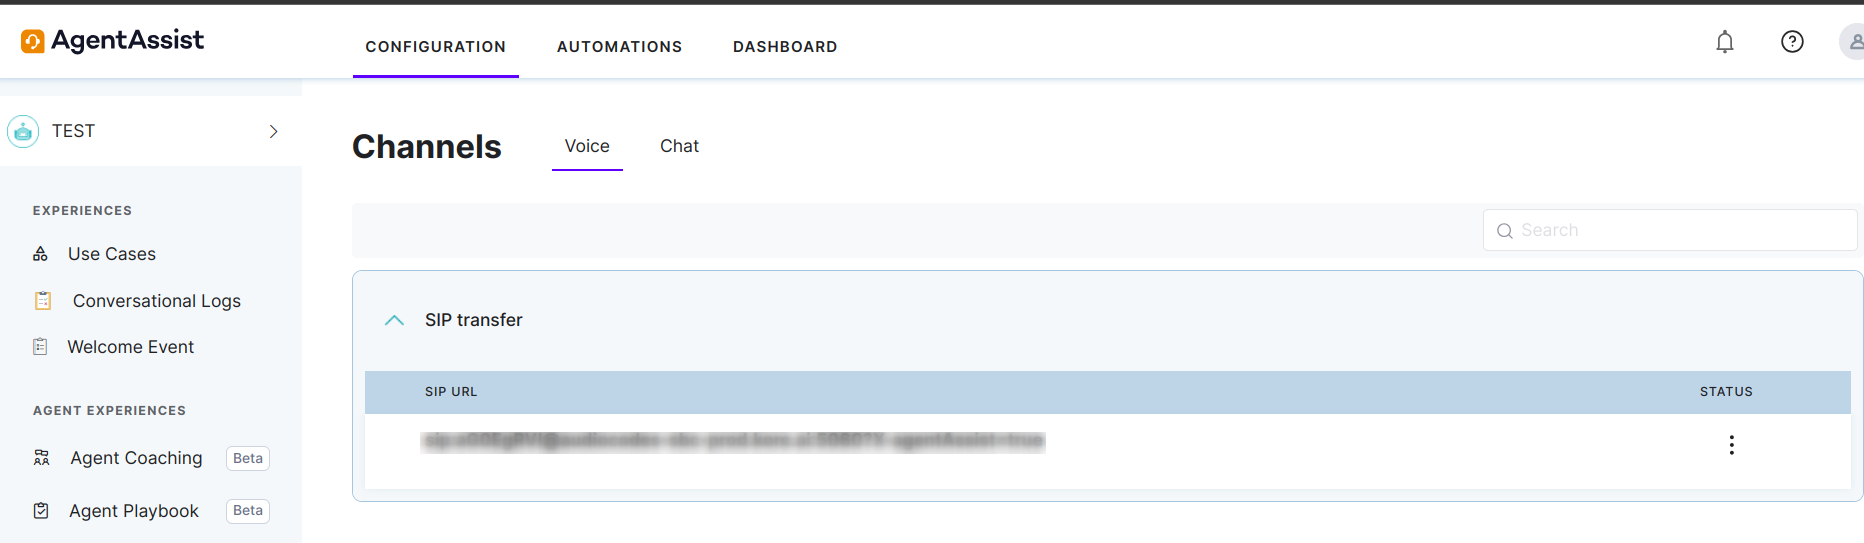
Find the SIP identifier from the AgentAssist account.
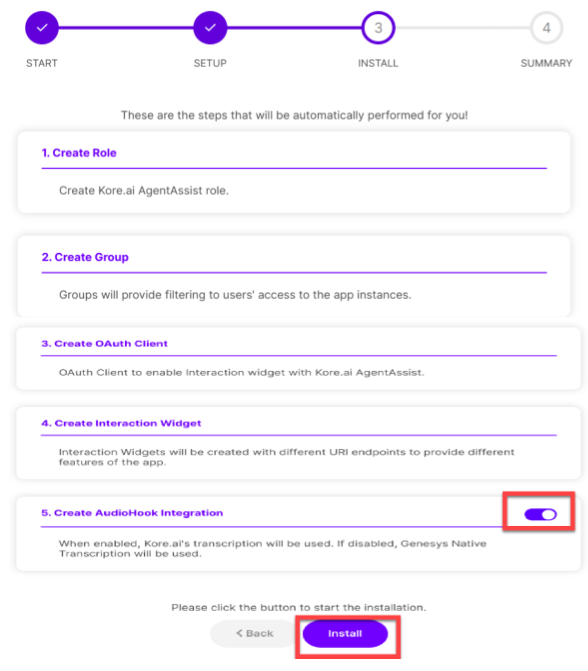
- Click Next. The wizard automatically performs a few setup steps, as shown in the following screenshot:

- Turn the Create Audiohook Integration toggle on/off to enable or disable it.
When enabled, Kore.ai’s transcription is used. When disabled, Genesys’s own transcripts are used. - Click Install.
The summary of all the steps the wizard has successfully performed, along with the results of the installation in raw JSON format, is displayed as shown in the screenshot below.
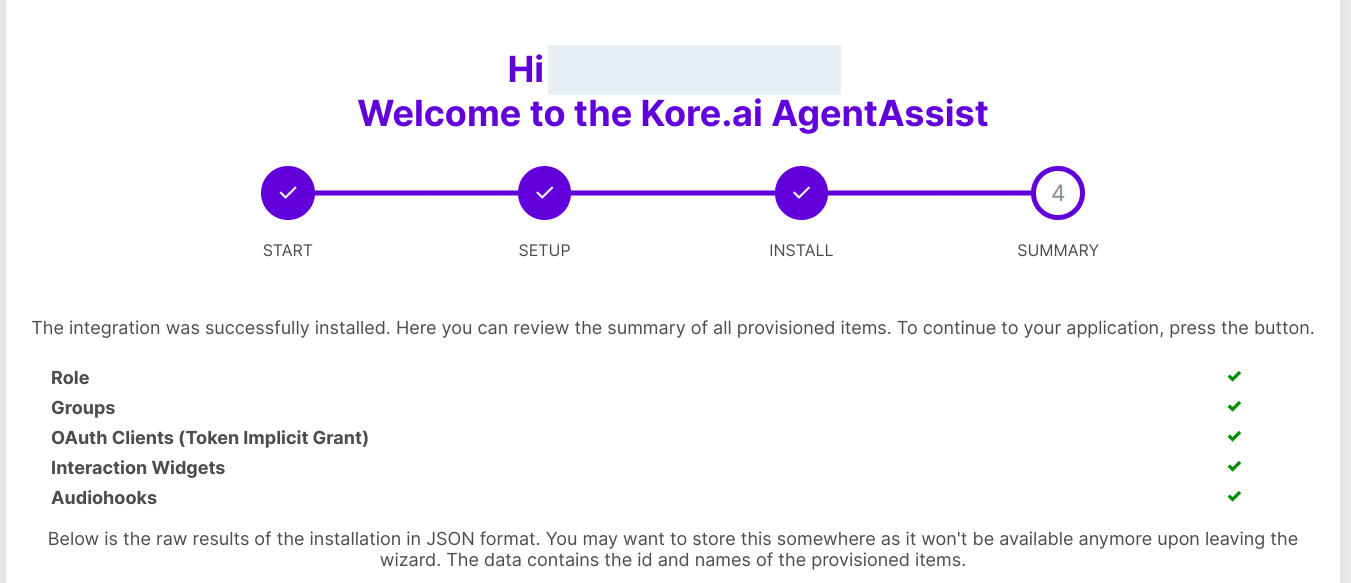

- Click Go to Application. The Kore.ai AgentAssist page is displayed.


Post-installation Steps
The next step after installation of the AgentAssist Application is to create/select groups that can view this application. Members of these groups could be agents or supervisors. Admins can create groups based on different criteria and grant permissions. For more information on groups, visit https://help.mypurecloud.com/articles/about-groups/.
Steps to select groups:
- On the Genesys Cloud Admin page, click Integrations under the Integrations menu.

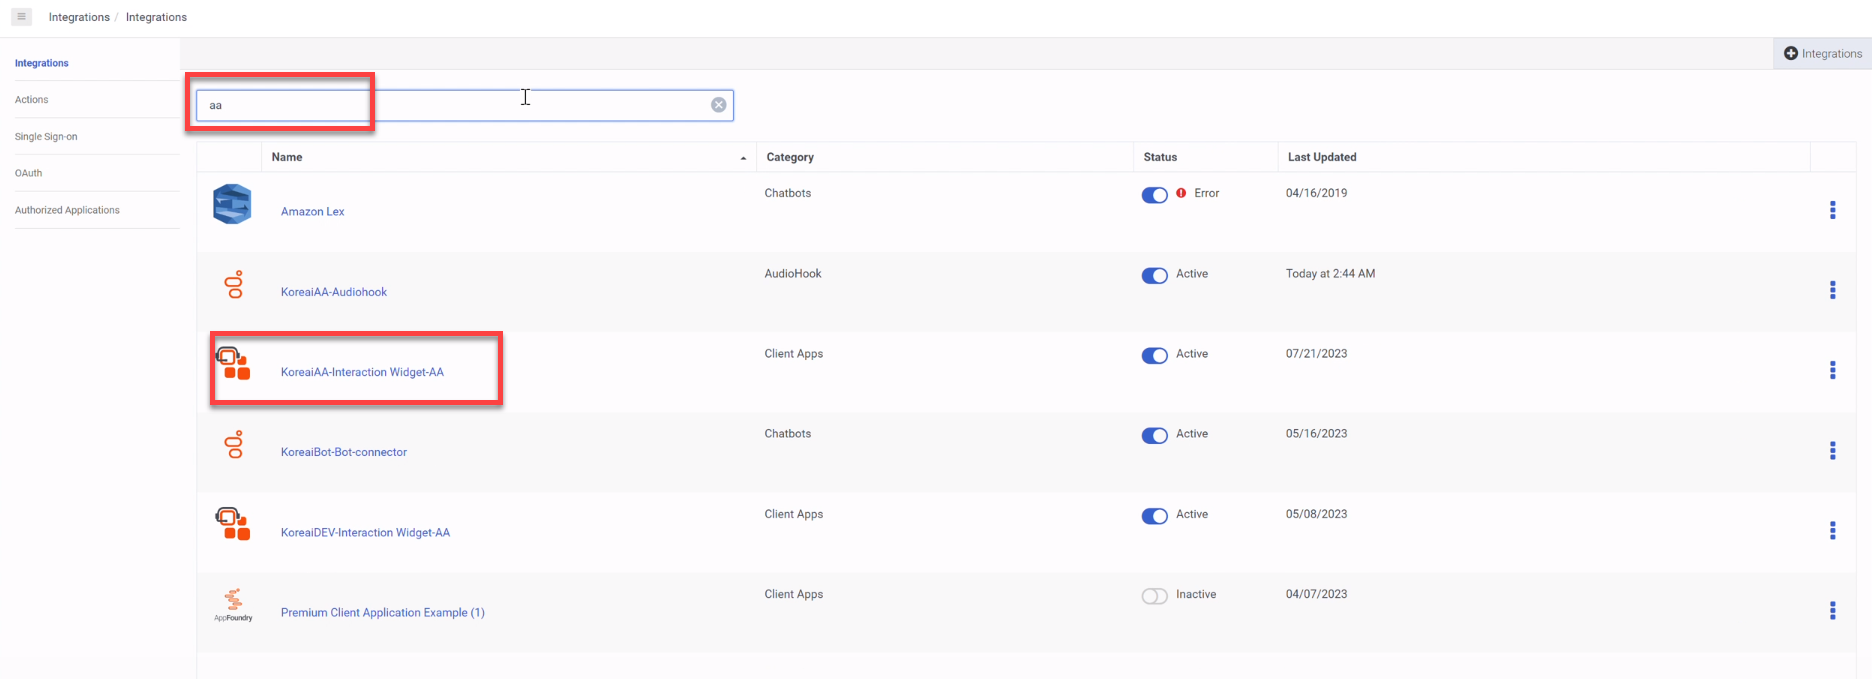
- Using the search bar, find and click the KoreaiAA-Interaction Widget-AA widget.

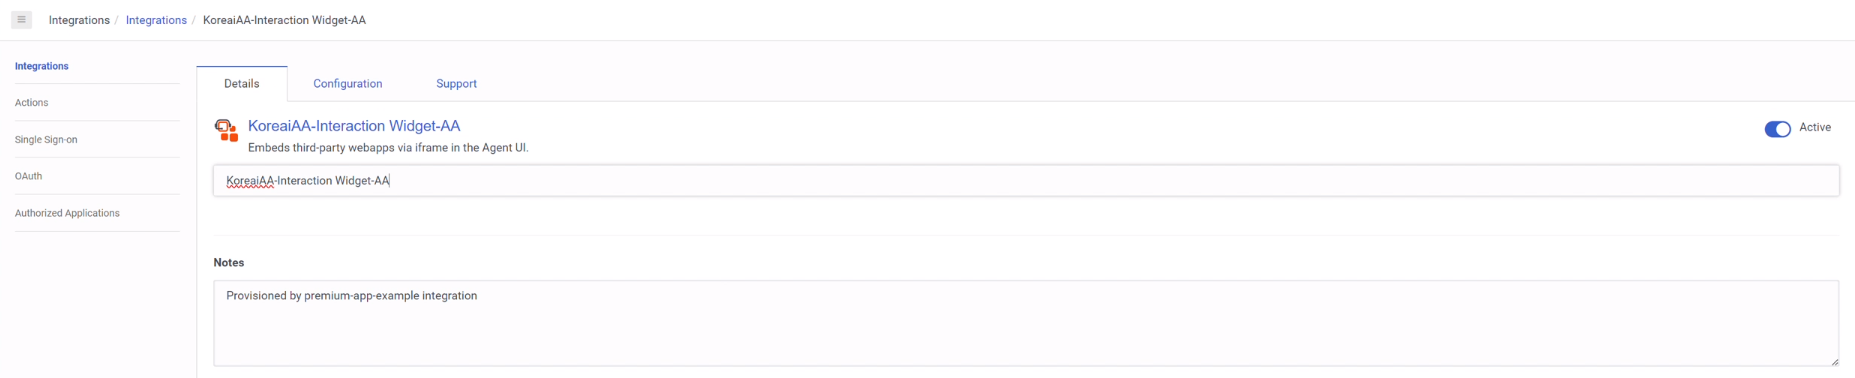
- The following screen appears.

- On the widget, click Configuration, and go to the Group Filtering section.
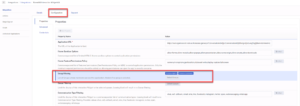
Note: Only the members of the selected groups can view this application. - Click Select Groups and select the group names whose members can view this application.

AgentAssist Chat Simulation
Prerequisite
The AgentAssist widget must receive a “session disconnect” event to display the Conversation Summary feature. For this feature to work, you must update or confirm the existing messaging configuration. (This confirmation is required for any Messaging Configuration connected to a deployment routing to a Genesys agent using Kore.ai AgentAssist during a live messaging interaction with a customer.)
- In the Messenger Configurations page, click Apps and select Display conversation status and disconnect session.

- Click Save New Version.

Steps to Start Chat Simulation
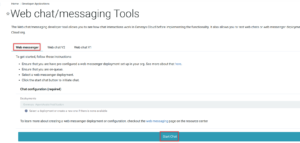
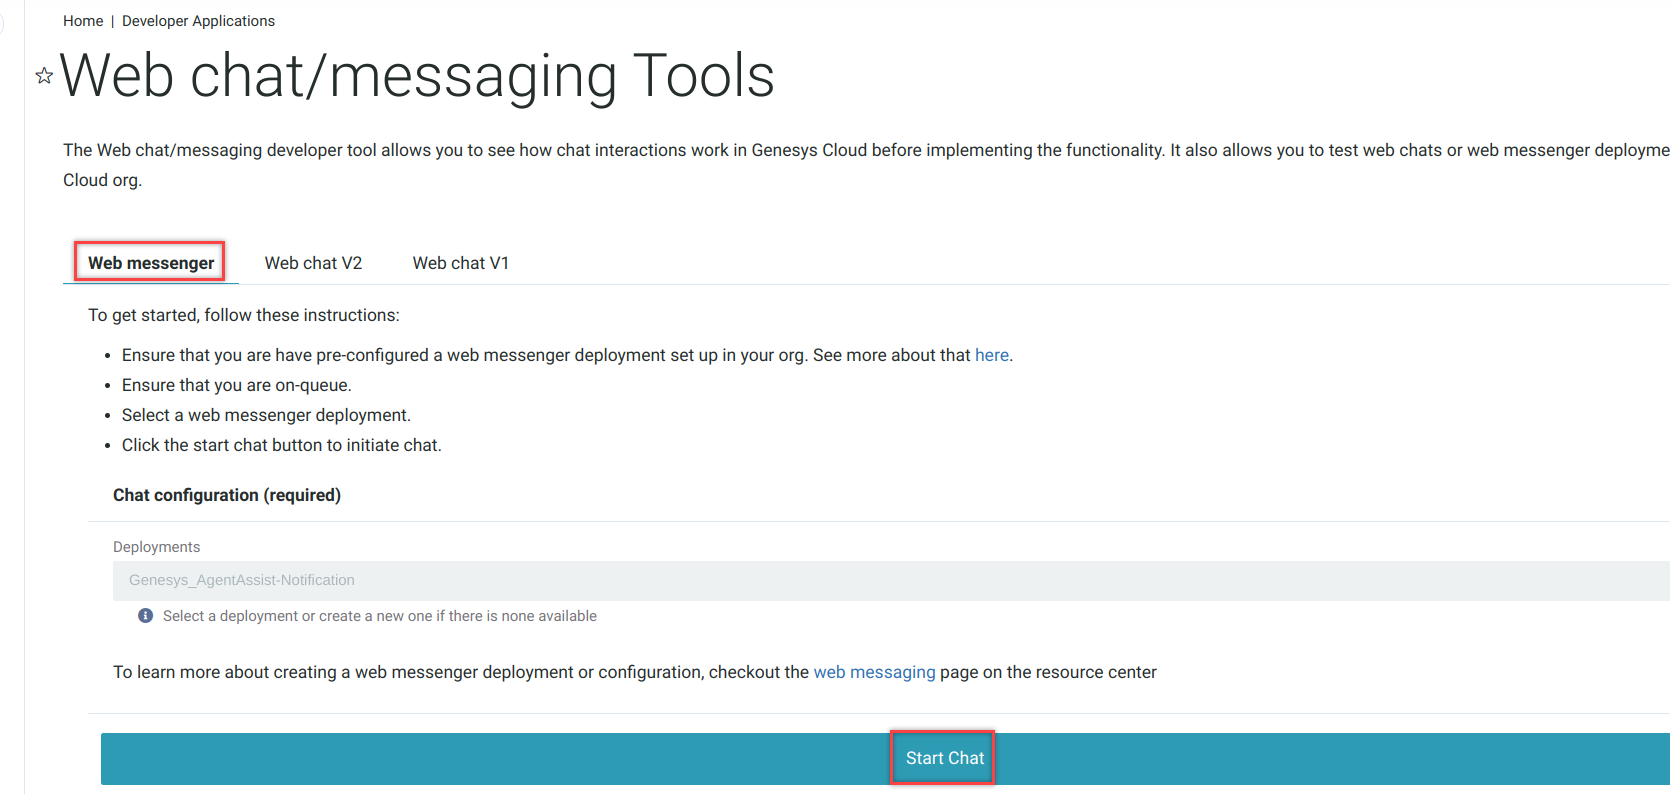
- Sign in to Genesys Developer Applications.
Note: To start chat simulation, you must have access to the Genesys Developer portal (an account with Genesys).
- Select Web Messenger for the simulation and then click Start Chat to initiate the chat simulation.

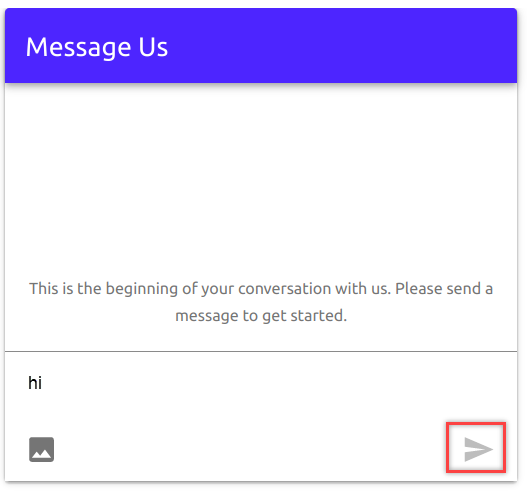
- Enter a message on the Message Us window and click the Send icon.

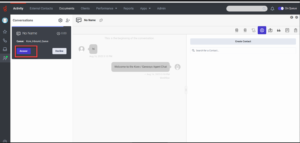
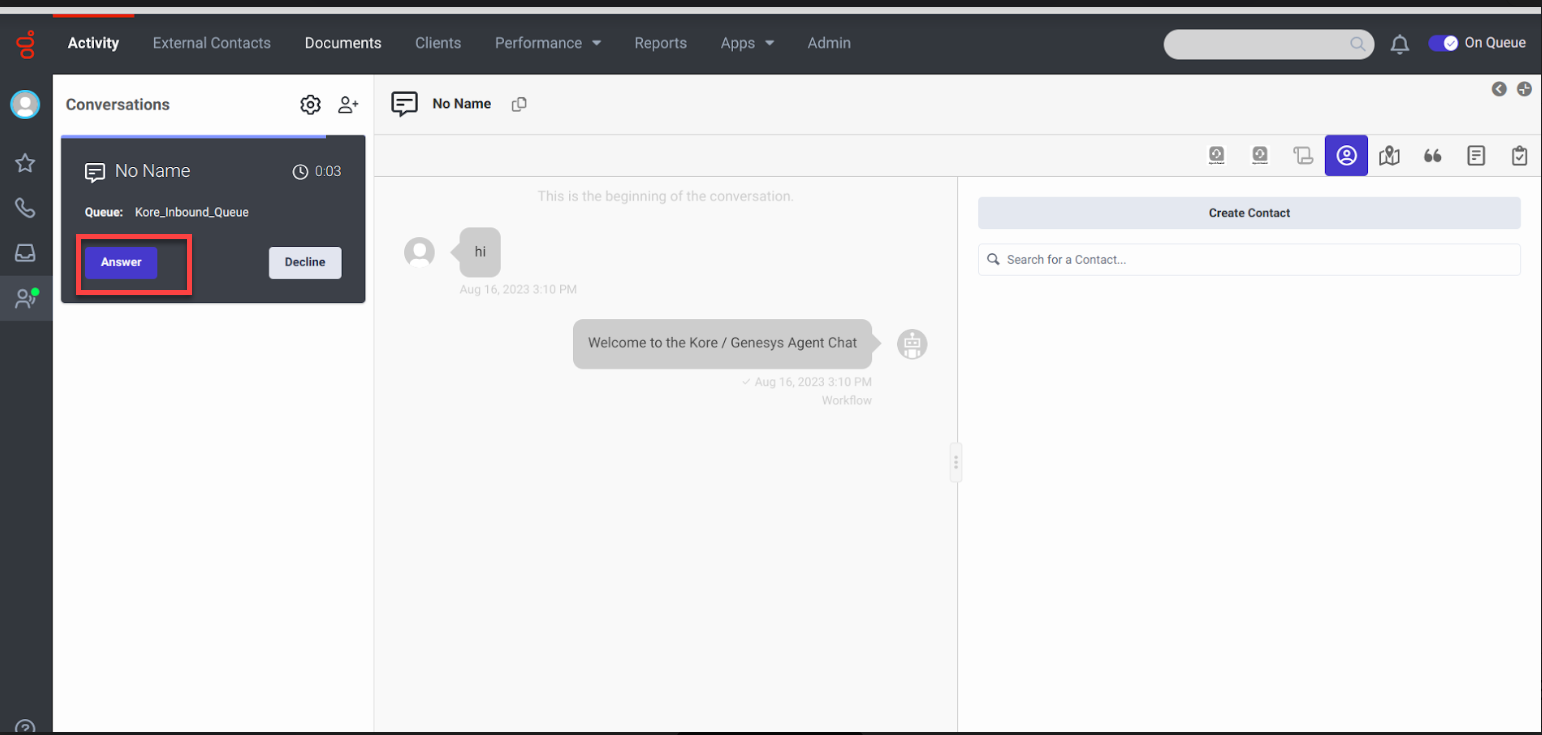
- Activate the On Queue toggle on the top–right corner of the page.

- A new chat notification appears on the Genesys Web Chat page. Accept the conversation by clicking the Answer button on the left panel.
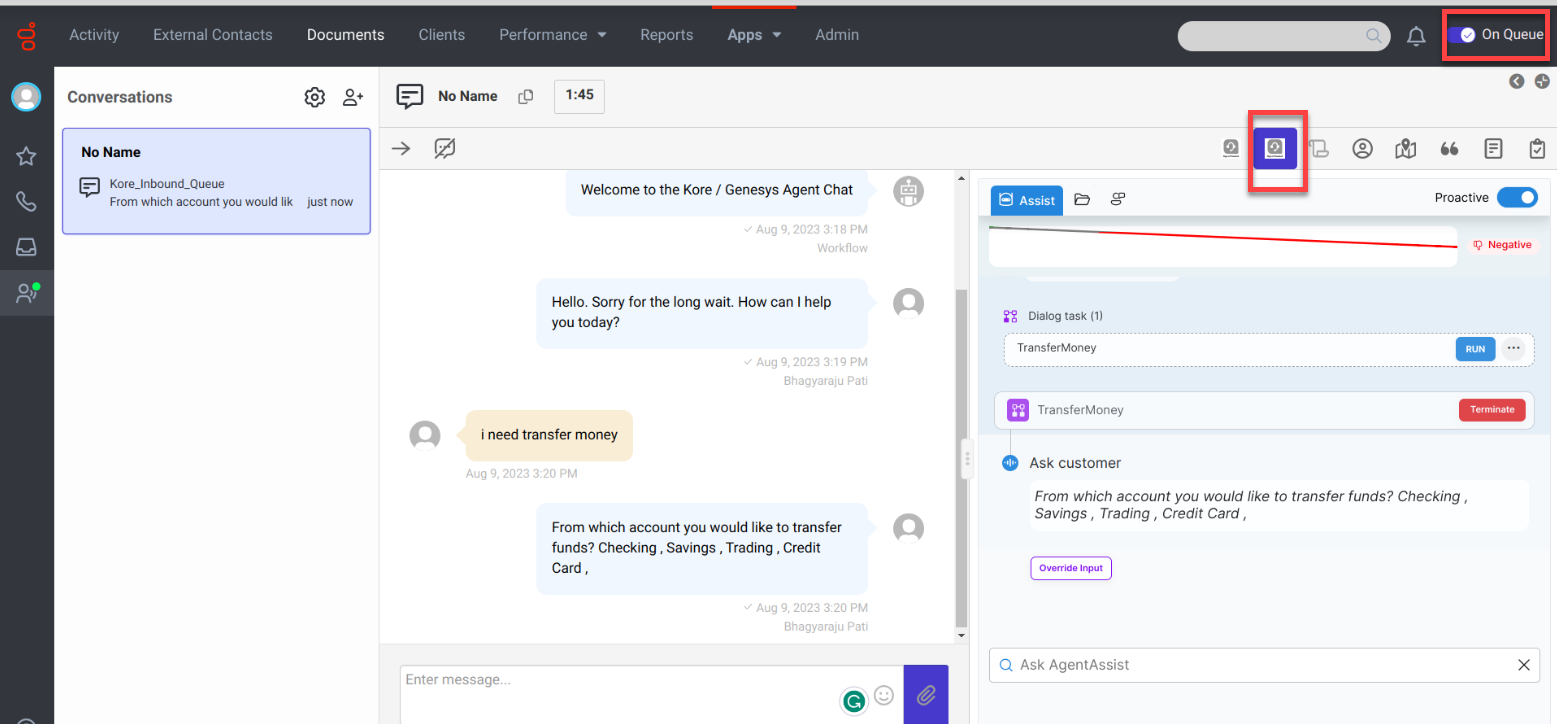
- Select the Interaction Widget icon to view chat simulation.


Related Link