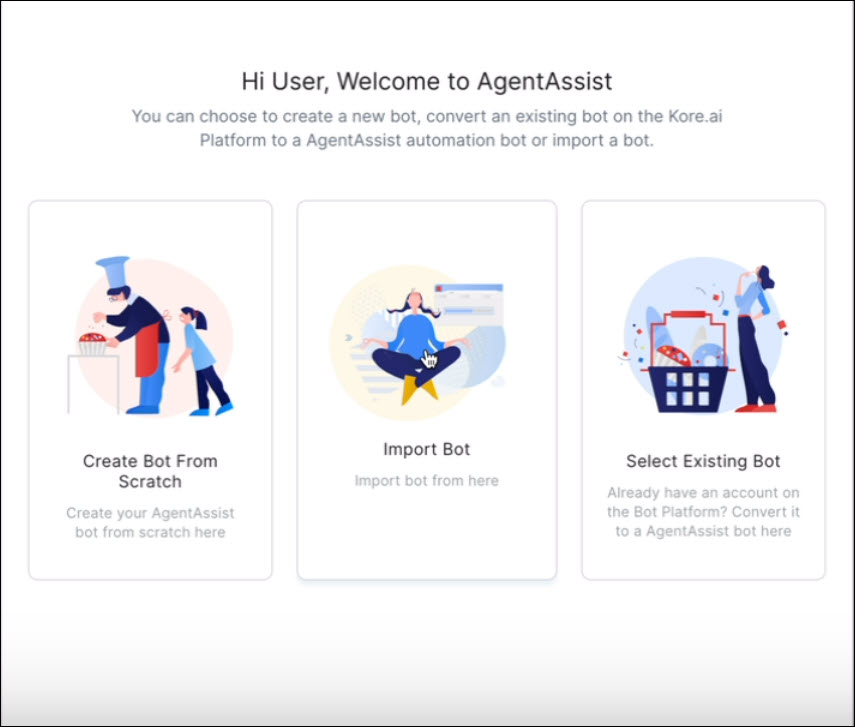
AgentAssist allows you to create a bot in three different ways.
You can select from the following three options:
- Create a Bot from Scratch.
- Import a Bot.
- Select an Existing Bot.
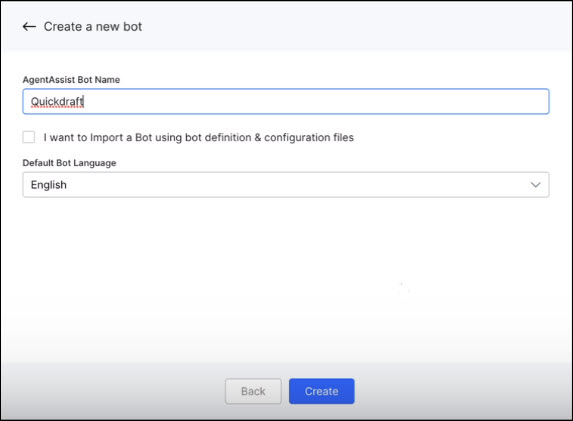
Create a Bot from Scratch
When there is no existing bot in the environment, you can create a new bot from scratch.
To create a bot from scratch:
- Enter a Bot Name.
- Select the Default Bot Language, e.g., English.
- Click Create.
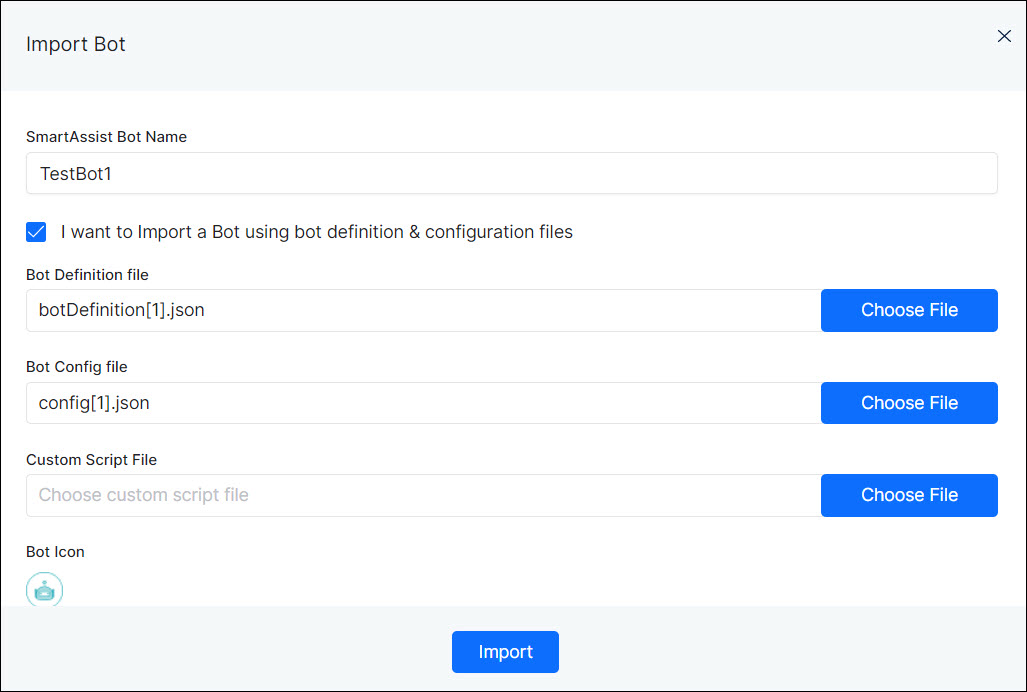
Import a Bot
You can import a bot if you have a downloaded copy of the bot with all configured use cases.
To import bot:
- Enter a Bot Name.
- Select I want to import a Bot using bot definition and configuration files.
- Choose file for the following:
- Bot Definition
- Bot Configuration
- Custom Script
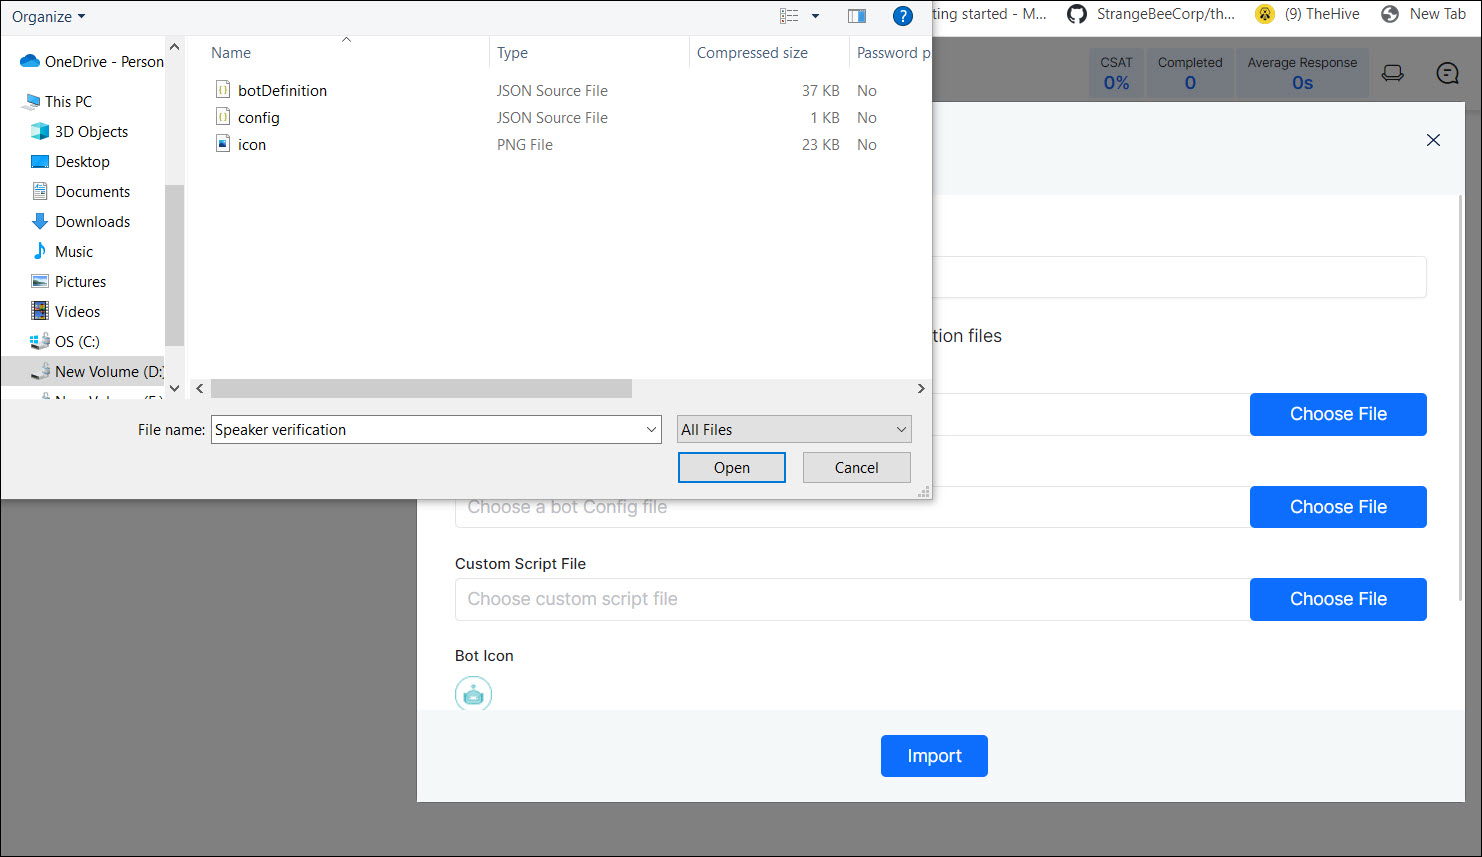
- Import the files.
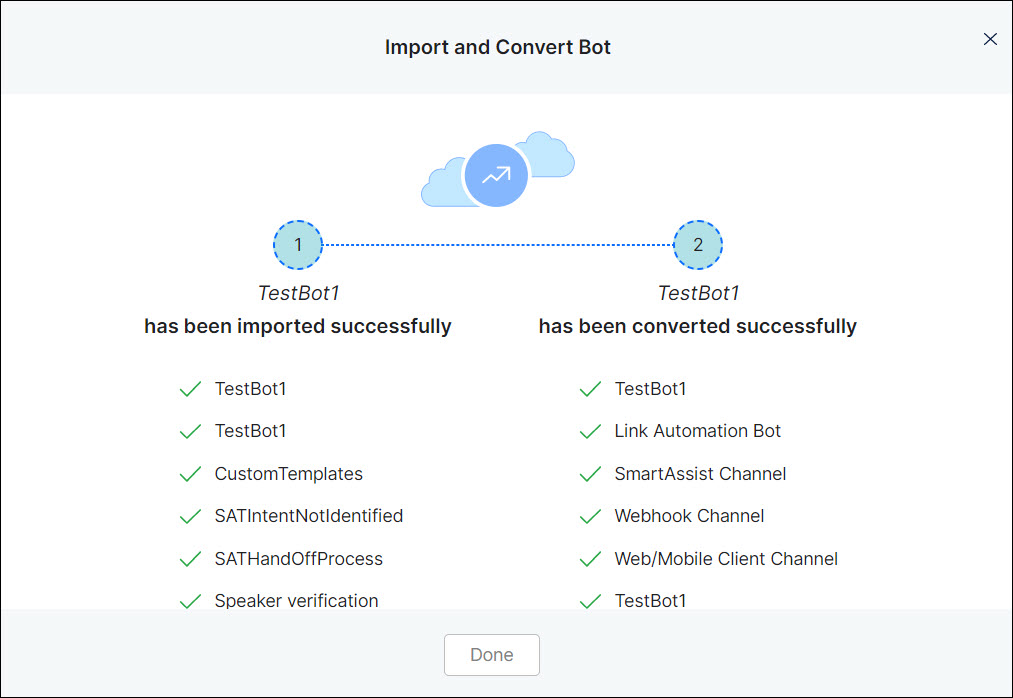
After you import the bot successfully, the screen appears as shown below:
Select an Existing Bot
A bot created under the same account as the logged-in account should be available in the library to link with AgentAssist.
When you create an account on the Kore.ai platform and build an account on agent assist, an account is also created on the XO Platform. In case you have an agent assist account and you already have an XO platform account, then the two accounts will be mapped together. The XO platform allows you to create a bot that will be listed in its library. You can use existing bots from XO’s platform’s library when creating a bot in AgentAssist.
To select an existing bot:
- Select an existing Bot.
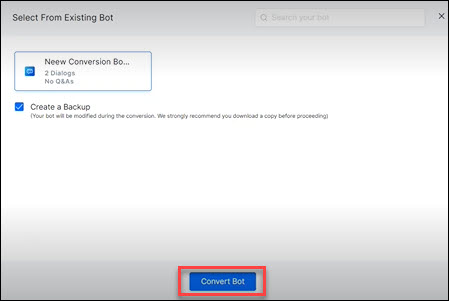
- Click Convert Bot. After creating a new bot, or importing it, or using an existing bot the user has to go to chat settings as shown in the next step and should be able to see the bot details. These bot details are required to make connection with third party agent desktop.
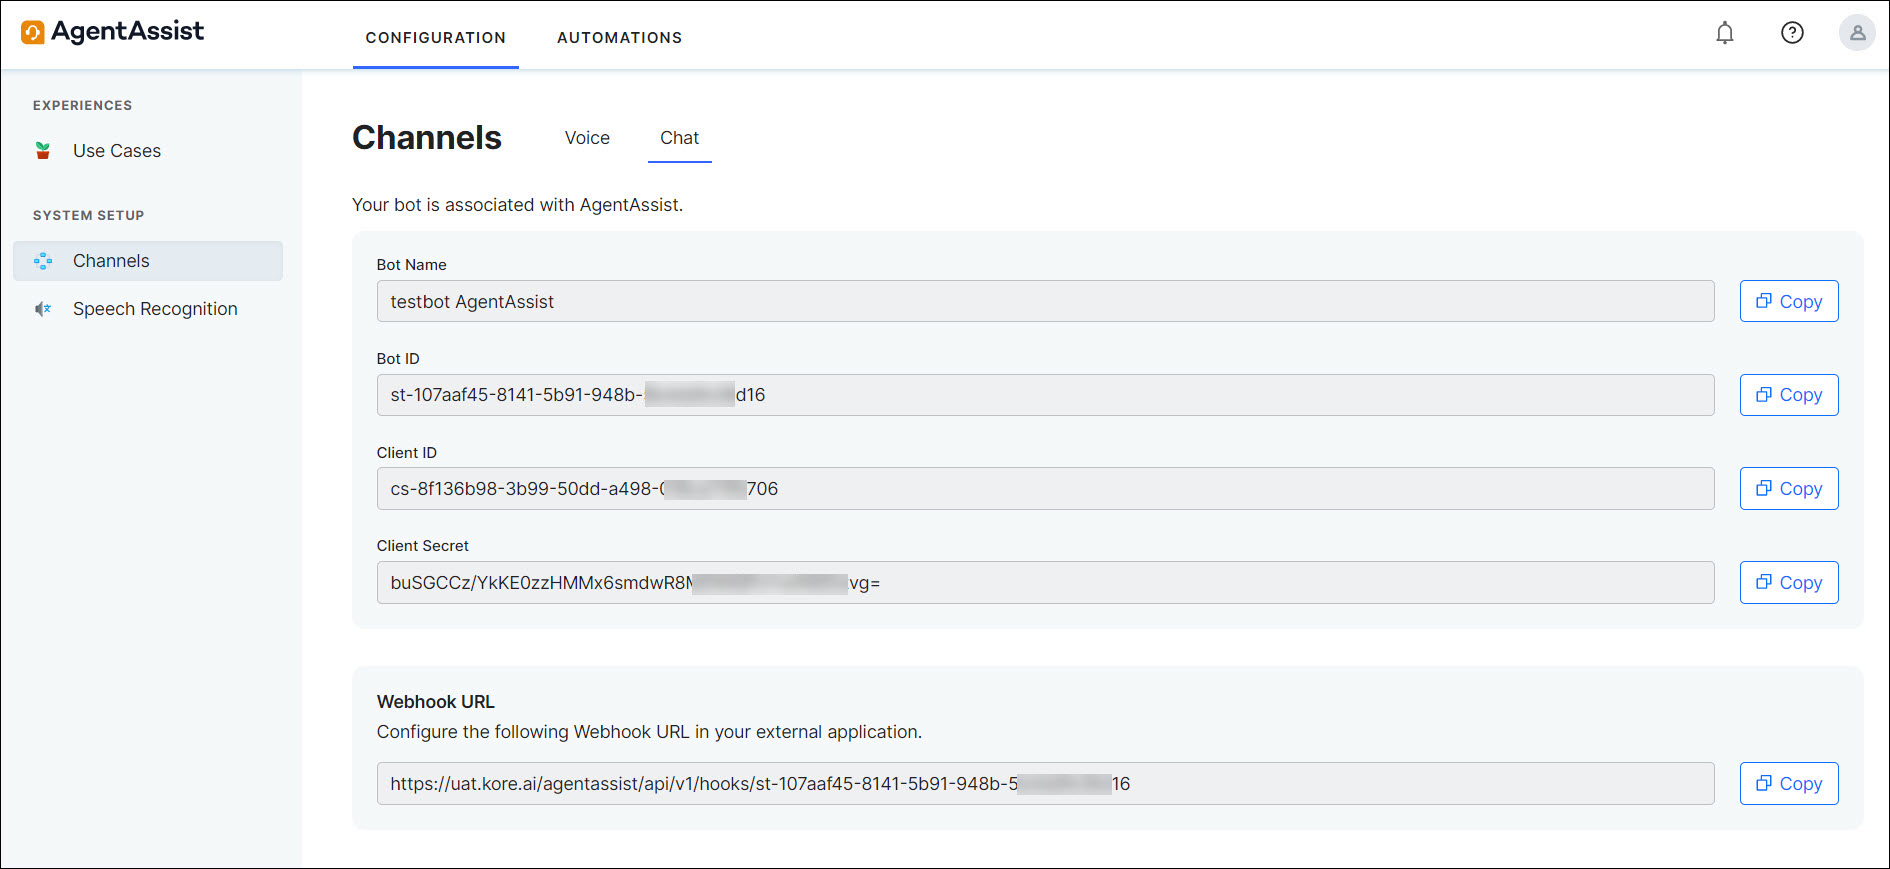
- Go to Channels > Chat and view the bot details.
Auto-filled bot details appear as shown below. The users can copy the required bot information and save it within the required 3rd party agent desktop, for example Salesforce, and Twilio Flex.

Creating a Use Case
You can create a new use case that can be used to drive the client through an experience based on their intent.
To create a use case:
- Go to Use case > Configuration > Conversations.
- On the General Setup tab, enter Use Case Name.
- Enter Category.
- Enter Alternate Utterance.

- Click Save.
- Go to the Triggers & Permissions tab.
- Enable/disable the settings During Chats, During Calls, and Launch by Library as required.
- Click Save.
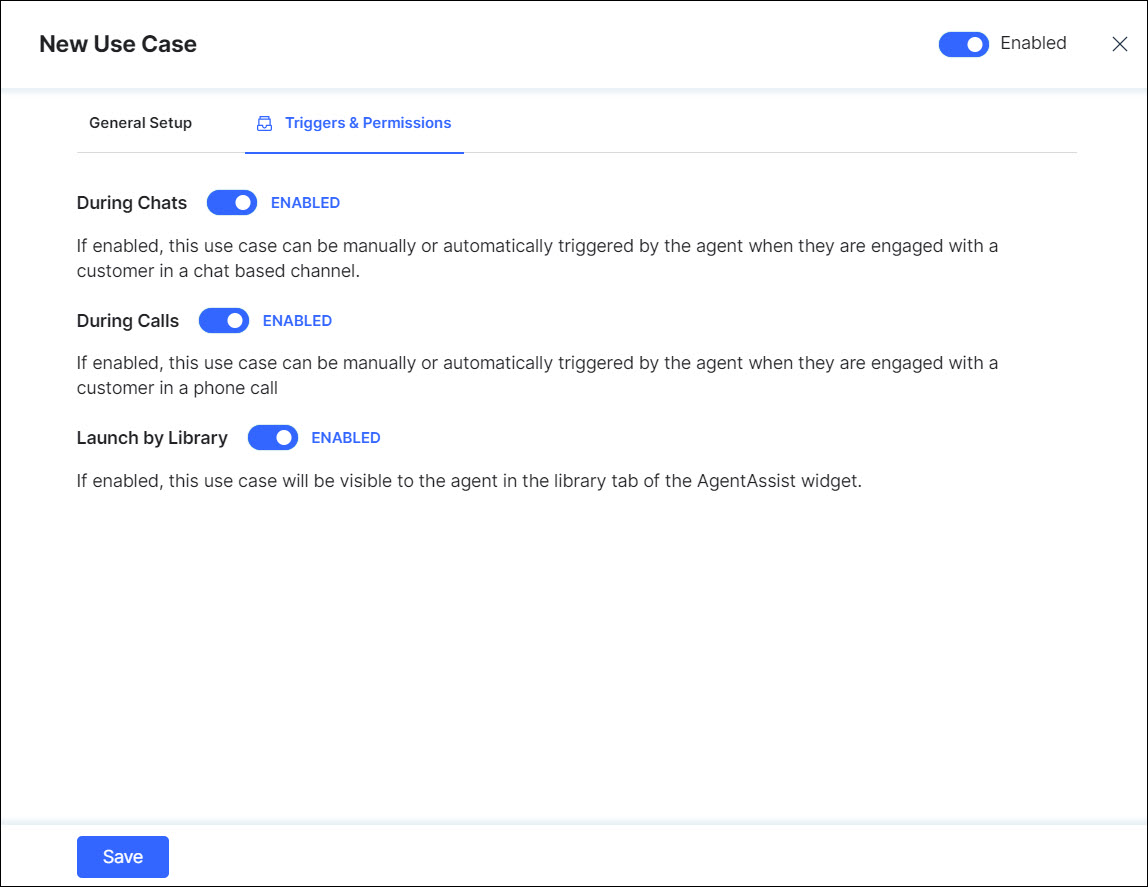
During Chats: If enabled, this use case can be manually or automatically triggered by the agent when they are engaged with a customer in a chat channel.
During Calls: If enabled, this use case can be manually or automatically triggered by the agent when they are engaged with a customer in a phone call.
Launch by Library: If enabled, the use case will be listed in the menu of use cases in the agent assist widget allowing the agent to browse and find this use case to trigger it.
Find Chat Bot Details (Bot Id, Client ID, Client secret key)
The following step helps the agent find the bot on 3rd party systems (for example, Salesforce):
- Go to Configuration > System Setup > Channels > Chat and view bot details.
Auto-filled bot details appear as shown below. The users can copy the required bot information and save it within the required environment (for example, Salesforce).