Overview
This document explains the AgentAssist Voice channel integration with NICE-CTI Salesforce.
Shared Responsibilities
| Activity | Responsibility | |
| CXOne Customer | Kore.ai | |
| Nice CX One Platform | ||
| ACD Configuration |
|
|
| CXOne Studio Script |
|
|
| Signal API Auth |
|
|
| Agent Assist Hub |
|
|
| Kore Bot Configuration |
|
|
| Salesforce Org | ||
| Chat Configuration |
|
|
| Installing Kore AgentAssist Package |
|
|
| Configuring Kore AgentAssist Package |
|
|
Prerequisites
- The NICE CX Salesforce package installed in your Salesforce org.
- NICE CX account set up and can receive calls on the Salesforce Service Console softphone.
- NICE CX Studio installed on your device.
- Agent Assist Hub enabled for your account.
- Kore AgentAssist NICE InContact package for Salesforce installed in your Salesforce account.
- Accounts using audiosockets must be migrated to Kore Voice Gateway.
- Have the bot credentials saved separately. You need Bot ID, Client ID, Client Secret, and SIP URI. Read Configure Voice Channel and Chat Channel for a walkthrough.
Agent Assist Hub
- Sign in to your NICE account with the username and password provided by the NICE customer support.
- Click the applications launcher button.
- A menu opens from the left side of the page.
- Click OTHERS > Automation & AI.
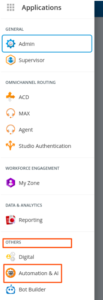
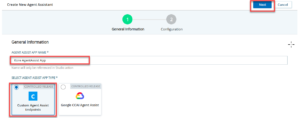
- Click Agent Assist Hub > Add Agent Assist App.

- Enter the name of the Agent Assist App in the AGENT ASSIST APP NAME field.
- Select Custom Agent Assist Endpoints.
- Click Next.
- Add the following settings with config parameters provided by the Kore.ai representative:
- Agent UI Option: Available by default (could be account specific)
- App URL: Kore.ai AgentAssist URL. https://agentassist.kore.ai/integrations/nice/iframe/?params={scriptparams} by default unless specified by your Kore.ai representative.
- App Title: As per the requirement.
- Participants: Both
- Text Relay Endpoint: https://agentassist.kore.ai/integrations/nice/relay/toKore
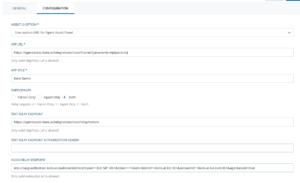
- Audio Relay Endpoint: <Websocket URL>/audiosocket/nice?sipuri=<Bot SIP URI>&token=<Token>&botId=<Bot ID>&accountId=<>&agentassist=true
-
- Websocket URL: “wss://savg-webserver.kore.ai” unless specified.
- Bot SIP URI and Bot ID: From the bot details.
- Account ID: From the Koreai representative.
- Token: Create a JSON Web Token on jwt.io with the following details.
- Payload: {“appId”: <Bot Client ID>}
- Header: {“alg”: “HS256″,”typ”: “JWT”}
- Secret: Your Kore.ai Client Secret.
-
- Scroll down and add the following Configuration Parameters:

- Agent UI Option: Available by default (could be account specific)
- Click Create.


Salesforce Setup
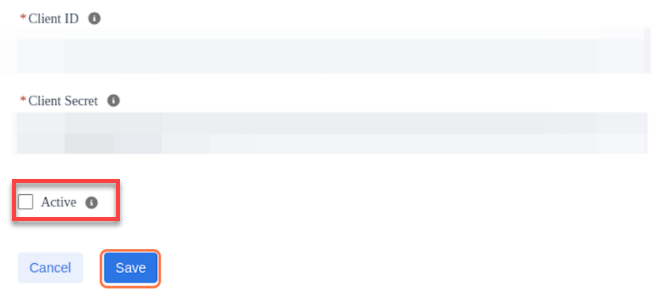
Configure the Kore AgentAssist Licence
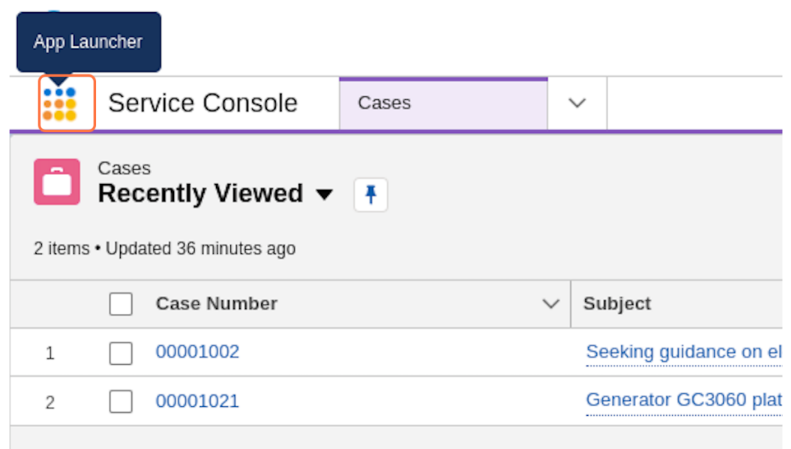
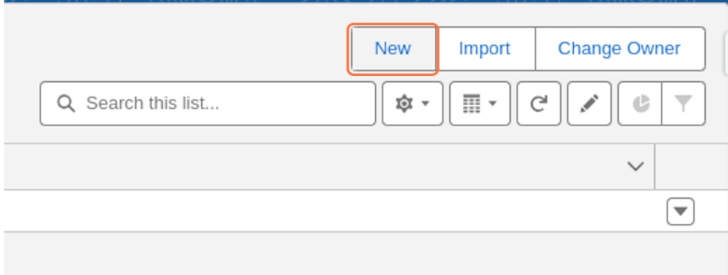
- Click the app launcher.
- Type “kore” in the search box and select Kore AgentAssist Feature Configuration from the displayed list.
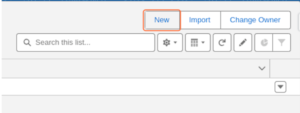
- Click New from the top right corner of the page.
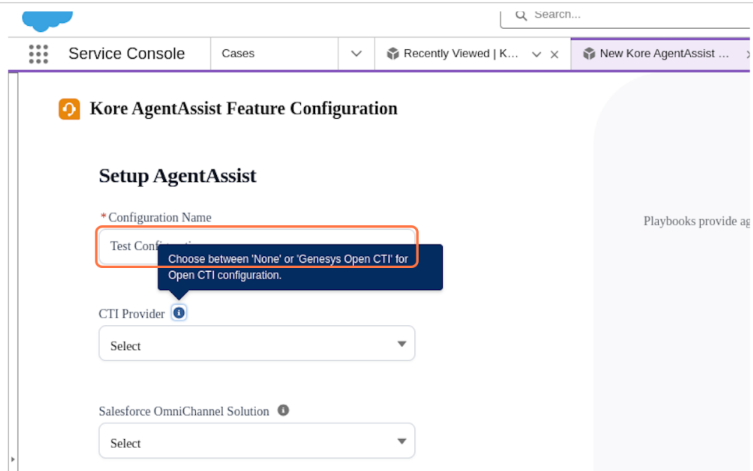
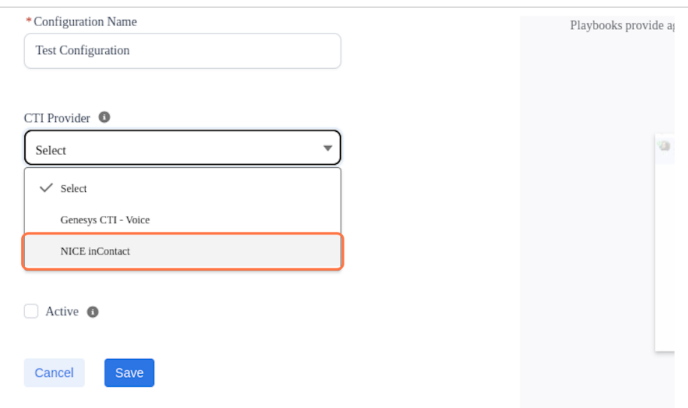
- Type Test Configuration in the Configuration Name field.

- Select NICE inContact in the CTI Provider list.

- Select Active and click Save.


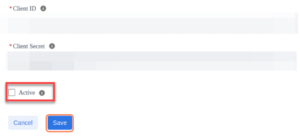
Configure Kore.ai AgentAssist
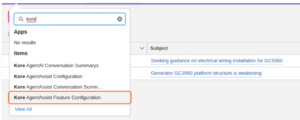
- Click the app launcher.
- Type “config” in the search box and select Kore AgentAssist Configuration from the displayed list.
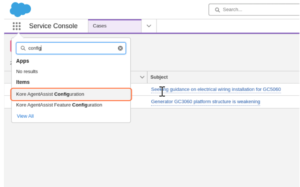
- Click New from the right top corner of the page.
- Enter the required details.
- Select Active and click Save.

Configure NICE API Credentials
- Click the app launcher.
- Type “nice” in the search box and select Nice Signal Credentials from the displayed list.
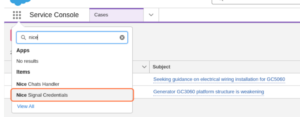
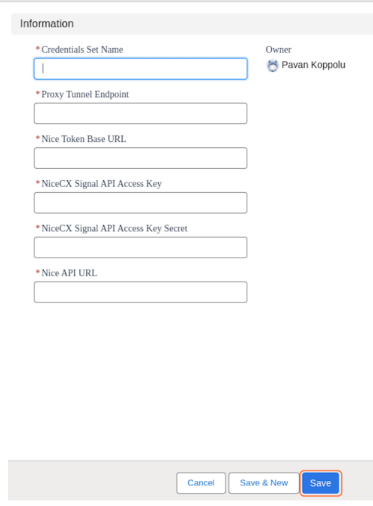
- Click New from the top right corner of the page.
- Add the required configuration parameters.
You can receive the “Proxy Tunnel Endpoint” from your Kore.ai representative. - Request the NICE Token Base URL and NICE API URL from your NICE CX representative.
- Click Save.


Configure NICE CTI Data in Salesforce
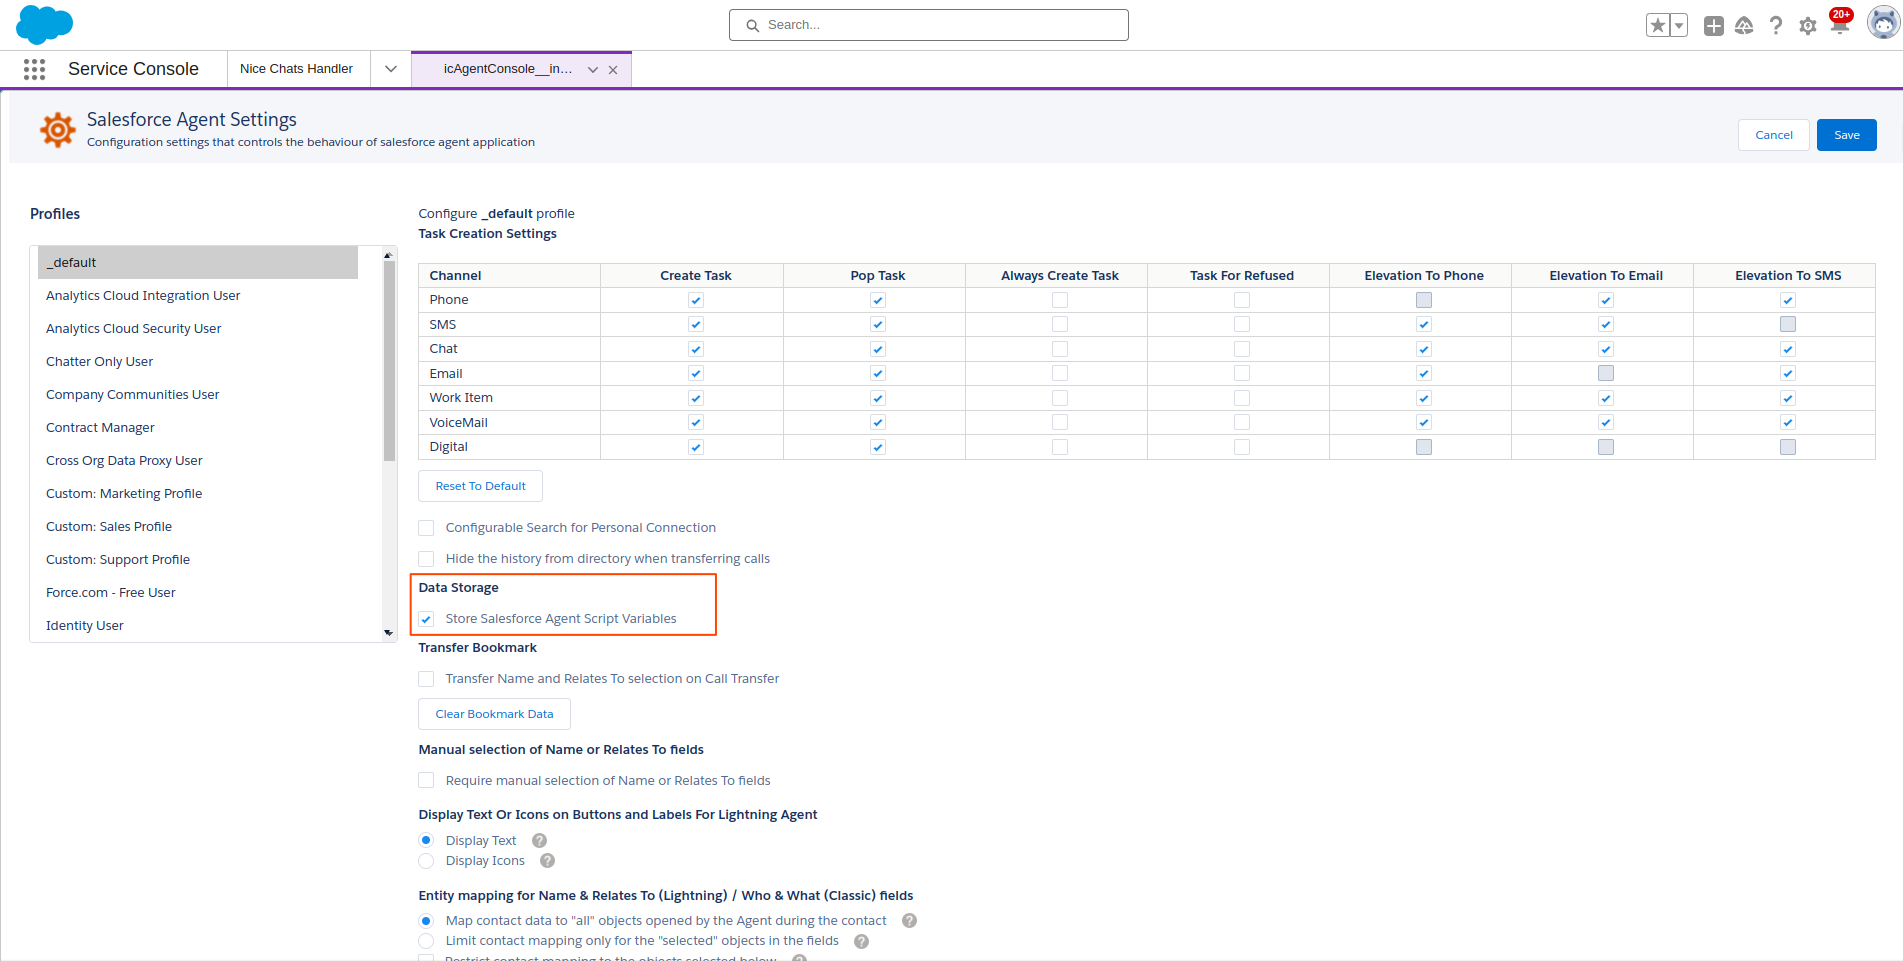
- Click the app launcher in Salesforce and go to Salesforce Agent Settings.
- Sign in to your NICE CX account.
- Ensure the data storage setting, Store Salesforce Agent Script Variables, is enabled, and click Save.

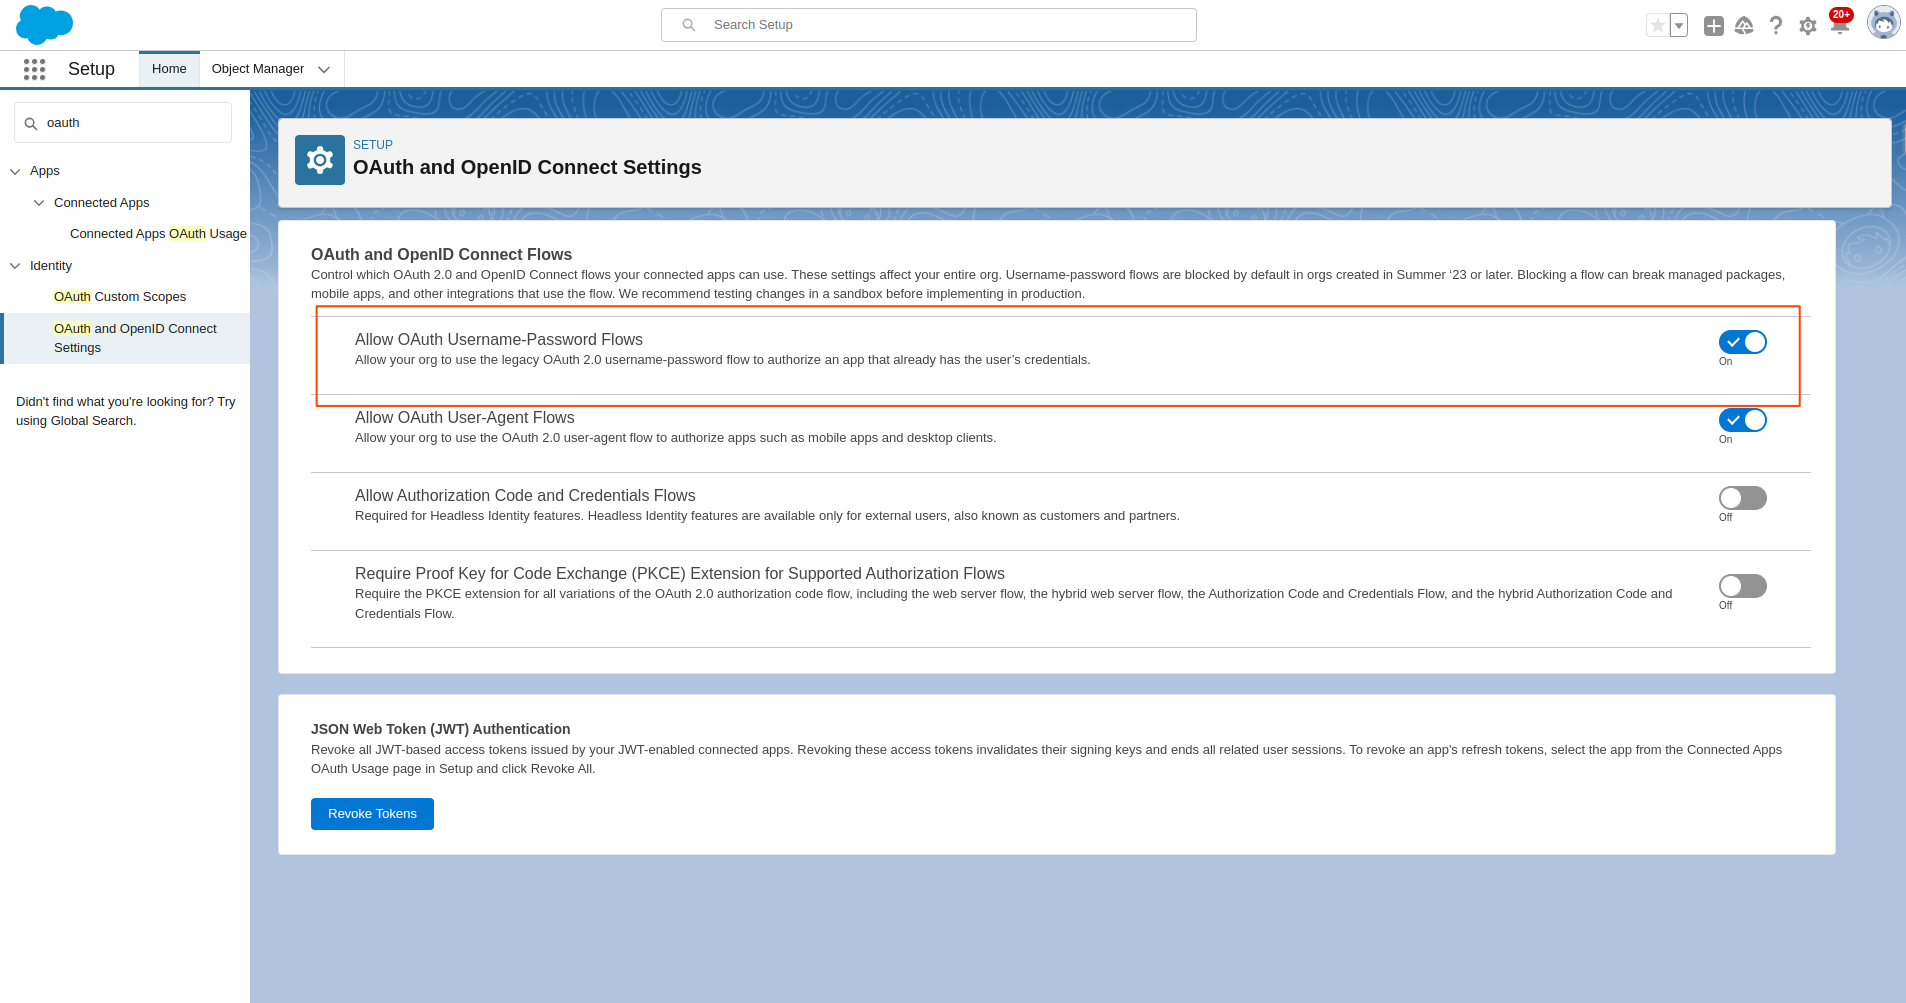
Enabling Salesforce OAuth
- Go to Setup > OAuth and OpenID Connect Settings and enable Allow OAuth Username-Password Flows.
- Create a connected Salesforce app and get the Access Key and Access Token. Follow this guide for help.
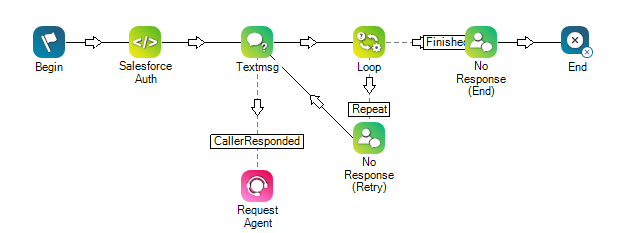
Connecting Salesforce with NICE Studio Script
- Open the NICE CX Studio app.
- Click the Salesforce Auth tile, and add the credentials you generated.
The password is your Salesforce password appended with your Security Token. Refer to this guide for help. - Replace the Salesforce Base URL too. Check the next step for instructions.

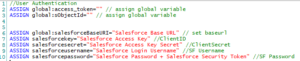
- Modify the Salesforce Base URL as per your Salesforce org. You can get it by running the following curl:
curl –location –request POST ‘https://login.salesforce.com/services/oauth2/token?grant_type=password&client_id=<Salesforce Client ID>&client_secret=<Salesforce Client_Secret>&username=<Salesforce_Username>&password=<Salesforce Password + Salesforce Security Token>’- Change the parameters as per your Salesforce account.
- Save the flow and you can now test with a new call.

NICE CX – Attaching Number to the Script
- Go to the NICE home page.
- Click the application launcher button.
- Click ACD.
- Click Points of Contact.
- Click the number you want to attach with AgentAssist.
- Click Edit.
- Change the script based on your needs.
- Click Done.