The Agent AI Settings page lets users configure the Agent AI widget’s appearance. On this page, users can choose which features they want on the widget, channel-specific settings, and the URL-opening behavior.
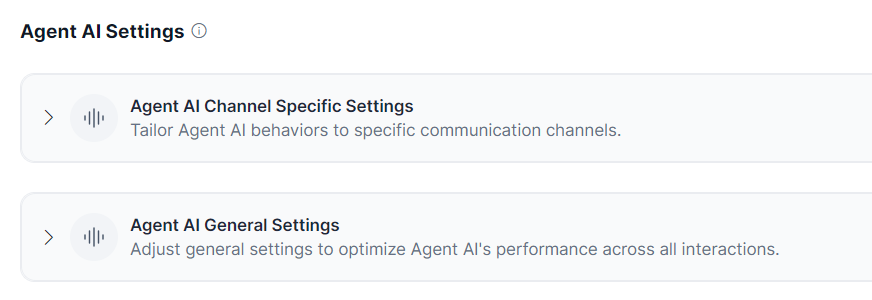
This page has the following main sections:
- Agent AI Channel Specific Settings
- Agent AI General Settings
Agent AI Channel-Specific Settings
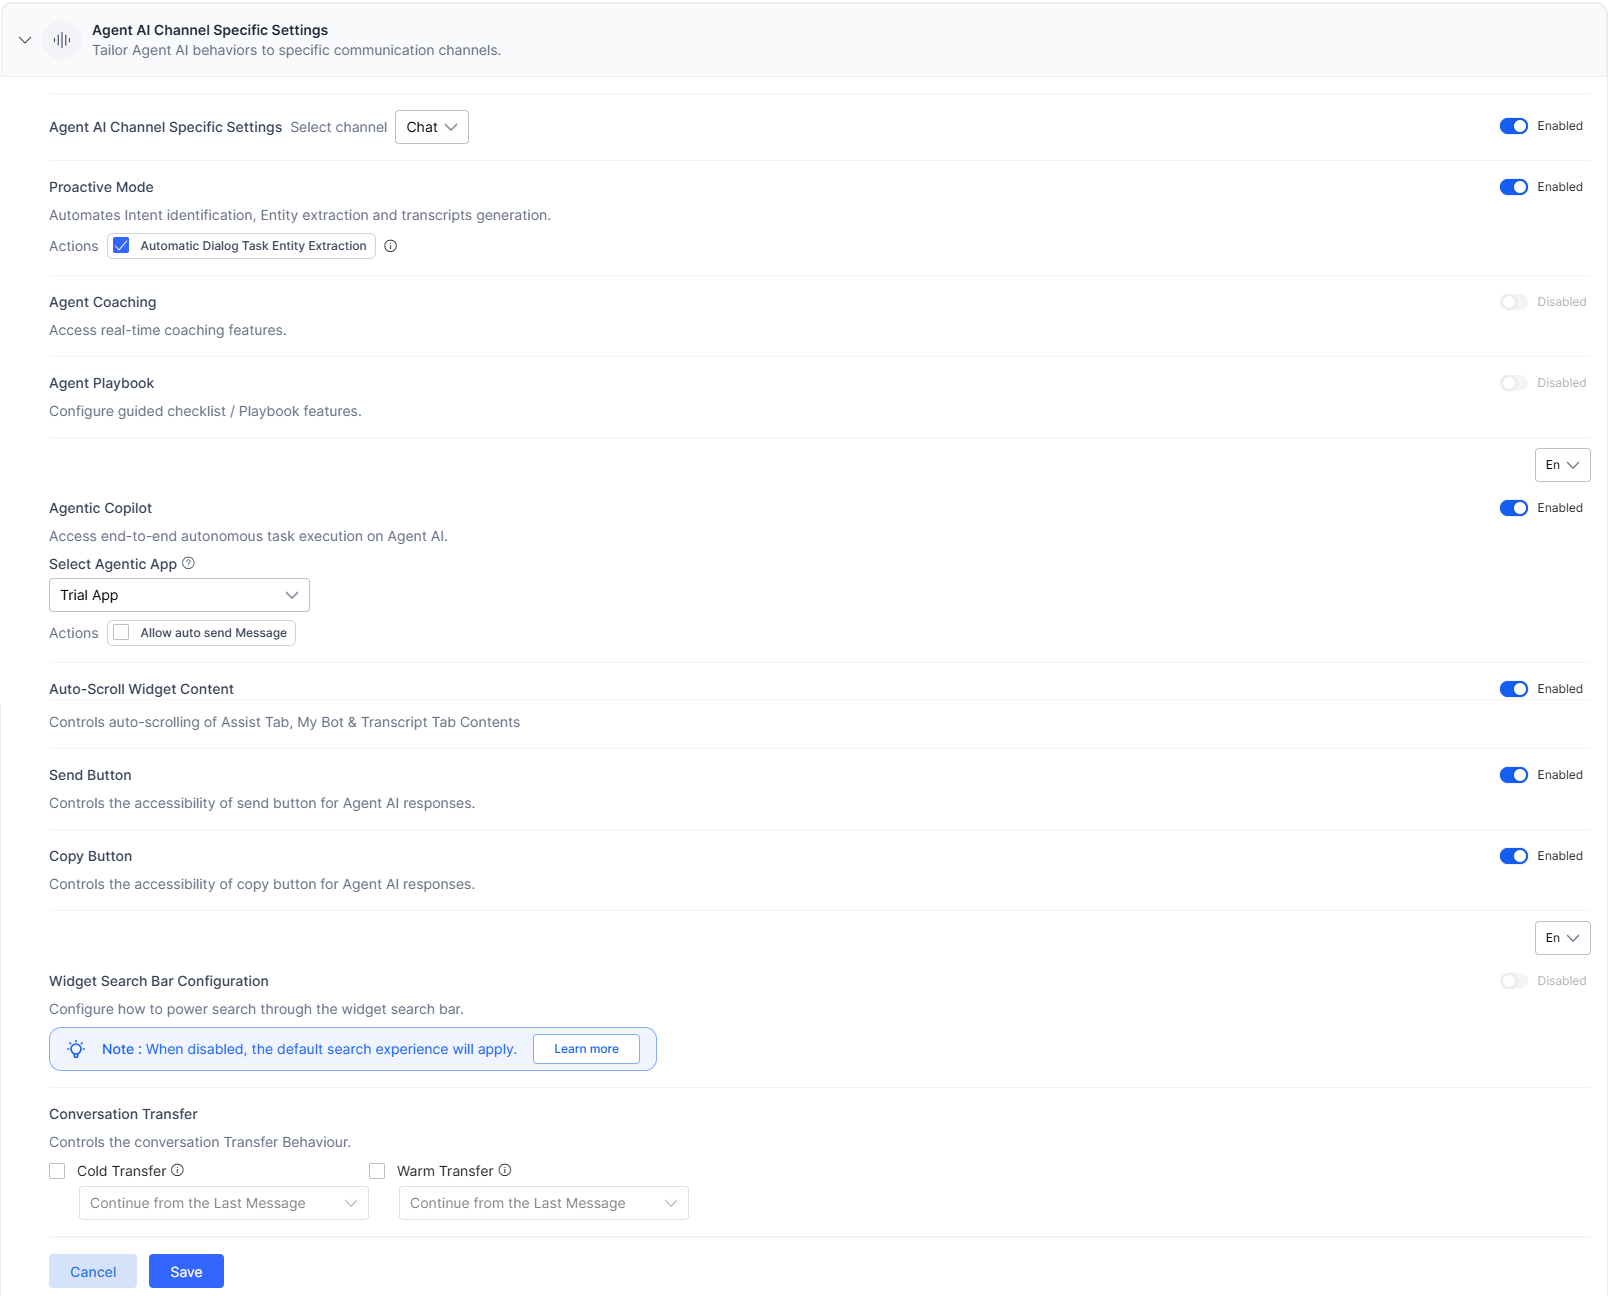
This section lets you set your preferences based on the channels. It has three channels—Chat, Voice, and Email—with a channel-specific default selection of options. The following options toggles are available to select under this section:
- Proactive Mode: This widget automates intent identification, entity extraction, and transcripts generation. It lets you have automatic (proactive) transcripts logging and intent suggestions. When enabled, you can also use the Automatic Dialog Task Entity Extraction option to automatically extract entities from user messages during a dialog task execution. If disabled, there will not be any automatic intent suggestions or transcripts logging. However, you can still use greetings, Search bar, and MyBot automations. By default, this widget is enabled for all three channels.
- The Assist tab/Run button remains in the disabled state. Only Run with agent’s input is available.
- The Playbook feature functions as follows:
- For Dynamic playbooks, identification through the bulb icon and adherence are not functional, but tick-off and step progression continue to function.
- For Primary playbooks, the automatic adherence or automatic tick-off does not happen.
- If the Playbook widget is also disabled, the default landing page is “My Bot”.
- Agent Coaching: This widget enables real-time agent coaching based on the analysis of agent utterances and speech. You can set up specific utterances and speech patterns for Agent AI to take relevant actions, such as providing hints and nudges or emailing the manager when those patterns occur. If disabled, you will no longer be able to utilize this feature. To resume real-time coaching, you must enable this feature. By default, it is disabled for all channels and is available for Chat and Voice channels only.
- Agent Playbook: This widget provides agents with structured guidance and helps streamline task management. Supervisors can define stages and steps to follow, choose step progression (sequential or random), mark whether the steps are completed manually or automatically, and set adherence notifications. They can leverage this feature to gain valuable insights into agent adherence to specific playbook steps and use this data to enhance agents’ ability to handle interactions and significantly improve customer satisfaction.
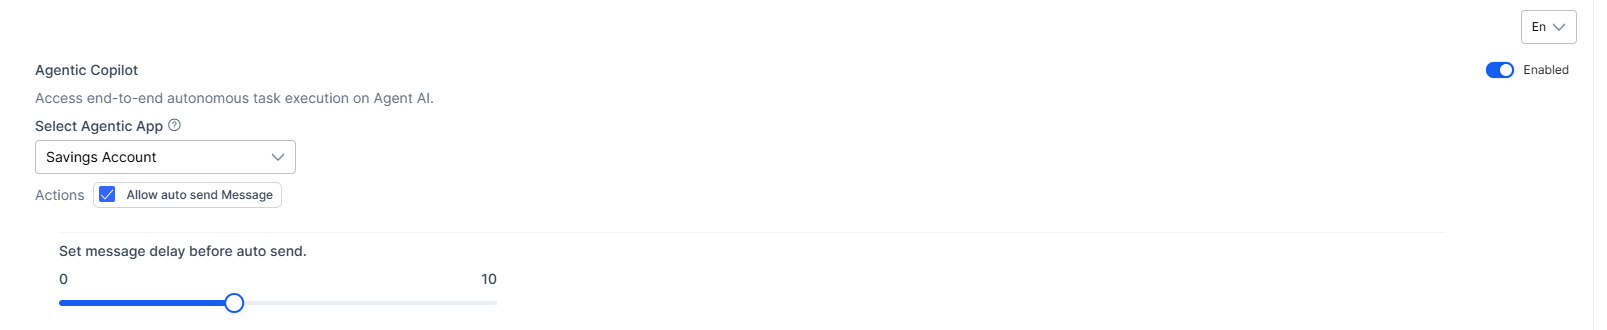
If disabled, the Playbook tab doesn’t appear in the widget, but you have the Assist tab and the welcome messages in the Assist tab. However, if Playbook is enabled, then welcome messages become a part of the Playbooks step, and nothing appears in the Assist tab. By default, this widget is disabled, but you can enable it for all three channels. - Agentic Copilot: The Agentic Copilot feature enables you to have autonomous, end-to-end task execution. Agents monitor the conversations and can cancel, override, or edit the messages. In this section, you can select a language, enable/disable this feature, select an app, select to auto send messages, and set a timer (up to 10 seconds) for auto sending messages.
- Auto-Scroll Widget Content: This widget lets you manage the auto-scroll functionality for the content in the Assist, My Bot, and Transcript tabs. When enabled, the system automatically navigates to the bottom of the respective tab to display the newest content. Admins can enable/disable it through the Widget Settings > Agent AI Settings > Agent AI Channel Specific Settings page, while the Agents can access it in the Agent AI widget > Settings tab. Between these two users, the Agents can override the Admin’s selection.
- Control Transcript Visibility between Agents: This feature, available only for the Voice channel, restricts transcript visibility to the current agent. Visibility can be managed using public APIs or agent entry/exit events, except in warm transfers/conference calls where all participants can view shared transcripts. The following options are available:
- Use public APIs to control transcription: Control transcript visibility through the Control Transcription API.
- Use agent’s entry and exit events: Control transcript visibility based on agent’s entry and exit events–transcripts become visible when an agent joins, and prior conversations are hidden once the previous agent exits.
- Send Button: This widget lets you control the accessibility of the Send button functionality for Agent AI responses. It is available for the Chat and Email channels, and by default enabled for the Chat channel.
- Copy Button: This widget lets you control the accessibility of the Copy button functionality for Agent AI responses. It is available for the Chat and Email channels, and by default enabled for both these channels.
- Widget Search Bar Configuration: This widget enables you to have a configurable search experience through the widget search bar. Search results load faster because they display as soon as data is retrieved from the first available source (XO Platform, Search AI, or Agentic App), while results from other sources load gradually. When disabled, the default search experience displays results from all sources simultaneously. When enabled, you can select one or more of the following options based on your need:
- XO Platform: To identify and surface intents such as dialogs and FAQs through the XO Platform.
- Search AI: To get search results or answers from the Search AI app.
- Agentic App (LLM): To power search results through a customizable Agentic App. You must select an Agentic App from the dropdown list, from which results will display in runtime.
- Conversation Transfer: This widget lets you define and categorize the conversation transfer behavior based on the transfer type and channels. It applies only to the third-party configurations where appropriate transfer events are transmitted.
- Cold Transfer: It is defined as a conversation handover that happens between two agents and is applicable to all three channels – Voice, Chat, and Email. The conversation summary is generated again for the receiving agent, and this summary, along with the feedback options, gets added to Agent-1’s Assist tab. Agent-2 can change the summary feedback for voice and email channels.
- Warm Transfer: It is defined as a conference call between two agents and applies to both Voice and Chat channels. During this process, Agent-2 has the ability to modify the Summary Feedback, but the Run, Override, Send, Copy, Terminate, Restart, and List View buttons remain disabled until Agent-1 disconnects from the call.
Both the Cold Transfer and the Warm Transfer have the following options to choose from:- Scroll up to the First Message: The chat history page scrolls up to the top of the page (first message).
- Continue from the Last Message: The chat history page scrolls down to the bottom of the page (last message).
- Configure Dialog Task: The user has to select one of the dialog tasks associated with a bot from the list. If a dialogue task of fetching a summary of agent-1 and the customer is selected, agent 2 will see it automatically when the conversation is transferred to them.
Steps to set channel-specific preferences
- Sign in to Agent AI.
- Go to CONFIGURATION > SYSTEM SETUP > Widget Settings.
- Click to expand Agent AI Channel Specific Settings on the Agent AI Settings page.
- Select a channel in the Select channel list.
- Click the toggle against Agent AI Channel Specific Settings to enable it (if disabled).
- Turn the toggle on or off against the Proactive Mode widget.
- Select or clear the Automatic Dialog Task Entity Extraction option.
- Turn the toggle on or off against the Agent Coaching, Agent Playbook, Auto-Scroll Widget Content, Send Button, and Copy Button widgets, as required.
- For the Agentic Copilot feature:
- Select a language from the language list.
- Click the toggle to Enable/Disable the Agentic Copilot feature.
- Select an app from the Select Agentic App list.
- Click to select the Allow auto send Message option. Clearing this option cancels all unsent or new Agentic messages.
- Set the timer for the Set message delay before auto send field by using the slider. You can set a delay up to a maximum of 60 seconds.
- Turn the toggle on or off for the Control Transcript Visibility between Agents (for Voice channel only) option, and select one of the following options:
- Use public APIs to control transcription
- Use agent’s entry and exit events

- Select an option under the Conversation Transfer section.
- Turn on the Widget Search Bar Configuration toggle.
- Select one or more options—XO Platform, Search AI, Agentic App.
- If you select Agentic App, select an app from the dropdown list.
Note: The Search AI and Agentic App fields are disabled until they are configured. A warning message prompts you to configure them before use.
- Click Save to save your settings.
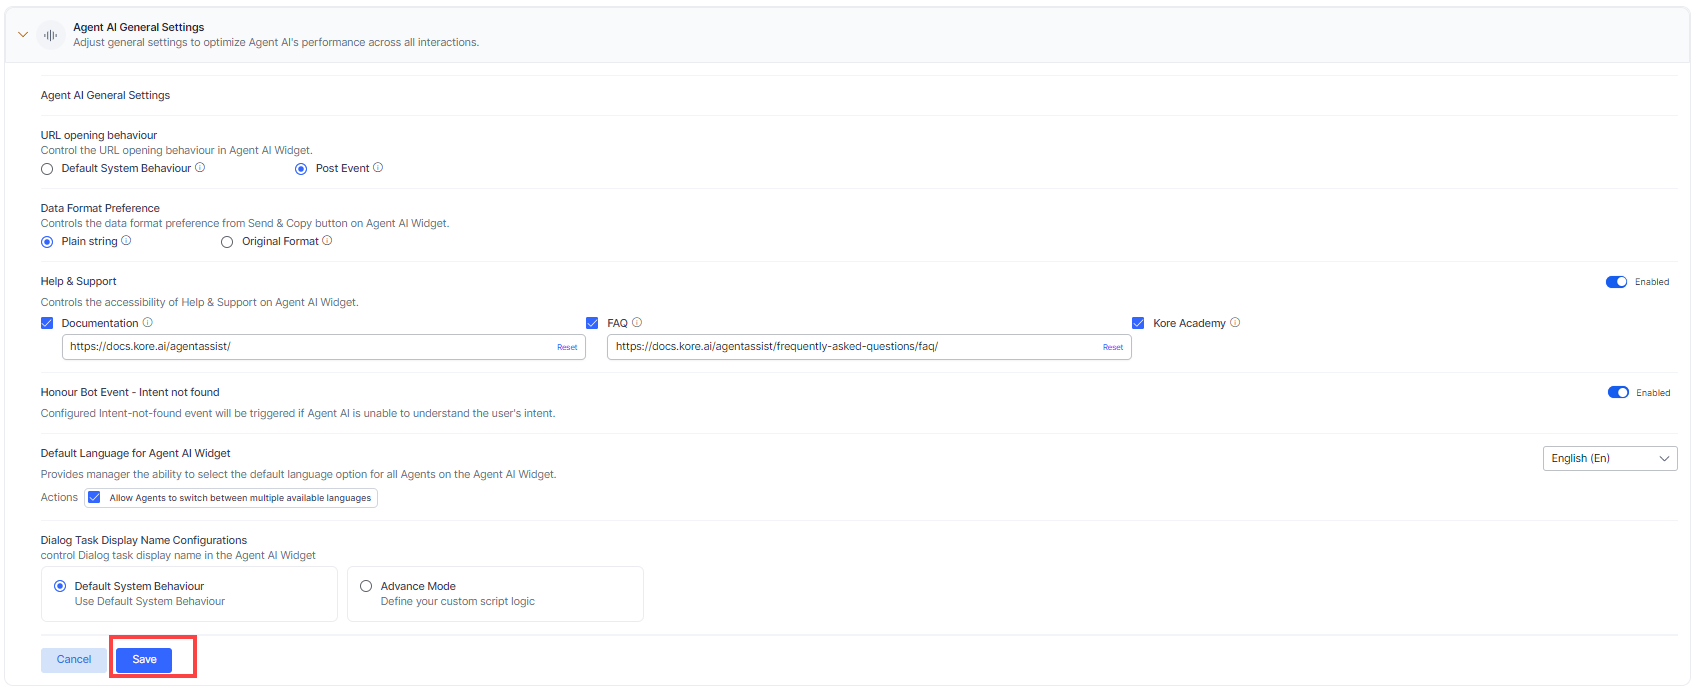
Agent AI General Settings
This section lets you set up the general features of the Agent AI widget. Here, you can turn on or off the event-not-found event trigger, control the URL opening behavior.
- URL opening behavior: Here, you can customize the behavior for URL opening in the Agent AI widget for desktop applications. The following options are available:
-
- Default System Behavior: The Agent AI widget uses the system’s default approach for URL opening – the link/page opens in a new window.
- Post Event: When a URL is clicked within the Agent AI widget, it initiates an event named “AgentAI.UrlClickedMessage.” This event enables the desktop application to manage the URL’s opening behavior, as defined in the agreement between Agent AI and the agent desktop application. The following screenshot depicts the actions in the widget when you click a URL:

As in the above image, when you click a link in the widget the AgentAI.UrlClickedMessage event is triggered and a log opens on the right showing the URL. Desktop applications can take this URL and customize its opening behavior.
- Data Format Preference: You can decide the message text format that you send to the customer through the Send/Copy fields for the Playbooks and Dialog Tasks in the Agent AI widget. The values to choose from are:
- Plain String: Transmits messages in plain text format
- Original Format: Transmits messages in HTML tags. as received.
- Help & Support: This section gives you access to the available documents, FAQs, and the Kore Academy courses. You can select whether or not to display Help & Support, which components to show under it, and the URLs of those components.
- Honor Bot Event – Intent not found: Here, you can turn on or off the Honor Bot Event – Intent not found toggle. When turned on, the configured intent-not-found event triggers if Agent AI doesn’t understand the user’s intent.
- Auto Correct: Turn on or off the Auto Correct toggle. When on, this feature improves typing accuracy in the Search tab by highlighting misspelled words and suggesting corrections. Refer here for more information.
- Third Party Configuration: Turn on or off this toggle to use third-party configurations in third-party agent desktops.
- Default Language for Agent AI Widget: In this section, you can select a language for the Agent AI widget. You can select the app’s language (Interactive Language) or a different language from the dropdown list. At runtime, the widget appears in the selected language. You can also enable a checkbox to allow agents to change the language at runtime. If disabled, agents can’t change the language.
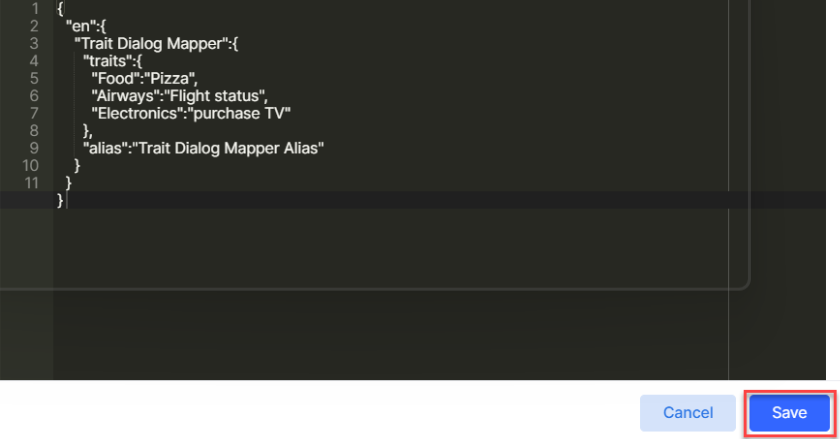
- Dialog Task Display Name Configurations: Here, you can set up the “trait” identification method that helps display appropriate trait-based Dialog Tasks for agents. This method helps display the “child”/sub Dialog Tasks if they are the most accurate match, based on customer interaction. To use the “trait” based Dialog Task display, admins must define a custom script logic in the Agent AI Settings page.
Steps to set Agent AI General Settings
- Go to CONFIGURATION > SYSTEM SETUP > Widget Settings.
- Click to expand the Agent AI General Settings section.
- Select Default System Behavior or Post Event under the URL opening behavior section.
- Select Plain String or Original Format in the Data Format Preference section.
- Enable or disable the Help & Support toggle.
- Click to select any or all of the components (Documentation, FAQ, and Kore Academy).
- Click to customize the default URLs of the Documentation and/or FAQ components.
- Enable or disable the Honor Bot Event – Intent not found toggle.
- Enable or disable the Auto Correct and Third Party Configuration toggles.
- Select a language from the list in the Default Language for Agent AI Widget section. Select Interactive Language, if you want the app’s language to appear as the widget’s default language.
- Select/clear the Allow agents to switch between multiple available languages field.
- Select Default System Behavior or Advanced Mode in the Dialog Task Display Name Configurations field.
- If you select Advanced Mode, a pop-up box to enter custom scripts appears.
- Enter your script, and click Save.
- Click Save to save your settings.
Auto-corrections for the Search tab
The Auto Correct feature improves typing accuracy in the Search tab by highlighting misspelled words and suggesting corrections. Admins can enable or disable this feature in Widget Settings > Agent AI General Settings > Auto Correct to define the widget landing behavior. They can also select the Use Custom Dictionary option to upload a list of words for auto-corrections and download the uploaded list to customize, as required. During run time, agents can enable or disable the Auto Correct feature in the Settings tab > Auto Correct toggle. Between the admin and the agent, agent’s selection takes precedence.
Steps to turn on or off Auto Correct:
- Sign in to Agent AI.
- Go to Widget Settings > Agent AI General Settings.
- Turn the Auto Correct toggle on or off, as required.
- Select or clear the Use Custom Dictionary option.
- Upload your customized list of words.
- Click Save.
Agents can enable or disable the Auto Correct toggle by using the following steps:
- Sign in to the Agent AI widget.
- Go to the Settings tab.
- Enable or disable the Auto Correct toggle.