Download the OrchestratorImplementation.json script file from Kore.ai Talkdesk repository into your device; the script helps Kore.ai to access the voice streams coming to your contact center.
Sign in to Talkdesk and go to Studio.
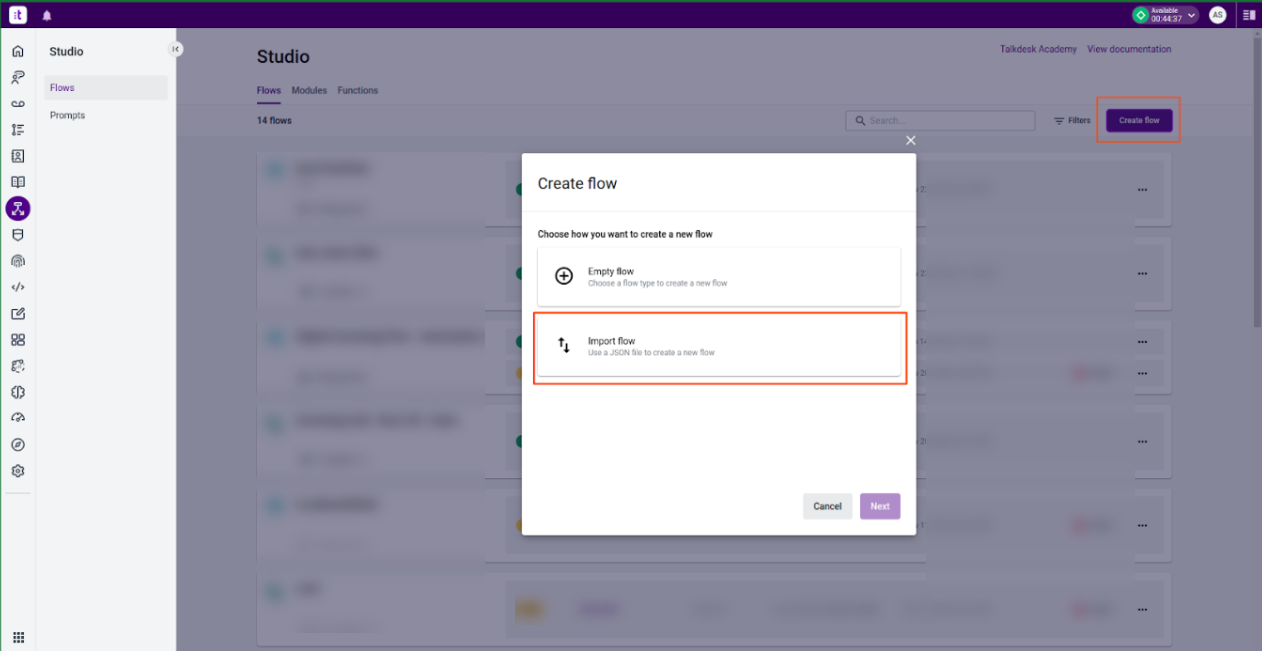
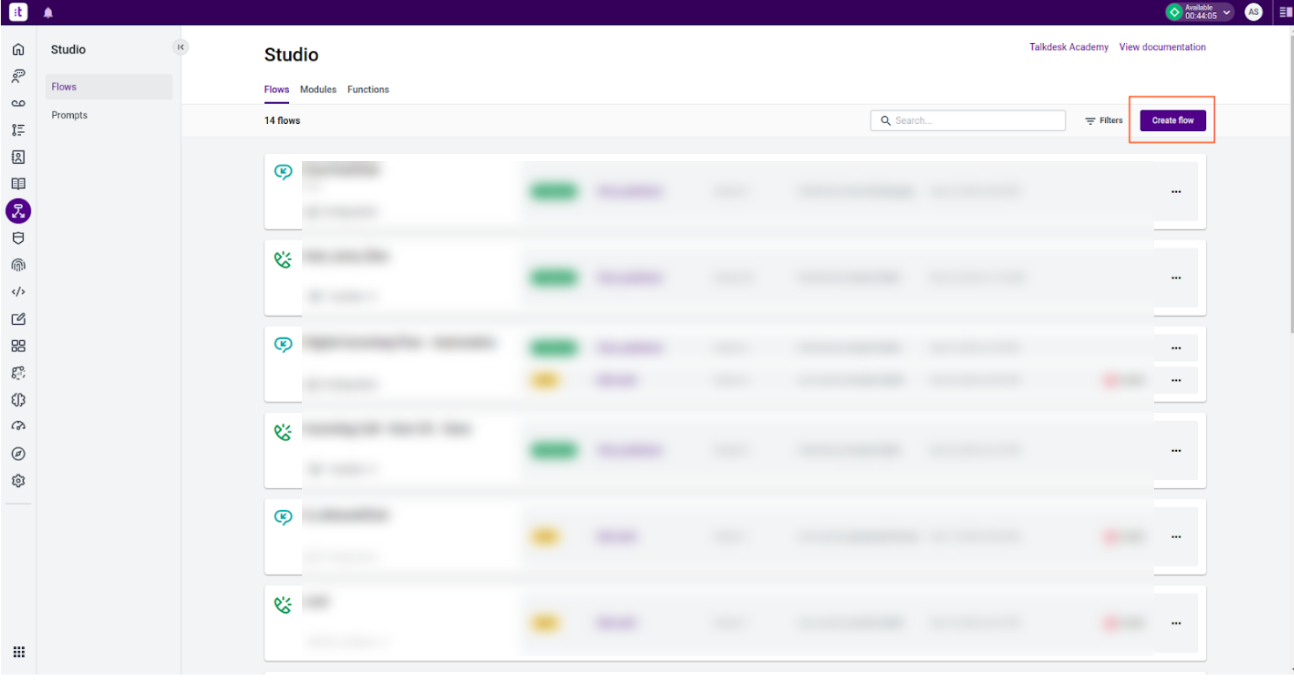
Click Create Flow.
Click Import Flow, and then click Next.
Import the file downloaded in Step 1.
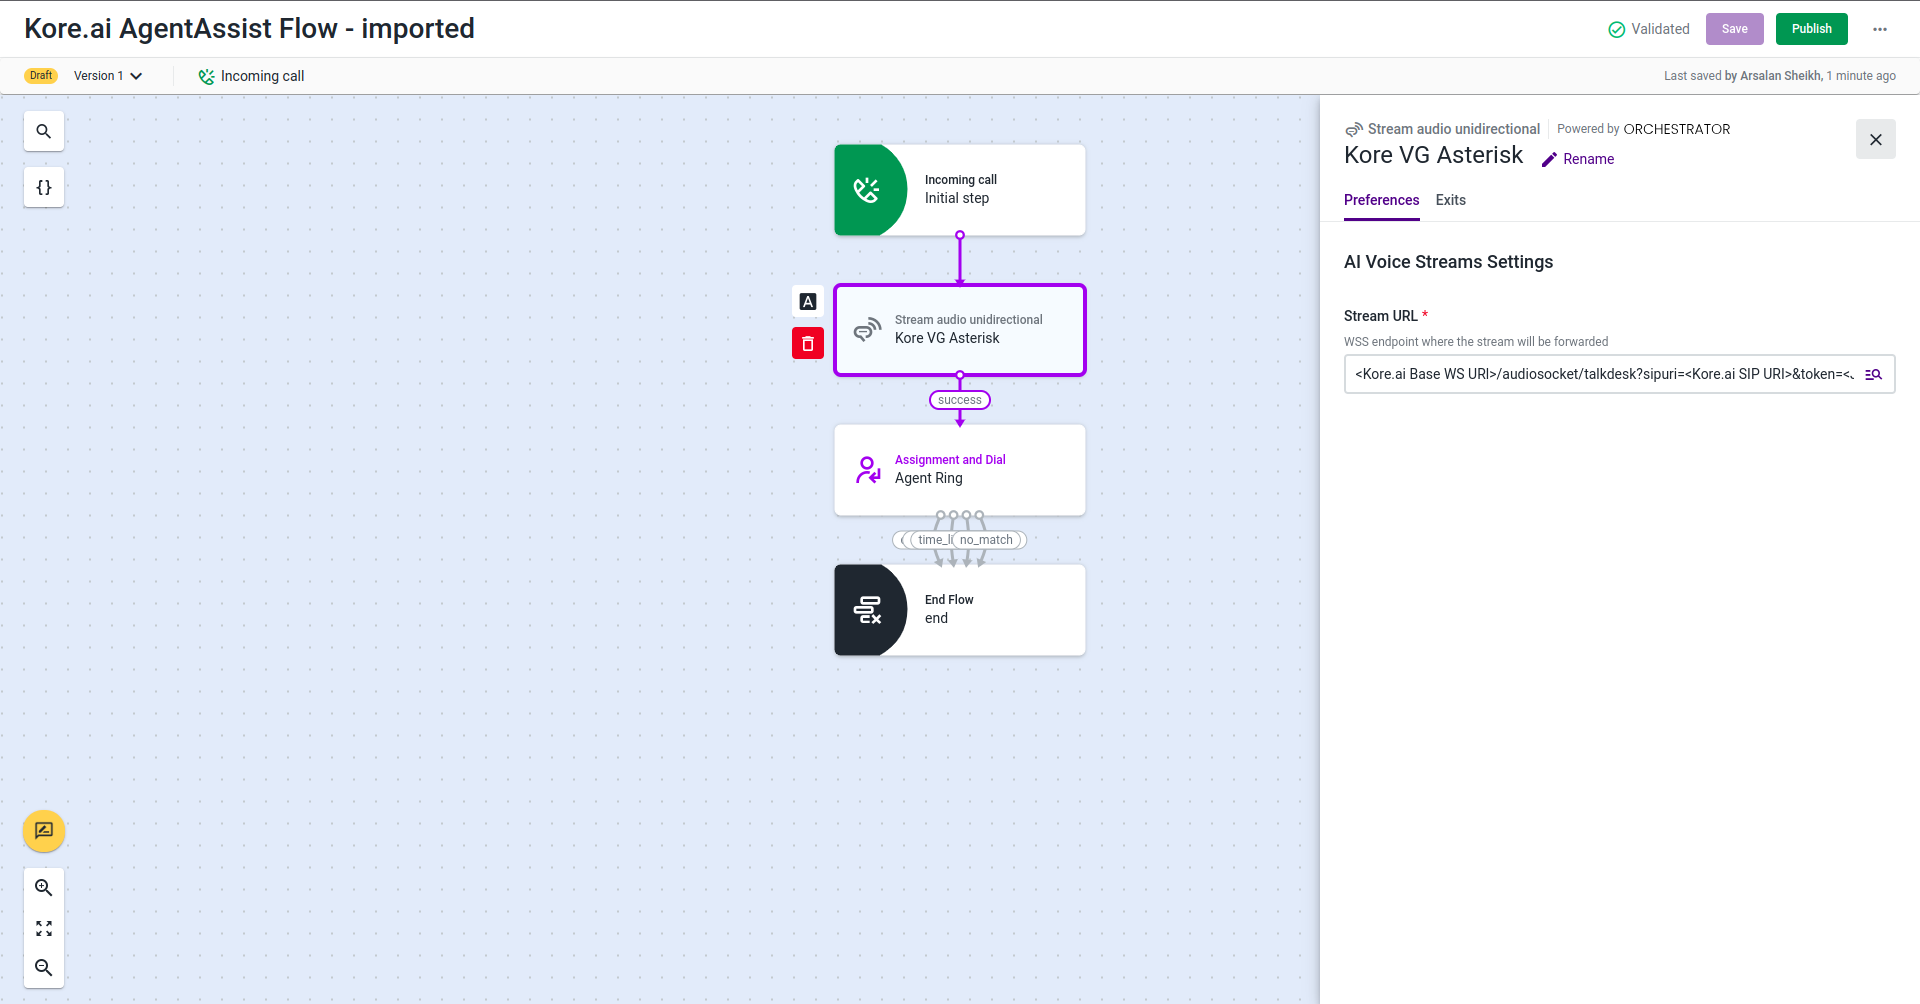
Click the Stream Audio Unidirectional component.
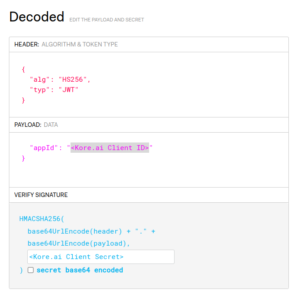
Go to https://jwt.io/ and generate a token. (Client ID and Client Secret are available with your Kore.ai representative.)
Edit the following parameters (available with your Kore.ai representative) in the Stream URL as shown below:
Kore.ai Base WS URL
Kore.ai SIP URI
Kore.ai Bot ID
Kore.ai Account ID
You can change the Agent AssignmentandDial as per your preferences.
Click Save, and then click Publish on the top-right corner of the page. Attach a number to the flow.
Click Create Card and import the downloaded file in step 1 into the new card to configure Kore.ai. AgentAssist Widget parameters. Refer to Importing and Exporting Flows for help.
Edit the following variables:
Agentassist_url – AgentAssist host URL without the trailing “/” Note: Enter https://agentassist.kore.ai to access AgentAssist Widget V2 and the Widget URL copied from Configuration > System Setup > Channels > Chat page of the AgentAssist for AgentAssist Widget V3.
bot_id
client_id
client_secret
You can change the iframe_height value as desired or keep the default at 600px.
Download the Call-end Summary Trigger script file from the Kore.ai Talkdesk repository, and perform the above steps to create another flow with this downloaded file. Note that you need to edit only the bot_id here.
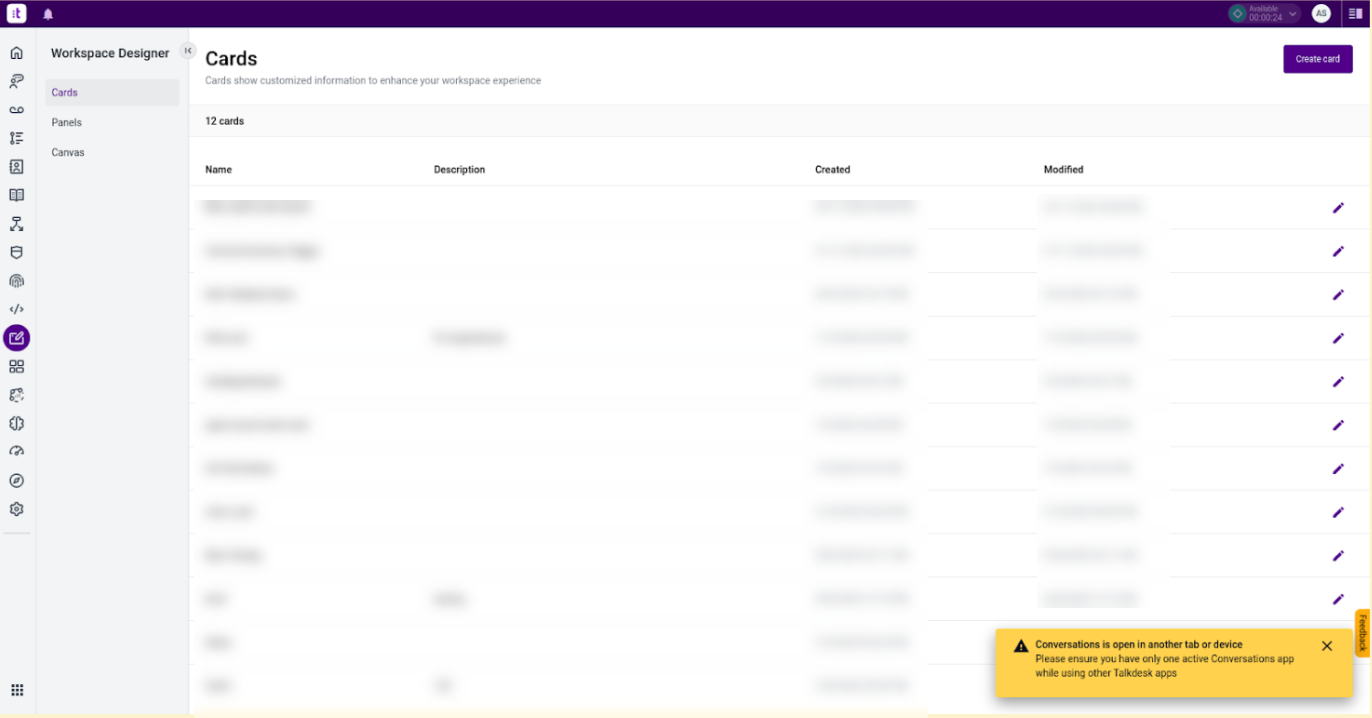
Go to Workspace Designer, and click Panels.
Click Create panel and give it an appropriate name.
Click Edit on the panel you created.
Click the Add Card button on the right-upper corner of the page.
Select Kore AgentAssist for TalkDesk first and then Call-end Summary Trigger card. Note that the sequence is important.
Give the cards appropriate sizes.
Click Save on the top-right corner.
On the Workspace Designer, go to Canvas and click the Edit button on the Secondary Canvas option.
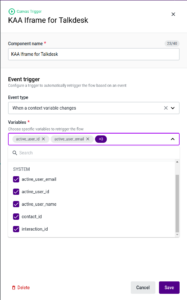
In the trigger, use the following settings, and click Save.
Attach a Render Panel component to both the exits of the trigger.
Give a name to the Render Panel component above and choose the panel to render that you just created.
Click Save, and then click Publish on the top-right side of the page.
Step 3: Usage Test
Go to the Conversations tab in Talkdesk.
Open the Secondary Canvas by clicking on the top-right corner of the page.
On the top of the panel, click the dropdown and select Canvas.
Now, you can make a call, and the AgentAssist widget should reflect it on the side panel.
Download the OrchestratorImplementation.json script file from Kore.ai Talkdesk repository into your device; the script helps Kore.ai to access the voice streams coming to your contact center.
Sign in to Talkdesk and go to Studio.
Click Create Flow.
Click Import Flow, and then click Next.
Import the file downloaded in Step 1.
Click the Stream Audio Unidirectional component.
Go to https://jwt.io/ and generate a token. (Client ID and Client Secret are available with your Kore.ai representative.)
Edit the following parameters (available with your Kore.ai representative) in the Stream URL as shown below:
Kore.ai Base WS URL
Kore.ai SIP URI
Kore.ai Bot ID
Kore.ai Account ID
You can change the Agent AssignmentandDial as per your preferences.
Click Save, and then click Publish on the top-right corner of the page. Attach a number to the flow.
Click Create Card and import the downloaded file in step 1 into the new card to configure Kore.ai. AgentAssist Widget parameters. Refer to Importing and Exporting Flows for help.
Edit the following variables:
Agentassist_url – AgentAssist host URL without the trailing “/” Note: Enter https://agentassist.kore.ai to access AgentAssist Widget V2 and the Widget URL copied from Configuration > System Setup > Channels > Chat page of the AgentAssist for AgentAssist Widget V3.
bot_id
client_id
client_secret
You can change the iframe_height value as desired or keep the default at 600px.
Download the Call-end Summary Trigger script file from the Kore.ai Talkdesk repository, and perform the above steps to create another flow with this downloaded file. Note that you need to edit only the bot_id here.
Go to Workspace Designer, and click Panels.
Click Create panel and give it an appropriate name.
Click Edit on the panel you created.
Click the Add Card button on the right-upper corner of the page.
Select Kore AgentAssist for TalkDesk first and then Call-end Summary Trigger card. Note that the sequence is important.
Give the cards appropriate sizes.
Click Save on the top-right corner.
On the Workspace Designer, go to Canvas and click the Edit button on the Secondary Canvas option.
In the trigger, use the following settings, and click Save.
Attach a Render Panel component to both the exits of the trigger.
Give a name to the Render Panel component above and choose the panel to render that you just created.
Click Save, and then click Publish on the top-right side of the page.
Step 3: Usage Test
Go to the Conversations tab in Talkdesk.
Open the Secondary Canvas by clicking on the top-right corner of the page.
On the top of the panel, click the dropdown and select Canvas.
Now, you can make a call, and the AgentAssist widget should reflect it on the side panel.