The Linked Services section lets you enhance the capabilities of Agent AI by integrating it with external services. It includes two subsections-Search AI and Agentic Configurations. While linking with Search AI enhances Agent AI’s search capability across web and mobile platforms, Agentic configuration allows you to configure, manage, and connect the Agentic Copilot apps to enable autonomous, end-to-end management of conversations.
Search AI
Search AI provides an intelligent, contextual, and personalized experience in every interaction across web and mobile channels. To enhance the search capabilities of Agent AI and allow restricted access for targeted users, you can configure up to three Search AI apps with the following scopes:
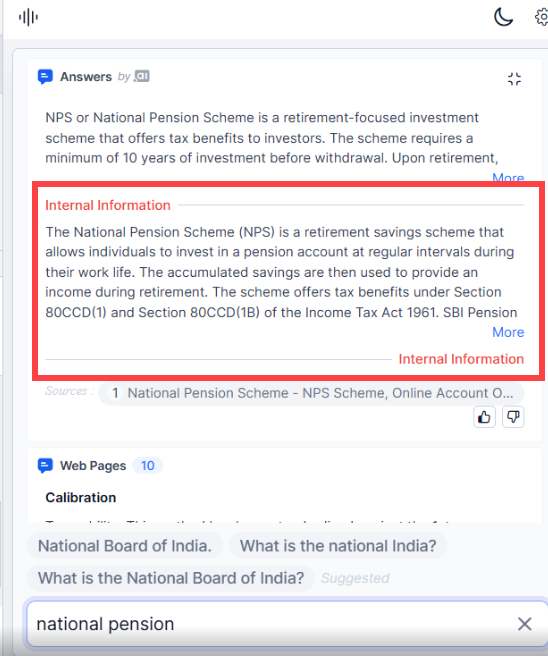
- Internal Information: This feature can be leveraged to send internal notes to agents. Agents can’t share the search results with customers as it doesn’t include the Send / Copy buttons. The following screenshot shows internal information related to the search words “national pension.”
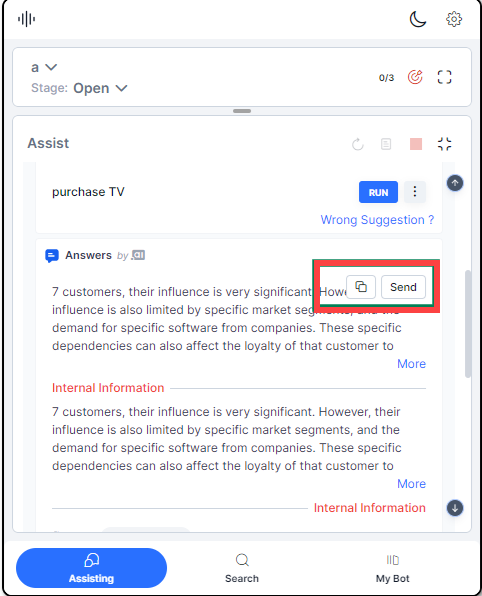
- External Information: This feature helps fetching external information through the Search AI apps, and this information has Send / Copy buttons for sharing with customers.
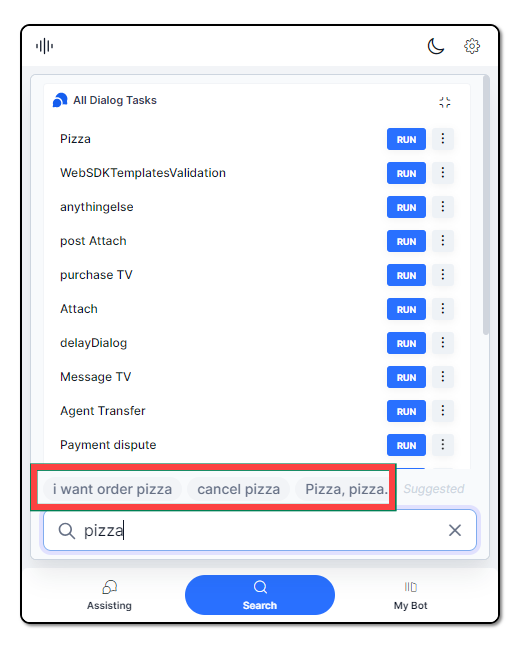
- Auto-Suggestions: Access to auto-suggestions (prompts) only. The following screenshot shows auto-suggestions related to the search word “pizza.”
How Does It Work?
- Set up Search AI Apps: Add all the segregated information sources (internal information, external information, and auto-suggestions) the targeted agents might need in their searches, like web pages, data, documents, and content from apps like ServiceNow and Confluence. Learn more.
- Link Search AI with Agent AI: Administrators can link up to three Search AI applications with Agent AI, as explained in this document. Once linked, Search AI content is automatically available for Agent AI as a service in runtime. Learn more.
- View Search AI data in Agent AI: In the Agent AI widget, agents can view relevant snippets and articles from the Search AI application, and Dialog Tasks and FAQs from the XO Platform or the Use Cases of the Agent AI application. Learn more.
How to Link Search AI with Agent AI?
Linking Search AI application with Agent AI is a two-step process:
- Enable the communication channel in Search AI: First, create client credentials in Search AI with these API scopes – Ingest Data, Live Search, Full Search, Advanced Search, and Auto Suggestions. Then, enable a communication channel. For more information, refer to this guide.
- Use the client credentials to link the Search AI apps with Agent AI: See the following steps:
Steps to link the Search AI apps with Agent AI
- Sign in to the Agent AI application.
- Go to Configuration > System Setup > Linked Services, and click Search AI.
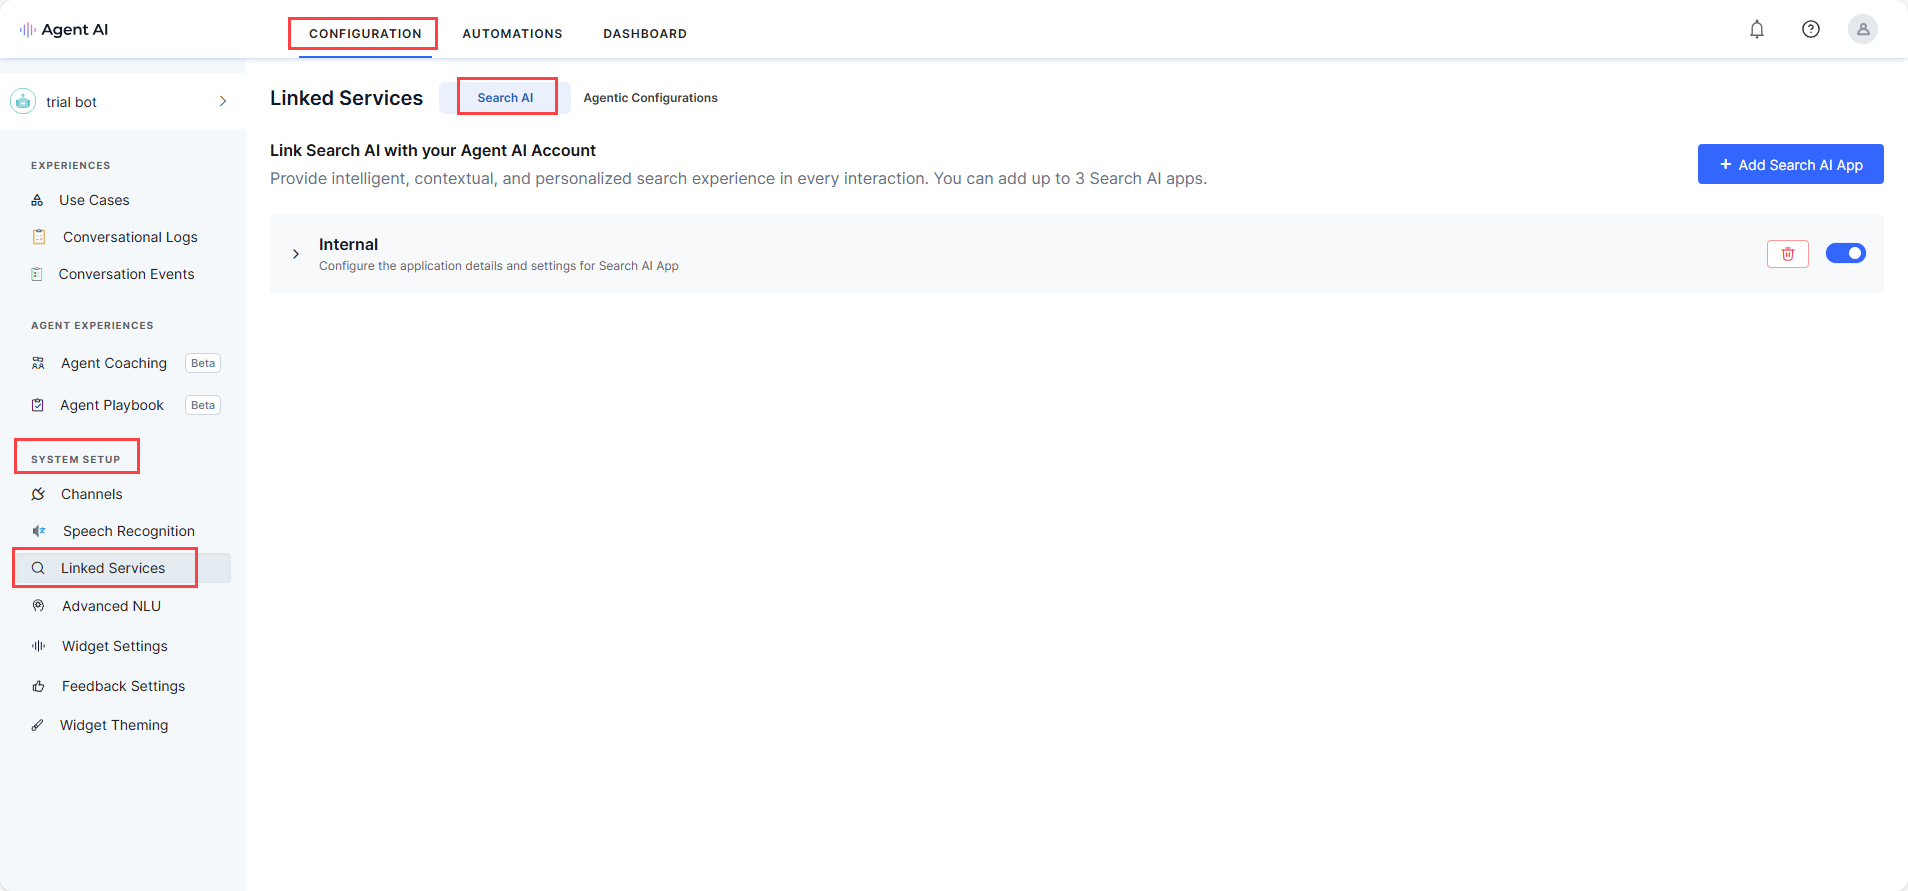
- On the Search AI page, click +Add Search AI App.
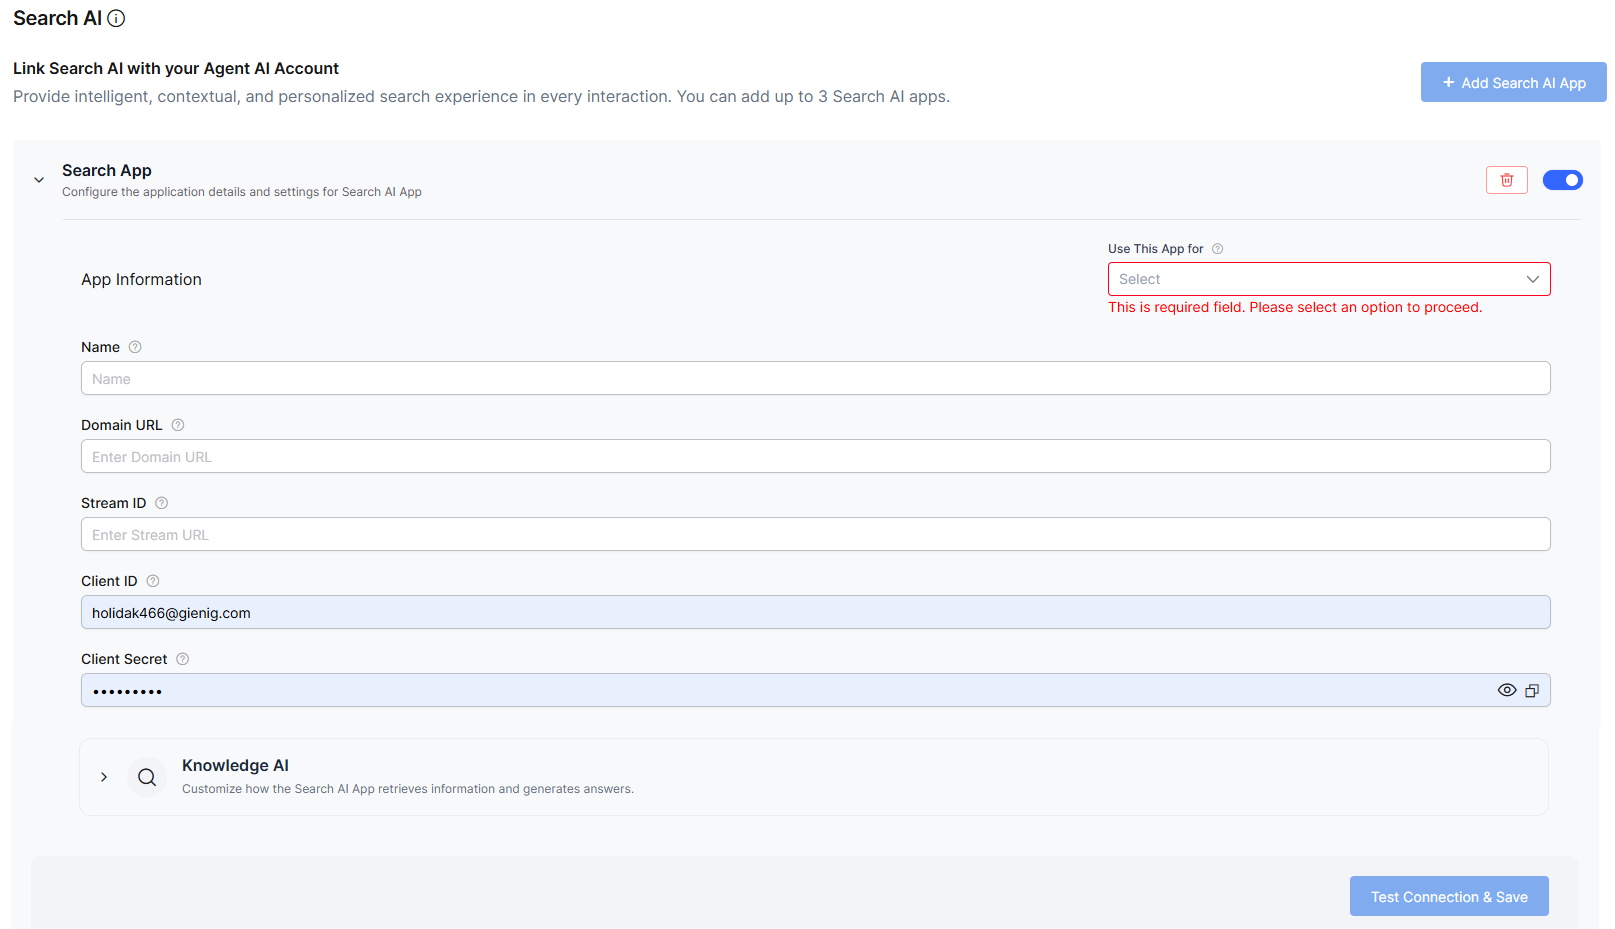
- Enter a name for the Search AI app in the Name field.
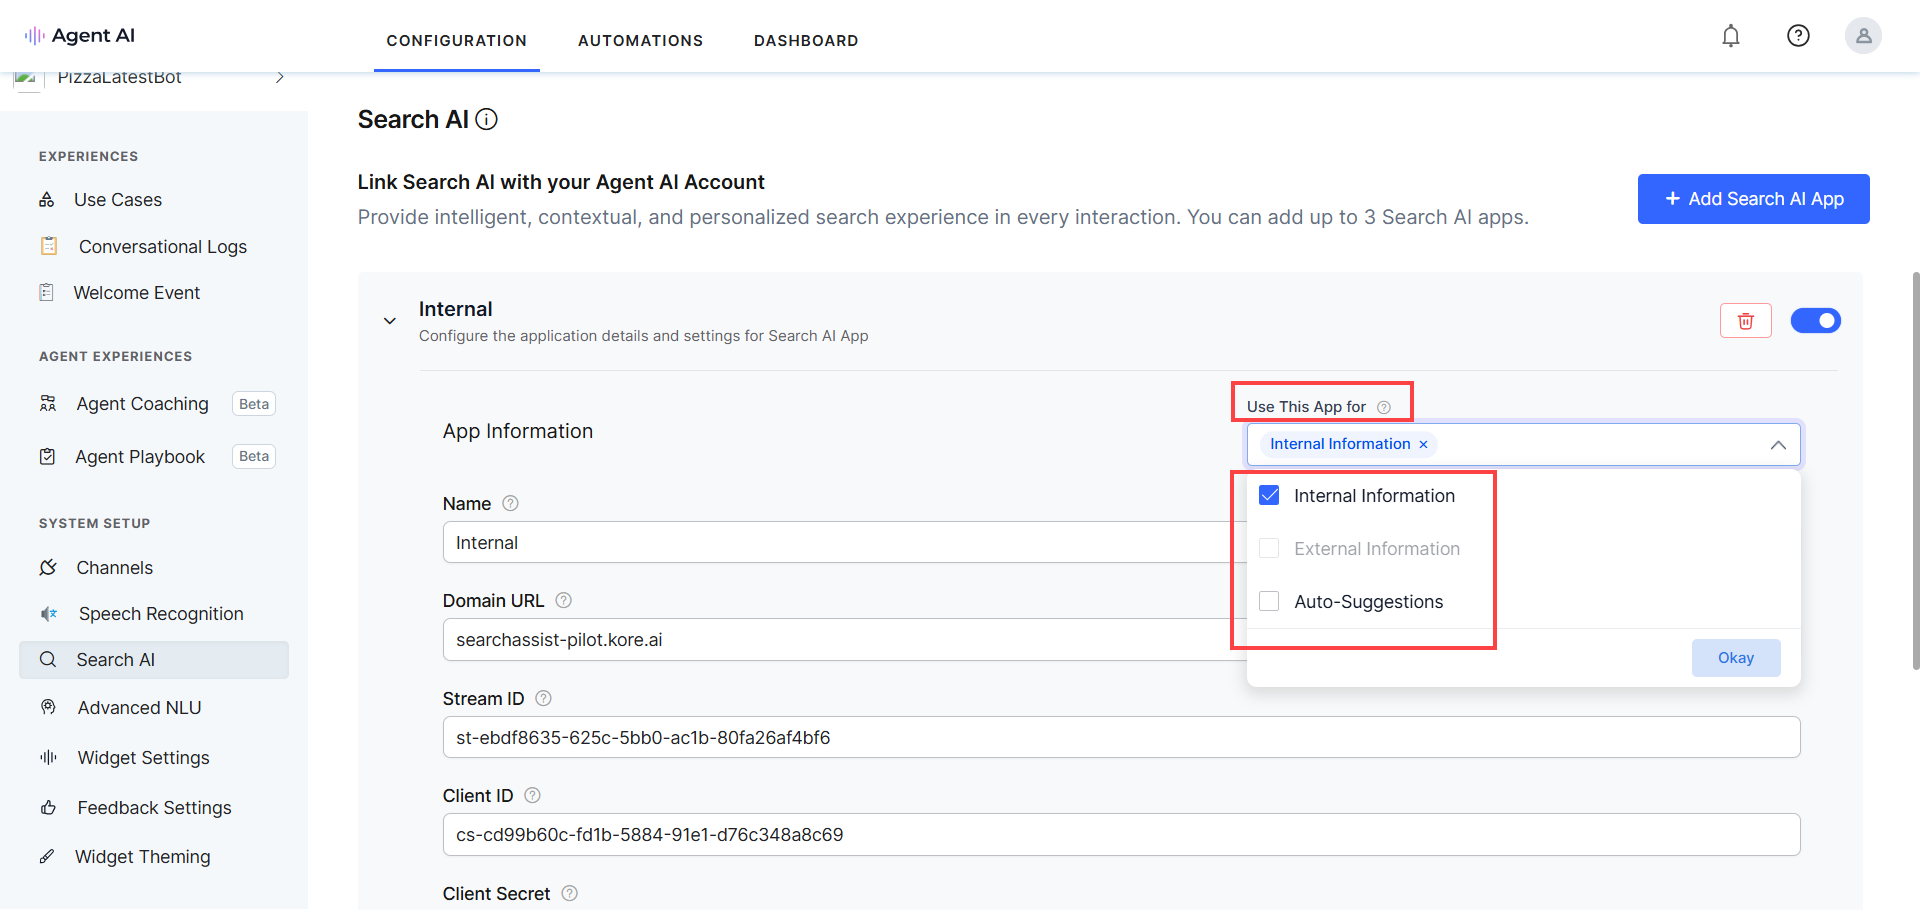
- Select an option or options in the Use This App for list. Refer to the Configuration Rules while selecting your options.
- Enter the following client credentials generated by the Search AI application:
- Domain URL: The Domain URL to be used for this specific search app.
- Stream ID: The Stream ID to be used for this specific search app.
- Client ID: The Client ID to be used for this specific search app.
- Client Secret: The Client Secret to be used for this specific search app.
- Expand the Knowledge AI section (displays only if you have selected Internal Information or External Information in the Use This App for field).

- Click the toggle to enable it. (By default, it remains disabled.)
- Select a channel in the Select channel list.
- Select the options under the Search Results, API Integration, and Control expand behavior of Answers sections.
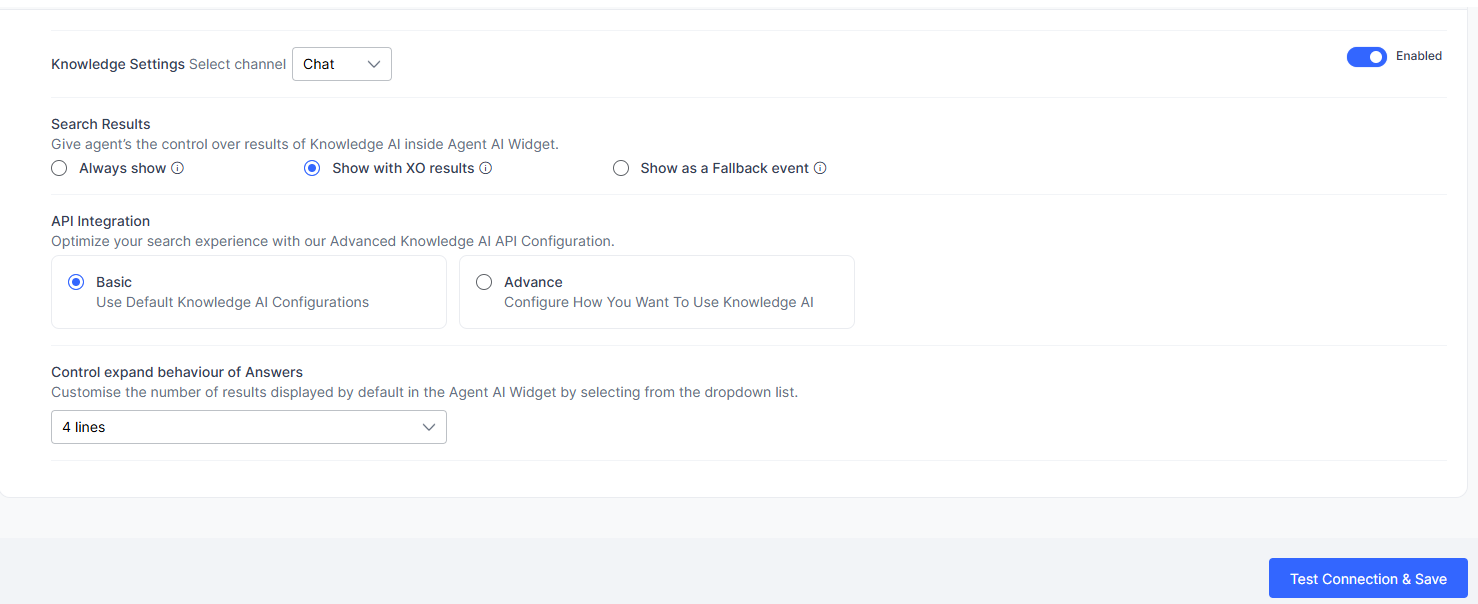
- Click Test Connection & Save to verify the configuration. The Connection Established Successfully message displays, if the connection is successful.
- Add more Search AI apps, as required by following the above steps.
Configuration Rules
- Choose either Internal Information or External Information with Auto-Suggestions.
- Internal Information and External Information can’t be combined in one app.
- Auto-Suggestions can be configured for only one Search AI app.
- Knowledge AI settings are available only when selecting either Internal Information or External Information.
Knowledge AI
This section lets you gain access to the Knowledge AI features within the Agent AI widget during customer interactions. Here, you can set channel-specific display of Knowledge AI search results. It has the following sub sections:
- Search Results: Gives you the control over Knowledge AI search results. Agents can select between Always Show, Show with XO Results, and Show as a Fallback event.
- Always Show: Shows all results of Knowledge AI regardless of bot intents. This is the default selection.
- Show with XO Results: Shows results of Knowledge AI only when relevant bot events such as Dialog Tasks or FAQs are detected.
- Show as a Fallback event: Shows results of Knowledge AI as a fallback when no bot events are detected.
- API Integration: You can optimize your search experience with the advanced Knowledge AI API configuration. Choose Basic to use the default Knowledge AI configurations or Advanced to configure how you want to use the Knowledge AI. The Advanced option lets you use your own API. The default selection is Basic.
- Control expand behavior of Answers: You can now customize the number of answers that appear for your Knowledge AI search in the Agent AI widget. For example, if you select “3” on this field, only three answers will appear in the widget. The default number is “4” and the minimum number to be selected is “2”.
How Does It Help Agents?
When Agent AI is integrated with Search AI, data from all the sources configured in the Search AI application are accessible to agents via the Agent AI widget > Search tab. In the search results, Snippets and Articles are shown from the Search AI application, and Dialog Tasks and FAQs are shown from the Use Cases of the Agent AI application. Agents can quickly review the search results and share relevant information with the customers. This feature also enables sending internal notes to agents with important, agent-only information that can’t be sent or copied to customers.
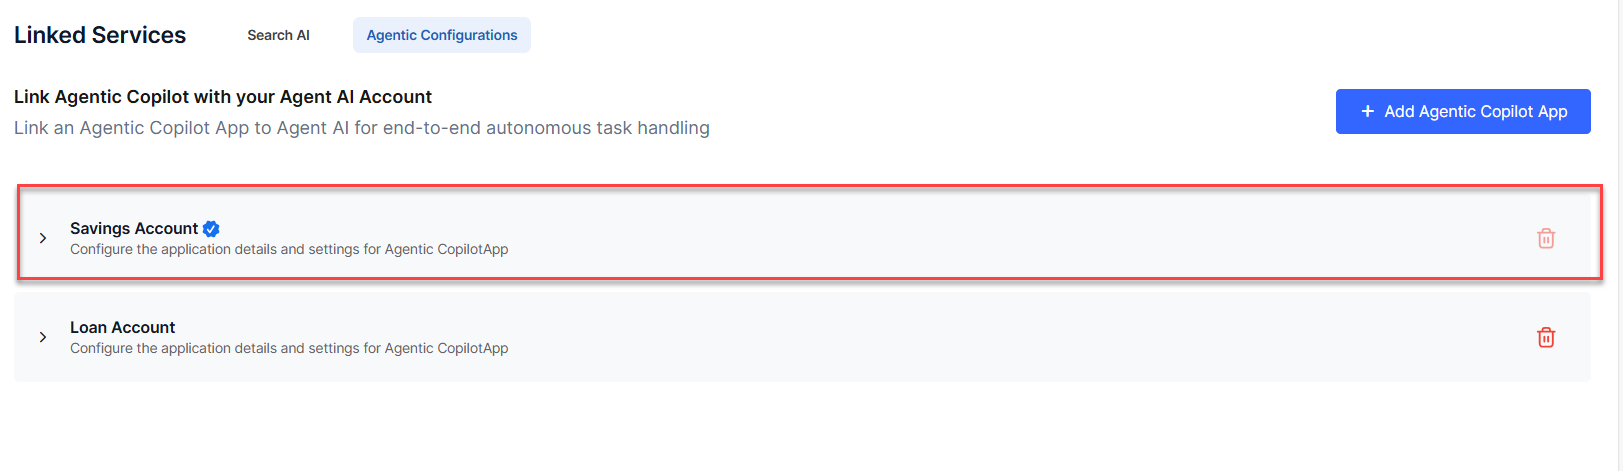
Agentic Configurations
The Agentic Copilot app is an agent’s aide. Once an Agentic app is successfully configured and linked with Agent AI, it manages end-to-end conversations autonomously. Agents supervise the conversations and focus more on the quality of service. They can cancel, override, or edit the Agentic conversations, as needed. Agents can also use the “custom tab” to run dialog tasks and perform LLM-powered searches.
This section lets you configure and manage the Agentic Copilot apps. You can configure, test, and save multiple apps simultaneously. Once configured, link these apps with Agent AI to have autonomous, end-to-end task execution.
Configuring an Agentic Copilot app
Follow these steps to configure an Agentic Copilot app:
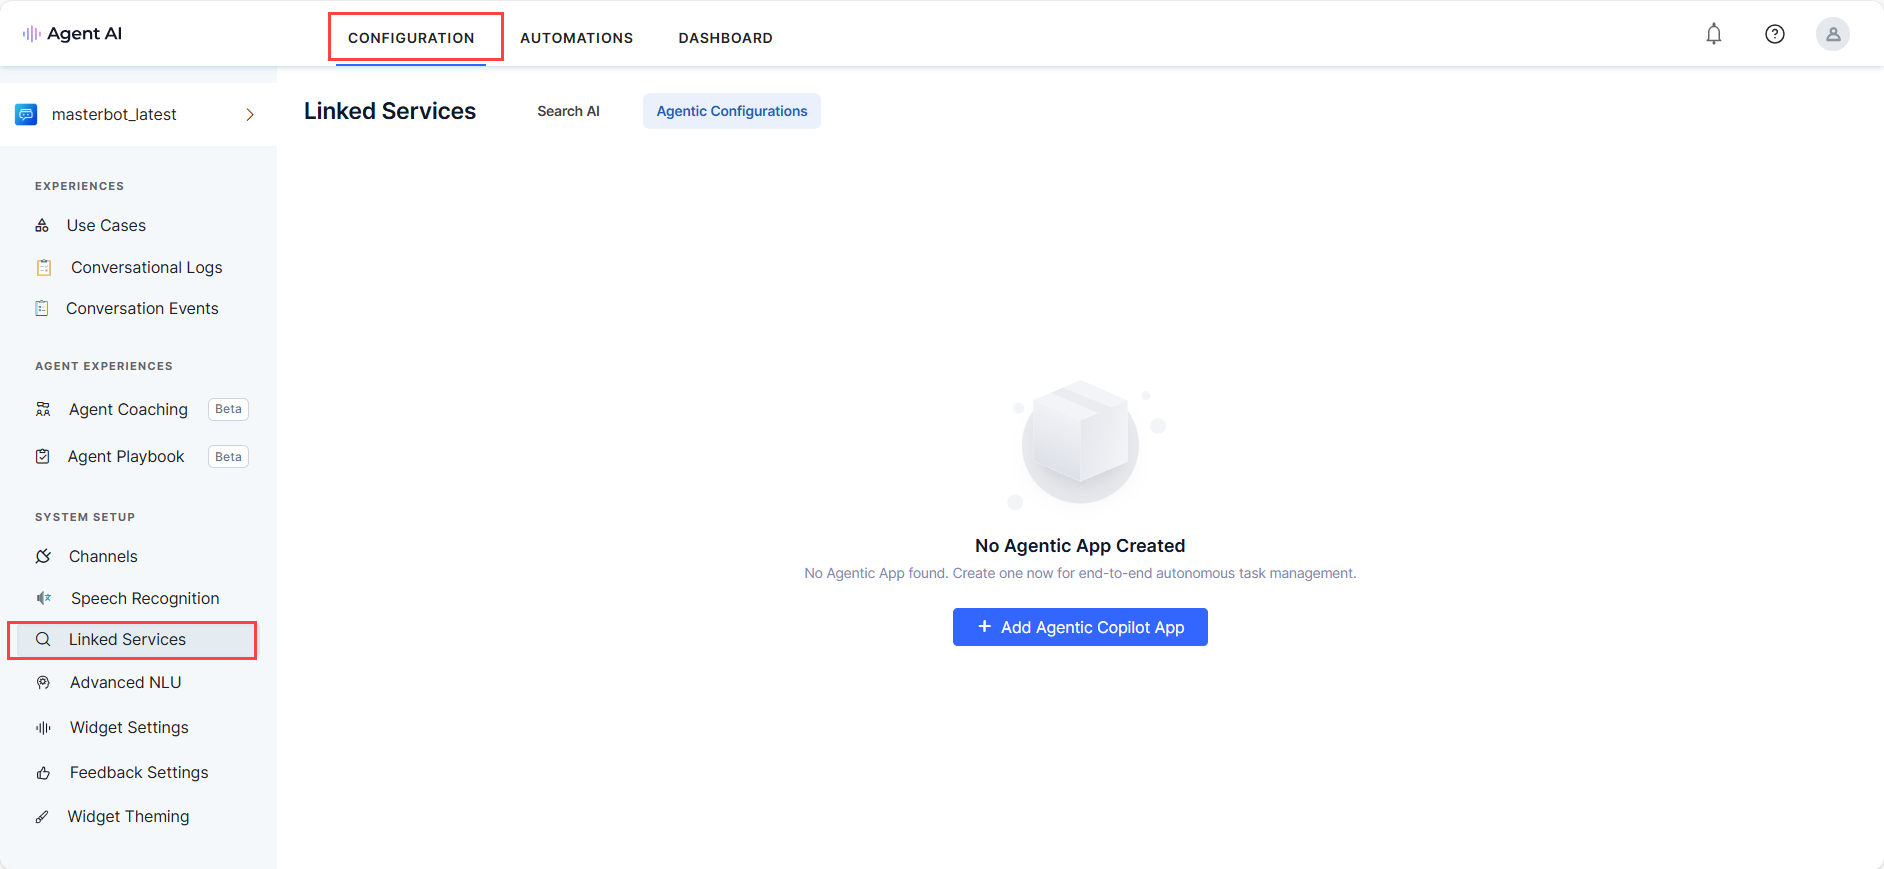
- Sign in to Agent AI.
- Go to Configuration > System Setup > Linked Services, and click Agentic Configurations.
- Click + Add Agentic Copilot App.
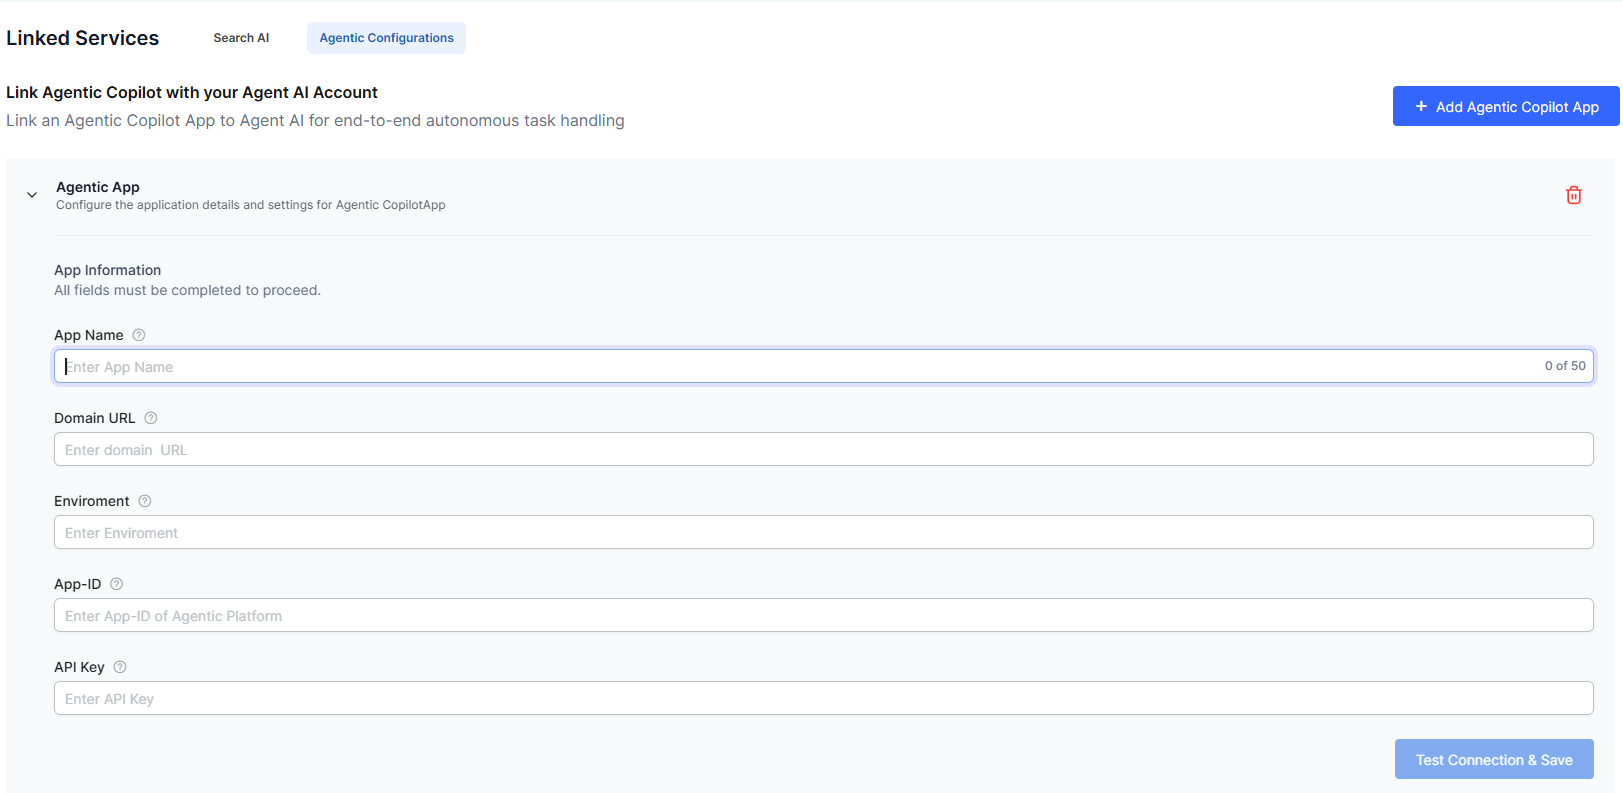
- Enter the following information under the App Information section:
- App Name: Enter a name for the new app. For example, Travel Agent. The character limit is set to 50.
- Domain URL: Enter the Agentic platform’s host URL. For example, agent-platform.kore.ai.
- Environment: Enter the environment name as configured in the “Environment” section of the Agentic Platform.
- App ID: Enter the Agentic app ID in use.
- API Key: Enter the API key as configured in the “API Keys” section of the Agentic Platform.
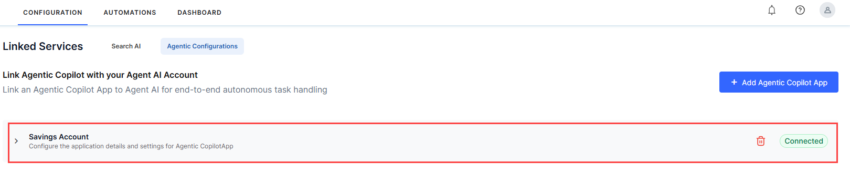
- Click Test Connection & Save. The configured app is saved and gets connected.

Deleting an Agentic Copilot app
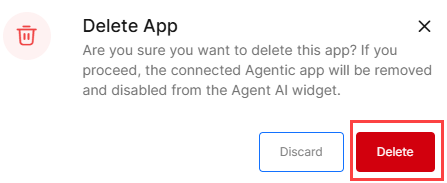
In this section, you can delete a configured app. When deleted, the connected apps automatically get disabled from the Agent AI widget. Follow these steps to delete a configured app:
- Click the “delete” button against a saved app.
- Click Delete on the confirmation screen.

Note: You can’t delete an in-use Agentic app; the delete button appears disabled, and a badge indicates the app is in use: