GETTING STARTED
Introduction to AgentAssist
Architecture and Configuration
Glossary
FAQ
Release Notes
Recent Updates
Previous Versions

SET UP AgentAssist
AgentAssist Setup Guide
Sign Up for AgentAssist
Conversation Automation
Automations Board
Create a Bot
Add Multiple Bots
Create Use Cases
Overview
FAQs Setup
Create Dialog Tasks
Welcome Events
LLM and Generative AI
Search AI
Agent Coaching
Playbook
Customizing the AgentAssist Widget
Configure Auto Summarization with Custom Dialog Tasks
Feedback Settings
Widget Theming (Layout Customization)
Supported Languages

INTEGRATIONS
AgentAssist Integration with Third-Party Applications
Amazon Connect
Amazon Connect with AgentAssist Voice Installation Guide
Amazon Connect with AgentAssist Chat Using Custom CCP
Amazon Connect with AgentAssist – Voice via AWS Third Party Applications
Channels
Voice
Configure Voice Channel
Configure Speech Recognition
Chat
SmartAssist
Configure AgentAssist
Demos
Voice Demo
Chat Demo
Salesforce
OmniChannel
Omni-Channel Configuration - Chat
AgentAssist Configuration - Chat
Genesys CTI
AgentAssist Voice Integration
NICE-CTI
Kore Agent AI with Salesforce NICE CX-CTI
Demos
Voice Demo
Chat Demo
Zendesk
Set up AgentAssist for Zendesk
Genesys
AgentAssist Integration with Genesys - Manual Setup Instructions
Agent AI Integration with Genesys Cloud CX
Set Up AgentAssist for Genesys
Change AgentAssist Bot in Genesys
Integrate Kore.ai Bot on Genesys Cloud CX Messaging
NICE MAX Desktop
Talkdesk
Twilio

AGENT EXPERIENCE
AgentAssist Widget
Bot Override and Automations

ANALYTICS
Conversation Logs
Dashboard
Agent AI ROI Analyzer (Beta)
APIs
Raw Data API v1
Raw Data API v2
Conversation Summary Trigger

Set up AgentAssist for Zendesk

The Kore.ai AgentAssist package is available on the Zendesk marketplace. After logging into the Zendesk account, you can install the package from the marketplace.

Prerequisites

Before you begin the installation, make sure you have the following information:

  • Login credentials for your Zendesk account.
  • Login credentials for AgentAssist.
  • Bot details (Client ID, Client Secret, and BotID).

Pre-Installation Steps

Log in to the AgentAssist account and find the bot details as per instructions in Step 1 and Step 2.

Step 1: Login to AgentAssist

  1. Visit https://agentassist.kore.ai/koreagentassist/.
  2. Enter your email address and click Continue.
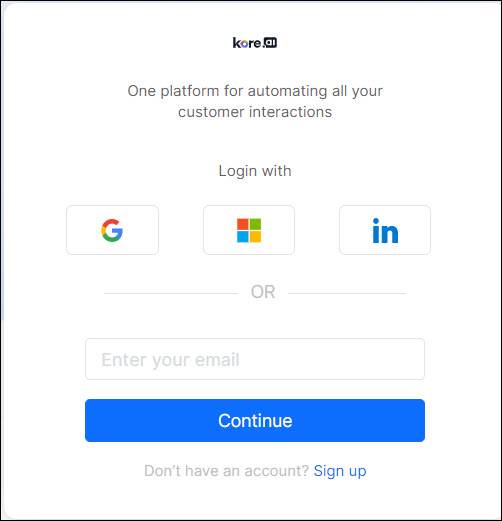
  3. Enter the password and click Sign In.

Step 2: Find the Bot Details

To find Bot details (Client ID, Client Secret, and BotID):

  1. In AgentAssist, go to Configuration > Channels > Chat.
    Auto-filled bot details are displayed.
  2. Copy all the required bot information – Client ID, Client Secret, and BotID.

Install AgentAssist in Zendesk

  1. Log in to your Zendesk account.
  2. Find the Kore.ai AgentAssist for Zendesk package from the marketplace and click Install.

    The Installation dialog box is displayed.
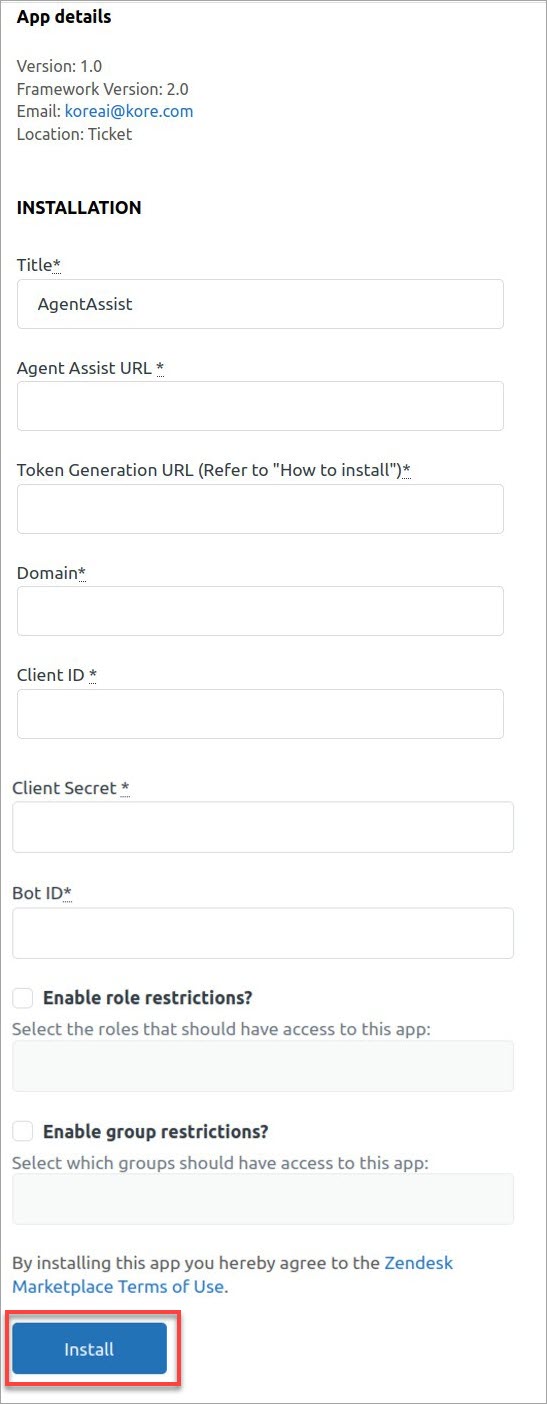
  3. Enter or select the required information in the dialog:
    • Title: By default, the title is AgentAssist.
    • AgentAssist URL: You can find it from your Zendesk environment on the AgentAssist Configuration page. 
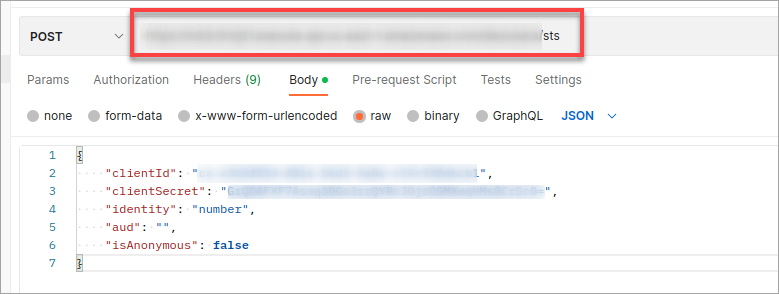
    • Token Generation URL: You can find it from your Zendesk environment. There should be a REST service available with an implemented method of POST. The method should accept the body, as shown in the image below. Create a JWT token using the ClientID and the Client Secret. You can have any service hosted on any cloud platform or the Zendesk environment.
      The token generation URL is marked below:
    • Domain: In the earlier step, the domain name must be copied and pasted from the URL.
    • Client ID, Client Secret, and BotID: Fill in the previously copied AgentAssist’s bot information in these fields. The same information that you copied in the pre-installation step.
    • Enable Role restrictions? (optional) Select the Roles that should have access to the AgentAssist package.
    • Enable Group restrictions? (optional) Select the Groups that should have access to the AgentAssist package.
  1. Click Install.

The AgentAssist widget is now available within Zendesk. Agents can start using the widget in Zendesk.