GETTING STARTED
Introduction to AgentAssist
Architecture and Configuration
Glossary
FAQ
Release Notes
Recent Updates
Previous Versions

SET UP AgentAssist
AgentAssist Setup Guide
Sign Up for AgentAssist
Conversation Automation
Automations Board
Create a Bot
Add Multiple Bots
Create Use Cases
Overview
FAQs Setup
Create Dialog Tasks
Welcome Event
LLM and Generative AI
Access Custom Data in Agent AI Bot
Search AI
Agent Coaching
Playbook
Customizing the Agent AI Widget
Configure Auto Summarization with Custom Dialog Tasks
Feedback Settings
Widget Theming (Layout Customization)
Supported Languages

INTEGRATIONS
AgentAssist Integration with Third-Party Applications
Amazon Connect
Amazon Connect with AgentAssist Voice Installation Guide
Amazon Connect with AgentAssist Chat Using Custom CCP
Amazon Connect with AgentAssist – Voice via AWS Third Party Applications
Channels
Voice
Configure Voice Channel
Configure Speech Recognition
Chat
SmartAssist
Configure AgentAssist
Demos
Voice Demo
Chat Demo
Salesforce
OmniChannel
Omni-Channel Configuration - Chat
AgentAssist Configuration - Chat
Genesys CTI
AgentAssist Voice Integration
NICE-CTI
Kore Agent AI with Salesforce NICE CX-CTI
Demos
Voice Demo
Chat Demo
Zendesk
Set up AgentAssist for Zendesk
Genesys
AgentAssist Integration with Genesys - Manual Setup Instructions
Agent AI Integration with Genesys Cloud CX using Kore Data Table
Set Up AgentAssist for Genesys
Change AgentAssist Bot in Genesys
Integrate Kore.ai Bot on Genesys Cloud CX Messaging
ServiceNow
NICE MAX Desktop
Talkdesk
Twilio

AGENT EXPERIENCE
AgentAssist Widget
Bot Override and Automations

ANALYTICS
Conversation Logs
Dashboard
Agent AI ROI Analyzer (Beta)
APIs
Raw Data API v1
Raw Data API v2
Conversation Summary Trigger

Bot Override and Automation

While using the agent desktop, agents can access the Agent AI Bot, which helps answer customer queries based on customer context and intents. After the intent is identified, you can start the automation that the bot suggests.

Bot Override

During the execution of automation, there might be an occurrence where the bot does not understand the customer inputs, which would lead to a “try again” error. 

If the error occurs multiple times, the agent (being aware of the input format) can intervene to correct the input.

Steps to override Bot inputs

  1. Below the automation step, click Override Input.
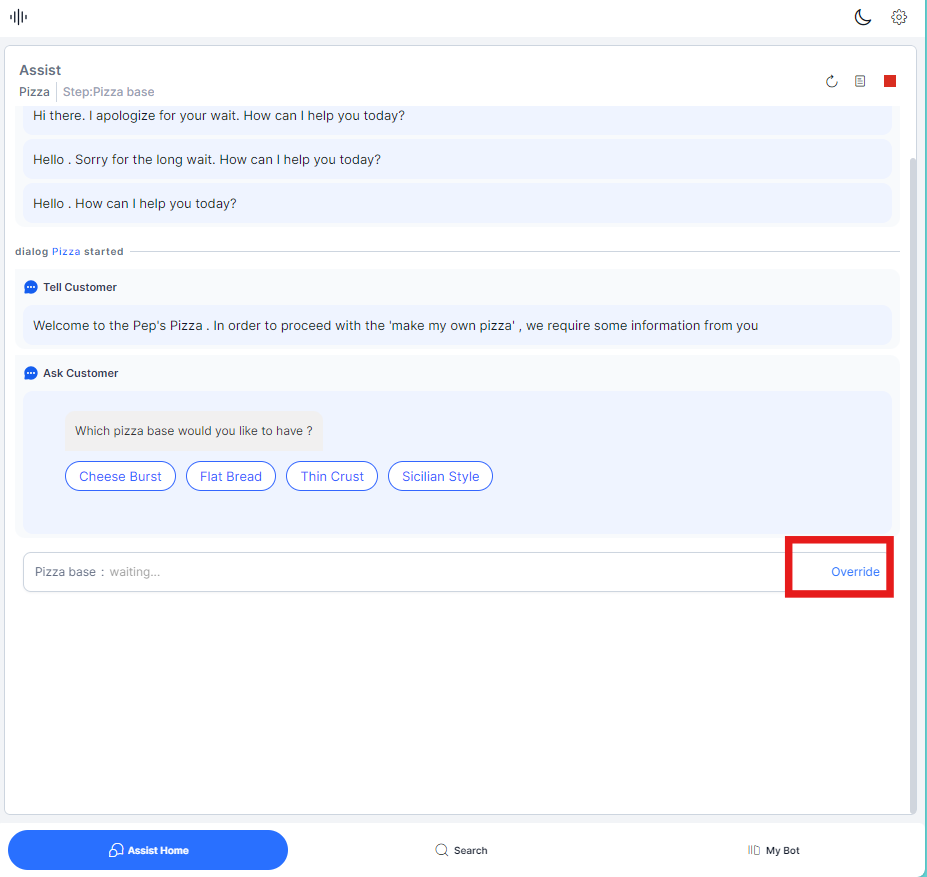
  2. The Type to continue box is displayed. Enter the required value in the box.
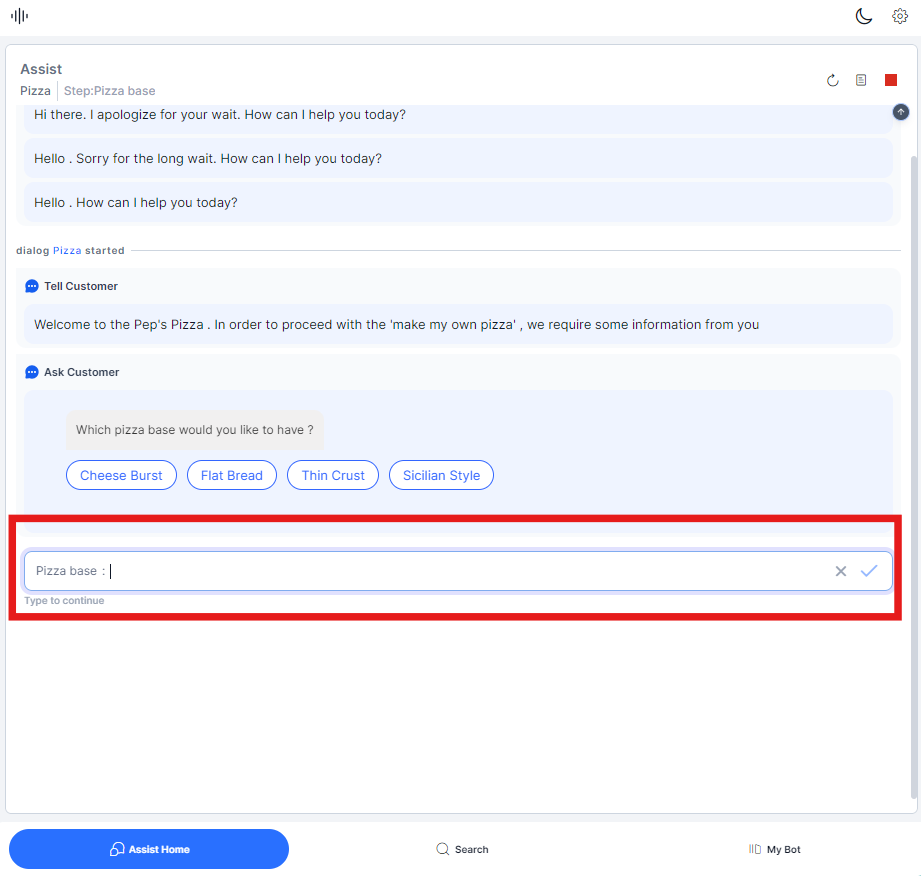
    The path is corrected, and the control gets back to the user.
    To provide a better experience to the customer, you can intervene and correct the bot’s path.

Terminate Automation

The terminate automation option allows you to stop ongoing automation anytime. There can be multiple reasons to terminate an automation: 

  • Accidental automation clicks.
  • Unexpected behavior.
  • Customer doesn’t want to proceed with the intent anymore. 

Steps to terminate an automation

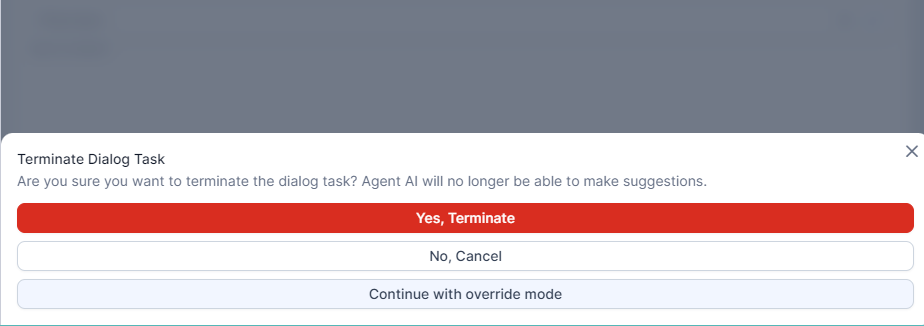
  1. On the Assist/My Bot tab, next to the automation step, click Terminate. A confirmation pop-up message appears. 
  2.  Click Yes, Terminate to stop the running task.
     

Sentiment Analysis

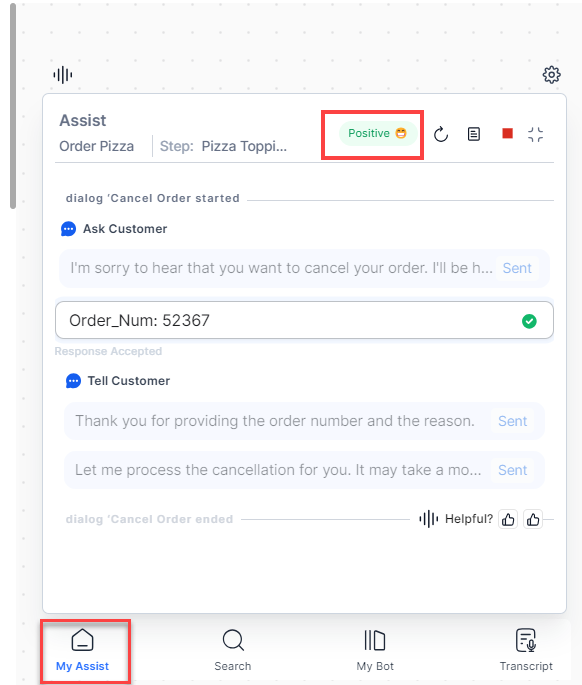
A single agent may serve multiple customers at a given time. It would mean switching back and forth continuously. In spite of transitions, sentiment analysis allows agents to detect the customer’s sentiment instantly.

The bot continuously assesses the customer’s sentiment based on their messages and lets you know it in real-time.

The customer sentiment is placed at the right-top corner of the widget.

Search or Ask a question

The search function allows you to search for FAQs/automations directly from the bot. You can identify automations behind an intent by asking the bot using the search bar. In addition to being easily accessible, the search bar also lets you look up information concurrently with a customer conversation. The search bar is placed at the bottom of the Agent AI widget and is easily accessible to agents.

Steps for searching/asking a question

  1. In the Ask a question search bar, type the question you want to ask the bot.
  2. Press the Enter key on the keyboard. Agent AI shows related search results. You can use the search results to respond to the customer.

Run Automation with Agent’s Input

There are two ways to run automations: 

  • Customer Inputs  
  • Agent Inputs (Bot override)

Automation with the customer inputs feature introduces the capability where agents give the inputs to the bot allowing the agents to have control of the entire automation process. The agents can run this automation in parallel and provide the customer with the final results.

Steps to run an automation

  • Run button: For Dialog Tasks. Click to run a configured Dialog Task.
  • Click the ellipsis and click Run with agent’s input. The automation starts on the My Bot tab. The automation is a parallel session dedicated to the agent and won’t impact customer interaction.

The Run with Agent’s input feature allows an agent to run automation independently and helps agents retrieve information directly and give the final result to the customer, thereby decreasing the AHT drastically.