GETTING STARTED
Introduction to AgentAssist
Architecture and Configuration
Glossary
FAQ
Release Notes
Recent Updates
Previous Versions

SET UP AgentAssist
AgentAssist Setup Guide
Sign Up for AgentAssist
Conversation Automation
Automations Board
Create a Bot
Add Multiple Bots
Create Use Cases
Overview
FAQs Setup
Create Dialog Tasks
Welcome Event
LLM and Generative AI
Access Custom Data in Agent AI Bot
Search AI
Agent Coaching
Playbook
Customizing the AgentAssist Widget
Configure Auto Summarization with Custom Dialog Tasks
Feedback Settings
Widget Theming (Layout Customization)
Supported Languages

INTEGRATIONS
AgentAssist Integration with Third-Party Applications
Amazon Connect
Amazon Connect with AgentAssist Voice Installation Guide
Amazon Connect with AgentAssist Chat Using Custom CCP
Amazon Connect with AgentAssist – Voice via AWS Third Party Applications
Channels
Voice
Configure Voice Channel
Configure Speech Recognition
Chat
SmartAssist
Configure AgentAssist
Demos
Voice Demo
Chat Demo
Salesforce
OmniChannel
Omni-Channel Configuration - Chat
AgentAssist Configuration - Chat
Genesys CTI
AgentAssist Voice Integration
NICE-CTI
Kore Agent AI with Salesforce NICE CX-CTI
Demos
Voice Demo
Chat Demo
Zendesk
Set up AgentAssist for Zendesk
Genesys
AgentAssist Integration with Genesys - Manual Setup Instructions
Agent AI Integration with Genesys Cloud CX
Set Up AgentAssist for Genesys
Change AgentAssist Bot in Genesys
Integrate Kore.ai Bot on Genesys Cloud CX Messaging
NICE MAX Desktop
Talkdesk
Twilio

AGENT EXPERIENCE
AgentAssist Widget
Bot Override and Automations

ANALYTICS
Conversation Logs
Dashboard
Agent AI ROI Analyzer (Beta)
APIs
Raw Data API v1
Raw Data API v2
Conversation Summary Trigger

Salesforce Omni-Channel Chat Configuration

This document explains the Omni-Channel Chat configuration process in Salesforce. 

Prerequisites

  • Developer or a Production Salesforce org
  • Basic knowledge of Salesforce terminology

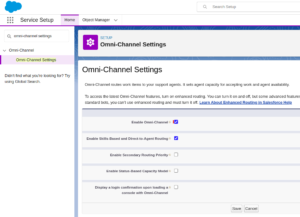
Enable Omni-Channel

  1. Sign in to your organization.
  2. Go to Salesforce Service Setup.
  3. In the quick find box, search Omni-Channel Settings.
  4. Select Enable Omni-Channel and click Save.
Set Up Web Chat in Salesforce

  1. Sign in to your organization. If you’re in Salesforce Classic, switch to Lightning Experience.
  2. Go to Service Setup.
  3. Click View All under Recommended Setup.

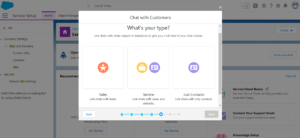
  4. Type chat in the search box and select Chat with Customers.

  5. Create a queue and assign the Salesforce users to the queue.

  6. Click Next and enter the priority value.
  7. Click Next and enter Work Item Size and Agent Capacity.
  8. Enter the public URL of the website where you want to add your chat widget. (For this demo, we’ll use VF Pages.)

  9. Select the org type.

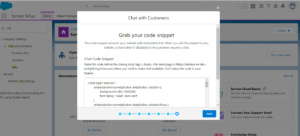
  10.  Copy the Chat Code Snippet and save it on your local device.
  11. Click Next and Done.

Add the Omni-Channel utility to your Lightning Application

  1. Go to Lightning Experience > Setup.
  2. Enter “App in the Quick Find box.
  3. Select App Manager.
  4. Click the dropdown list next to the console app that you want to add Omni-Channel to (for example, Service Console), and click Edit.
  5. Click Utility Bar > Add.
  6. Click Omni-Channel.
  7. Click Save.
  8. Click Done.

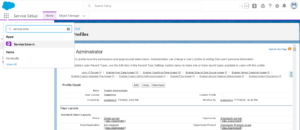
Enable Service Presence Status Access

  1. Enter Profile in the quick find box, and then select Profiles.
  2. Select System Administrator. 
  3. Edit Enable Service Presence Status Access and assign Presence Status Available – Chat, On Break, and Busy.

Assign Permission Sets

  1. Search for Permission Sets in the quick find box, and select it.
  2. Search for Chat Setup Flow.
  3. Open Permission Set.
  4. Locate Service Presence Statuses Access under the Apps heading and open it.
  5. Click Edit.

  6. Move the required Presence Statuses to the right side.

  7. Click Save.

Configuring the App

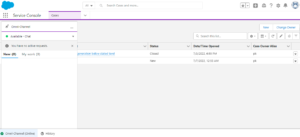
  1. Select App Launcher.
  2. Click the tile for the app that you want (Service Console, in this case).
  3. Click the Omni-Channel widget to set the agent online.
Testing the Chat

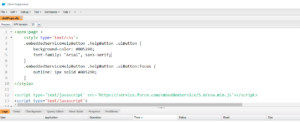
  1. Open the Salesforce Developer Console and create a new Visualforce page.
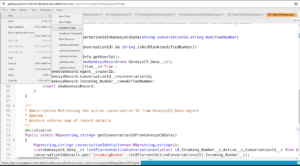
  2. Paste the code you copied in the Set Up Web Chat in Salesforce step. Or, you can find the code from the following steps:
    1. Go to Setup and type Embedded in the quick find box.
    2. Select Embedded Service Deployments.

    3. Click the dropdown list and select View.

    4. Click the Get Code button.

    5. Copy the code to the clipboard.
    6. Click Done.

  3. Go to the Visualforce page and paste the code in between the apex:page tags.
  4. Save and click the Preview button.

    It navigates to another tab. At the bottom right, you can find the Chat symbol.
  5. Click the Chat button.
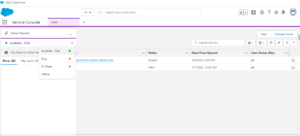
  6. Go to Service Console, open the Omni-Channel widget, and set Presence Status to Available – Chat.
  7. Provide Information to initiate the chat.
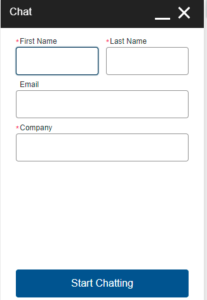
  8. Click the Start Chatting button.

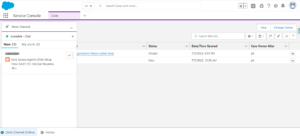
  9. Accept the chat in Salesforce.

    Once you accept the work item, it comes under the My Work tab. Now, you can start a conversation with a customer.
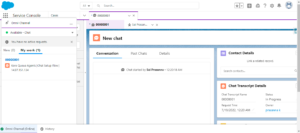
  10. Start the conversation.