Proactive Web Campaigns
Web campaigns are online strategic initiatives to promote a product, service, cause, or brand. They harness the power of web engagement to reach and engage target audiences effectively. Their utility lies in their ability to amplify visibility, generate leads, foster brand awareness, and ultimately, achieve predefined objectives with precision and measurable outcomes.
You can access the Proactive Web Campaigns by going to Campaign Management > Proactive Web.

Proactive Web Campaign Types
| TYPE | DESCRIPTION |
|---|---|
| Chat | A message is displayed on the web page. This action pushes the configured messages to the chat widget message channel. |
| Banner | A banner is displayed to the customer at the top or bottom of a web page. |
| Post | A post is displayed as a pop-up at the center of the web page. |
| Button | A button is displayed to the customer on the web page. This button can be static or triggered by an action from the customer and can be placed on the right or left side of the web page. |
On this page, the following details of the web campaigns are shown in a table:

- Name - The campaign name and Type.
- Actions - Play/Pause/Replay, Stop, Edit, Clone campaign.
- Status - Status of the campaign.
- Ready: When a campaign is saved and ready to run.
- Active: The campaign is started and running.
- Paused: The campaign is paused.
- Completed: The campaign is exhausted, and all the proactive messages are sent.
- Type - Chat, Post, Banner, or Button.
- Sent - The count of proactive messages sent to website visitors.
- Goals - The count of campaign goals achieved.
Create Proactive Web Campaigns
Creating proactive web campaigns involves strategizing and implementing initiatives to anticipate and address user needs before they arise, enhancing user experience and engagement. Campaign managers are crucial in orchestrating these efforts, utilizing data-driven insights and innovative techniques to craft compelling content and optimize campaign performance.
Steps to create a proactive web campaign:
- Go to Campaign Management > Proactive Web.
- Click + New Campaign.
You can access the Proactive Web Campaigns by going to Campaign Management > Proactive Web.

Chat
-
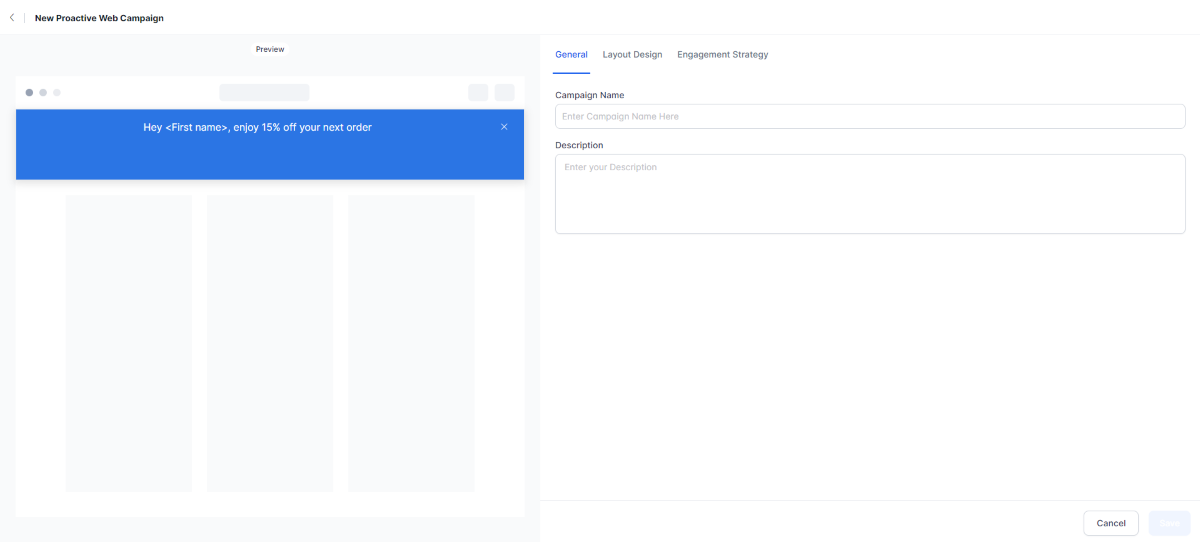
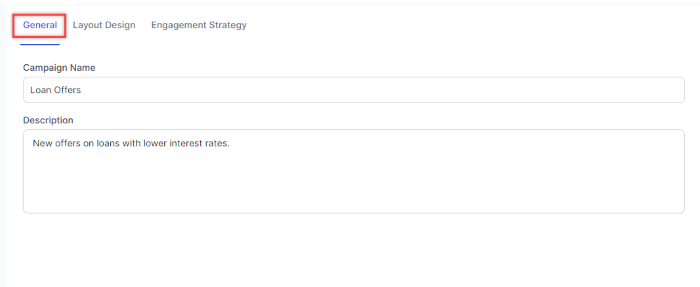
Click the General tab and enter the Campaign Name and Description.
-
Click the Layout Design tab. Under the Message Header click the Edit icon to enter the header Text and Image that can be used along with the displayed message, and click Save. By default, the message header is enabled.

-
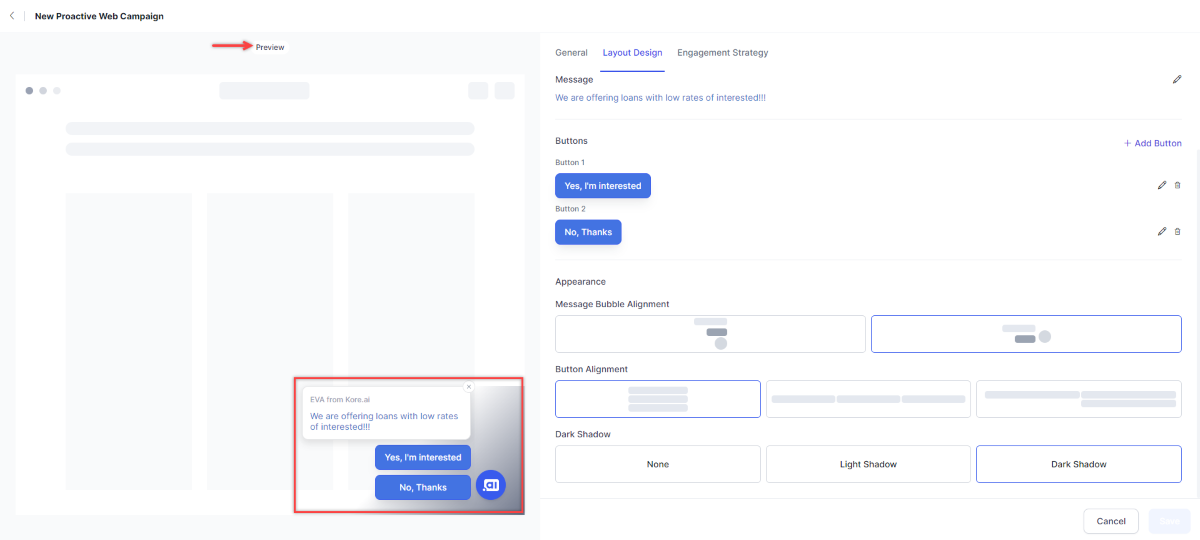
Click the Edit icon and enter the message to be displayed to the website visitor. You can select the font size, make the text bold, italics, underline, select, add links, text color, or add variables, and click Save.

-
Click + Add Button to add a new button.
 Click the Edit icon to edit the details of an existing button. You can enter the Text for the button, select the Action performed on clicking the button, Background Colour, Text Colour for the button, and click Save.
 The following options are available for the Actions:
- Send to URL - Selecting this option displays the URL field where the user will be redirected.
- Send to Bot - The conversation will be redirected to the bot.
- Dismiss - Dismiss the proactive chat offer.
-
Under the Appearance section, select the Message Bubble Alignment, Bubble Alignment, and Dark Shadow.

-
The Preview Section on the left side shows the configured layout.
-
Click the Engagement Strategy tab and configure the following:
-
Website: Click the + Add Website button and select the URL/Page Name. URLs are crucial for directing users to specific web pages, tracking campaign performance, and optimizing user experience, ultimately enhancing audience engagement and conversion rates. Select the URL and the condition about what the URL contains.

-
Rules: Rules establish guidelines and standards to govern the execution of online marketing initiatives, ensuring effectiveness and compliance. Click the + Add Rule button and select the rules. You can select from the following rules:
- User, Is, known/anonymous.
- Country, Is/Not, “name of the country”.
- City, Is/Not, “name of the city”.
- Page Visit Count, Equals To, “count”.
- Time Spent, Equals To, no.of Seconds.
- Hover On, ID/Class/Query Selector, “Add Rule”. The rule can be set as follows:
- On a web page, select the object or element.
- Right-click and select 'Inspect'.
- In the 'Inspect' section, click the Elements tab. It will have the "id" and/or "class"
-
To use a "Query Selector", right-click the specific HTML element and select 'Copy Selector'.
Note
The above steps are specific to Chrome browser and might vary for other web browsers.
-
Goals: The purpose is to provide clear objectives and measurable targets to guide the campaign's strategy and assess its effectiveness in achieving desired outcomes. Click the + Add Goal button and select the goals.

-
Channel: The purpose of channels in a web campaign is to designate a medium through which the campaign's message is disseminated, facilitating targeted outreach and engagement with the intended audience. Select the channel for the campaign from the dropdown.

-
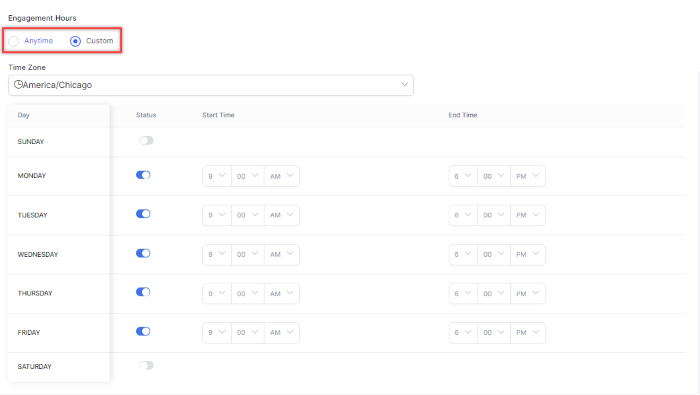
Engagement Hours: Select the time duration for running the campaign. You can select from the following:
-
-
Click Save.
Post
-
Click the General tab, and enter the Campaign Name and Description. Steps to add the name and description are same for all proactive web campaign types. Learn more.
-
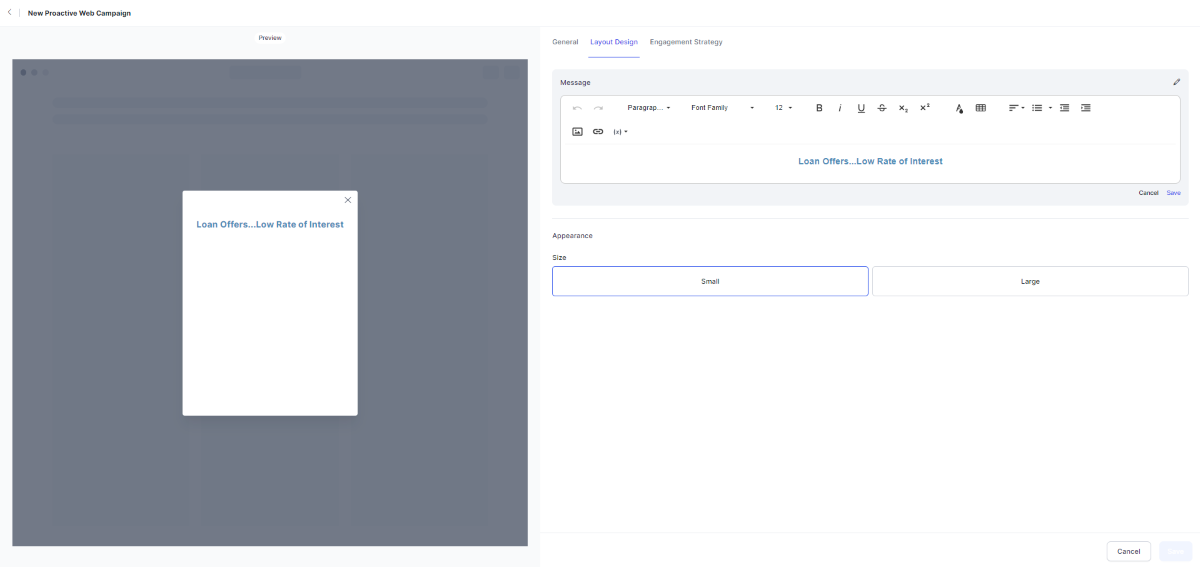
Click the Layout Design tab. Click the Edit icon under Message, enter a message to be displayed, and click Save. You can use the options available in the editor to design the layout. Under Appearance, select the Size.
-
Click the Engagement Strategy tab and configure the Website, Rules, Goal, Channel, and Engagement Hours. Steps to configure the engagement strategy are same for all proactive web campaign types. Learn more.
- Click Save.
Banner
-
Click the General tab, and enter the Campaign Name and Description. Steps to add the name and description are same for all proactive web campaign types. Learn more.
-
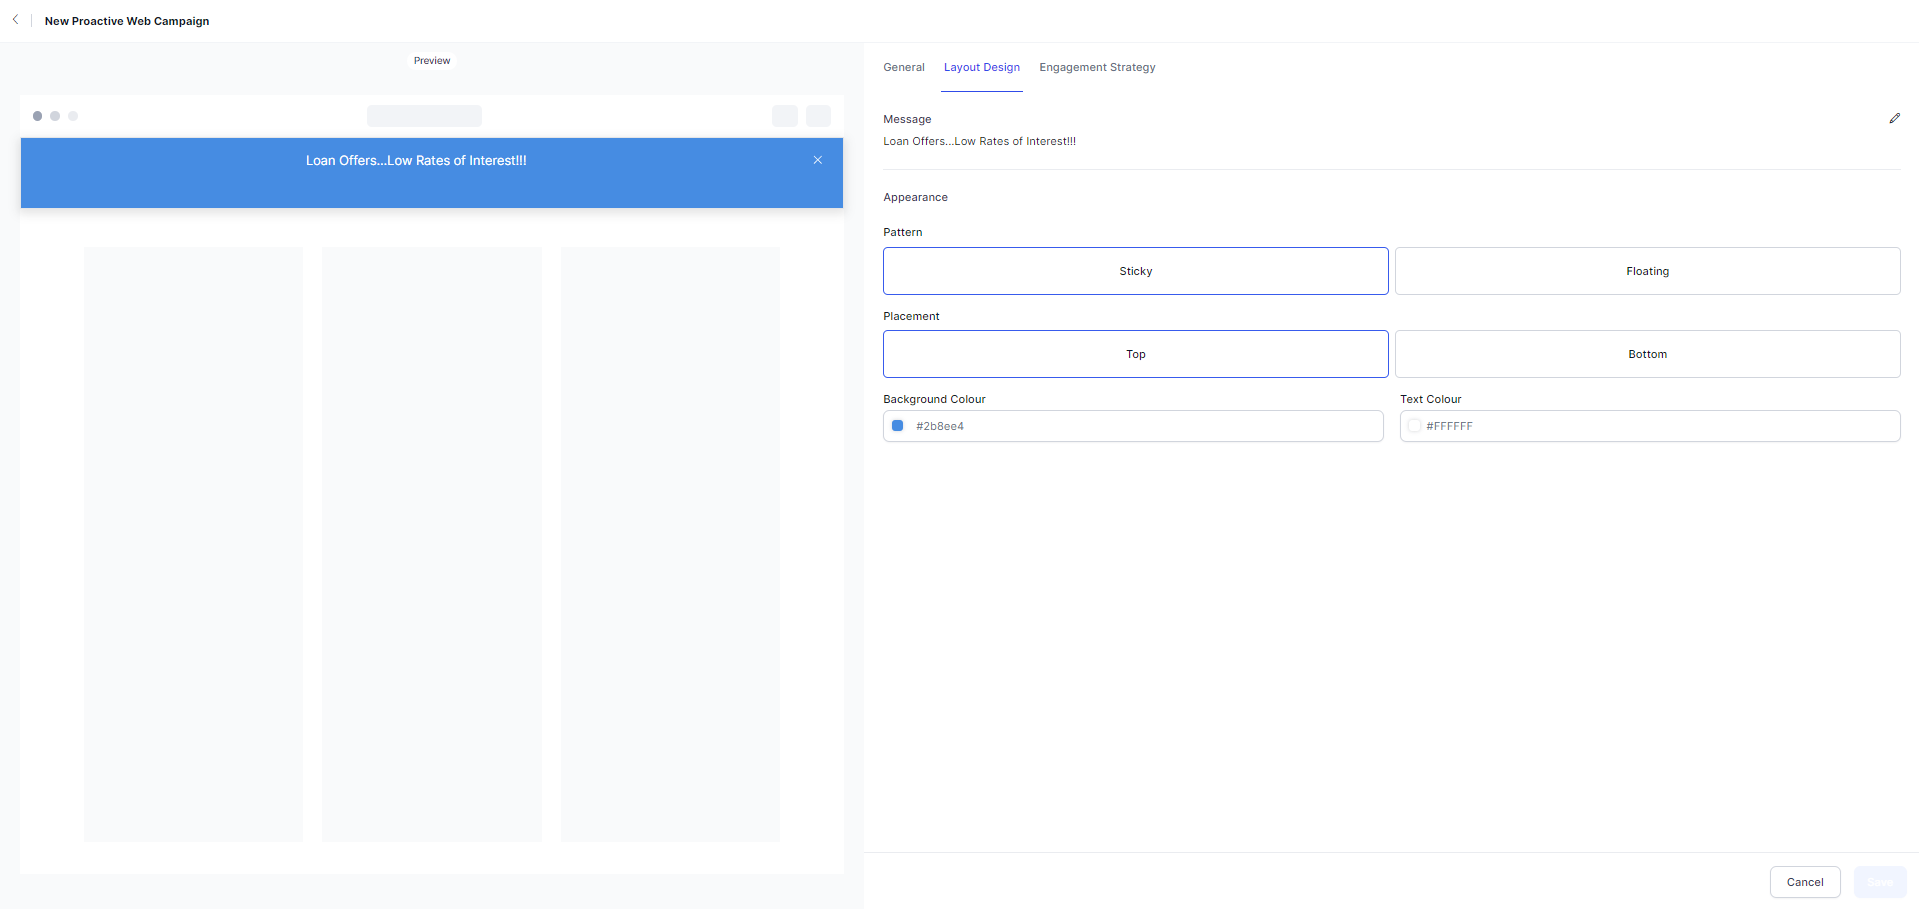
Click the Layout Design tab. Click the Edit icon under Message, enter a message to be displayed, and click Save. You can use the options available in the editor to design the layout. Under Appearance, select the Pattern (Sticky/Floating), Placement (Top/Bottom), Background, and Text Color.
-
Click the Engagement Strategy tab and configure the Website, Rules, Goal, Channel, and Engagement Hours. Steps to configure the engagement strategy are same for all proactive web campaign types. Learn more.
- Click Save.
Button
-
Click the General tab, and enter the Campaign Name and Description. Steps to add the name and description are same for all proactive web campaign types. Learn more.
-
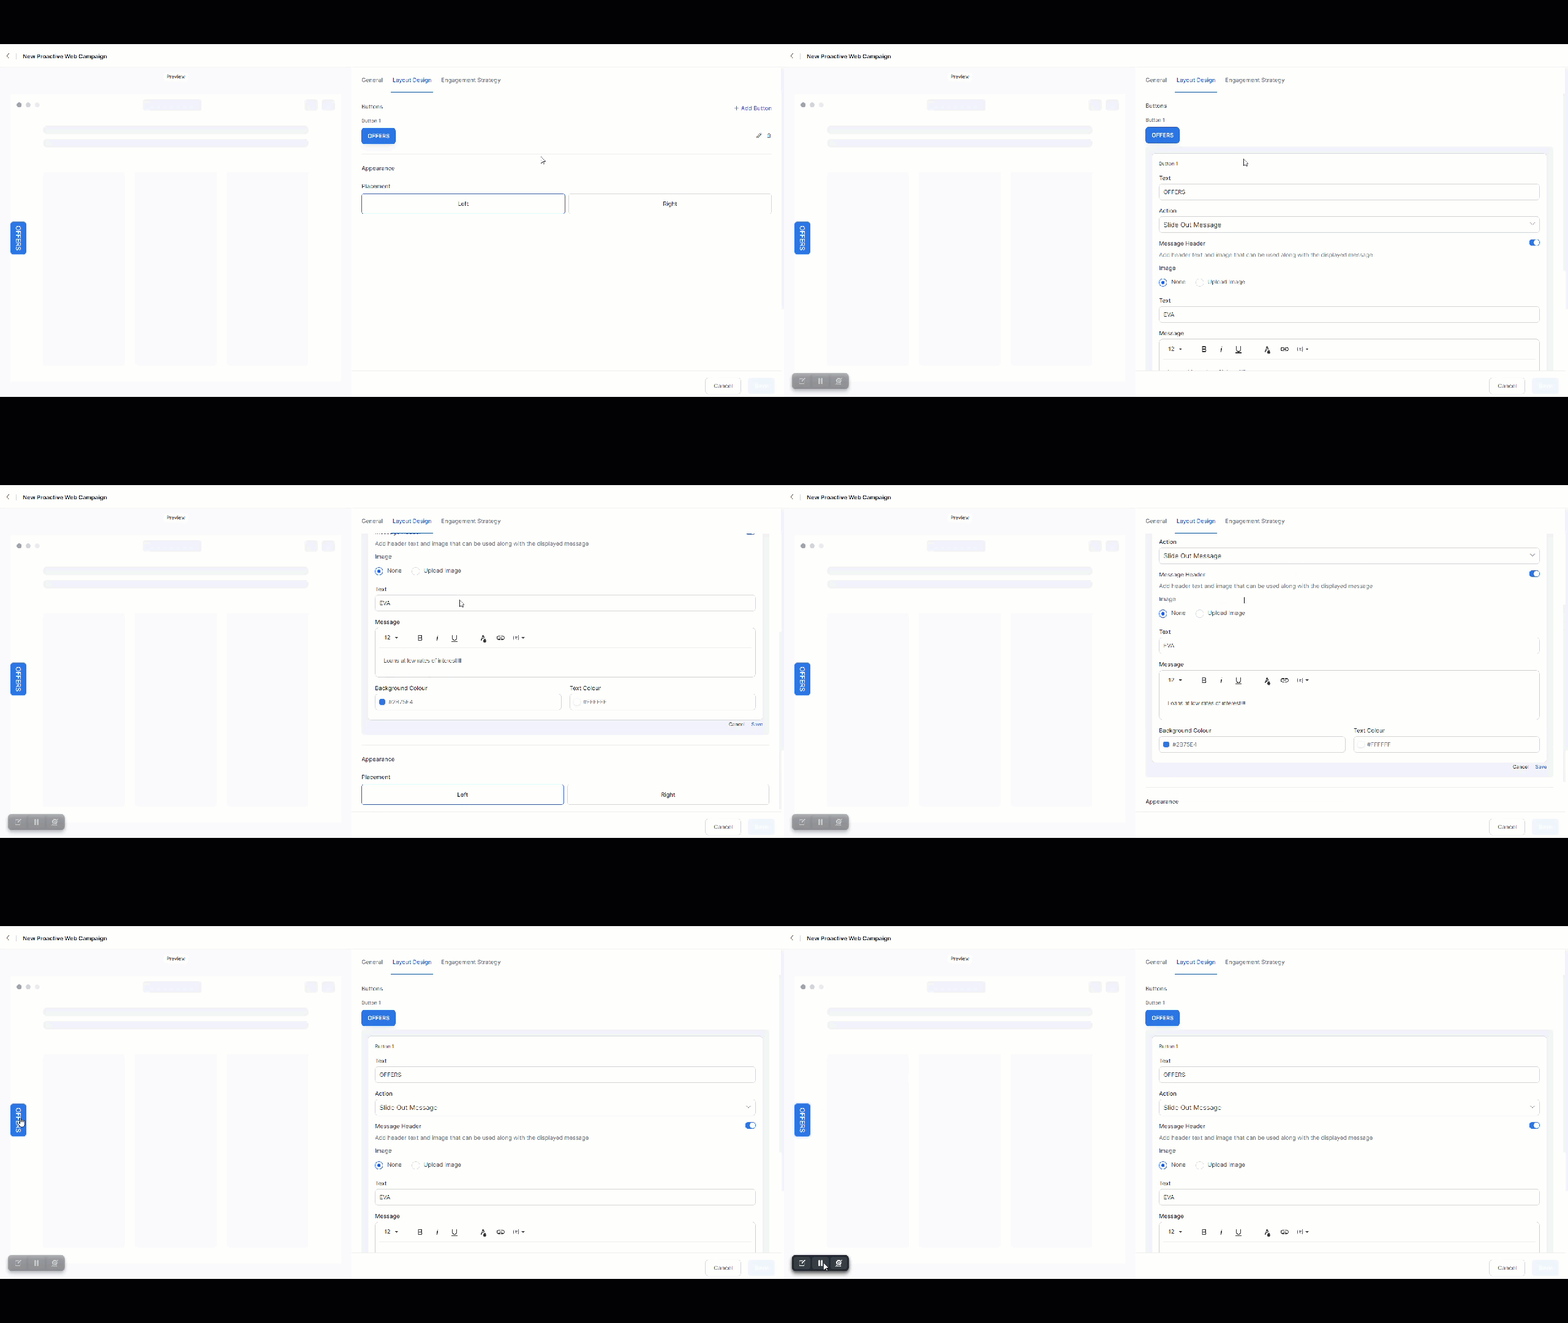
Click the Layout Design tab. Click the Edit icon on the right corner and do the following:
- Enter the Text that will be displayed on the button.
- Select the Action (Send to URL/Slide Out Message) to be performed when the button is clicked.
- Upload an image if required.
- Enter the header Text that will be displayed when the button is clicked.
- Enter the Message that will be displayed when the button is clicked. You can use the options available in the editor to design the layout.
- Select the Background and Text Color.
- Select the Placement of the button (Left/Right).
-
Click the Engagement Strategy tab and configure the Website, Rules, Goal, Channel, and Engagement Hours. Steps to configure the engagement strategy are same for all proactive web campaign types. Learn more.
- Click Save.
Templates
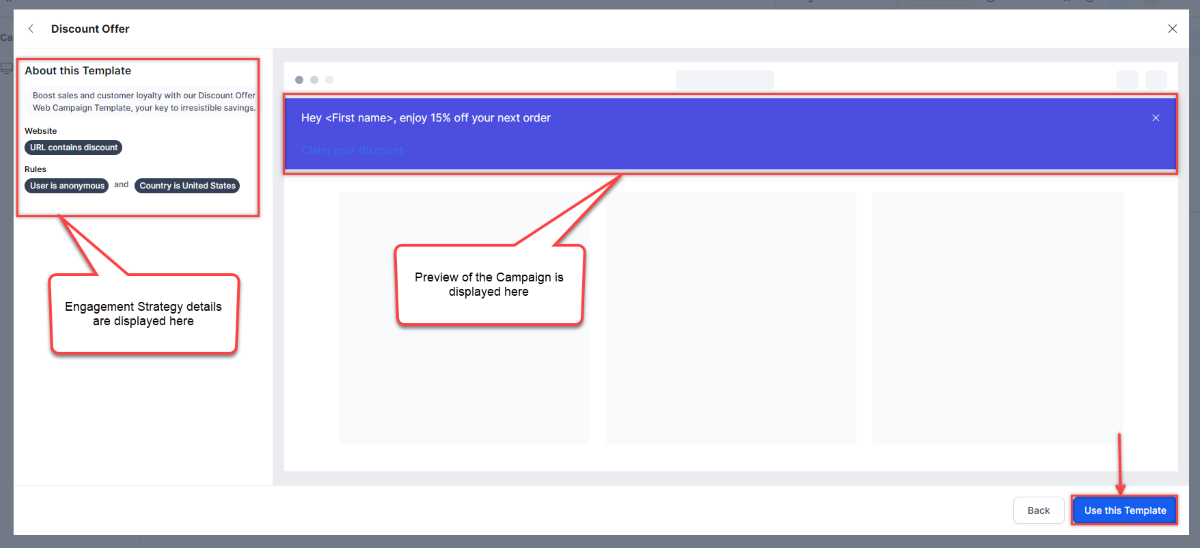
The purpose of using templates in web campaigns is to streamline and expedite the creation of consistent and visually appealing content. Templates provide a structured framework that enables you to easily plug in content elements, ensuring uniformity across various campaign materials. By using templates, marketers can save time, maintain brand coherence, and efficiently produce engaging content tailored to different platforms and audience segments. Additionally, templates facilitate collaboration among team members and allow for swift adjustments and iterations based on campaign performance and feedback. Overall, templates enhance productivity, brand consistency, and campaign effectiveness in the dynamic landscape of digital marketing.
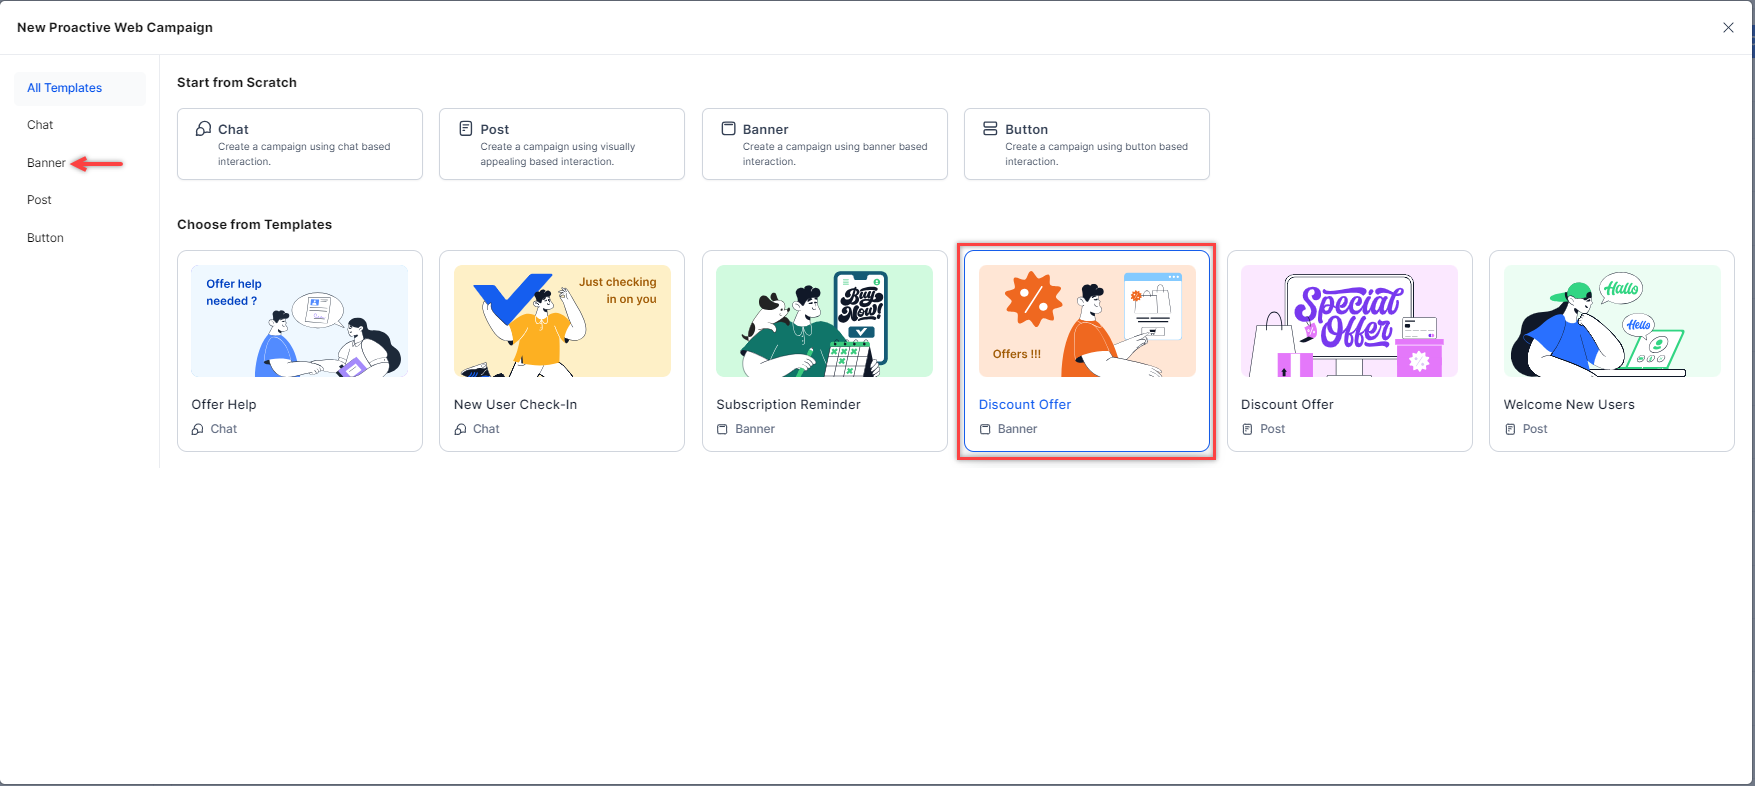
You can choose templates by going to Campaign Management > Proactive Web > + New Campaign > All Templates / Choose from Templates.

Using a Template to Create a Proactive Web Campaign
Steps to create a proactive web campaign using a template:
-
Click the template that you want to use for the campaign. For example, Banner.
-
Enter the required information and create the web campaign.
Schedule Proactive Web Campaigns
Scheduling allows precise control over when your messages will be delivered. You can seamlessly plan campaigns to coincide with peak engagement times, ensuring maximum impact. Whether daily, weekly, Monthly, or Yearly, tailor your schedule to optimize outreach and enhance audience responsiveness. Scheduling a campaign will activate the campaign at a designated date and time.
Steps to schedule a Campaign:
-
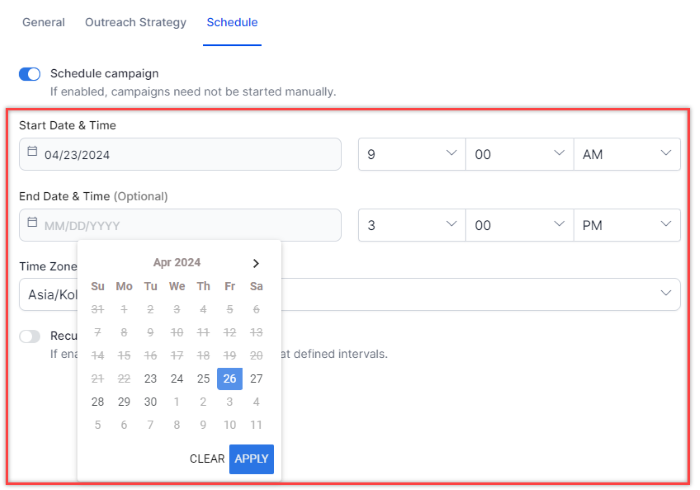
Click the Schedule tab and turn on the Schedule Campaign toggle.

-
Select the campaign Start Date & Time. End Date & Time is optional.
-
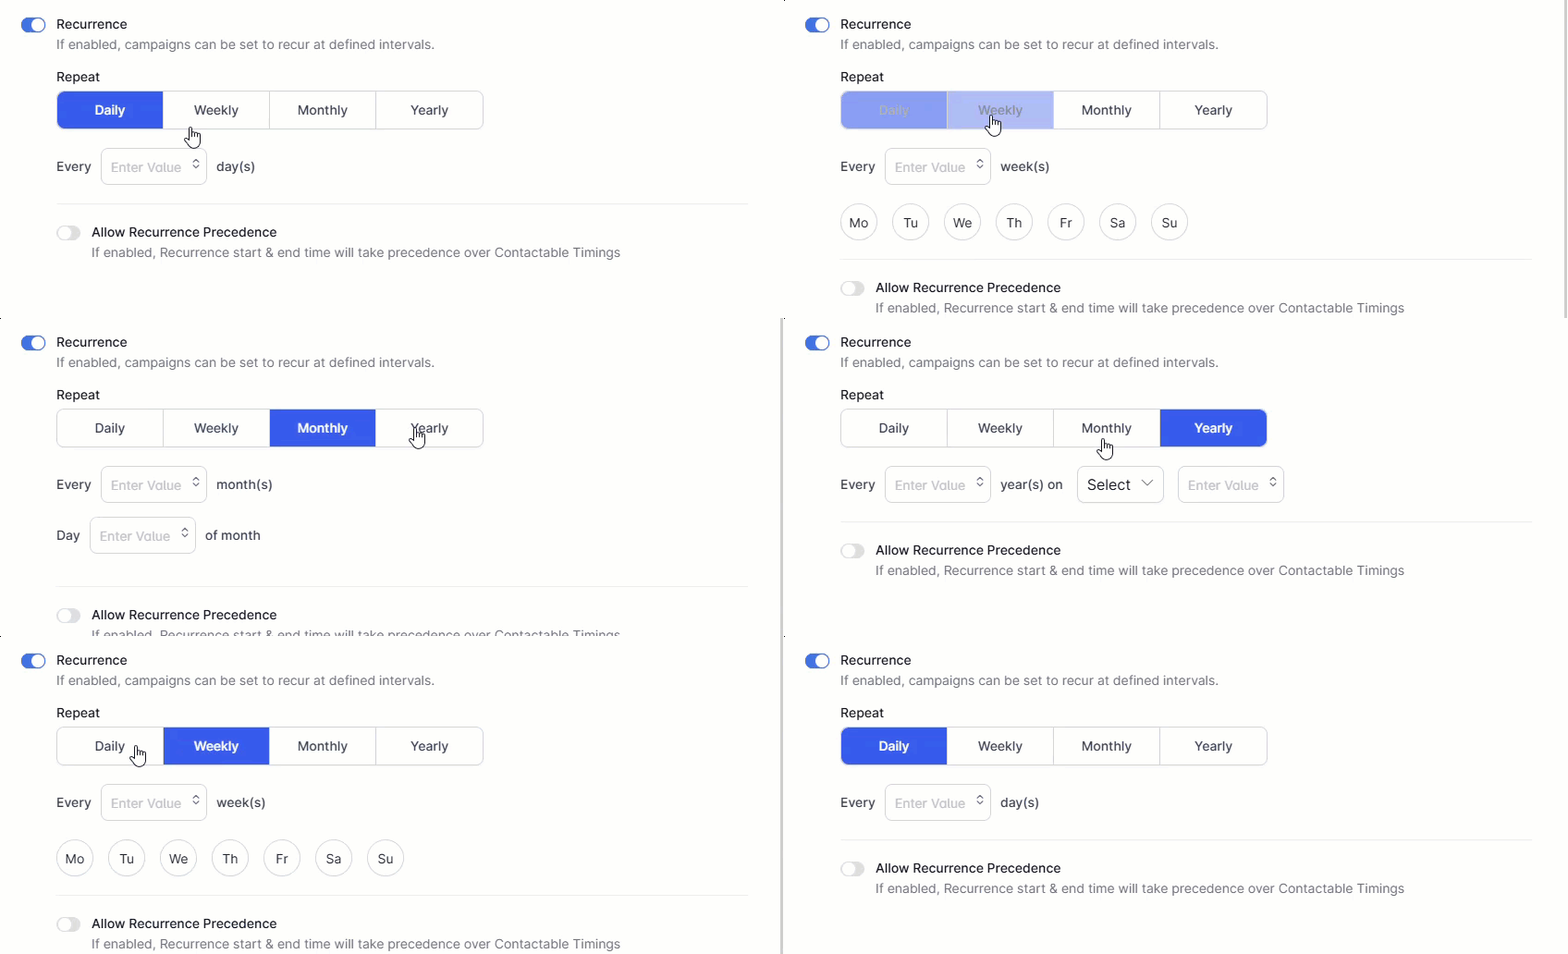
Turn on the Recurrence toggle if you want the campaign to recur at defined intervals. You can select from the following options:
- Daily,
- Weekly,
- Monthly,
- Yearly.
Every “Enter Value” day(s) is a subset of what you select, Daily, Weekly, Monthly, or Yearly.
Note
When a Scheduled campaign completes the first occurrence, it considers that run as complete so on the next recurrence it will start reaching the contacts freshly. For example, If a campaign is scheduled to run every week on Monday then on the first occurrence of Monday, the dialer will dial as many contacts as it can and then treat the contact list as completed. The next Monday the dialer will again consider dialing all contacts in the list.
-
Turning on the Allow Recurrence Precedence toggle will give the recurrence start and end time precedence over Contactable timings. For example, if Contactable Timings are 9:00 AM to 6:00 PM but the user selects Recurrence Start Time as 8:00 AM, the campaign will start contacting from 8:00 AM.

-
Click Save. A campaign is created as per the configured schedule.
Notes
-
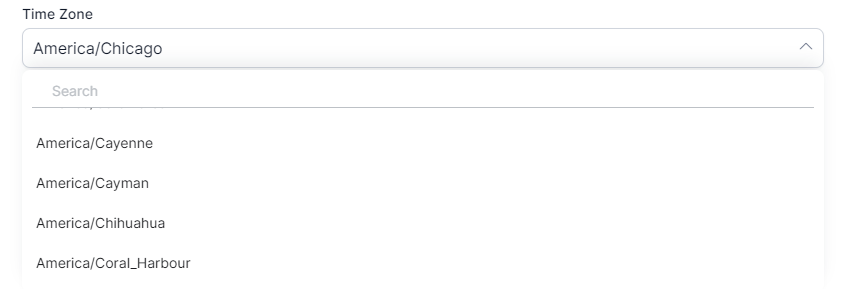
When a timezone is selected in the 'Contactable Timings' section, it automatically becomes the default timezone for scheduling in the 'Schedule' section. However, campaign managers can still choose a different timezone from the dropdown if necessary.
-
Once a campaign is scheduled, it will become active at the specified date and time. However, the contacts will be dialed according to the 'Contactable Timings' time and timezone settings.
-
To ensure accuracy, the contacts are scrubbed again 15 minutes before the scheduled time of a campaign.
-
A scheduled campaign will automatically run at the scheduled date/time but the contacts are dialed as per the contactable timings and timezone. Clicking the Run button for a scheduled campaign displays an error message.
-
Stop a Scheduled Campaign
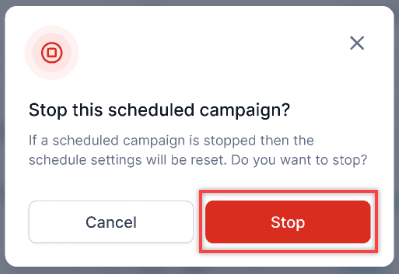
Click the Stop button under actions. Stopping a scheduled campaign will end the instance of that campaign; re-running a stopped scheduled campaign creates a new instance and all the contacts will dialed again.

A confirmation message is displayed. Click Stop.
Edit a Proactive Web Campaign
Editing a proactive web campaign allows you to make changes to the campaign as per your needs.
Steps to edit a web campaign:
-
Click the Ellipsis (⋮) icon beside the campaign name and click Edit.

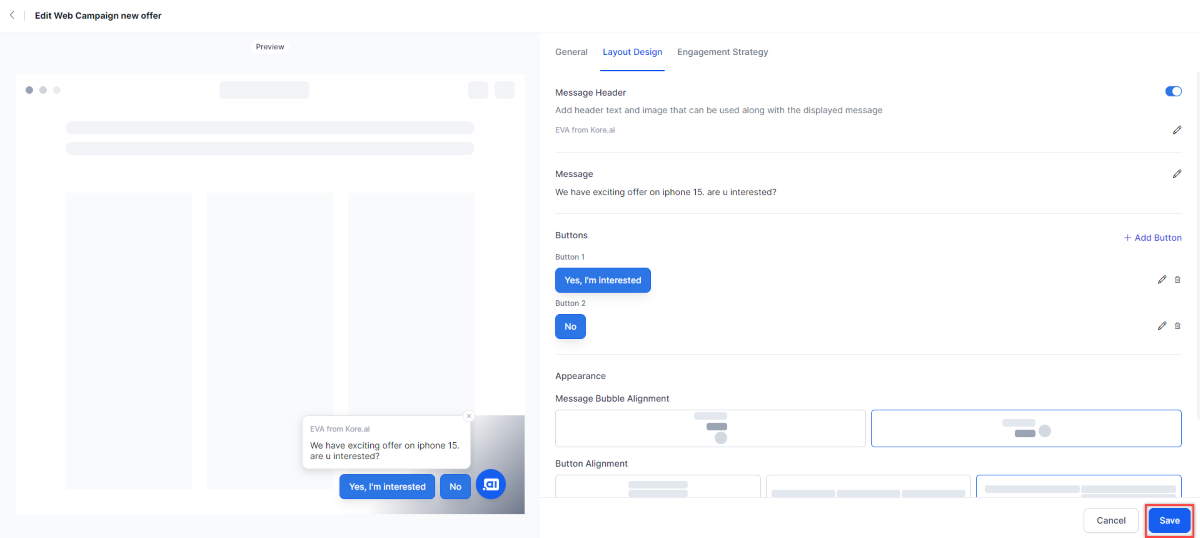
-
A pop-up window is displayed. Do the required changes and click Save.
Clone a Proactive Web Campaign
Cloning a proactive web campaign creates a replica of the original campaign. This is useful when two or more similar campaigns are run simultaneously.
Steps to clone a web campaign:
- Click the Ellipsis (⋮) icon beside the campaign name and click Clone.

- A cloned copy of the original campaign is created.

Stop a Proactive Web Campaign
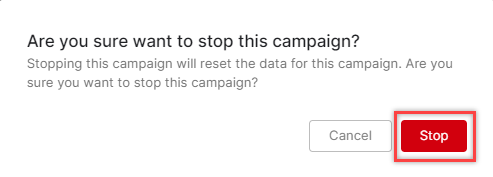
Stopping a web campaign resets the data, and a new instance of the campaign is created when you rerun the campaign.
Steps to stop a web campaign:
-
Click the Stop button under ACTIONS for the campaign you want to stop.

-
A Stop Campaign confirmation pop-up window is displayed. Click Stop.
Delete a Proactive Web Campaign
You can delete a web campaign if it has served its purpose or is no longer required.
Steps to delete a web campaign:
-
Click the Ellipsis (⋮) icon beside the campaign name and click Delete.

-
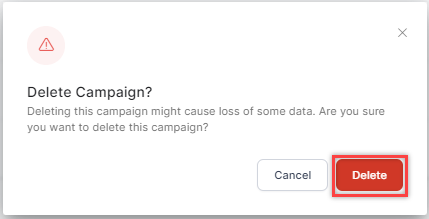
A Delete Campaign confirmation pop-up window is displayed. Click Delete.
-
The web campaign is deleted successfully.
Run Proactive Web Campaigns
You can run a proactive web campaign by clicking the Play button.

When the campaign runs, you can pause or stop it. You can also rerun a completed campaign.


