
A Role designates the permissions and the user’s level of access to the features of the Agent Desktop. Based on the role, a user can either have or not have access, have view-only access, or full-access (both view and edit). The Role Management feature lets the user create roles and set the access level for various Agent functionalities.
Add a New Role
To add a new role, follow these steps:
1. On the left pane, click the Role Management menu option under the User Management.
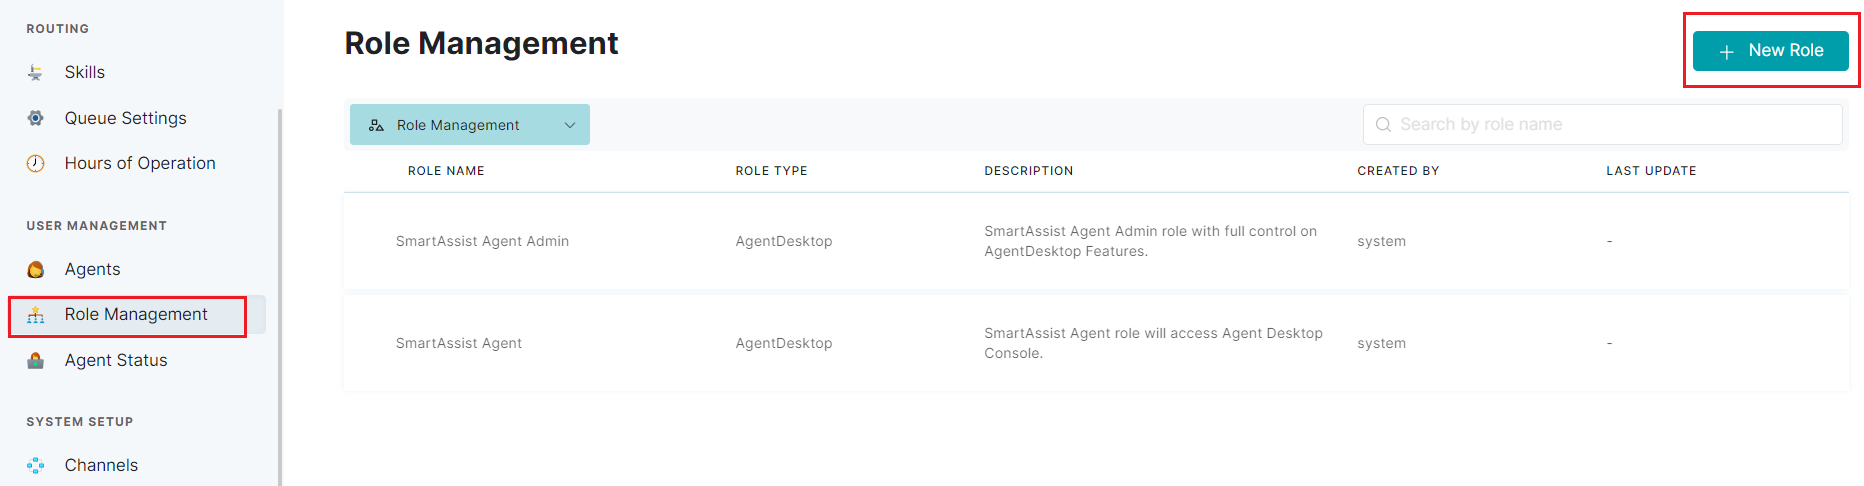
2. Click + New Role.
3. In the New Role window, provide inputs for the following fields:
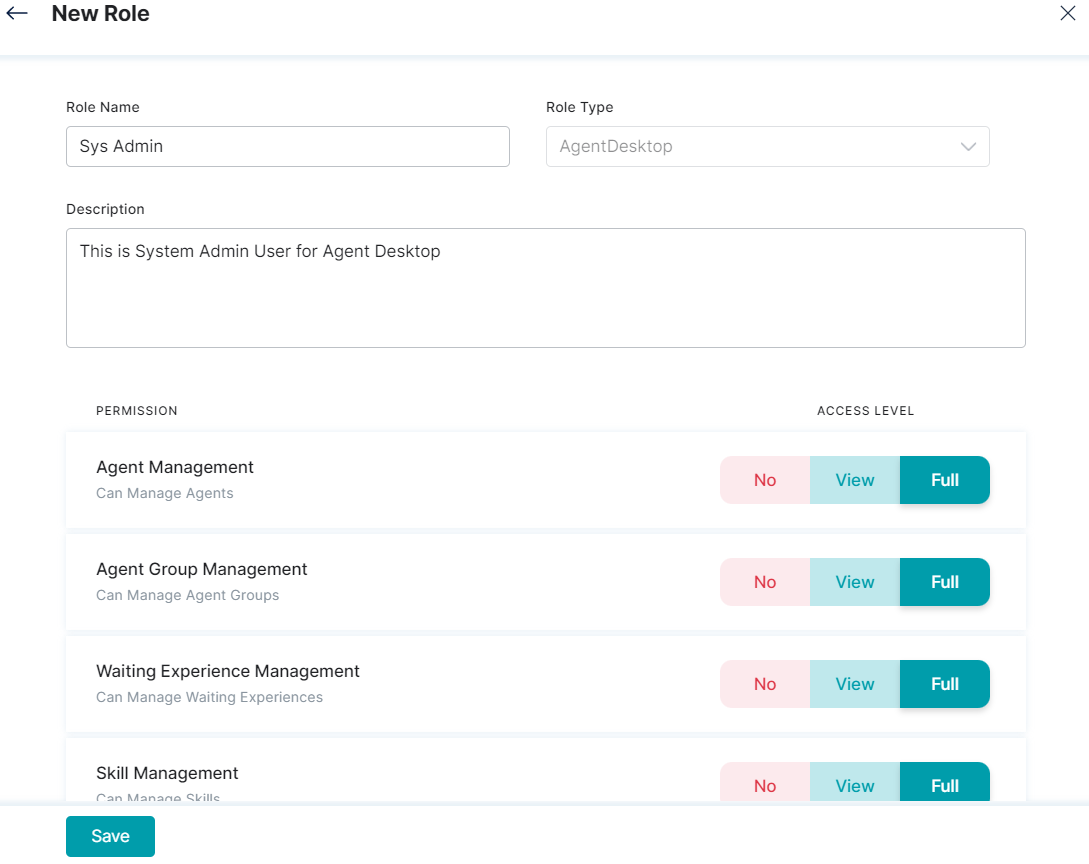
- Role Name – This name is assigned to an agent role (for example: administrator, system admin, developer).
- Role Type – Select an option from the drop-down list (the default selection is Agent Desktop).
- Description – Add the purpose and other information for roles and the responsibilities.
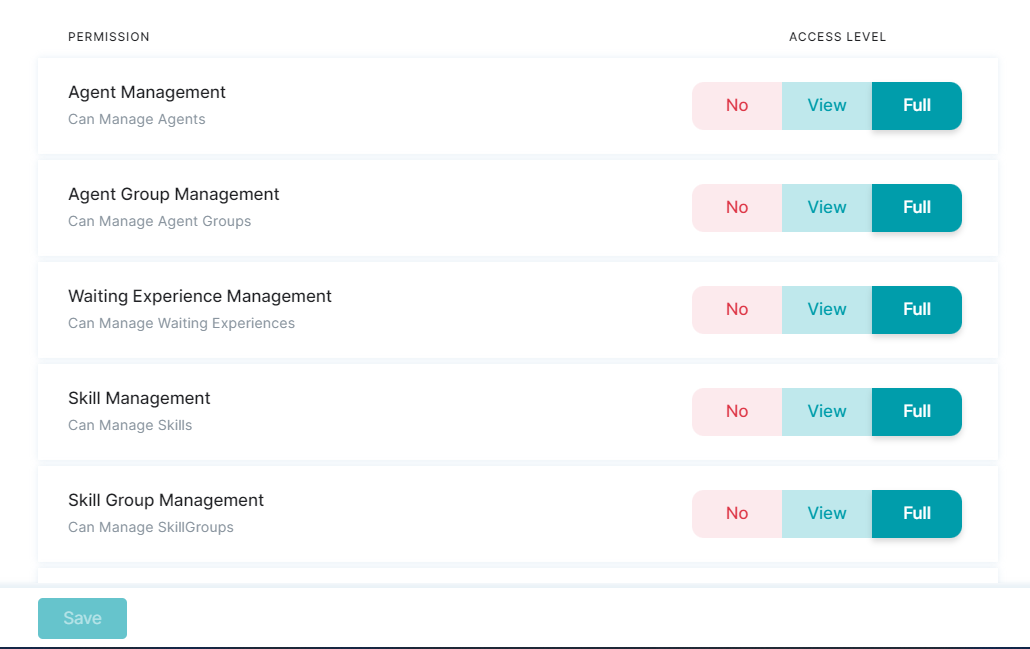
- Permission – Set the dashboard access controls permissions by selecting either No, View, or Full.
- No for no access permission.
- View for only view access permission. and
- Full for full access (view and edit) permission.
4. Click Save.
Edit a Role
To edit an existing role, follow these steps:
1. Click on the Role Name you want to update from the list.

2. In the Edit Role window, make changes to the required field values, and click Save.

3. Upon successful update, a confirmation message is displayed.
Delete a Role
To delete a role, follow these steps:
1. Click the delete icon of the custom Role Management entry that you wish to delete.
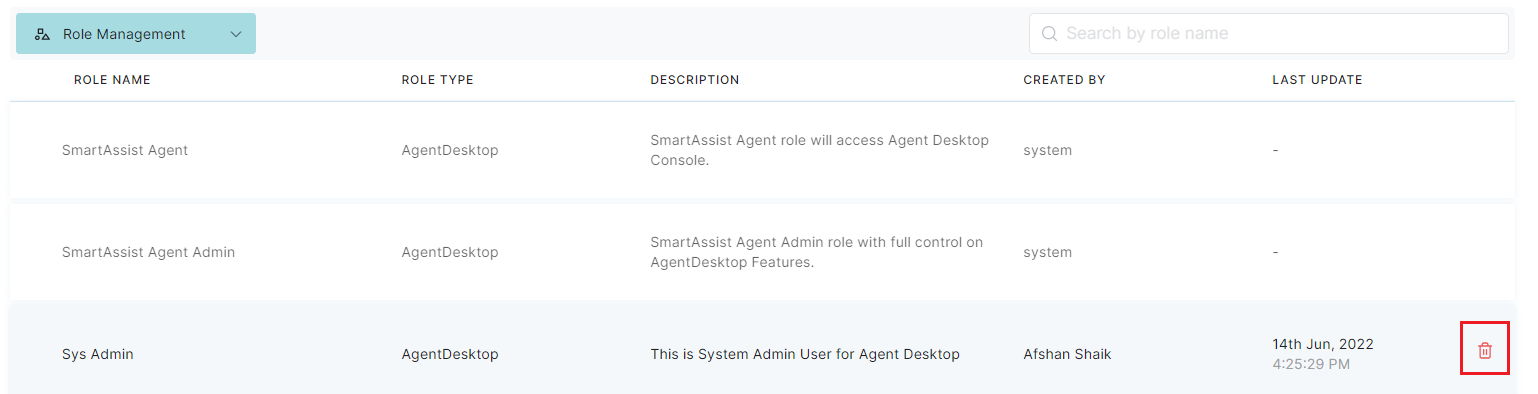
2. Click Yes on the confirmation window.
3. Upon deletion a success confirmation message is displayed and the role is deleted from the list.
Note: The predefined Agent Admin and Admin roles cannot be edited or deleted.