
An Agent Group is a collection of agents based on their skills, scopes, roles, and functionalities. All agents with specific skills are assigned to the same group to streamline customer service on SmartAssist.
SmartAssist offers the flexibility to create distinct agent groups for different skill types like customer communication, operations, technical support, etc., and communication channels.
Agents as Group Managers
Existing SmartAssist users (agents) can also be added as group managers while creating/modifying agent groups. Group managers monitor and manage agent groups on their monitoring console with the following permissions:
View
-
Limited visibility on agent activities which include, viewing agents lists or viewing agents dashboard.
-
Can view agents dashboard and see what they’re working on, the progress of tasks, and more.
-
Cannot view the agents screen when they’re talking to a customer.
Interact
-
Same as above, but can also use interactive functions.
-
Can view agents live screen and history of conversations in detail.
Create an Agent Group
To add a new agent group, follow these steps:
- Click Agents under User Management on the left panel.

2. Click + New Agent Group.
3. In the Add New Agent Group window, provide the input for the following fields:
- Group Name – Enter the name for the agent group.
- Description – Enter a brief description for the group.
- Group Managers – Use the search option to find and assign a manager to the new group. Alternatively, add a new manager.
4. Select the manager’s access level (View, Interact, Full).
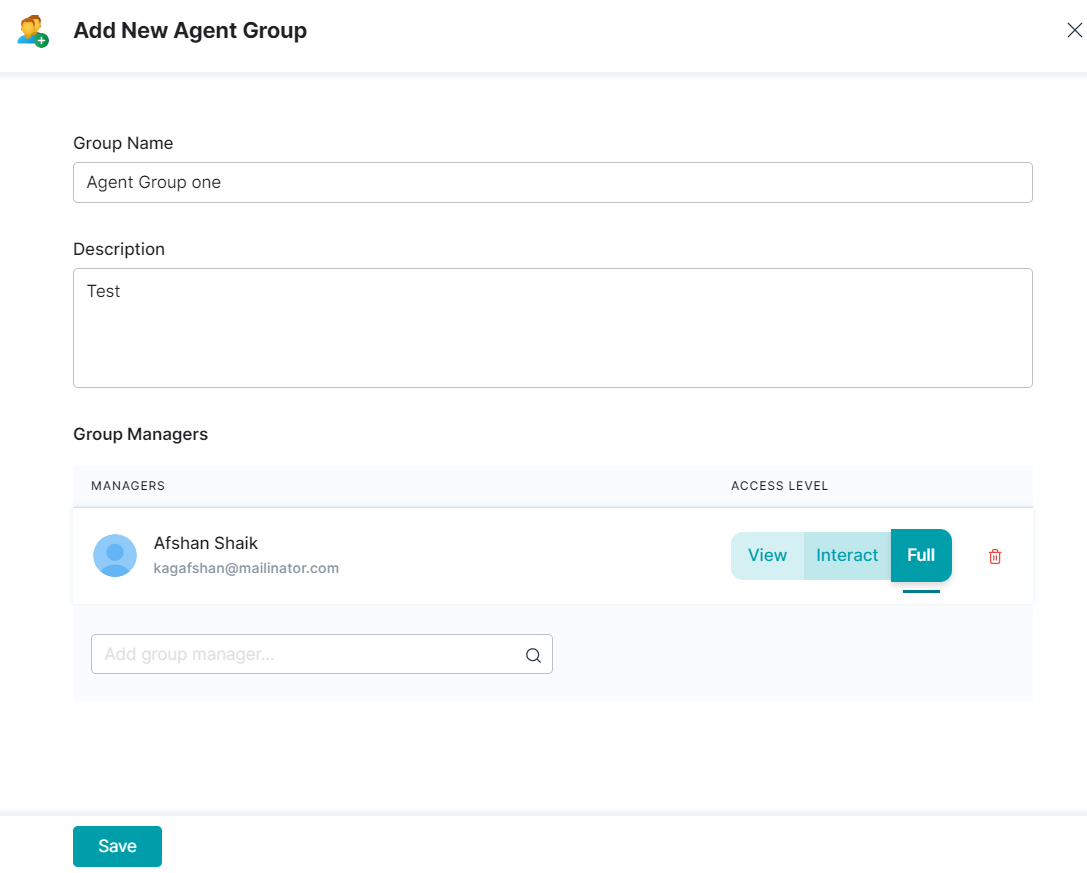
5. Click Save.
Edit Agent Group
To modify the agent group settings, follow these steps:
- On the Agents page, click edit icon next to the specific group you want to edit.

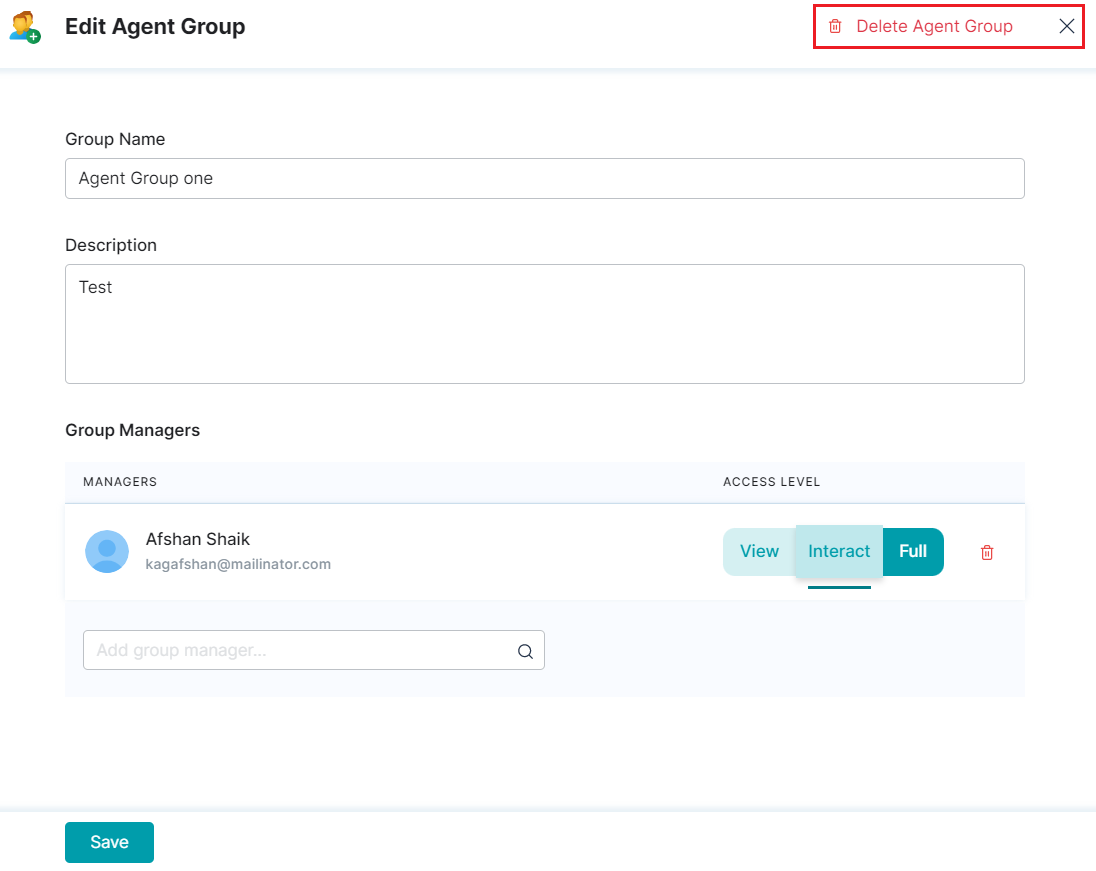
- In the Edit Agent Group window, do the required configuration changes.

- Click Save.
Delete an Agent Group
To delete an agent group, follow these steps :
- On the Agents page, click edit icon next to the specific group you want to edit.
- In the Edit Agent Group window, click Delete Agent Group icon.
3. In the confirmation pop-up, click Delete.
4. The deleted agent is removed from the application and cannot sign in.