
Add a Language
This feature helps add a language to the agent workspace for customer support.
To access Language, follow these steps:
1. On the left pane, click System Setup > Language & Speech.
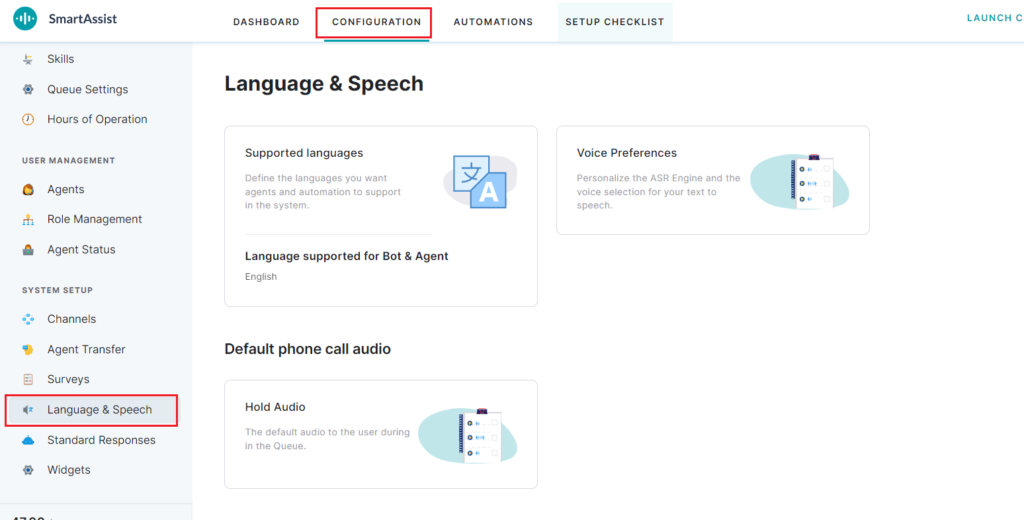
2. Click the Supported Languages tab.
3. In the Language panel, select the language and enable/disable the corresponding ACCESS TO field(s) that sets the access permission.
The following ACCESS TO permissions are available:
- Agent: A specific agent that uses the selected language for customer interactions.
- Call Automation: The call automation flow that implements for the selected language.
- Chat Automation: The chat automation flow that implements for the selected language.
4. Click Save.
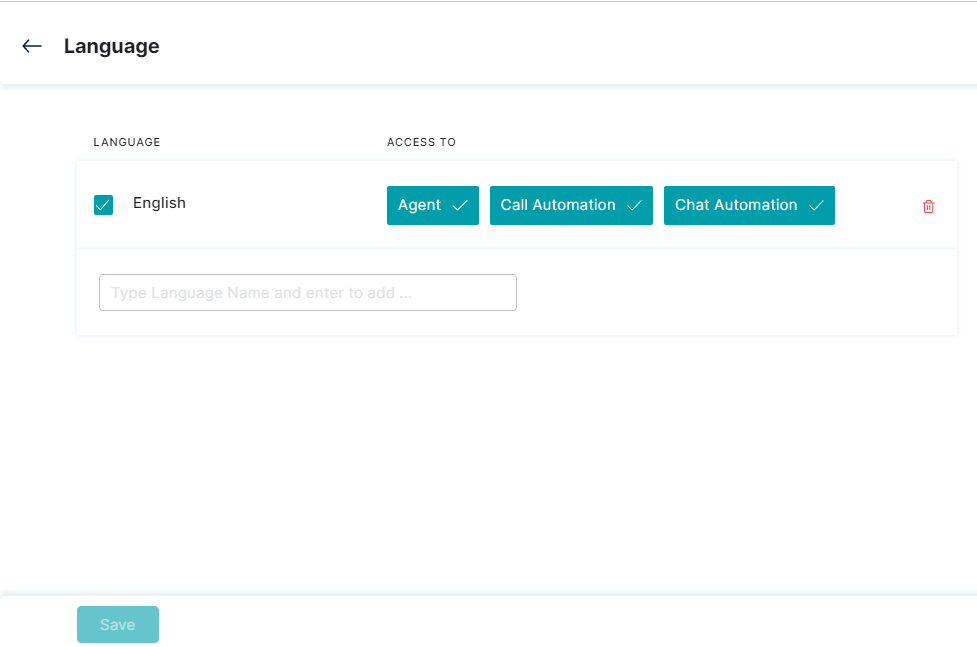
Select a Language
To select a language for customer support, follow these steps:
- Type the language in the search text area of the Language panel.

- Tap the language and set the agent and automation permissions under ACCESS TO. The access permissions include:
- Agent: To map the language to the agent.
- Call Automation: To map the language to call automation.
- Chat Automation: To map the language to chat automation.
3. Click Save.
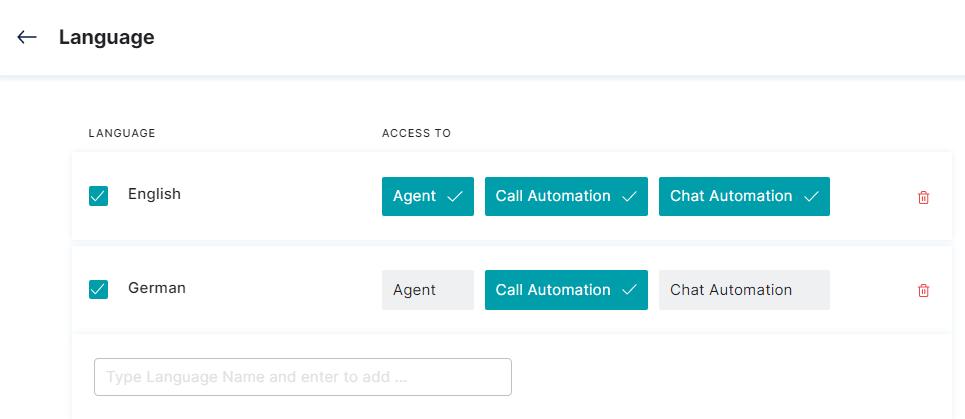
Unselect a Language
To unselect a language and its access flows, follow the steps below:
1. Search the desired language using the search feature.
2. Unselect the selected language by clicking the relevant checkbox. This disables the ACCESS TO permissions.

3. Click Save.
Delete a Language
This feature helps delete a language in the agent workspace.
To access Language, follow these steps:
- In the Language panel, click the delete icon for the language you want to remove from the list.
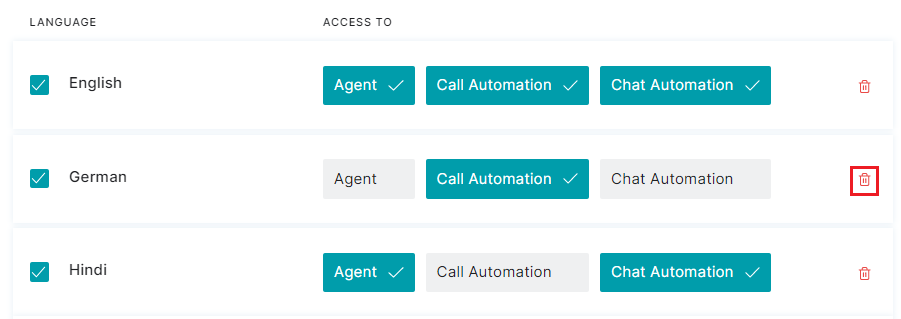
- The deleted language is not be available for the agent anymore.