
This feature helps configure how SmartAssist will handle automation for inbound voice calls. The platform offers the following options to transfer incoming calls:
Phone Number Configurations
This option helps add, edit, or delete a local or toll-free phone number to which incoming customer calls will be forwarded at a contact center.
Add or Purchase a Phone Number
To add a new phone number, follow these steps:
- On the left pane, click Channels under SYSTEM SETUP.
- You will be taken to the Voice tab with Phone Numbers and SIP Transfer options listed on the page.
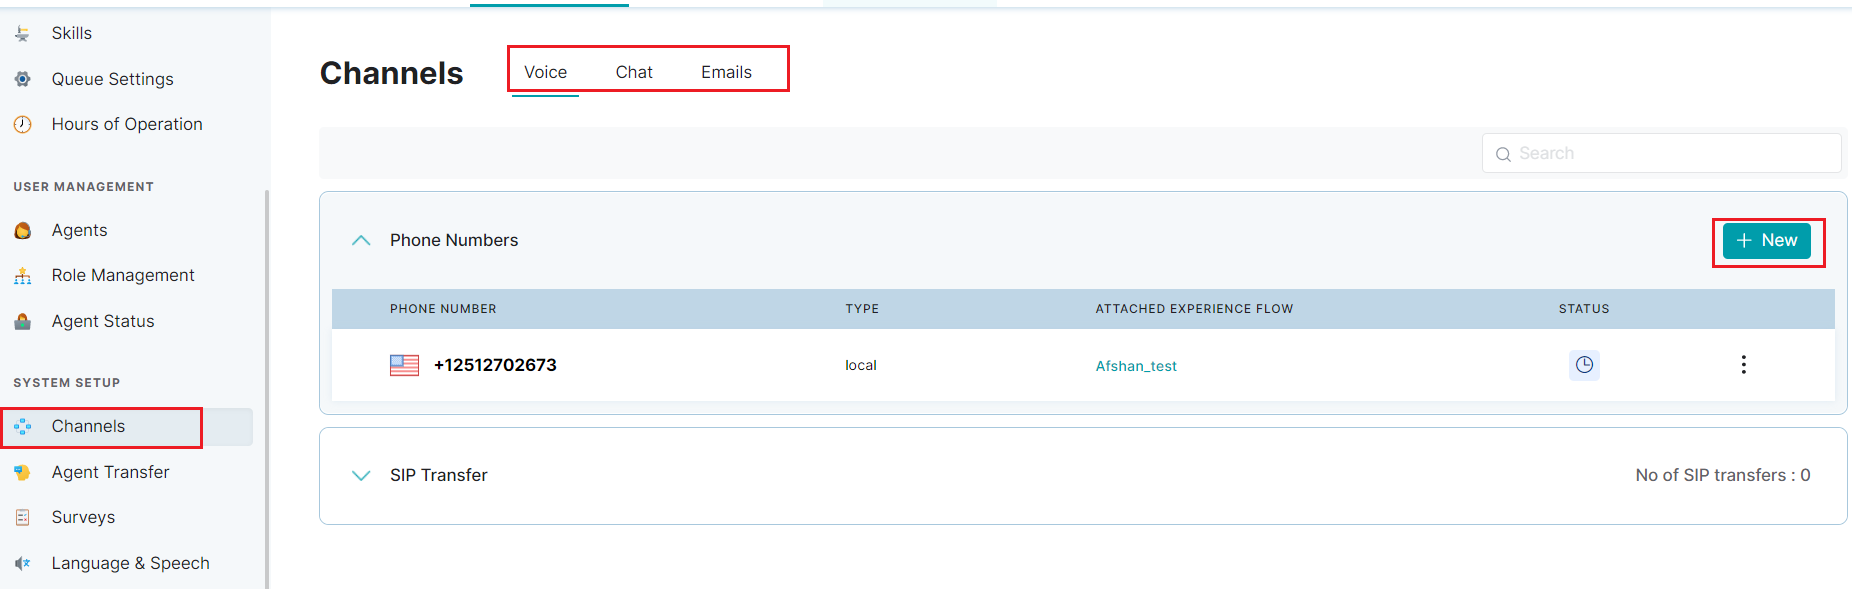
- In the Phone Numbers panel, click New button. If there are no phone numbers, a message Click on “New” to add/purchase a phone number is displayed on the screen
- The Call Phone Number window is displayed as below.
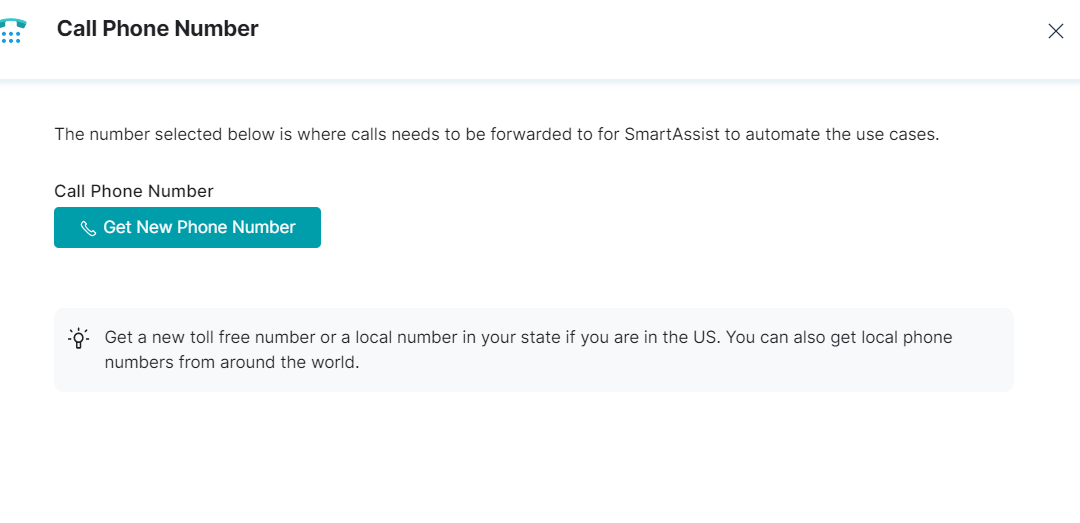
- Configure a custom local or toll-free number in the Get New Phone Number page, with the following steps:
- Select the country name.

- Select either the local or toll-free number option.

- Select State.

- Type area code.

- The configured monthly fee and the operational charge/minute information are automatically displayed.

6. Configure an available number with the following steps:
-
- Click the Get Number button.

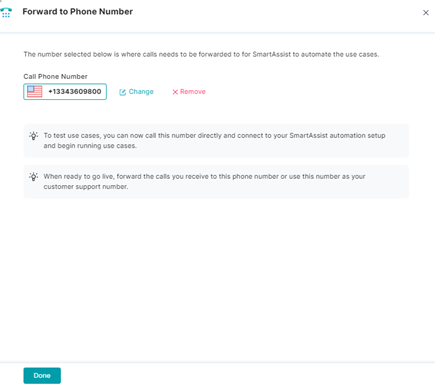
- In the Forward to Phone Number page, review the number and click Done.
- A success confirmation message is displayed and the phone number is added.
- Click the Get Number button.
Edit a Phone Number
To edit a phone number you’ve added previously, follow these steps:
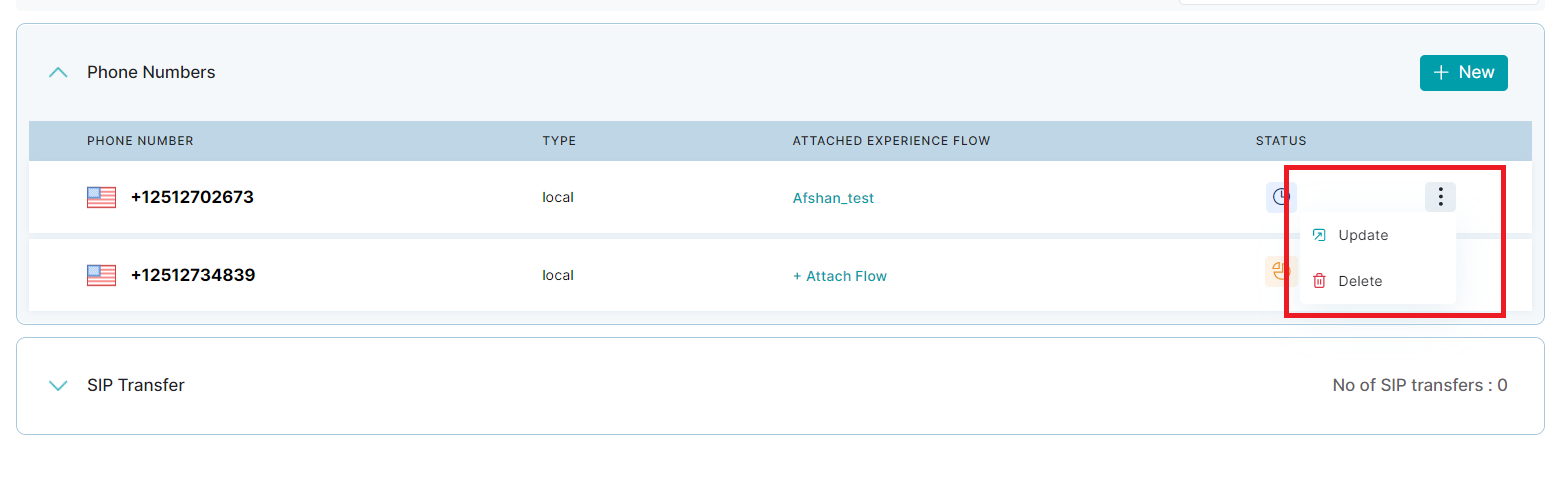
- Click Update at the ellipsis icon to edit the phone number.
- On the Forward to Phone Number page, click Change.

3. In the Get New Phone Number page, make the necessary edits, and click Done in the Forward to Phone Number page.


4. A success confirmation message is displayed once the phone number is updated.
Delete a Phone Number
To delete an existing phone number, follow these steps:
- Click Delete at the ellipsis icon to edit the phone number.
- The following pop-up is displayed. Click Delete button.
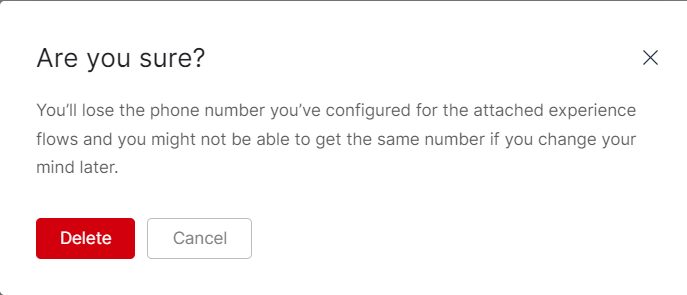
- Alternately you can click Update, go to Forward to Phone Number panel and click Remove.

4. In the confirmation pop-up, click CONFIRM.

5. A success confirmation message is displayed once the phone number is deleted.
This option is used for transferring calls to SmartAssist from a toll-free or local phone number using the Session Initiation Protocol (SIP) in your IVR system.
Setup SIP Transfer
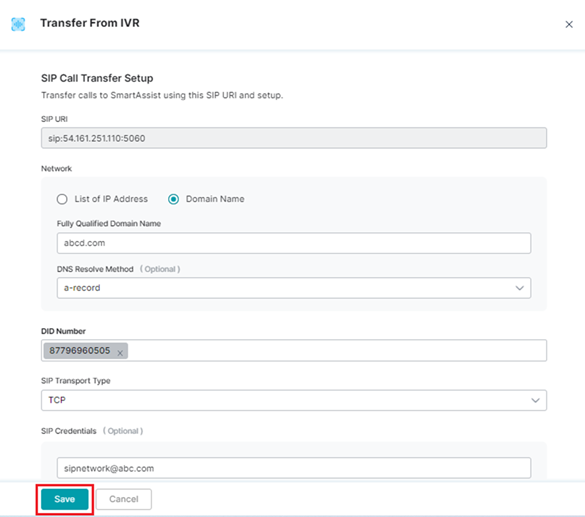
This feature helps to set up the network IPs and domains, DID number, SIP transport protocol, and SIP credentials (optional) while the SIP URI is pre-configured.
To configure SIP Call Transfer, follow these steps:
- On the left pane, click Channels under SYSTEM SETUP.
- You will be taken to the Voice tab with Phone Numbers and SIP Transfer options listed on the page.
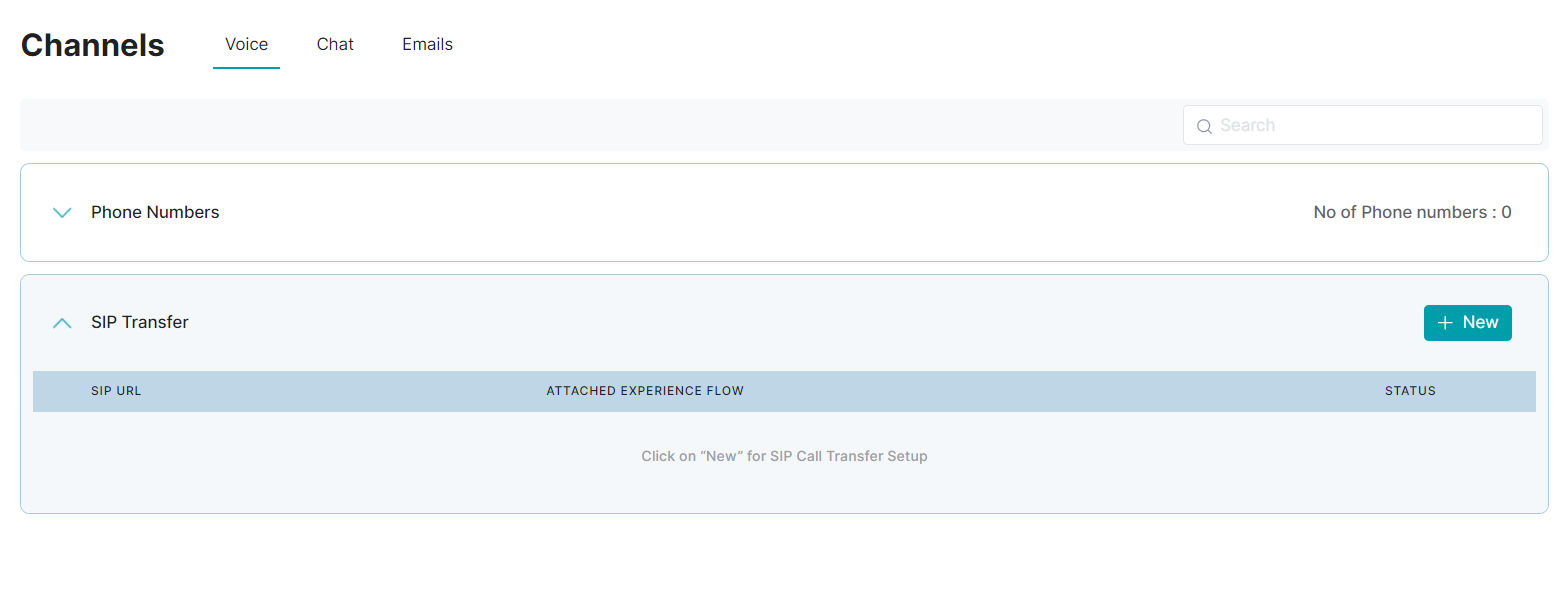
- Click New in SIP Transfer section. If there are no addresses configured, Click on “New” for SIP Call Transfer Setup is displayed.
- For List of IP Address, type the value(s) for Incoming IP Address in the textbox.

- For Domain Name, provide inputs for the following:
- Fully Qualified Domain Name: The domain name that specifies all domain levels, including the top-level domain and the root zone.
- DNS Resolve Method (Optional): Select an option from the list to translate IP addresses to domain names for resolution when the host name is associated with multiple IP addresses.

5. Provide the value(s) for the Direct Inward Dialing (DID) number to enable the virtual phone number(s) (also known as SIP trunk number(s)) from which calls will be routed to the existing telephone lines.

6. Select an option from the list for SIP Transport Type. This will set a protocol to route SIP traffic to servers and other endpoints.
![]()
7. (Optional) Set the SIP Credentials (username and password) to access your SIP call transfer setup account.

8. Click Save.
9. A success confirmation message is displayed, once the Transfer from IVR setting is updated.