
Surveys include a list of questions redirected to customers from agents to extract preference-based data or business feedback through chat or calls. SmartAssist lets you create and configure a new survey, and map it to an agent with the requisite skills.
Create a New Survey
To create a survey, follow these steps:
1. On the left pane, go to System Setup > Surveys.

2. In the Survey page, click the + New Survey button.
3. In the window, enable New Survey for the agent to conduct the customer satisfaction survey.

4. Under General Information, provide inputs for the following fields, and click Done.
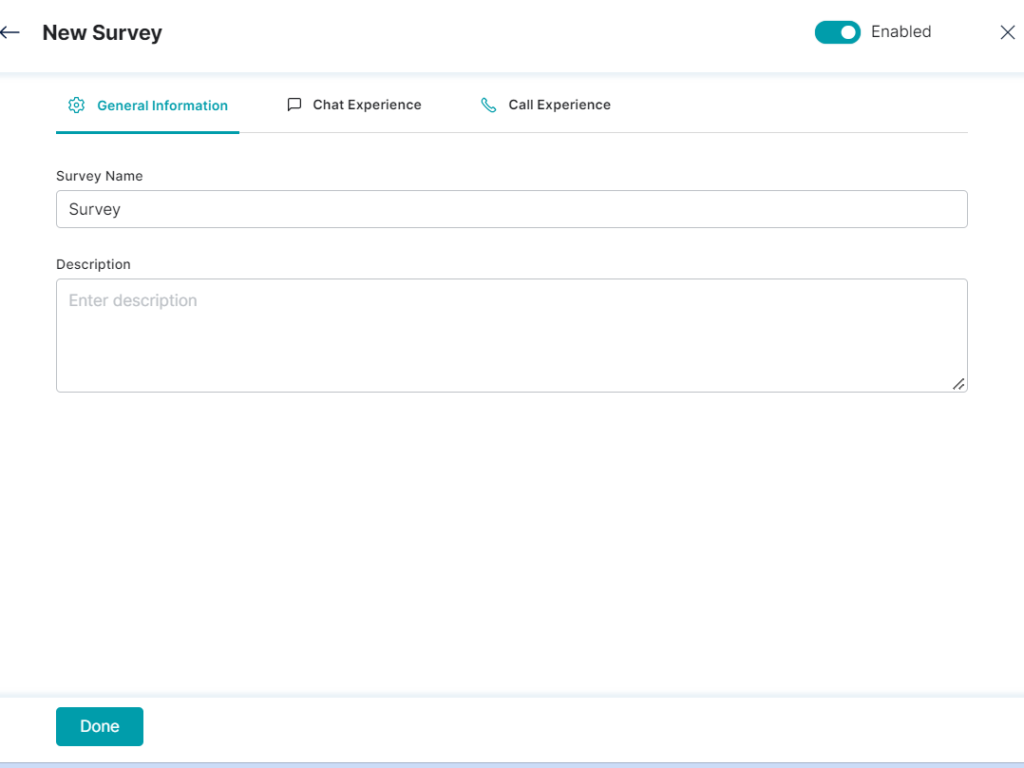
- Survey Name – This mandatory field requires the survey name for identification.

- Description – This mandatory field denotes the description text for the survey.

5. To Set up the Chat Experience, follow these steps:
- Click the Chat Experience tab to view the Chat Experience

- Enable Chat Experience to request the customers to take the survey during an agent chat session.

- Under Chat Experience, the following settings can be configured:
- Click the respective edit icons to set the Request Message and the Gratitude texts for the survey.
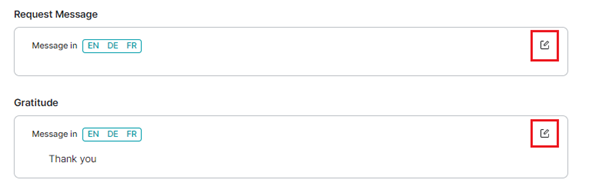
- Select a specific language for the message.
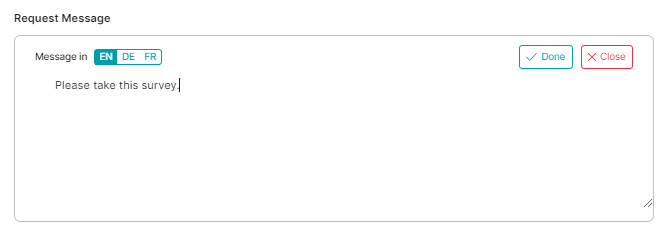
- Type the message text and click DONE to save.
- To set the Survey Frequency, configure the following options:

- Show to Everyone – Select this option to make it visible to all the customers.
- Show to Every nth User – Select this option to make it visible to every nth user. For example, if you type in 2 in the input textbox, the survey will appear to every second chatbot customer.
- Agents can Trigger – This will let the agents randomly trigger the survey to customers.
- Click the respective edit icons to set the Request Message and the Gratitude texts for the survey.
6. To configure the survey call experience under the Call Experience section, follow these steps:
- Click the Call Experience tab.
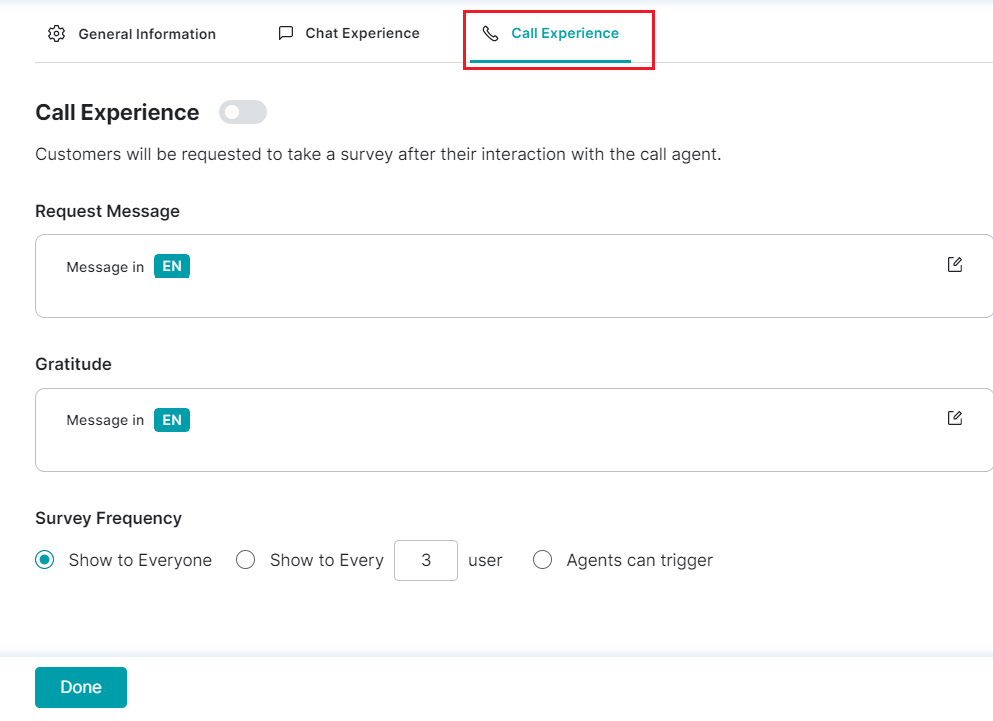
- Enable Call Experience for the voice agent to request the customer to take a survey after a call.

- Under Call Experience, configure the settings for the following:
Note: Click edit icons for Request message and Gratitude like in Chat Experience.- To set the Survey Frequency, configure the following options:

- Show to Everyone – Selecting this option makes the survey visible to all the customers.
- Show to Every nth User – Selecting this option makes the survey visible to every nth user. For example, if you type in 3 in the input textbox, the survey will appear to every third chatbot customer.
- Agents can Trigger – This will let the agents randomly trigger the survey to customers.
- To set the Survey Frequency, configure the following options:
7. Click Done after configuring the new survey.
8. A success confirmation message is displayed when the new survey is added to list.
Edit a Survey
To edit the survey information, follow these steps:
- Click on the survey name and in the Survey window, do the necessary edits in the General Information, Chat Experience, and Call Experience sections, and click Done.

- A success confirmation message is displayed when the survey information is updated.
Delete a Survey
To delete a survey, follow these steps:
- In the Survey page, click the Survey Name you’d like to update.
- In the window, click the Delete CSAT icon.
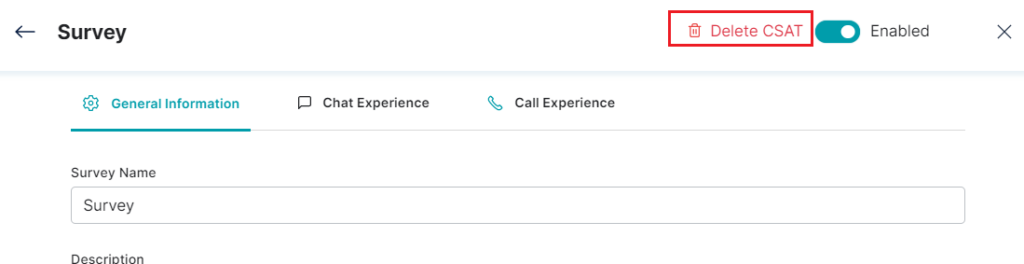
- In the confirmation pop-up, click Delete.
After the deletion confirmation message is displayed, the deleted survey is removed from the list and cannot be accessed by the agent.