This document explains the Integration of a Kore.ai bot on Genesys Cloud CX Messaging. This process includes creating a bot on Kore.ai, configuring settings, and establishing a connection with Genesys Cloud CX Messaging. This integration enhances the interaction experience with customers and enables businesses to provide automated customer support.
Prerequisites
- An account in bots.kore.ai with required dialog tasks for your use case.
- A Genesys account with admin privileges. The admin should have the following minimal permissions:
- Integrations – Integration: View
- Authorization – Role: All Permissions
- Integration – BotConnector: All Permissions
- Authorization – Grant: Add
- Architect: All Permissions
- Web Deployments – Deployments: All Permissions
- Web Deployments – Configurations: All Permissions
Steps to integrate a Kore.ai bot on Genesys Cloud CX Messaging
Browser/tab 1-Genesys Installer
- Sign in to Genesys PureCloud instance with admin privileges.
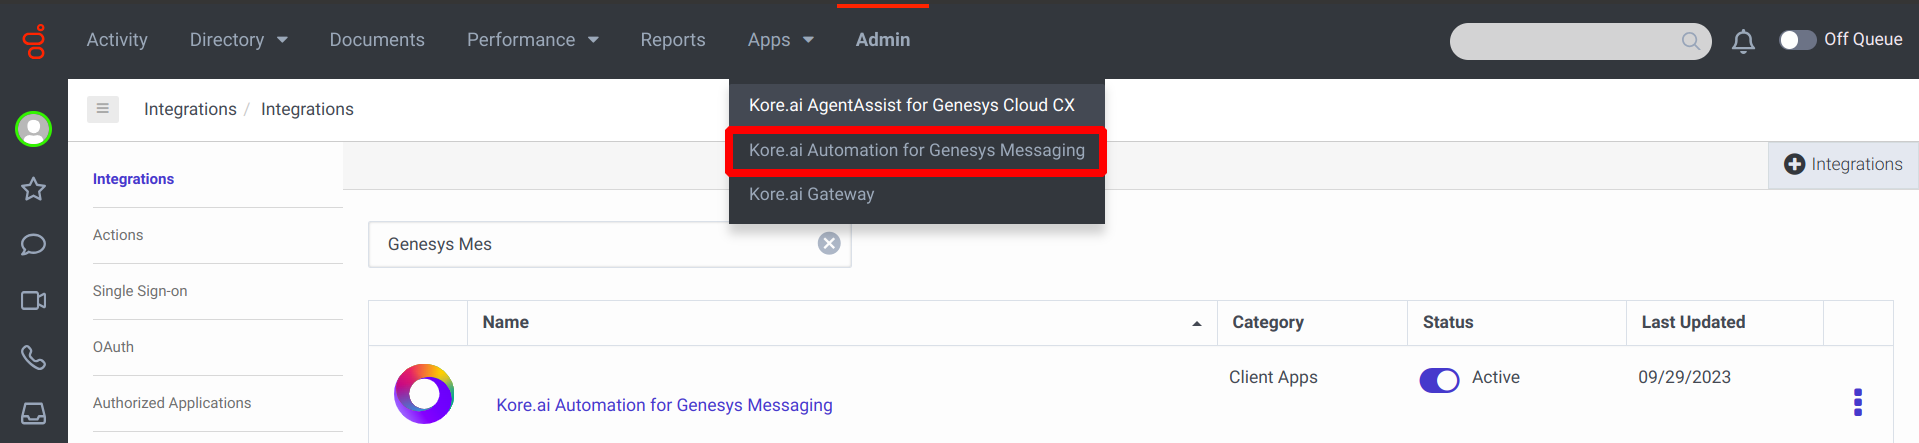
- Install the Kore Bot Automation installer by going to Admin > Integrations > Integrations.

- Enter Kore in the search box, locate Kore.ai Automations for Genesys Messaging, and click Install.

- After installing the app from App Foundry, click the Active toggle to enable the installer.

- After activating the app, manually refresh the web page.
- Click Apps > Kore.ai Automation for Genesys Messaging.
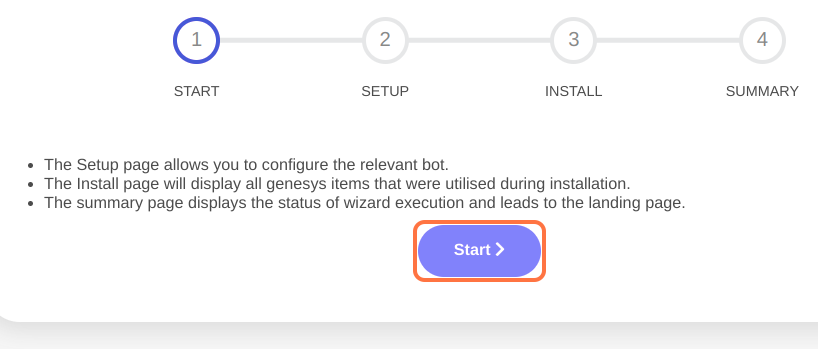
- Click Start.
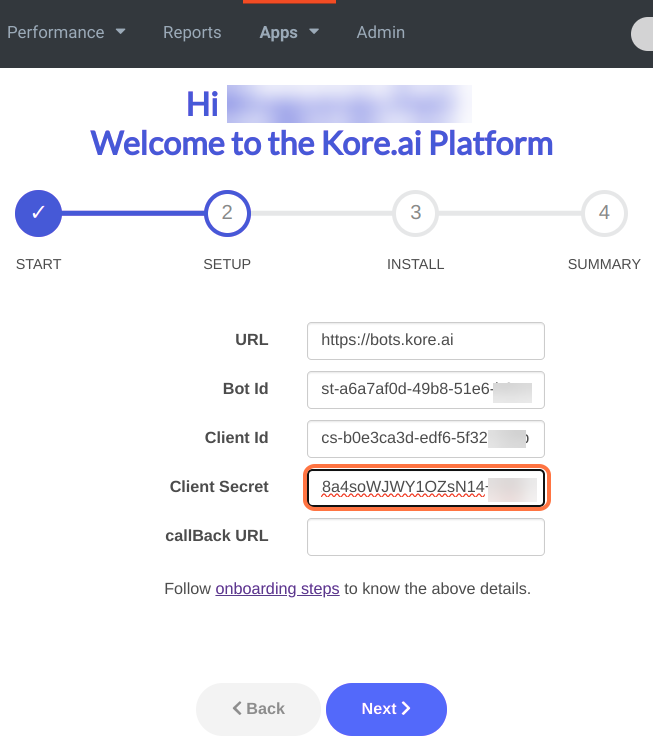
- Type https://bots.kore.ai in the URL field.

Browser/tab 2-AgentAssist Botbuilder
- Sign in to https://bots.kore.ai/botbuilder/login on a different tab or browser.

- Click DEPLOY > Channels > Genesys Cloud CX Messaging.

- Click Configurations.

- Type “https://login.mypurecloud.com” or any other Genesys PureCloud URL based on the location in the Genesys Cloud login URL field.

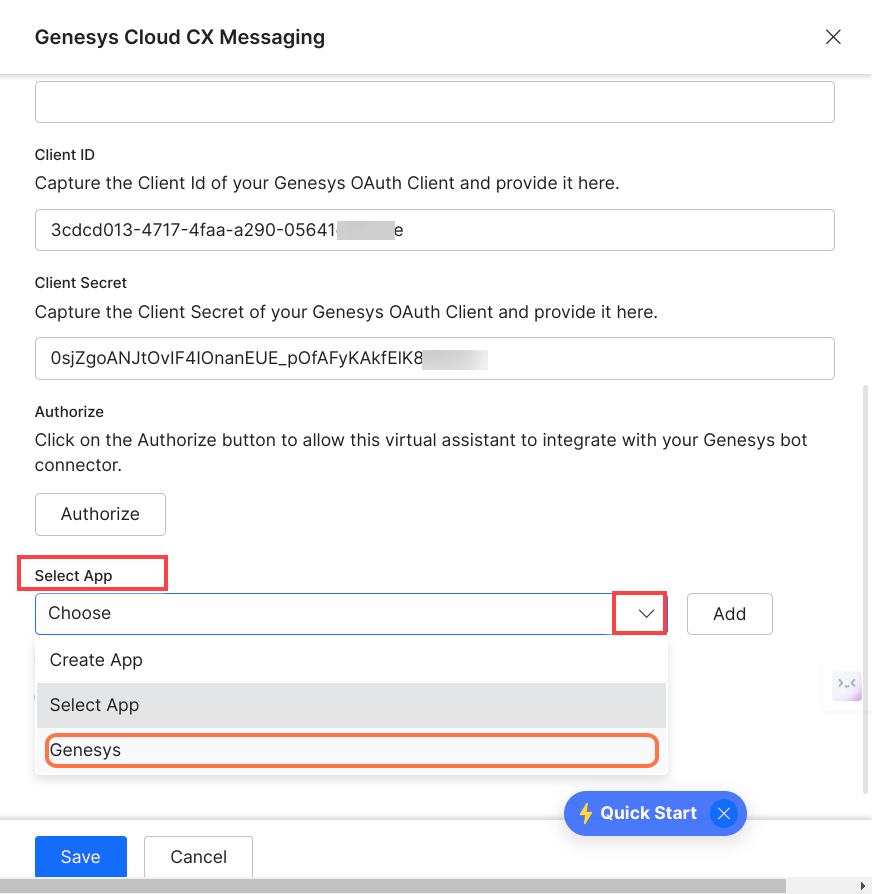
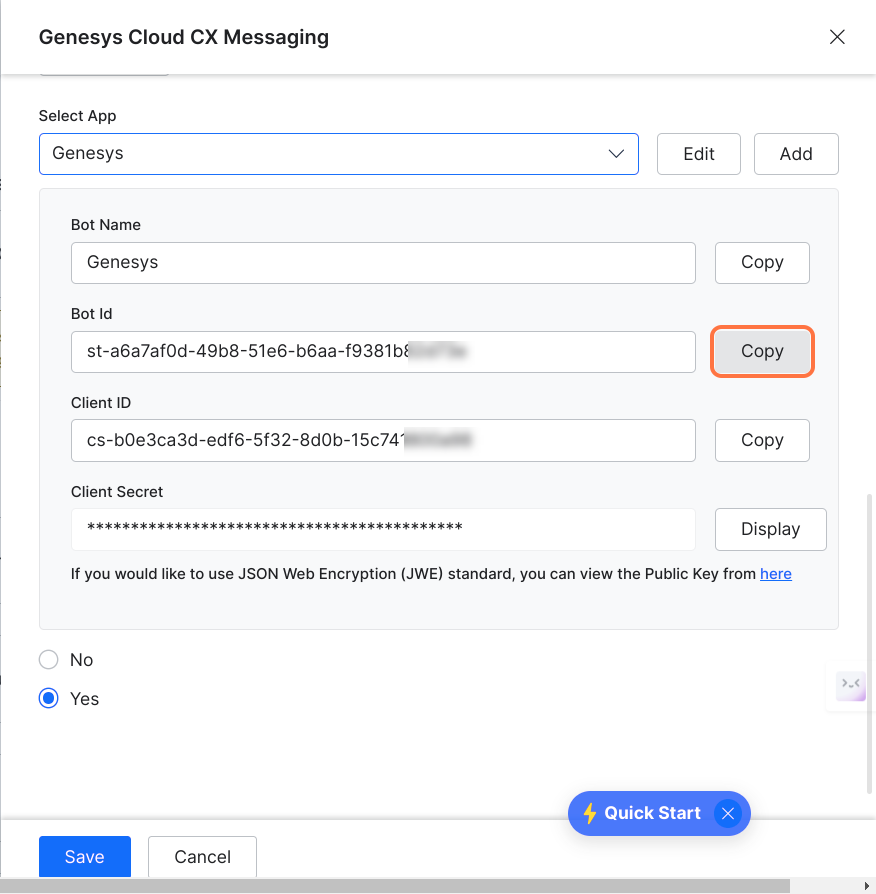
- Click the dropdown list and select your app in the Select App field; in the following example, it is Genesys.
- Click the Copy button against the Bot Id field to copy its value.
- Paste the bot ID into the Genesys installer Bot Id field from Browser/tab 1-Genesys Installer.

- Paste the bot ID into the Genesys installer Bot Id field from Browser/tab 1-Genesys Installer.
- Click the Copy button against the Client ID field to copy its value.

- Paste it into the Genesys installer Client Id field.

- Paste it into the Genesys installer Client Id field.
- Click the Copy button against the Client Secret field to copy its value.
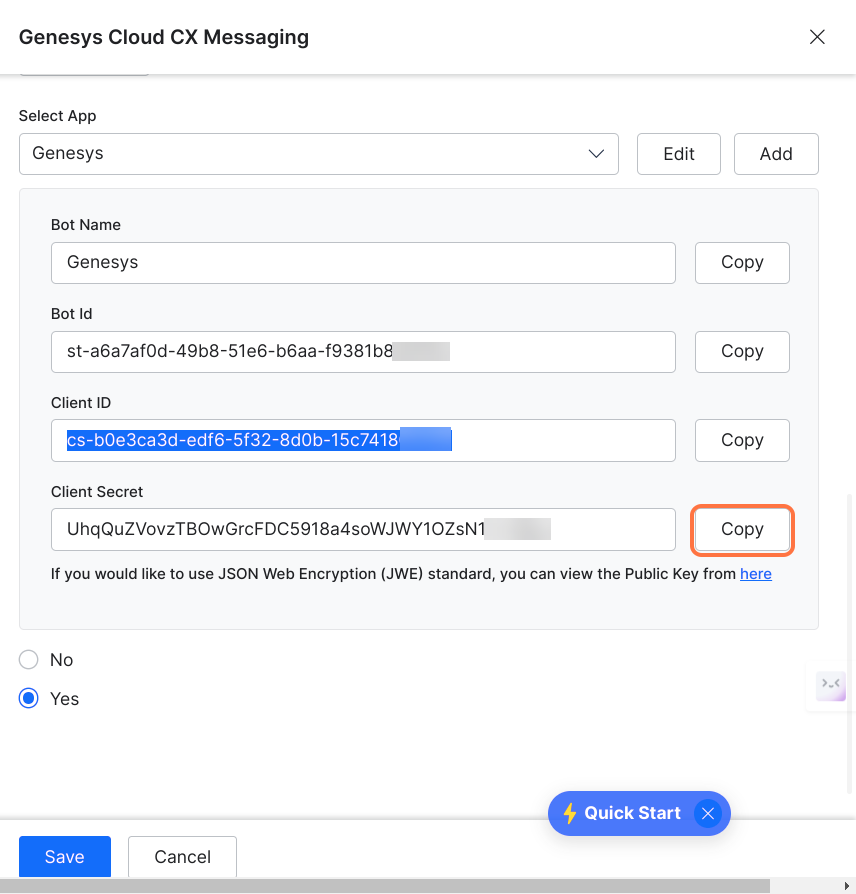
- Paste it into the Genesys installer Client Secret field.
- Paste it into the Genesys installer Client Secret field.
- Click the Copy button against the Callback URL field (go up in the Configurations page to locate it) to copy its content.

- Paste it into the callBack URL field of Genesys installer.

Note: If you have any firewall policies blocking the Callback URL, allow this URL before starting the installation. - Click Next.
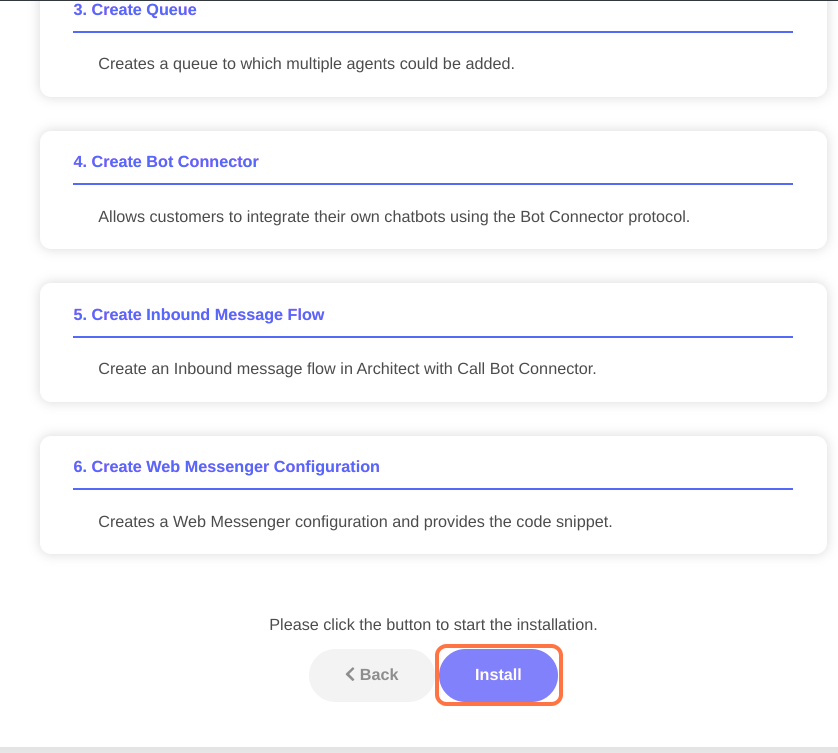
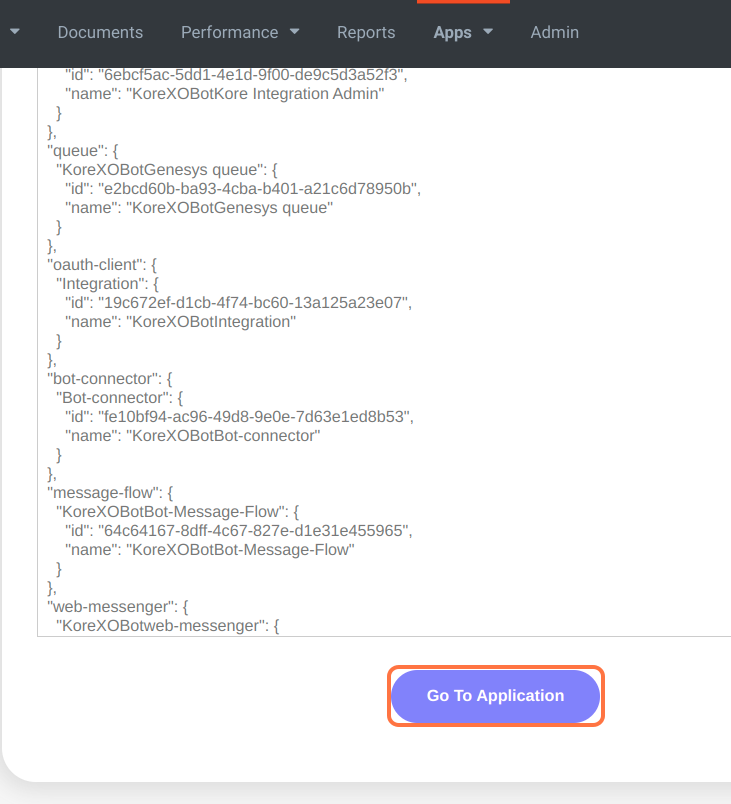
- Click Install.
- Click Go To Application.
- The following code and the Genesys OAuth details automatically generate once installation is done:
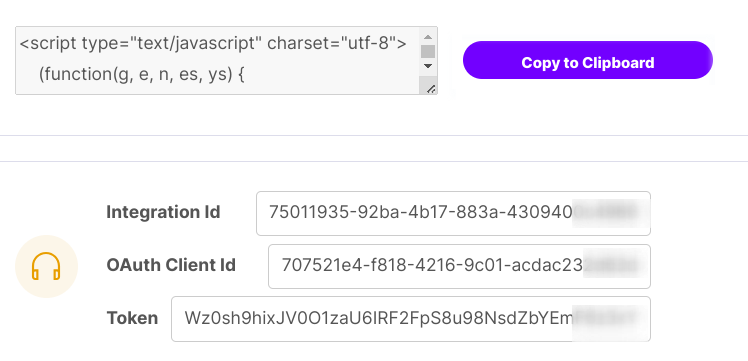
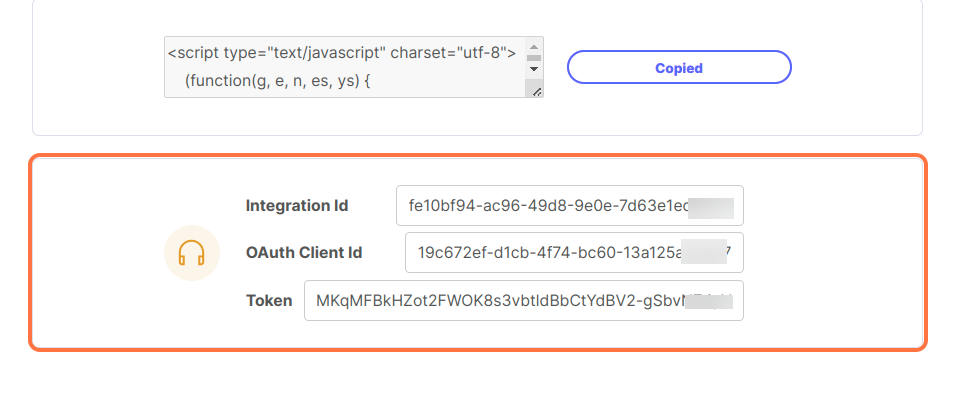
- Copy the values of the Integration Id field.
- Paste it into the callBack URL field of Genesys installer.
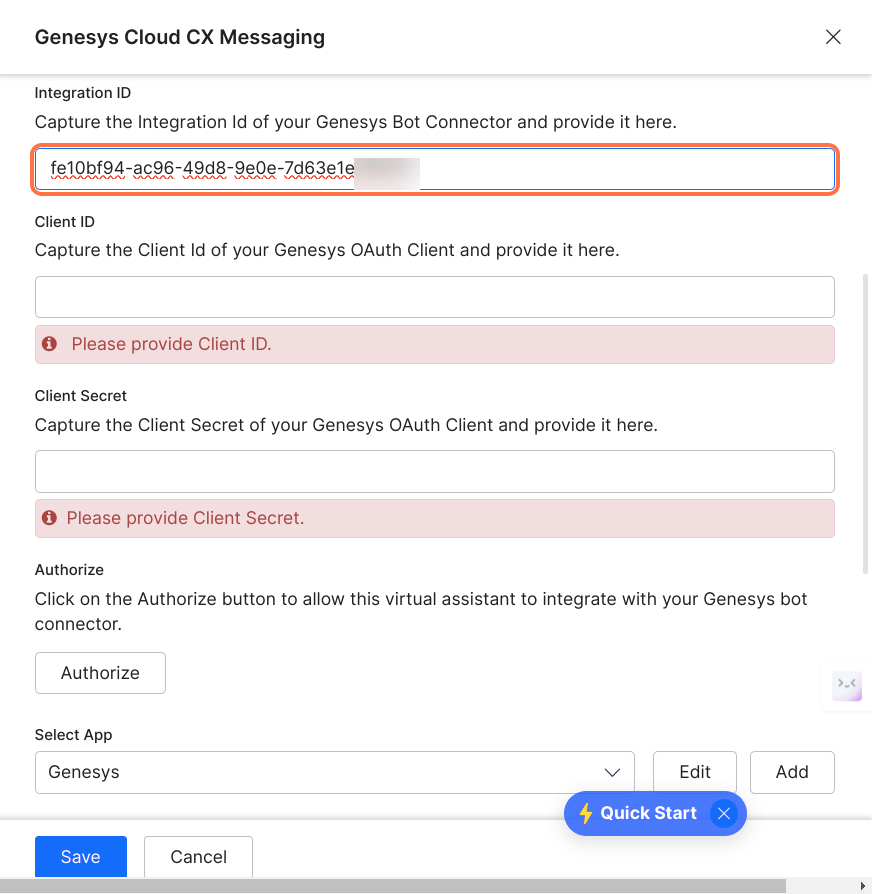
- Paste it into the Integration ID field of Genesys Cloud CX Messaging page of Kore application.
- Copy the values of the OAuth Client Id field from Genesys PureCloud.
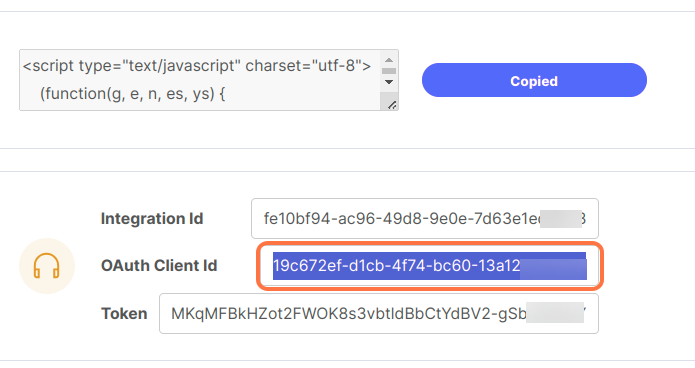
- Copy the values of the OAuth Client Id field from Genesys PureCloud.
- Paste it into the Genesys channel Client ID section.

- Copy the values of the Token field.
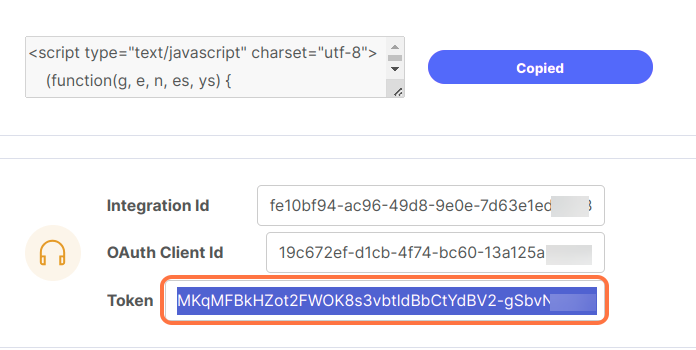
- Copy the values of the Token field.
- Paste it into the Genesys channel Client Secret section.
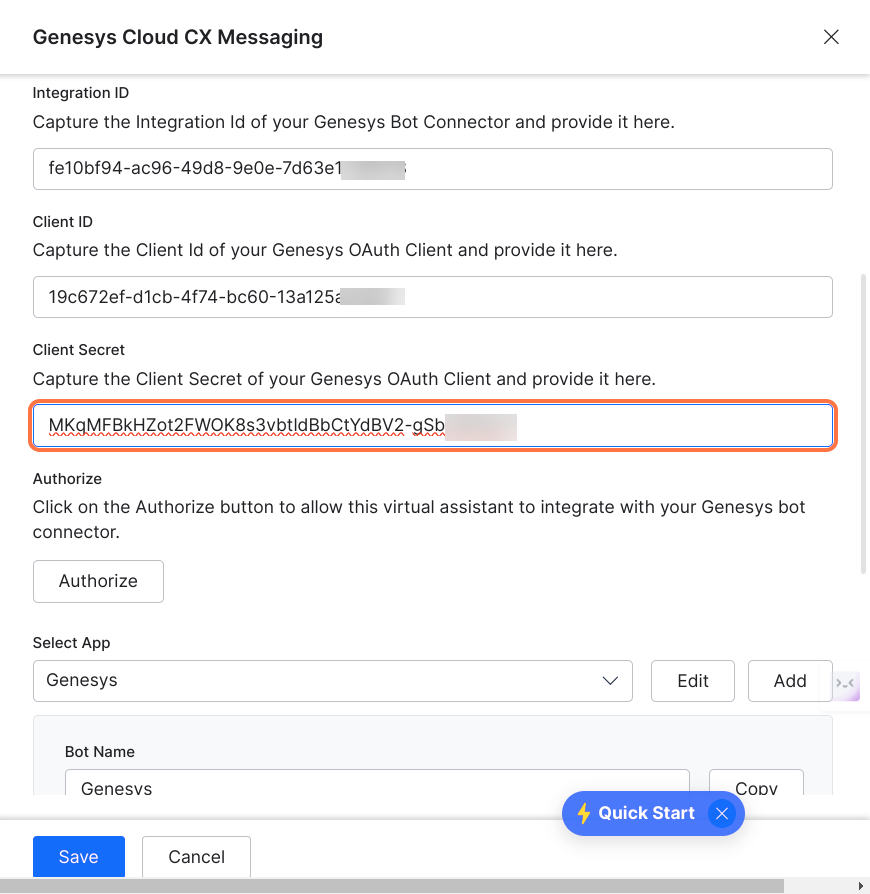
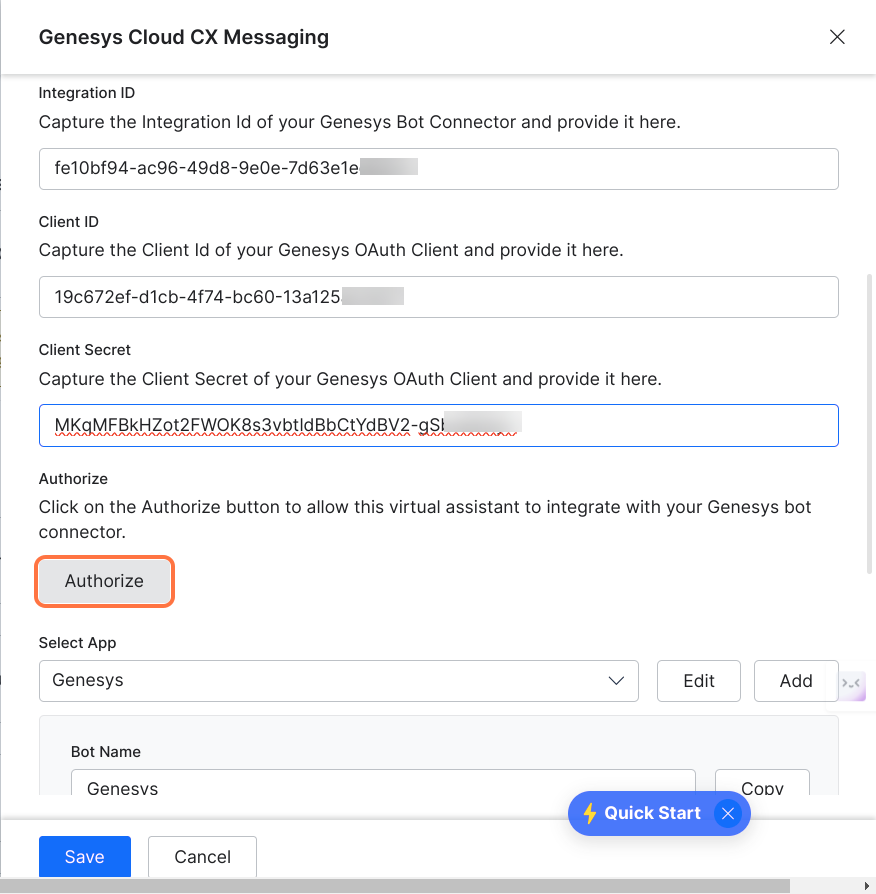
- Click Authorize.
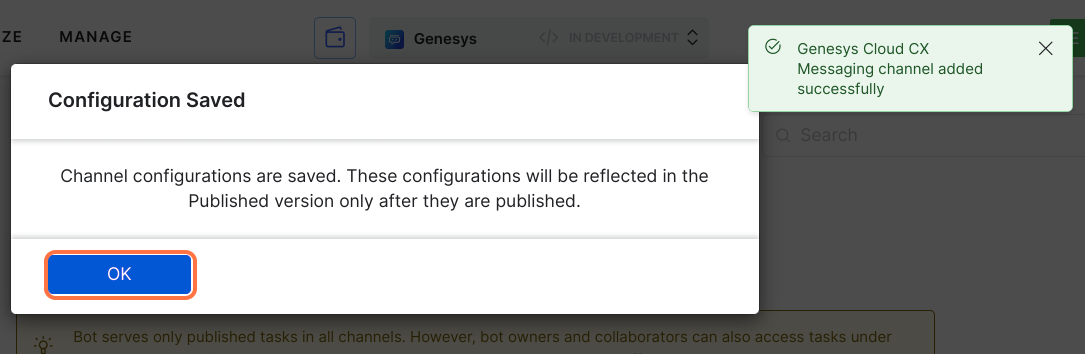
- Click Save.
- Click OK.
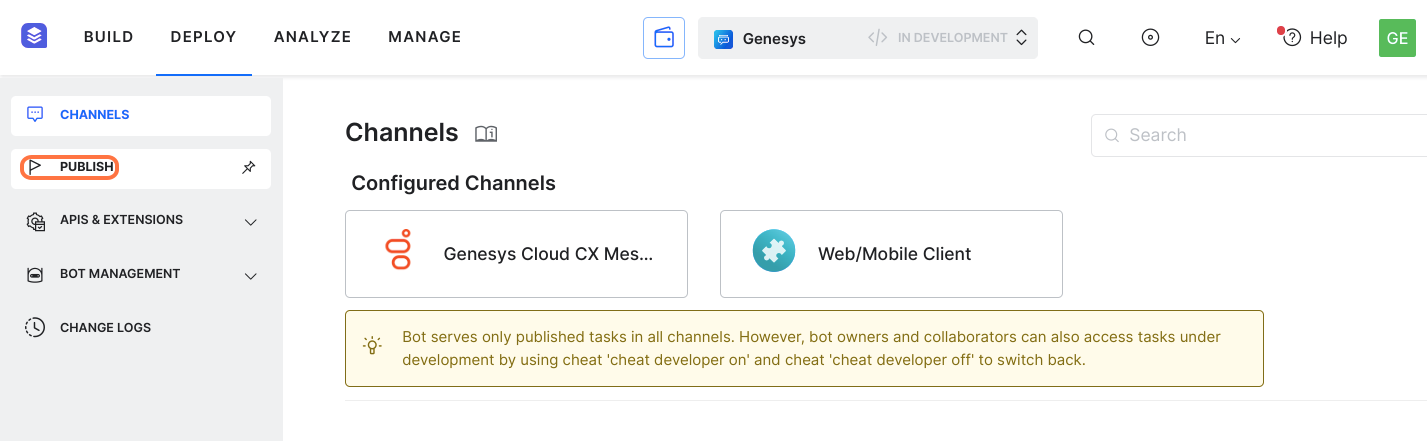
- Click Publish to publish the channel.
- Click Proceed.

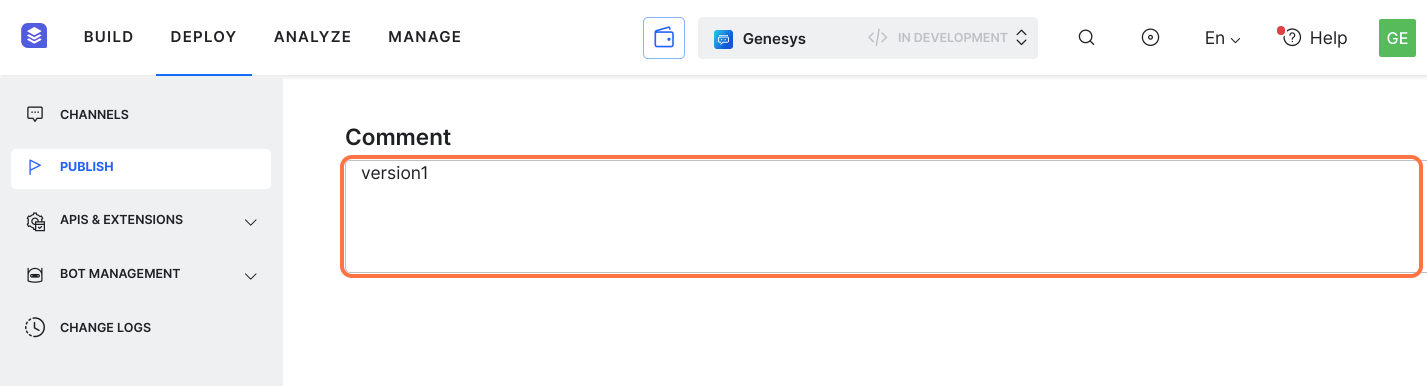
- Enter a comment in the Comment field.
- Click Confirm.
- Click Close.

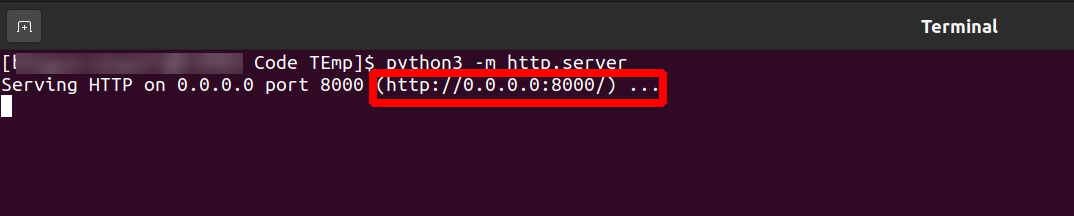
- Go back to the Genesys PureCloud application and click Copy to Clipboard.

- Paste it into any HTML page and run any sample application server. For example, python3 -m http.server. A sample URL similar to the following appears on your terminal.
- Click the sample URL to open it.
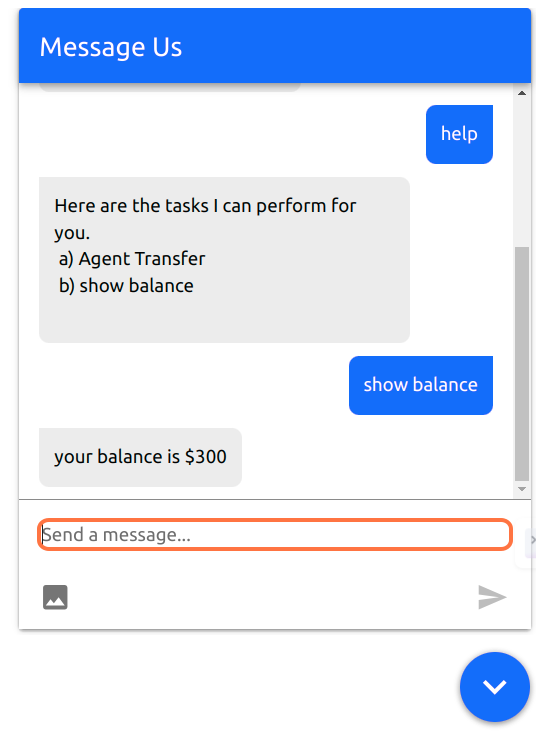
- Click the Messenger icon. You can run all your automations on this messenger.
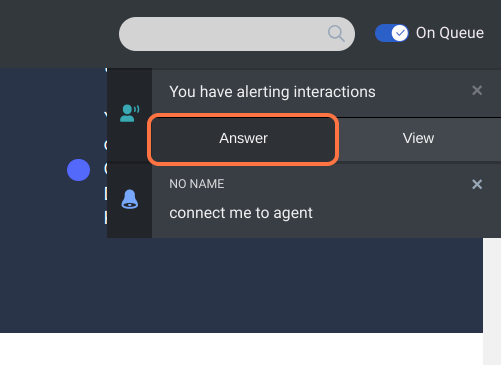
- Type “connect me to an agent” or your preferred dialogue for agent transfer and then press the Enter key.

Note: Agents assigned by the Genesys Admin to the auto-generated queue are connected to the chat conversation.

- Click Answer.
- The chat conversation begins between the customer and the agent on the queue.
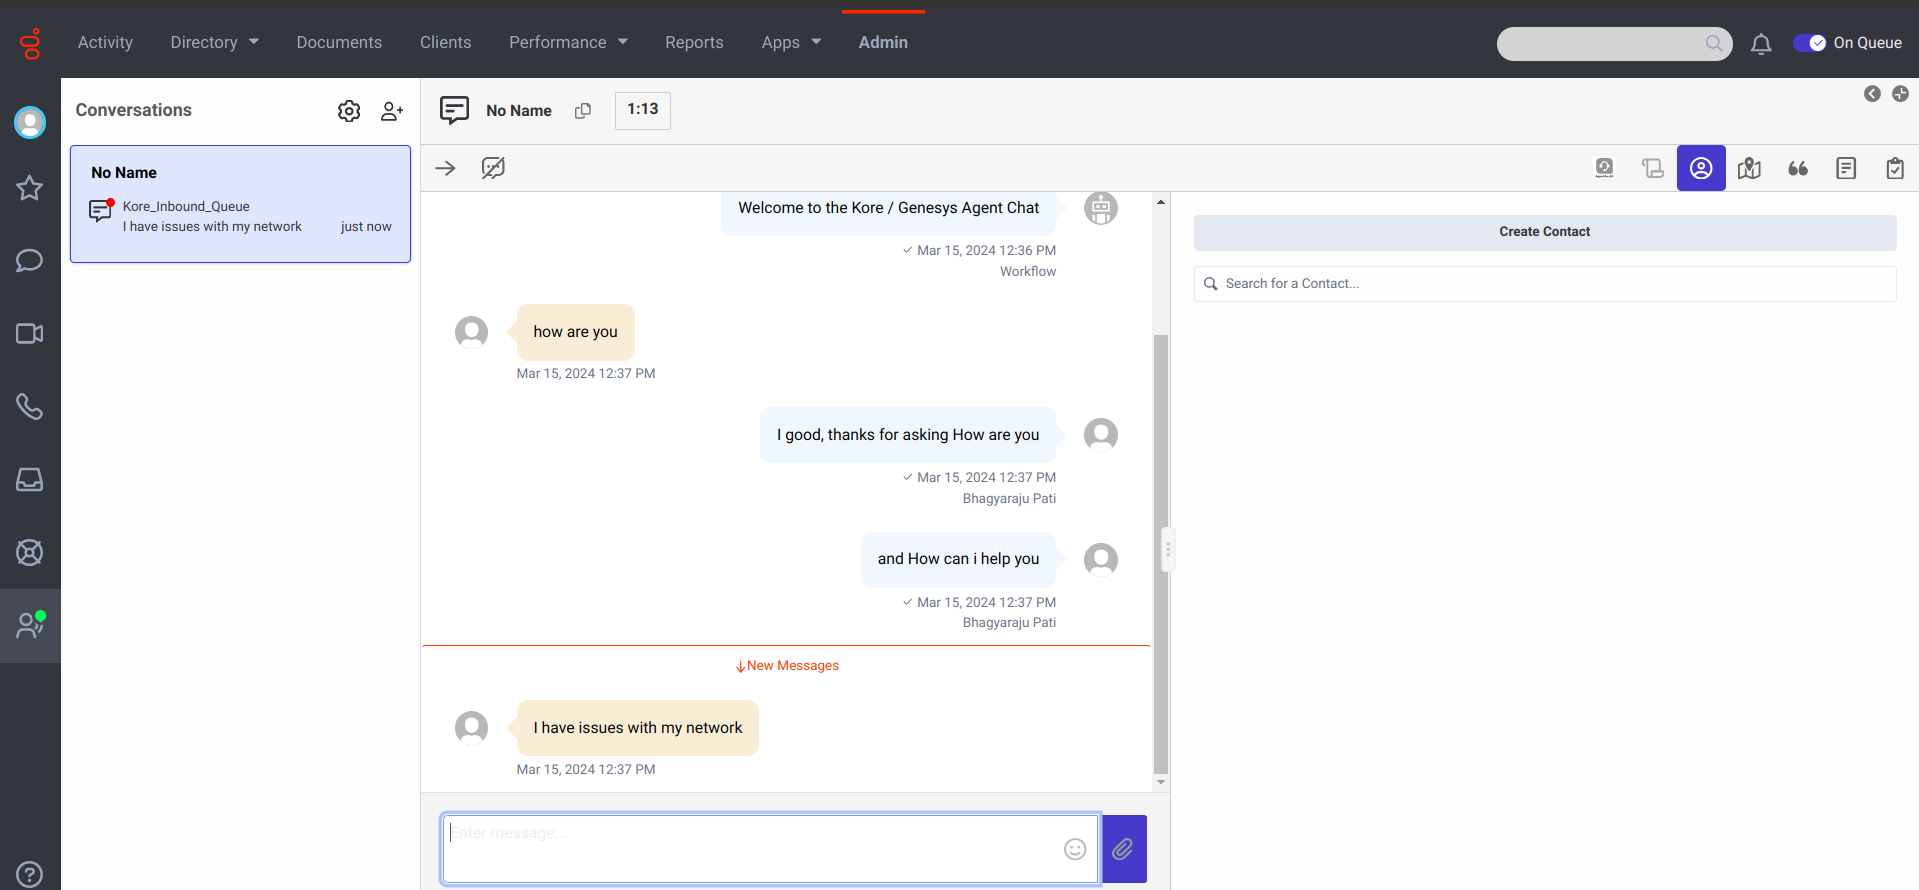
- The chat conversation begins between the customer and the agent on the queue.
- Go back to the Genesys PureCloud application and click Copy to Clipboard.