This document provides step-by-step instructions for integrating the Agent AI widget into the NICE Agent Desktop environment. This integration supports key Agent AI features such as Automation, Agent Coaching, Agent Playbook, Sentiment Analysis, and Transcription. It also supports end-of-call summary and custom data passing (such as agent name and ID) to the Agent AI widget.
Prerequisites
Before beginning the integration, ensure that you have the following:
- NICE CXone
- A NICE CXone administrator account with privileges to:
- Configure automatic call distribution (ACD).
- Create campaigns, skills, and dispositions.
- Access NICE CX Studio and NICE Integration Hubs (Automation & AI > Agent Assist Hub)
- NICE CX Studio installed on your Windows system.
- Agent Assist Hub available for your NICE CXone account. (Contact NICE Support; additional license cost applies.)
- Ability to place outbound calls from NICE Agent Desktop.
- Voice Interaction Streams available for your NICE environment.
- A NICE CXone administrator account with privileges to:
- Agent AI
-
- Access to the Agent AI application.
- Access to the Agent AI configuration portal.
- An existing Agent configured with:
- Channels → Voice Gateway (KVG) set up
- Channels → Web/Mobile (for Client ID, Client Secret, Bot ID)
- Agent AI widget URL, Bot ID, Client ID, Client Secret, and Account ID.
- SIP URI configured under
Channels > Voice > SIP Transfer - Network/firewall rules that allow access to:
- HTTPS: agentassist.kore.ai (or your on-prem host)
- WSS (Voice WebSocket): savg-webserver.kore.ai or region equivalent.
Definitions
| Section | Key | Definition | Reference |
| NICE CX Integration Hubs > Add Agent Assist App | Agent AI URL | The domain of the Agent AI. |
|
| NICE CX Studio > Outbound Voice Script and Configure Parameters | AgentAssistWidgetURL | URL that points to the Agent AI widget.
For example, https://agentassist.kore.ai/koreagentassist-sdk-v3/UI/agentassist-iframe.html |
Channels > Chat section of the Agent AI configuration portal. |
| NICE CX Integration Hubs > Add Agent Assist App
+ NICE CX Studio > Import Outbound Voice Script and Configure Parameters |
BotId | A unique identifier assigned to a bot. | Channels > Chat section of the Agent AI configuration portal. |
| NICE CX Integration Hubs > Add Agent Assist App
+ NICE CX Studio > Import Outbound Voice Script and Configure Parameters |
ClientId | An identifier provided to a client application. | Channels > Chat section of the Agent AI configuration portal. |
| NICE CX Integration Hubs > Add Agent Assist App
+ NICE CX Studio > Import Outbound Voice Script and Configure Parameters |
ClientSecret | A secret key or password associated with the ClientId. | Channels > Chat section of the Agent AI configuration portal. |
| NICE CX Integration Hubs > Add Agent Assist App | AccountID | A unique identifier assigned to an account. | Channels > Chat section of the Agent AI configuration portal. |
| NICE CX Integration Hubs > Add Agent Assist App | <a id=”kvg”>Voice Gateway(KVG)</a> |
|
Region Specific URLs
| Region | Agent AI URL | WSS URL | DNS |
| US | https://agentassist.kore.ai | wss://savg-webserver.kore.ai | @savg-us-prod-sbc-in-nlb-0d9a4c651955ff47.elb.us-east-1.amazonaws.com |
| JP | https://agentassist-jp.kore.ai | wss://jp-savg-audiosocket.kore.ai | @savg-jp-prod-int-nlb-3989d946fc1ced3b.elb.ap-northeast-1.amazonaws.com |
Configuration Steps
This section explains the configuration steps needed to integrate Agent AI with NICE CXone Agent Desktop.
- NICE CX Integration Hubs > Add Agent Assist Hub
- NICE CX Studio, Import Outbound Voice Script and Configure Parameters
- NICE CX Account Setup for Outbound Calls
- Outbound Voice Simulation
Step 1: NICE CX Integration Hubs > Add Agent Assist Hub
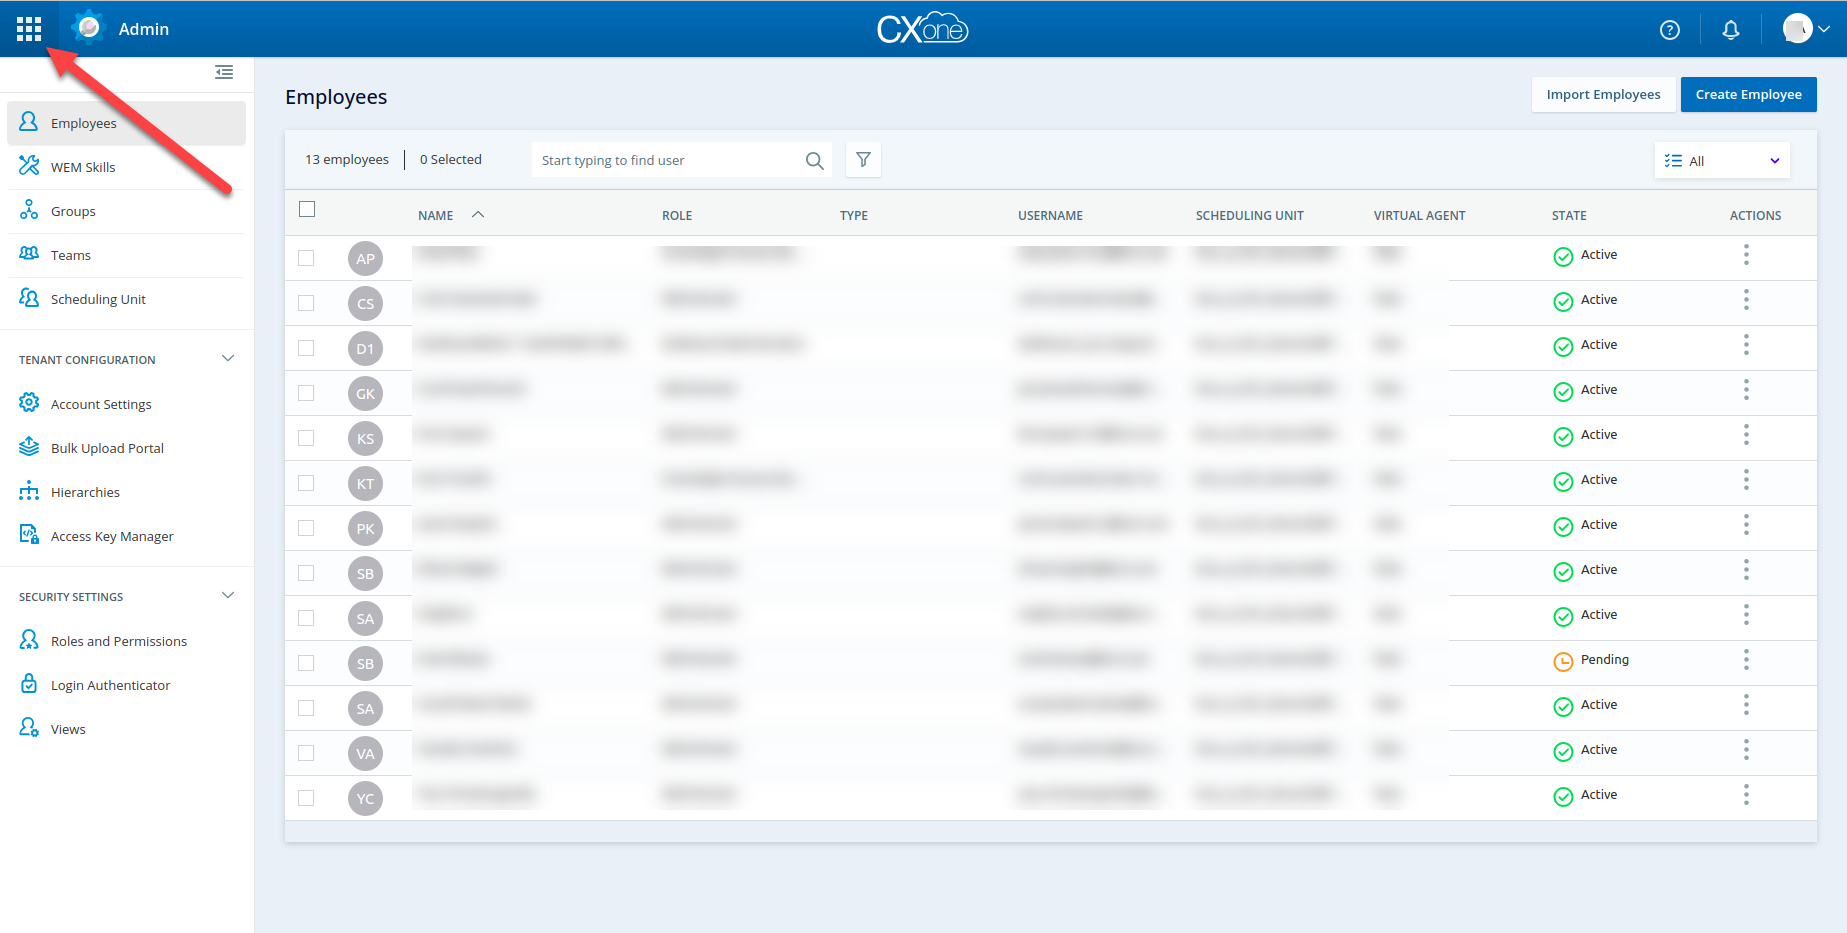
- Sign in to your NICE account with the user name and password provided by the NICE Customer Support.
- Select the Applications Launcher button.

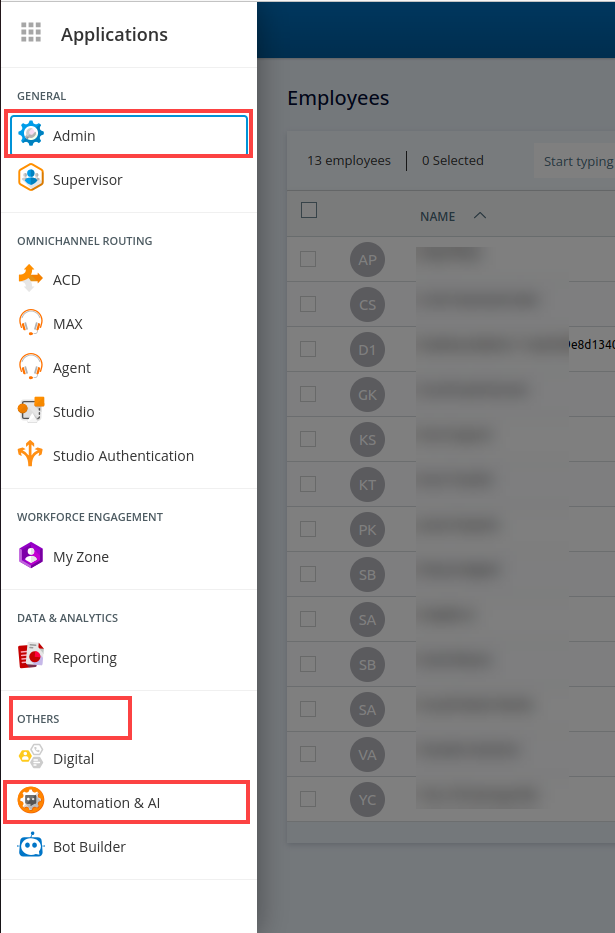
- Select OTHERS > Automation & AI.
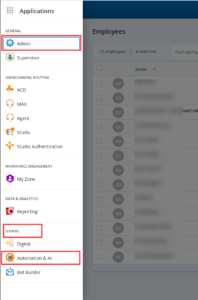
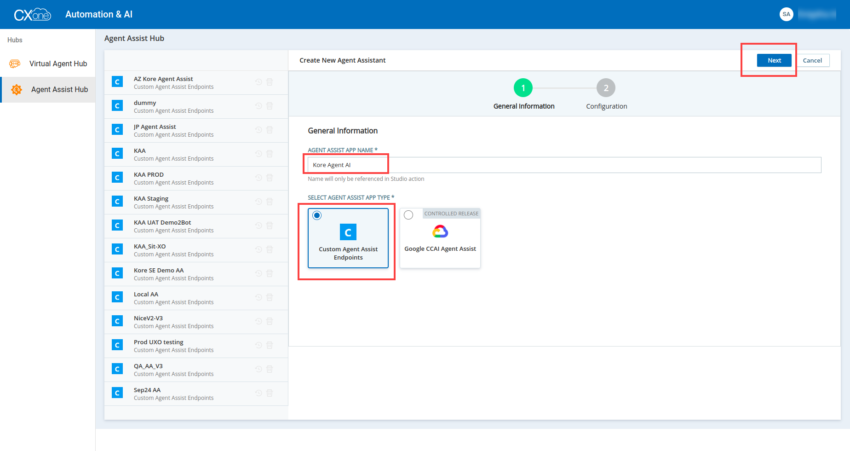
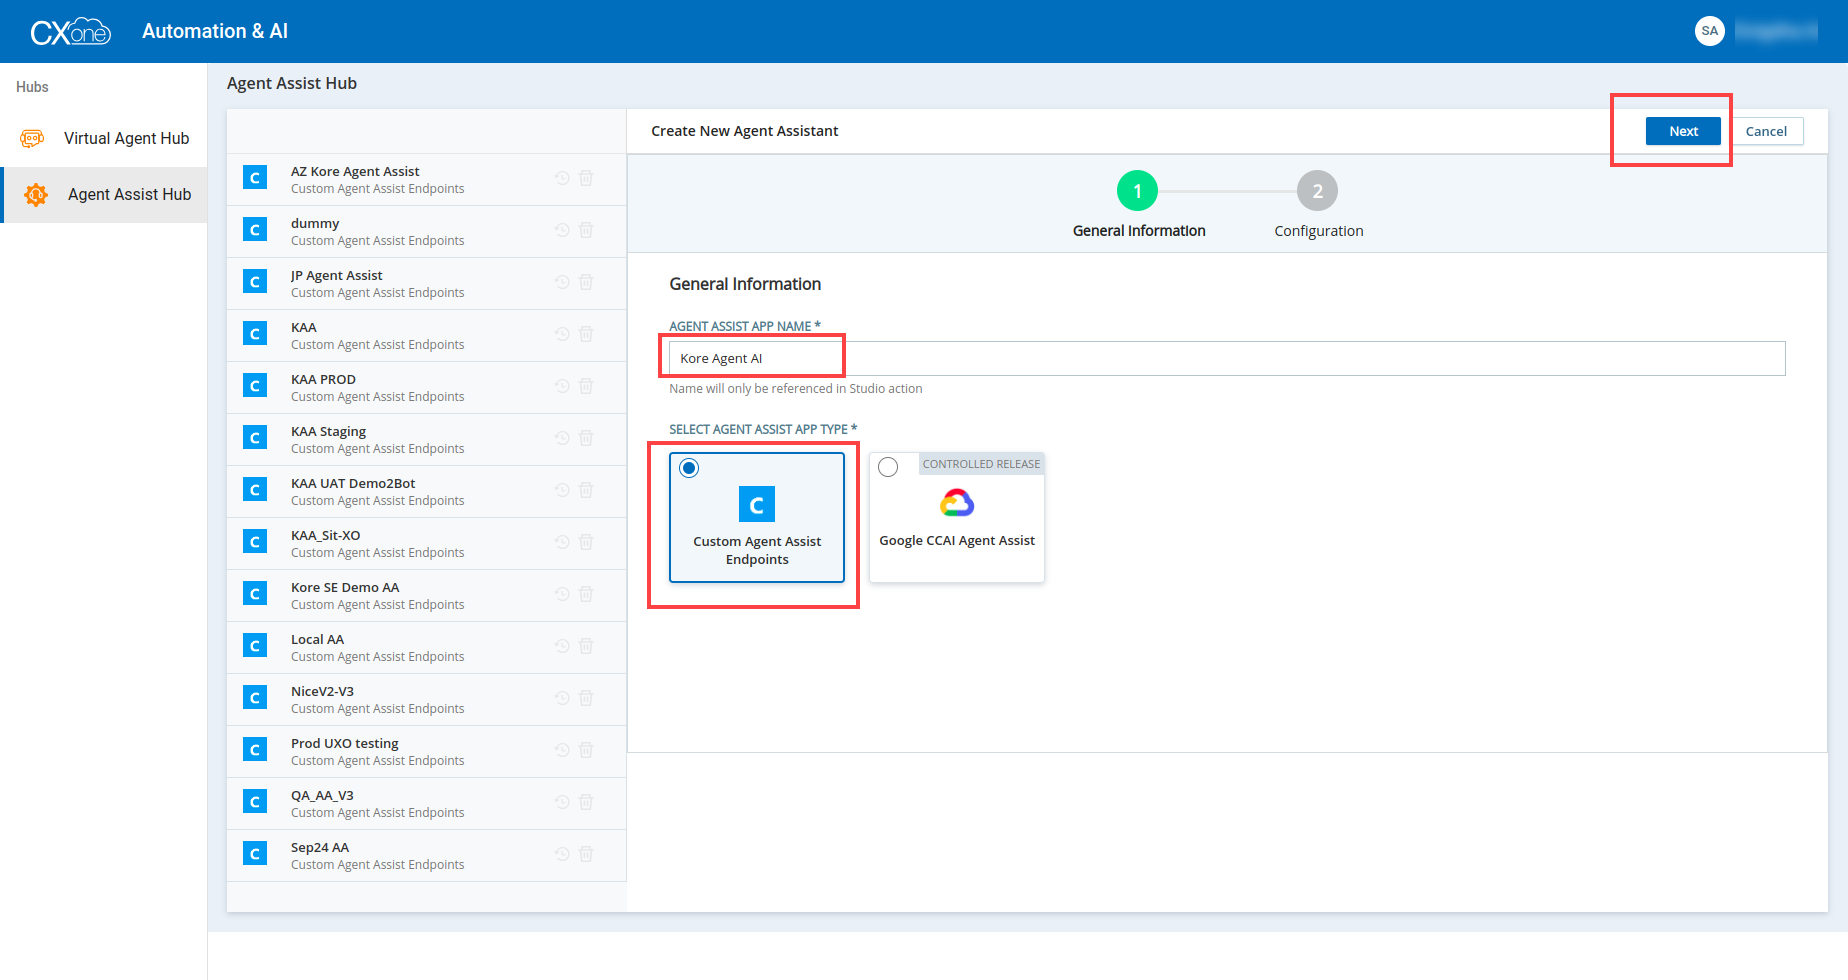
- Select Agent Assist Hub > Add Agent Assist App.
- Enter the name of the Agent Assist App in the AGENT ASSIST APP NAME field.
- Select Custom Agent Assist Endpoints.
- Select Next.
- Add the following settings with config parameters:
- Agent UI Option: No Assist Panel shown to the agent
- App Title: Agent AI (change as needed)
- Participants: Both
- Turn on the CTI Event toggle
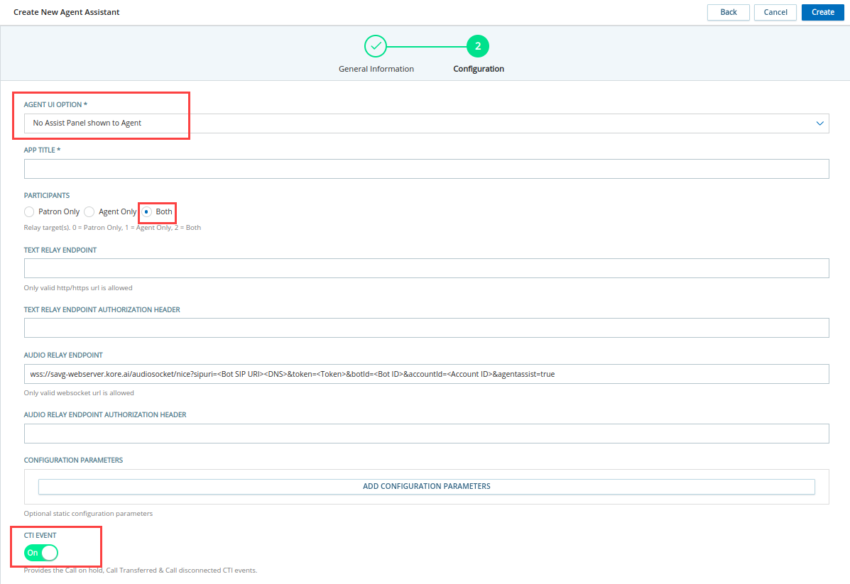
- Audio Relay Endpoint: <a href=”#kvg”>{Kore Voice Gateway(KVG)}</a>/audiosocket/nice?sipuri=<Bot SIP URI><DNS>&token=<Token>&botId=<Bot ID>&accountId=<Account ID>&agentassist=true
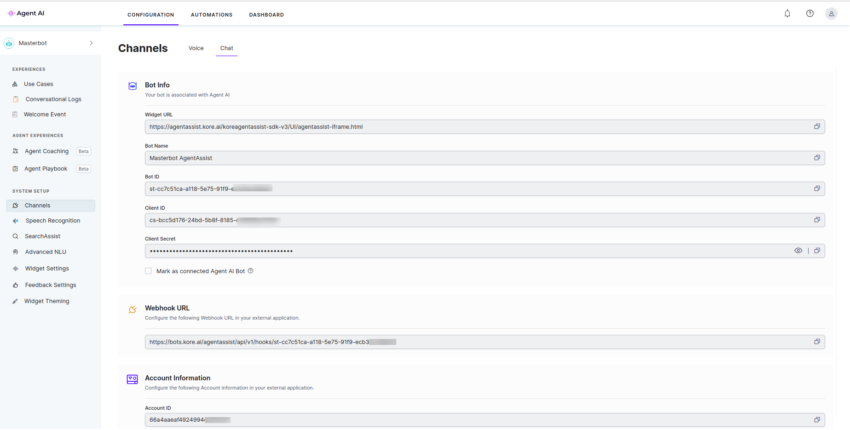
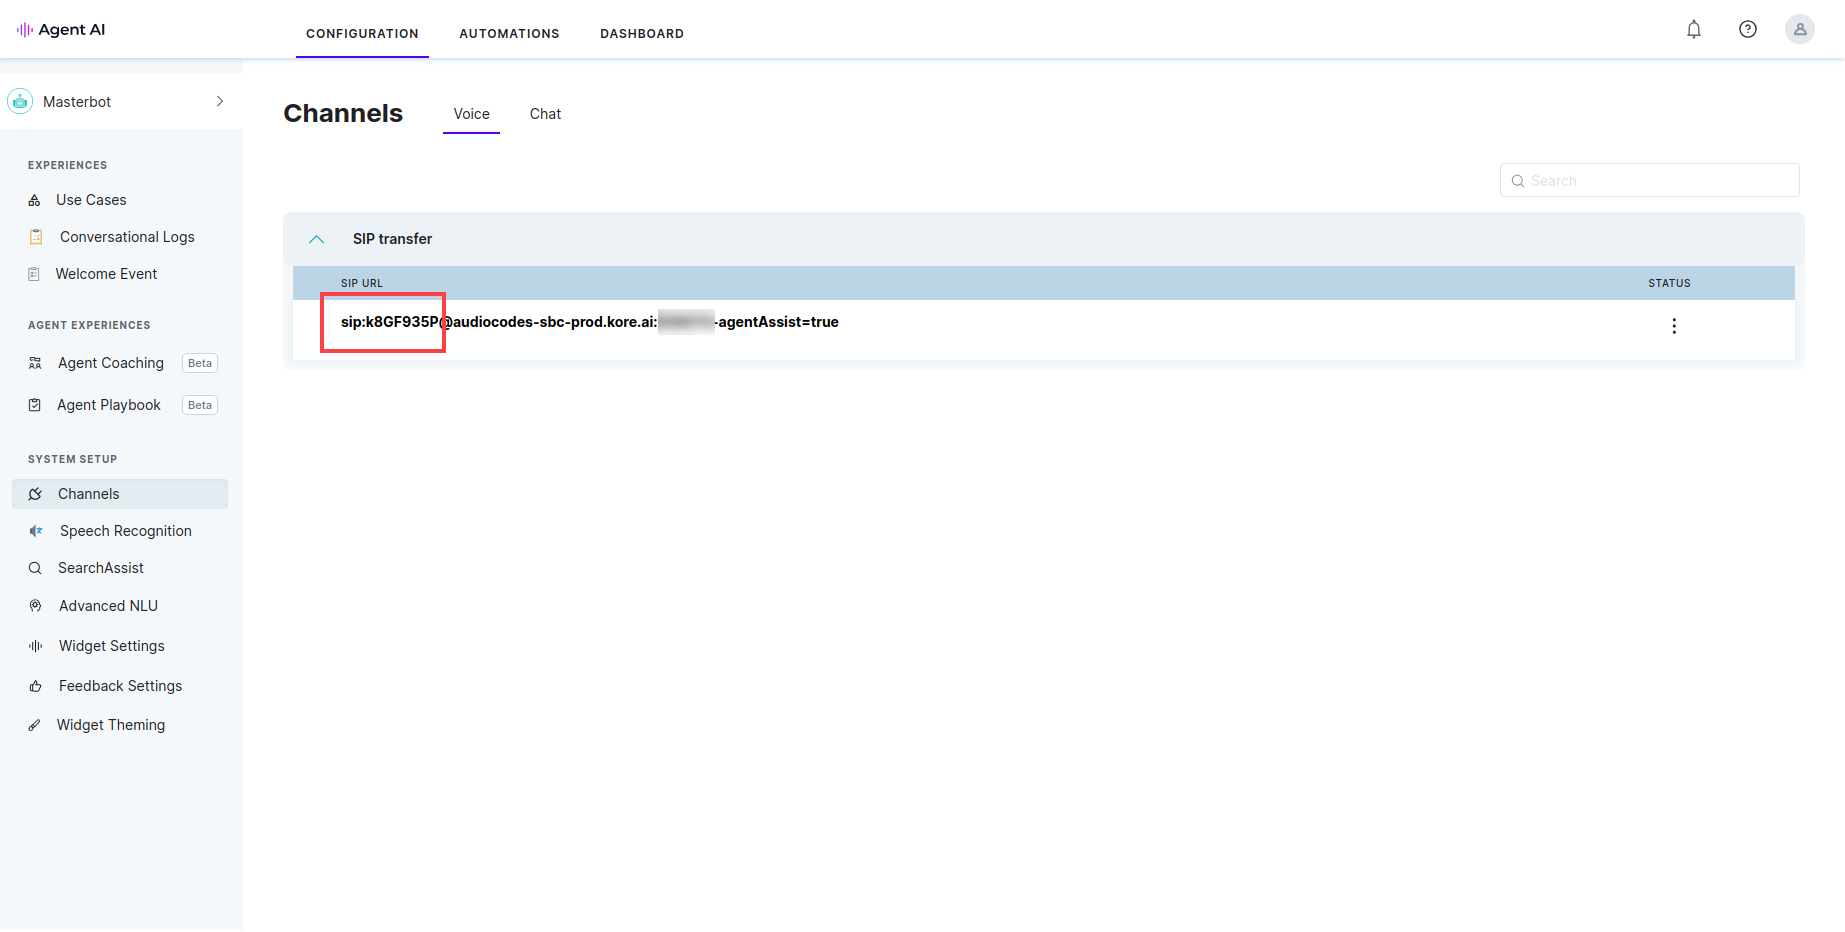
- Bot SIP URI: Channels > Voice section of the Agent AI configuration portal.

- Bot ID and Account ID: Channels > Chat section of the Agent AI configuration portal.
- Token: Create a JSON Web Token on jwt.io with the following details:
- Payload: {“appId”: <Bot Client ID>}
- Header: {“alg”: “HS256″,”typ”: “JWT”}
- Secret: Bot Client Secret.
- Bot SIP URI: Channels > Voice section of the Agent AI configuration portal.
- Select Create.

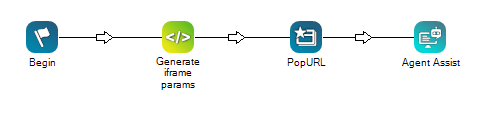
Step 2: NICE CX Studio > Import Outbound Voice Script and Configure Parameters
- Download the script for outbound voice from the Agent AI repository.
- Open the NICE CX Studio app from your desktop.
- Select File > Import from File.
- Select the downloaded outbound voice script.
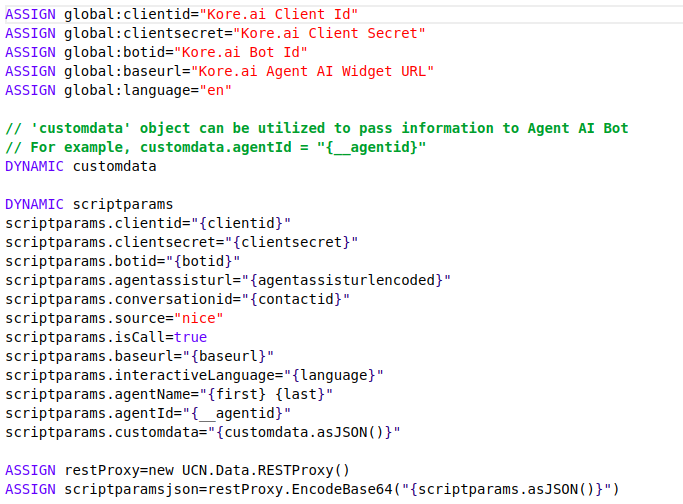
- Double-click the Generate iframe params tile.


- Update the values for the corresponding parameters:
- Agent AI Parameters
- Bot Client ID
- Bot Client Secret
- Bot ID
- Agent AI Widget URL
- Bot Language Code: en is set as the default language. Refer to the Supported Languages doc to provide the language code for your bot’s language.
- Custom Data: You can use the customdata object in the script to pass information to the Agent AI bot. During runtime, this customdata is accessible in the UserContext of the bot. Refer to Access Custom Data in Agent AI Bot for instructions on how to access customdata in the bot.
Include your data in the customdata object (one key-value pair per line). For example:- customdata.agentName=”Agent”
- customdata.agentID=”{__agentid}”
- Agent AI Parameters
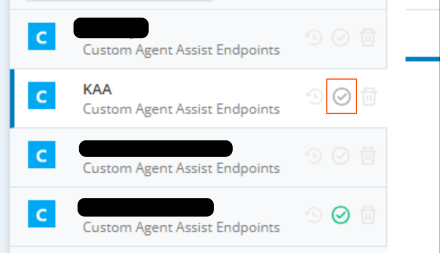
- Double-click the Agent Assist tile.

- Select the checkbox next to the Agent Assist instance you created in the above step.

- Select Yes.
- After selecting Agent Assist, select the Close button on the bottom-right corner of the page.
Note: Do not select the X button to close the window, as this does not save the changes.

Step 3: NICE CX Account Setup for Outbound Calls
Follow Set Up Manual Outbound Voice document to set up Outbound Voice in NICE CXOne.
During Skill creation, select the NICE Studio Script created in the previous step as the custom script.
Note: To view the summary pop-up in the Agent AI widget, you must select either Automatic Wrap-up or Disposition for the Post Contact setting of the skill. If you don’t select any, by default None is selected. The chat/voice screen automatically closes once the conversation ends.
Outbound Call Simulation
- Go to the NICE home page.
- Select Application Launcher > Agent.
- Select Integrated Softphone.
- Select Connect.
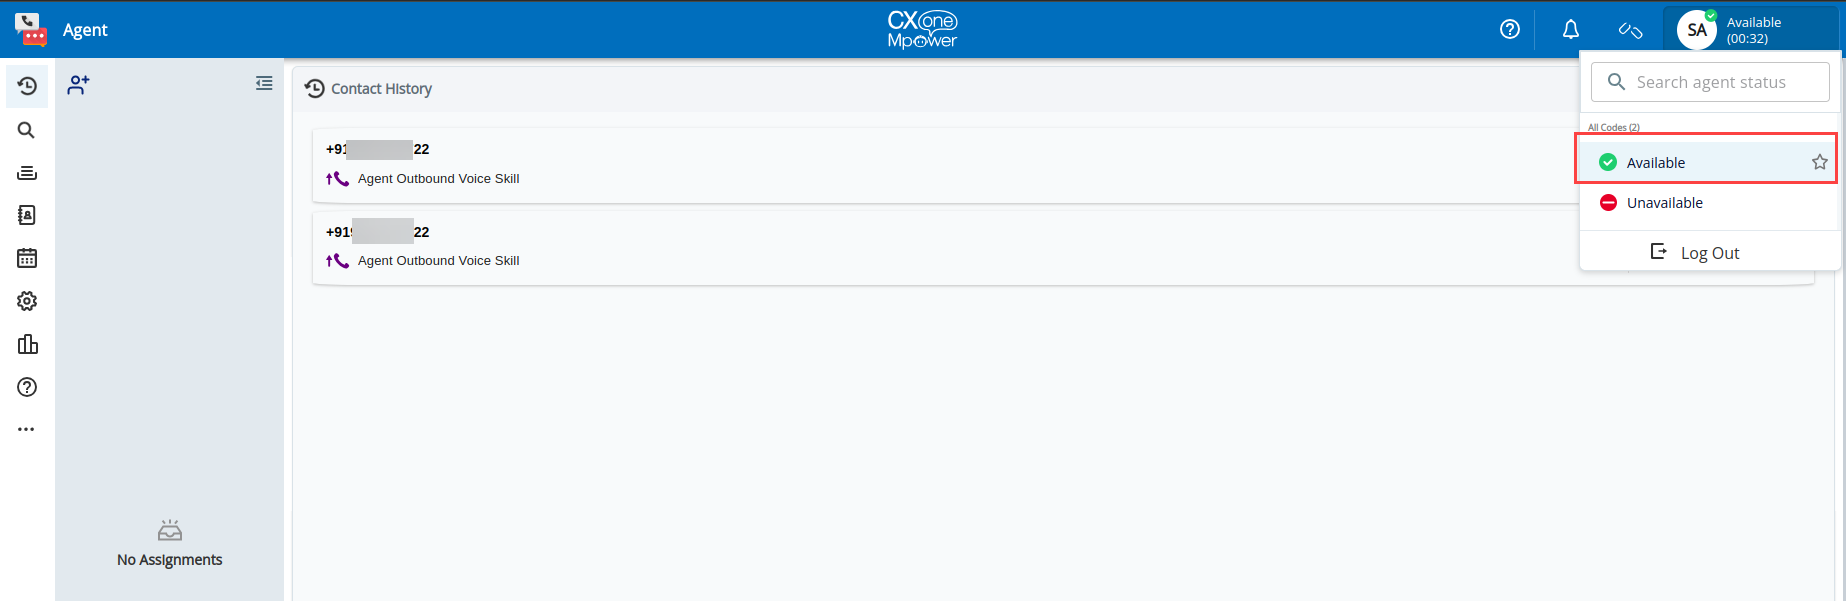
- Change the status to Available.

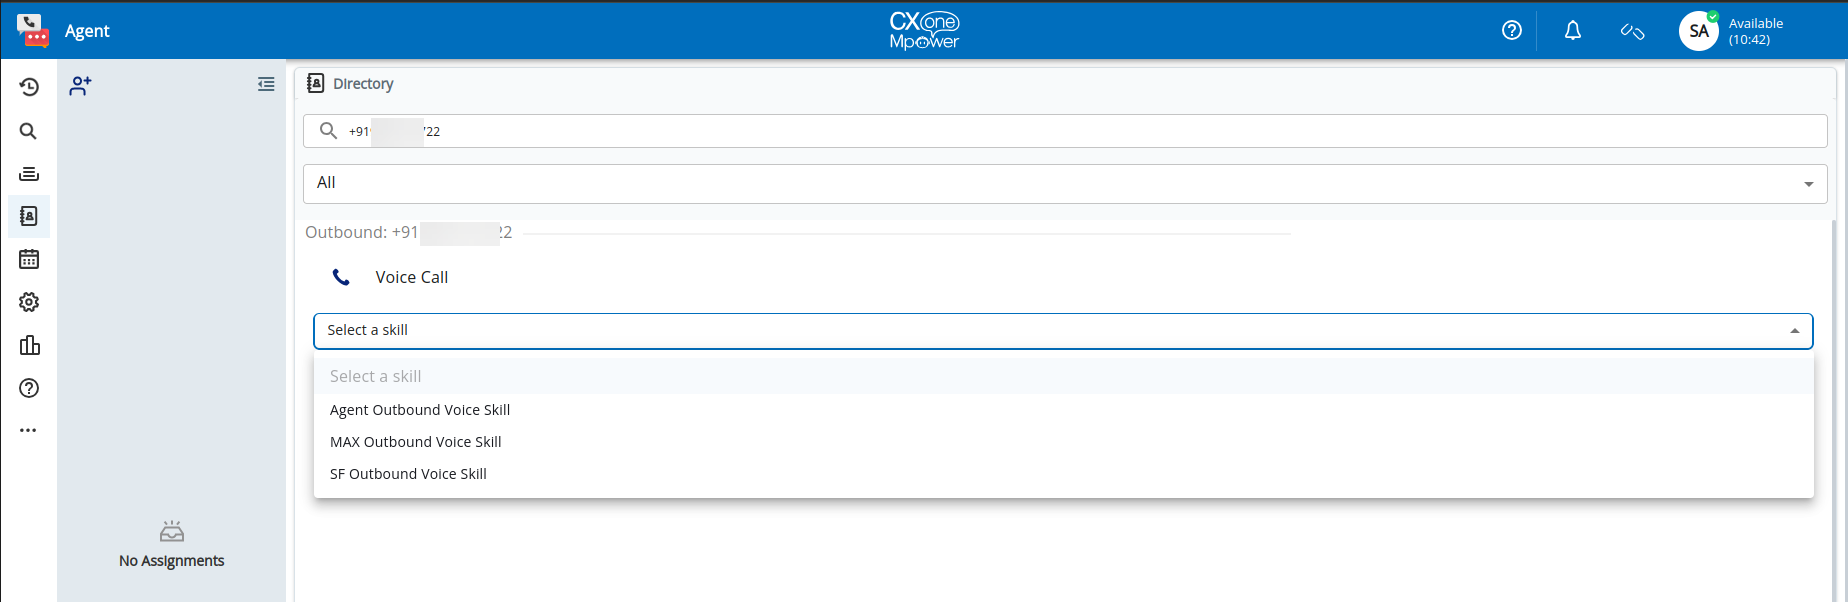
- Select New Outbound at the top-left of the desktop.
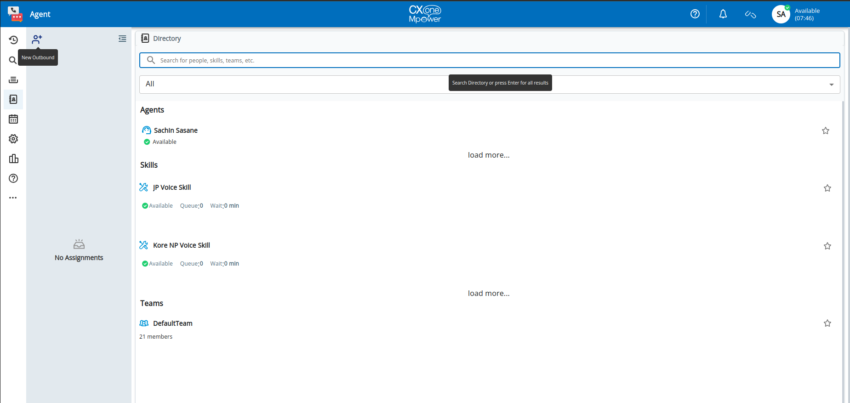
- Enter a phone number in the search bar, select Voice Call, and select the outbound skill created in the previous step.
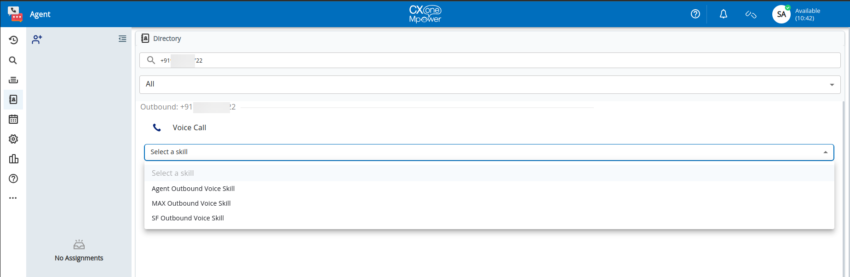
- Select the Call button.
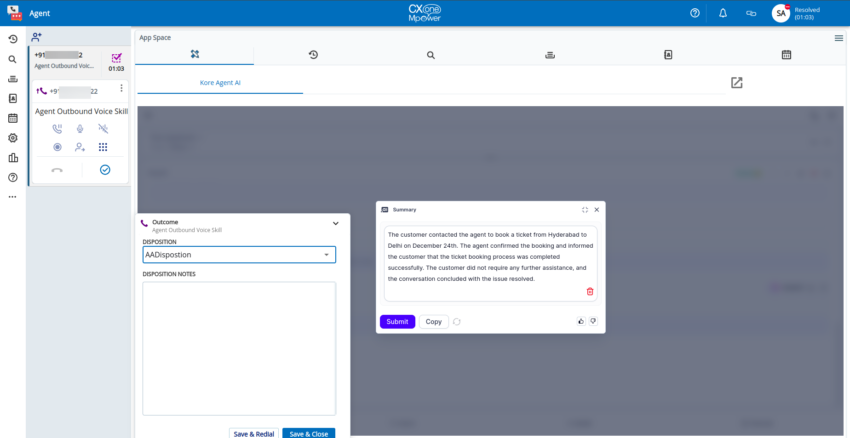
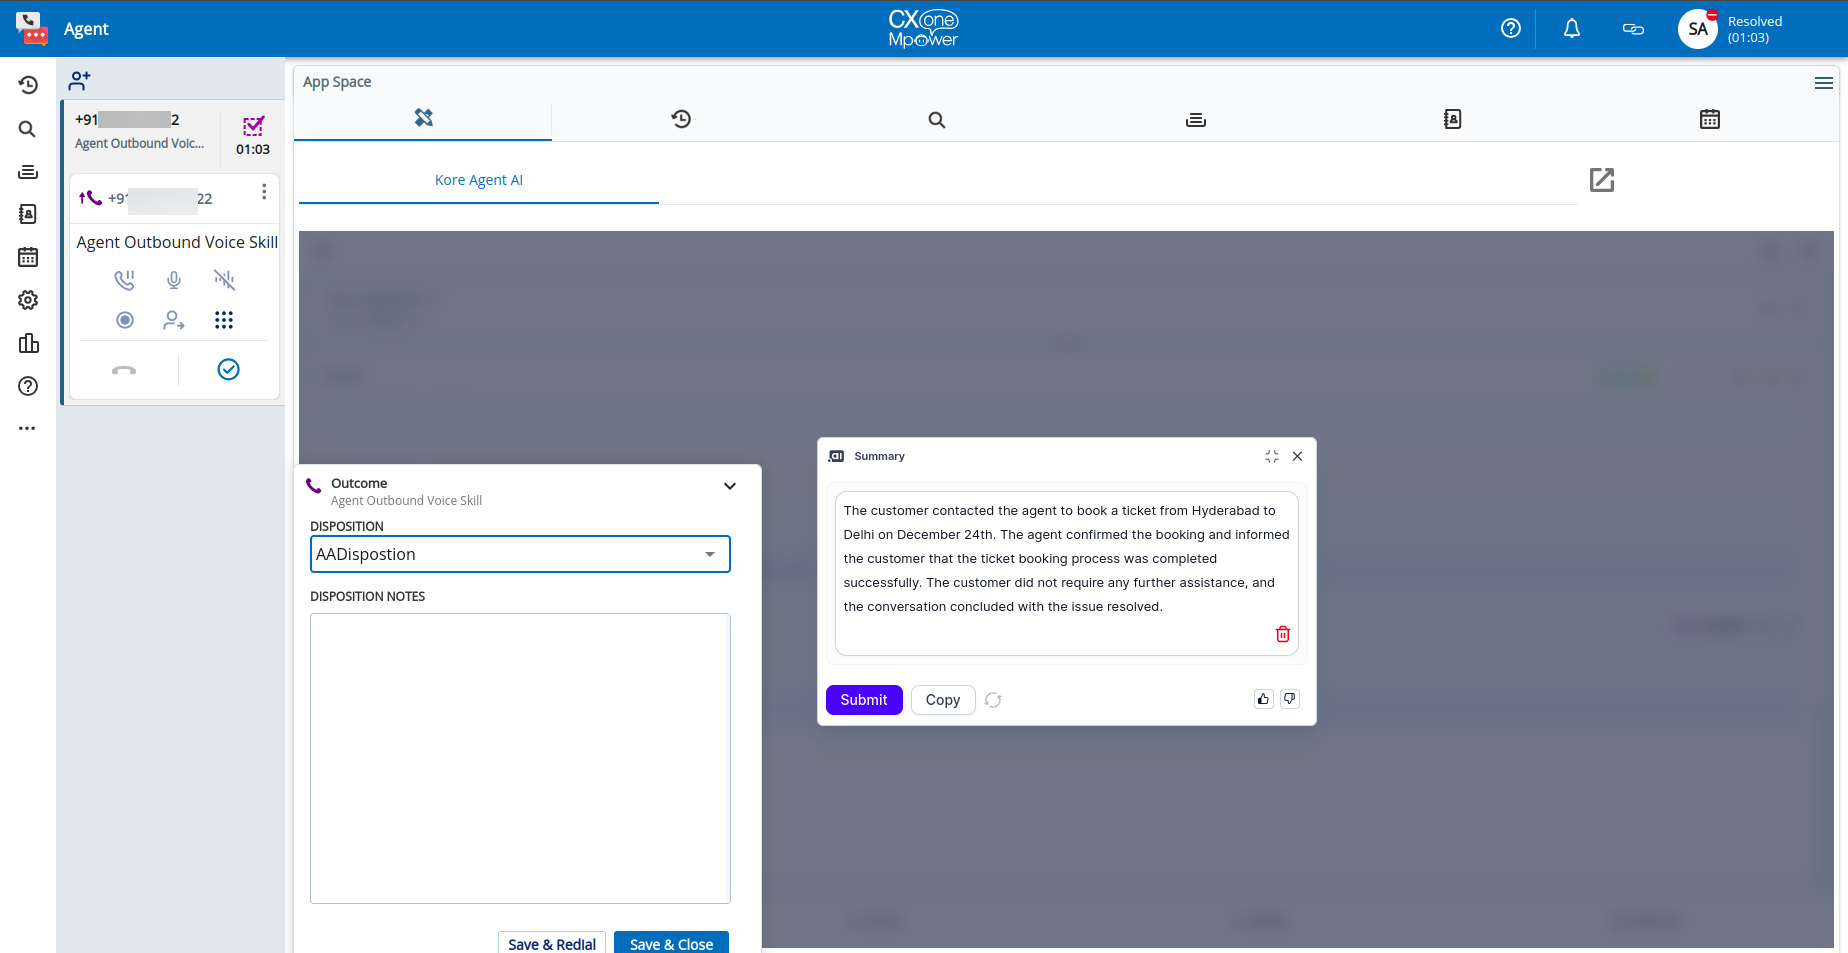
- When a customer accepts the call, the Agent AI widget loads automatically.
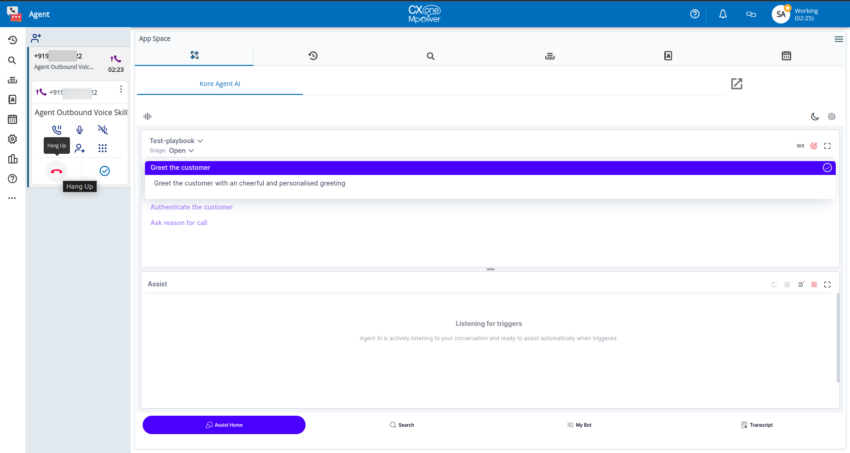
- Select Hang Up to disconnect the call.
- The call summary pop-up is triggered at the end of the call session.
- Select the disposition (Submit or Copy), and select Save & Close.