The Third Party Configuration section enables you to manage bot configuration parameters (such as QueueIdentifier and custom data) within an embedded Agent AI app. This enables dynamic iframe URL generation for third-party CCaaS/CRM platforms, eliminating the need for a separate configuration within the third-party desktop. This document explains the process of configuring, editing, and deleting third party integrations.
Configure a Third Party Integration
This section explains the process of configuring a third party integration.
- Sign in to Agent AI.
- Go to Configuration > System Setup > Third Party Configuration.
- Click + New Record.

- Enter values as per the following:
- Name: Name of the record.
- Description: A brief description about the record.
- Queue Identifer: Queue or skill name. You can enter multiple queue or skill names by pressing the Enter key.
Note: The Queue Identifier value must be unique at the account level, and it’s a string.
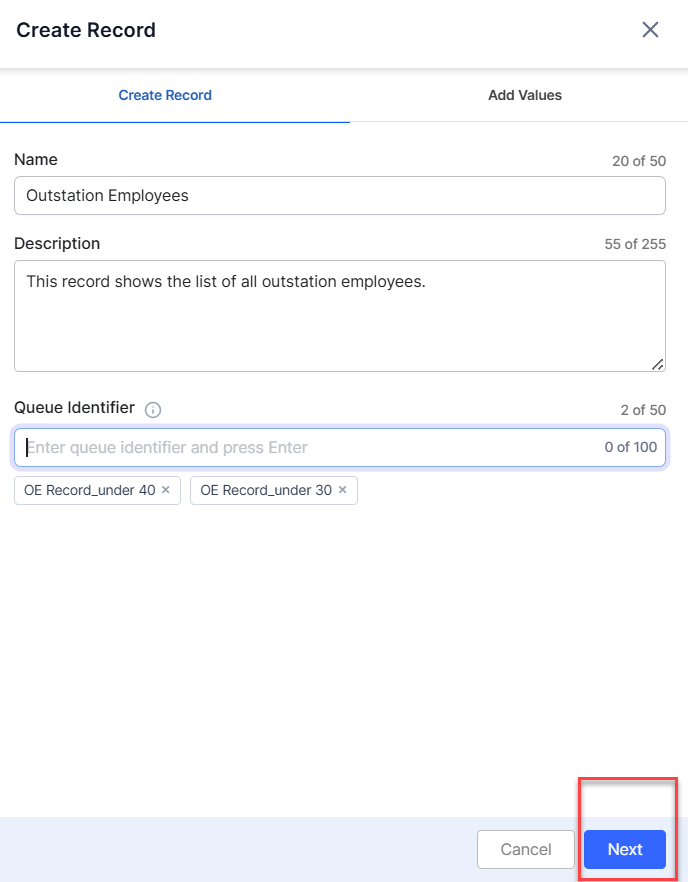
- Click Next.
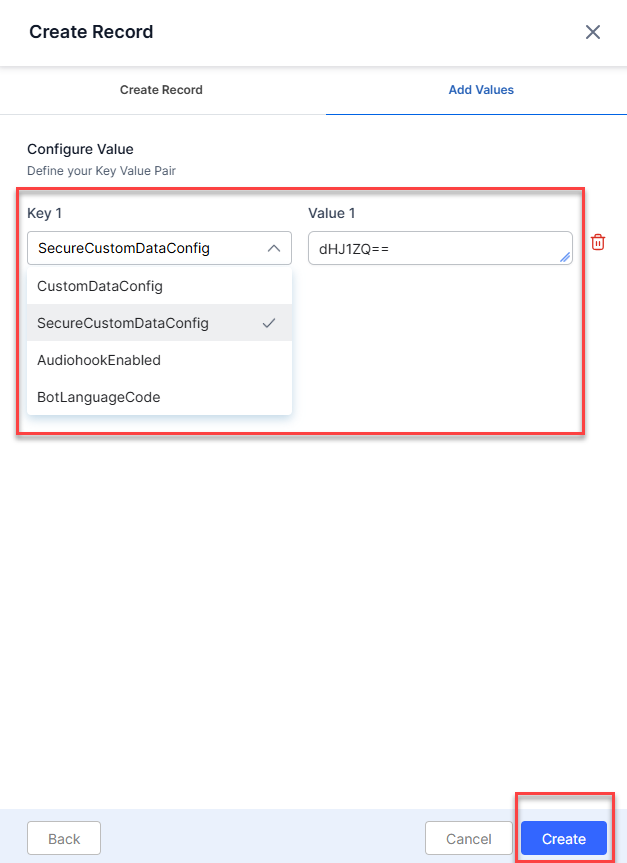
- Click + New Value Pair to define your key-value pair.
- Select a key from the Key 1 list and enter its value in the Value 1 field. You can create multiple key-value pairs (such as Key 2, Key 3) by clicking + New Value Pair.
- To delete a key, click the “delete” button against it.
- To delete a key, click the “delete” button against it.
- Click Create.
Field Description – Configure Value
| Field | Definition |
| CustomDataConfig | JSON object containing the necessary keys and xpath (paths to locate the value in Genesys Conversation API result JSON object). It is passed to the Agent AI widget during runtime and is available in the context object. |
| SecureCustomDataConfig | JSON object containing the necessary keys and xpath (paths to locate the value in Genesys Conversation API result JSON object). It’s a JSON, encrypted value. It is securely passed to the Agent AI widget during runtime and is available in the context object. |
| AudiohookEnabled | A setting or flag indicating whether Kore audio processing is enabled for the bot. It’s a boolean value (specific to Genesys desktop). |
| BotLanguageCode | Specifies the language and locale the bot should use during interaction. |
| Value | The values should be base64 encoded. |
Edit or Delete a Record
This section explains the steps to edit or delete an existing record.
- Sign in to Agent AI.
- Go to Configuration > System Setup > Third Party Configuration.
- Click the “vertical ellipsis” against a record you want to edit or delete, as in the following screenshot:
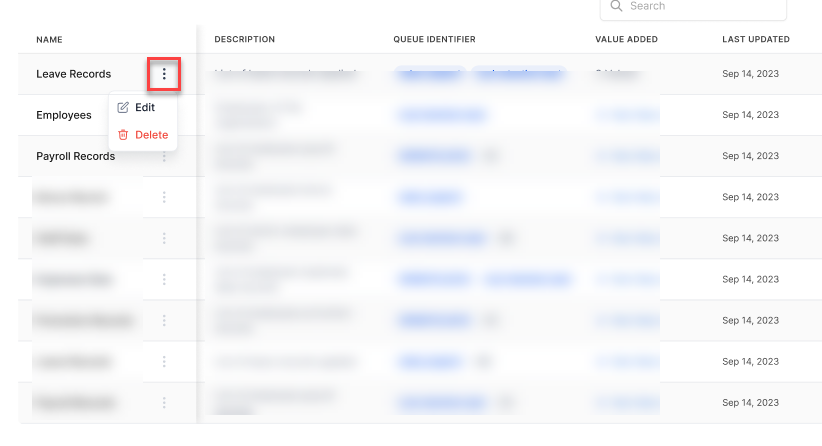
- If you click Edit, make the updates and click Update.
- If you click Delete, the following confirmation message appears:
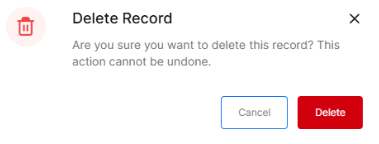
- Click the Delete button again to confirm deletion.