

Access the platform
Agent Platform is available to Kore.ai customers and partners. Sign-up is enabled only for approved domains. To request access for your organization, contact us. The platform runs in multiple regions. For the US-Central Cloud, use https://agents.kore.ai/. See the region-specific URLs below.Region-specific URLs and allowlist of IPs
The platform sends requests to a fixed set of egress IP addresses. If your systems use IP restrictions, add the region-specific egress IPs below to your allowlist to permit platform traffic.List of region-specific URLs and allowlist of IPs
List of region-specific URLs and allowlist of IPs
Set up your account, workspace, and initial configuration
- Sign in to the platform at https://agents.kore.ai/ and create a workspace as part of the onboarding flow.
- Invite team members to your workspace: click the Admin/Gear icon at the top, click Invite members, enter the member’s email address, select a role, and click Send invite.
- Configure the LLM provider and Arch AI:
- Register provider credentials and configure at least one supported model. See Configure LLM.
- Configure the model and credentials Arch uses to generate agent specifications and drive chat-based orchestration. See Configure Arch.
Ways to build on the platform
The platform offers three easy ways to build a project with Arch:Build with Arch in Studio
Arch designs, builds, evaluates, and optimizes AI projects from your business requirements. Describe your requirements in natural language, or upload supporting documents, and Arch generates the project architecture and artifacts, such as agents, workflows, and prompts. Arch then runs an initial evaluation and provides a working foundation that you can customize and deploy.Create a project with Arch
Sign in to the platform and select Start with Arch on the Projects page. Arch creates your project in three phases: Interview, Blueprint, and Build.1
Interview
Describe the project you want to build.Arch analyzes your request and interviews you to refine the requirements before generating the project blueprint. Arch may ask follow-up questions such as: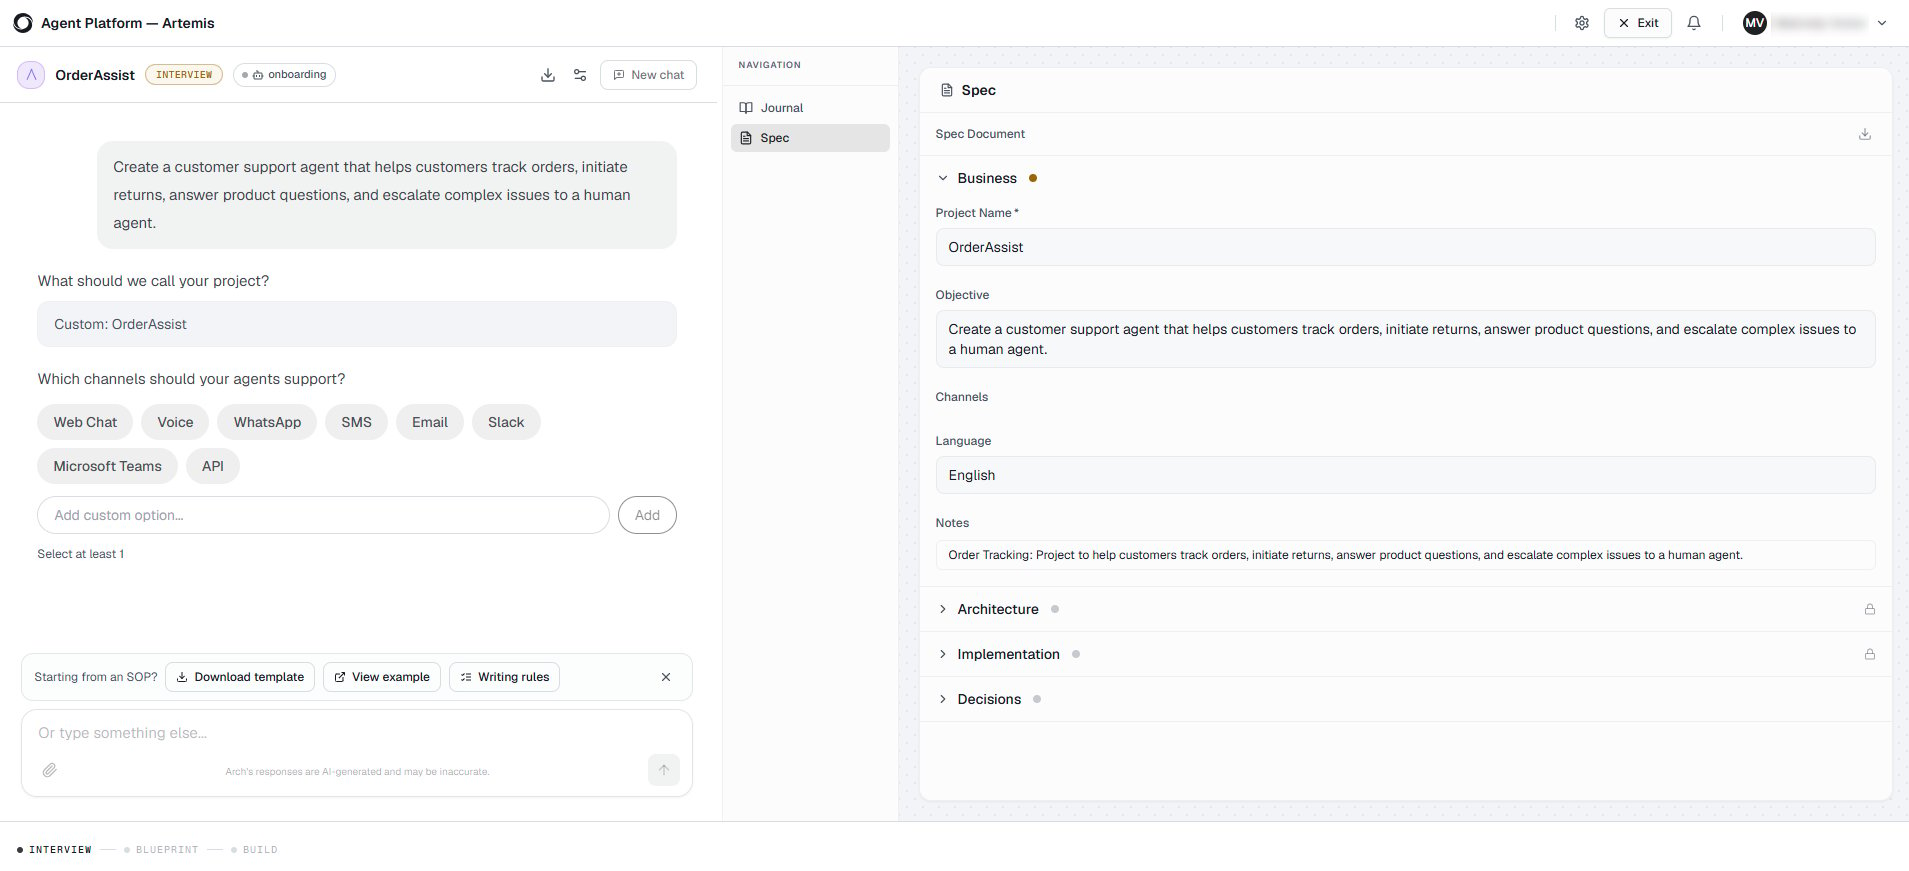
- Describe your requirements in natural language.
- Upload a Standard Operating Procedure (SOP).
- Upload design documents or reference documents.
2
Blueprint
After gathering your requirements, Arch generates a blueprint that represents the proposed project architecture.Review the blueprint and either accept it or request changes. Arch updates the blueprint based on your feedback until it accurately reflects your requirements.ExampleBased on the customer support requirements, Arch generates a blueprint containing a Customer Support Agent, an Order Management workflow, the required integrations, and relationships between the customer-facing and escalation agents.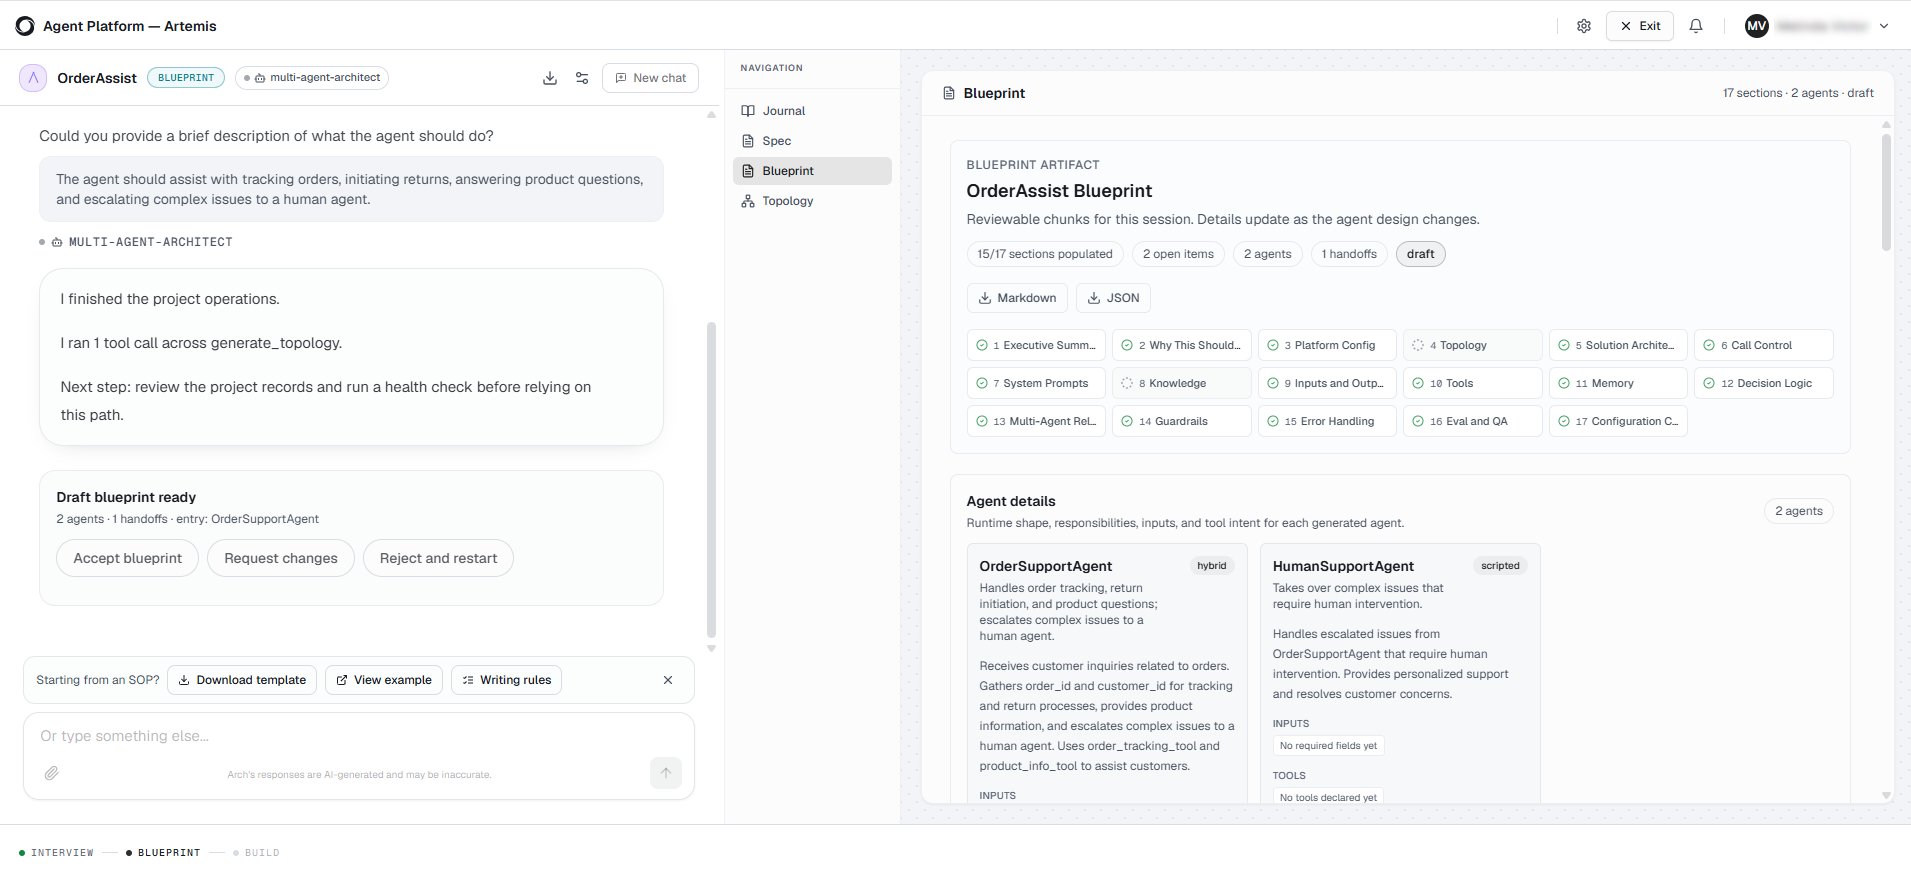
3
Build
After you approve the blueprint, Arch assembles the generated artifacts into a working project scaffold and opens the project in Studio.Depending on your requirements, Arch generates the necessary project artifacts, which can include: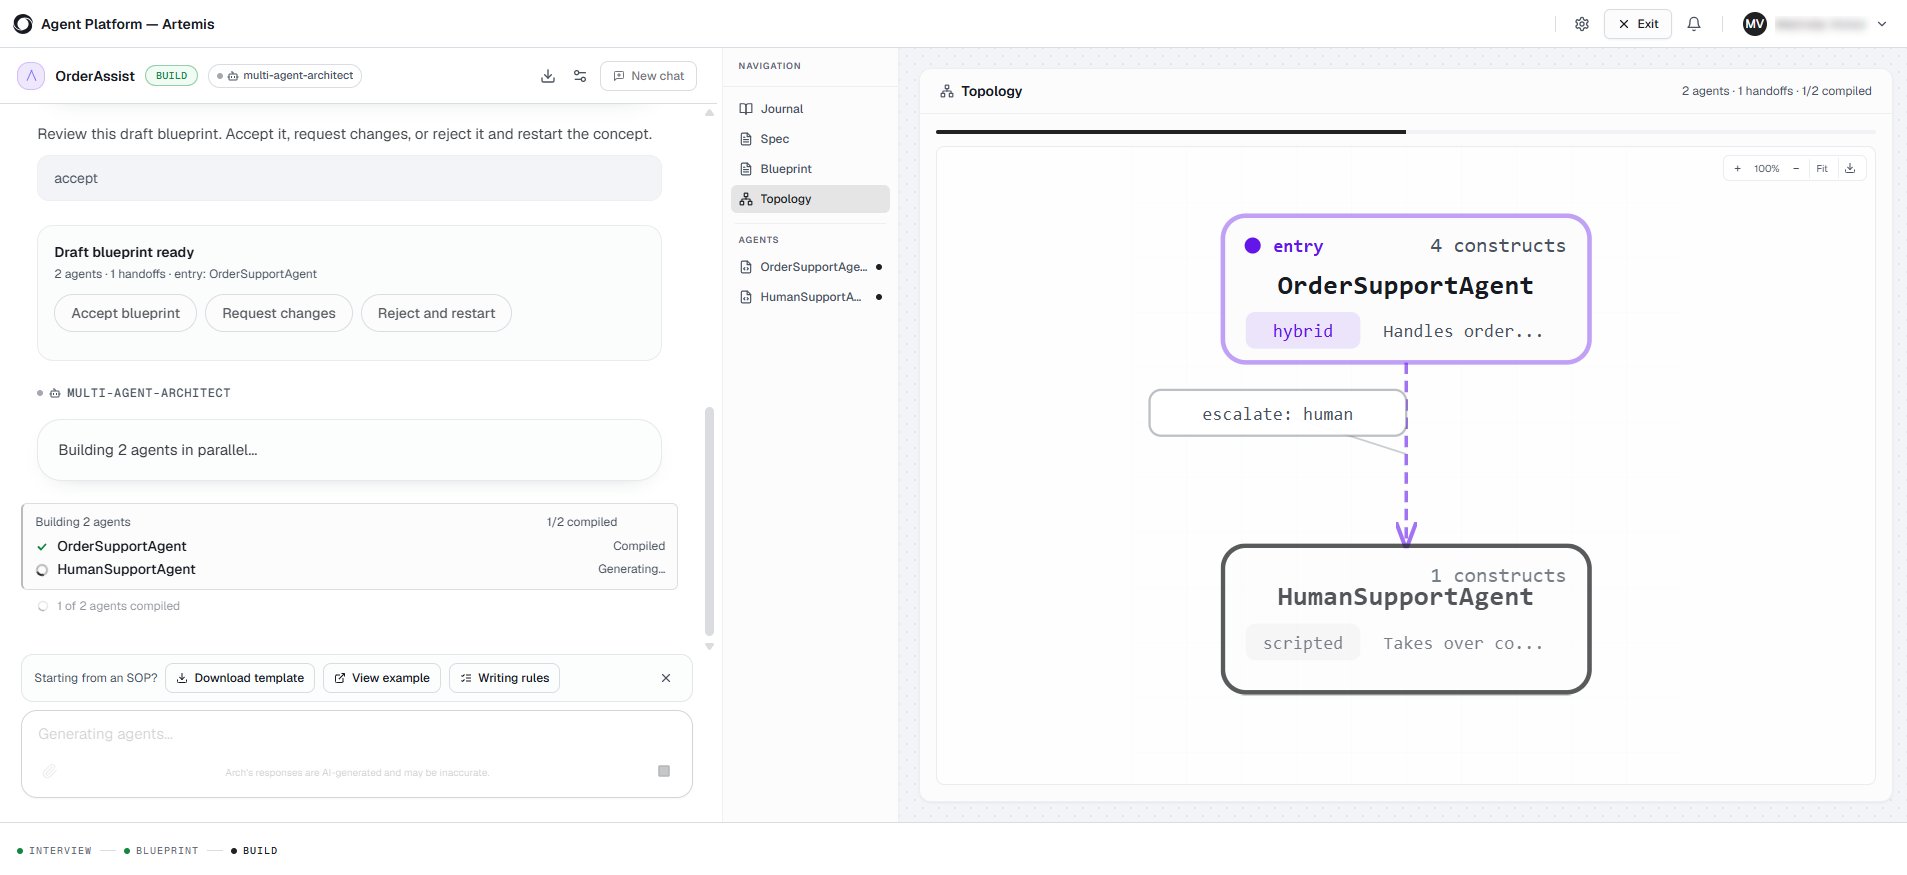
- Agents
- Workflows
- Tools
- Prompts
- Knowledge configuration
Review the project setup
After Arch generates your project, it opens the project in Studio and displays the Project setup panel. Review the project status and resolve any issues with the help of Arch before customizing your project.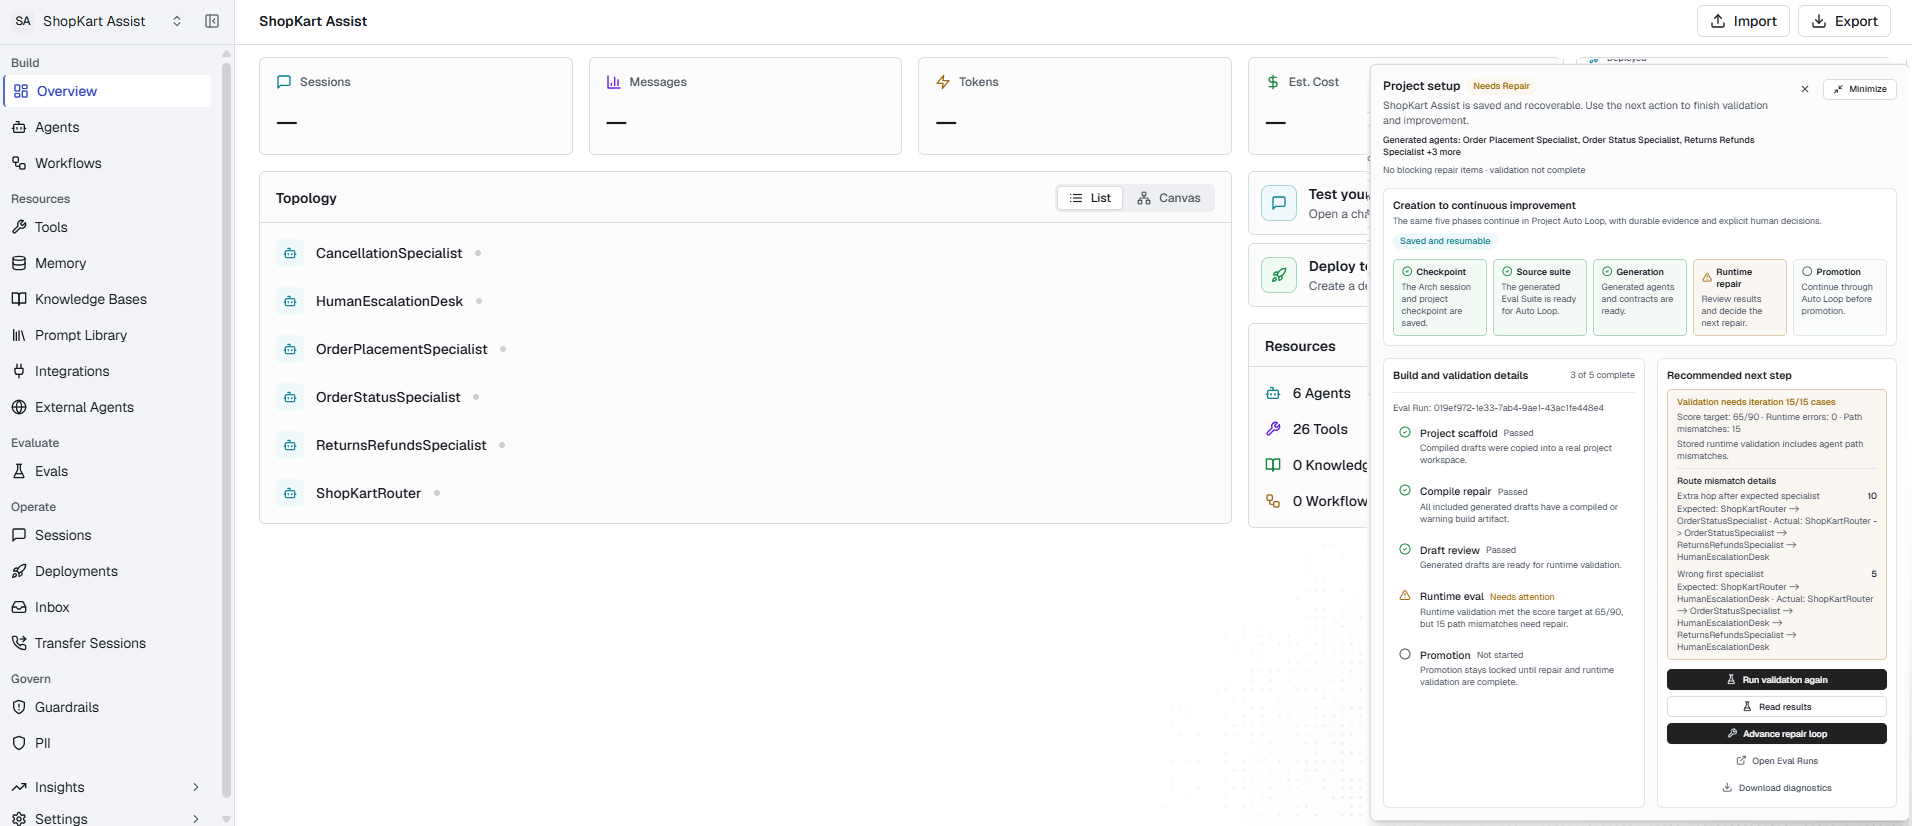
Review the initial evaluation
Arch generates an evaluation suite and runs an initial evaluation of the project. The evaluation uses generated scenarios and personas to simulate conversations and identify potential issues.- Review the identified issues and recommendations.
- Update your agents, workflows, prompts, or tools as needed.
- Rerun the evaluation to verify the improvements.
- Repeat this process until the project meets your quality requirements.
For more information about evaluation suites and results, see Evaluations. For more information about iterative optimization, see Optimize with Arch AI.
Customize your project
After reviewing the validation and evaluation results, customize the generated project to meet your business requirements. Depending on your project, you can:- Use Auto Tune to apply recommended improvements to your project.
- Review and update the generated agents, workflows, tools, and prompts.
- Replace placeholder or mock tools with production integrations.
- Configure authentication and connection settings.
- Configure knowledge sources and other project settings.
- Test the project and verify that it meets your business requirements before deployment.
Depending on your project requirements, Arch may generate placeholder tools or sample configurations. Replace these with your production systems before deploying your project.
Next steps
Learn how to customize and deploy your project:- Agents – Review and customize the generated agents.
- Workflows – Modify the generated workflows and orchestration logic.
- Tools – Configure production tools and integrations.
- Knowledge – Configure and manage knowledge sources.
- Evaluations – Run additional evaluations to validate project quality.
- Optimize with Arch AI – Improve your project using recommendations based on evaluation results.
- Deployment – Deploy your project to the target environment.