Accessing GALE
By signing up and creating an account, you can efficiently manage GALE's modules and collaborate with your team on projects in one place.
Supported Browsers
Use the latest version of Google Chrome, Microsoft Edge, Safari, or Firefox. Internet Explorer mode in Microsoft Edge is not supported.
GALE Account Creation Using SSO
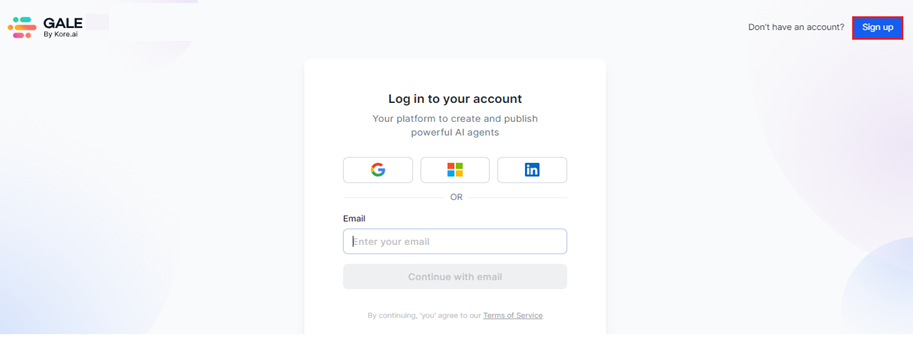
You can sign up for GALE at https://gale.kore.ai/.
When you sign up for GALE using Single Sign-On (SSO) options such as Google or Office 365, the platform utilizes your email address to create an account. Here's how the process works based on the domain of your email address:
Email Address with Kore.com Domain
- If your email address ends with "@kore.com" (e.g., john@kore.com), you are automatically granted access to GALE.
- You can directly create an account with your Kore.com email without any additional steps.
Email Address with a Different Domain
- If your email address has a different domain (e.g., john@doe.com), you cannot directly create an account.
- The Kore team needs to invite you to join GALE.
- Once invited, you can then proceed to create an account using your email address.
This ensures that only users with a Kore.com email can self-register, while others need authorization from the Kore team to gain access.
Accounts
While you sign up for GALE, you must do the following:
Create an Account
- Use your email address to register.
- Set a password for your new account.
Name Your Account
- After creating the account, provide a name that will be displayed on your user interface (UI). Learn more.
Master Admin Role
When you create the first user account on GALE, you automatically become the Master Admin or Owner. Learn more.
This role provides access to default permissions and administrative capabilities:
- Invite Team Members: Invite others to join your account via the Settings page to collaborate on agents, models, experiments, and other modules.
- Administrative Tasks: Manage account users, including adding, deleting, and modifying user profiles, and assigning roles and permissions. Learn more.
Joining and Switching Accounts
- Invitations: You can be invited to join other accounts by their respective owners.
- Switching Accounts: If you are part of multiple accounts, you can switch between them to work on various projects.
On the Settings page, you must enable the invite users permission to allow a user in your account to invite other users to their account.
Enable Invite Users
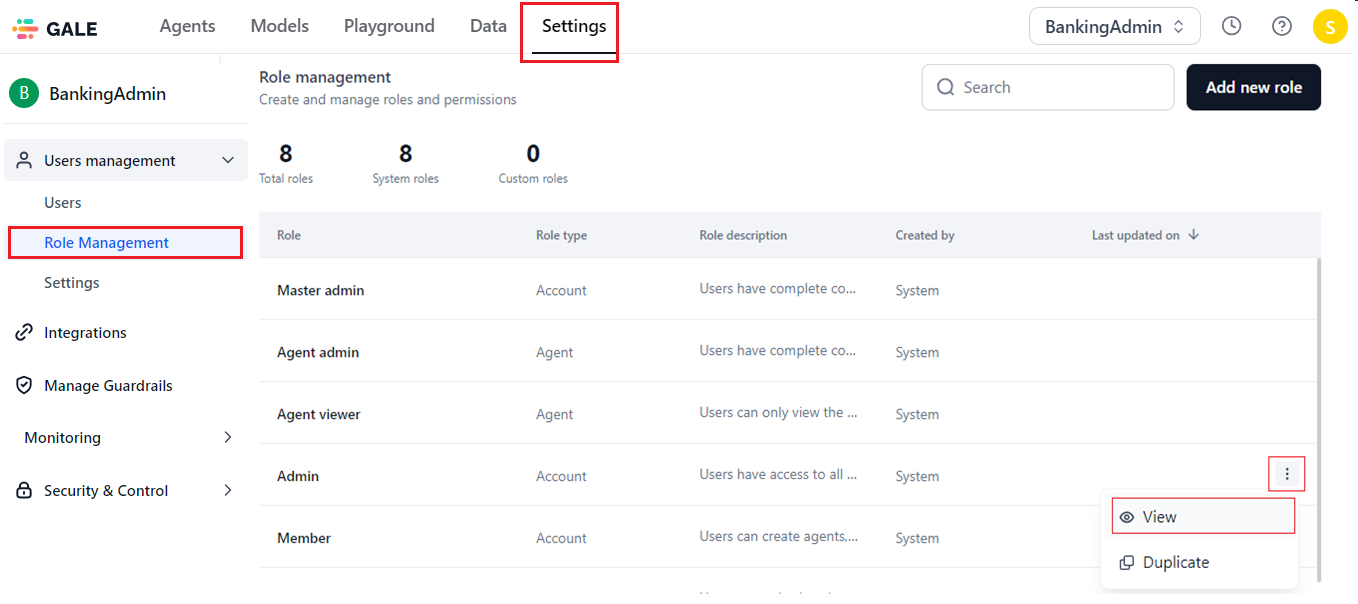
You can assign a system or custom role to a user in your account. This user can invite others only if the assigned role supports the invite user's permission. You can check this permission with the steps below:
- Navigate to Settings > Users Management > Role Management.
-
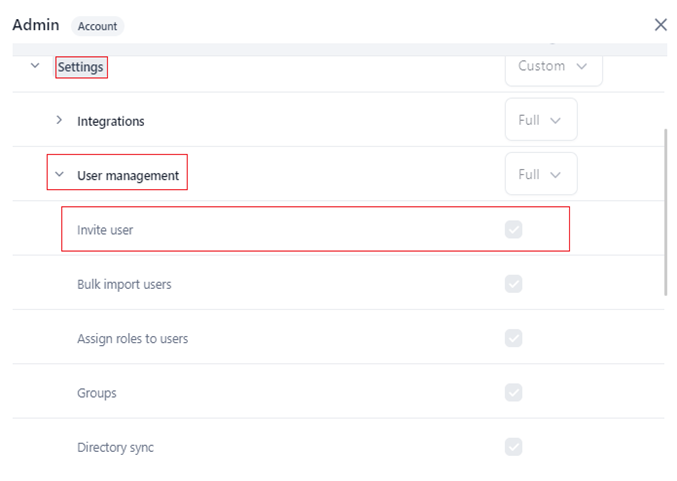
In the resulting window, go to Settings > User Management and select Invite User.
Note
For a custom role, you can enable Invite User. For a system role, editing this permission is not allowed.
Account Owner Privileges
An account owner or master admin can perform the following functions:
- Access the Settings page. Learn more.
- Add users via email invite or file import to their account.
- Delete users from their account (possible only when the user has deleted all the agents they’ve created).
- Manage data for user profiles, sessions/devices, agents, and models in their accounts.
- View system role details.
- Create, delete, and update custom roles.
- Assign or change roles (system/custom) for one or more users.
- Enable/disable Account or Agent permissions and set access levels for custom roles.
- Configure Active Directory synchronization of user data from another organization. Set up periodic and automatic refresh, and view sync history to track updates.
- Configure the ability to view and edit user profile fields.
- Set up which users will receive email notifications when they are added to the admin’s account.
- Manage guardrail scanners and configured integrations for the account.
New Account Sign Up and Activation
If you do not have an account on GALE, visit this home page link to sign up and follow the steps mentioned here.
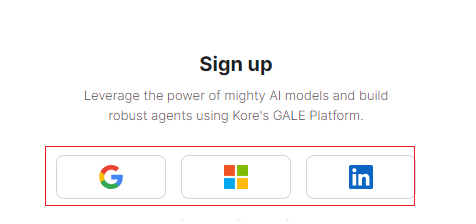
You can sign up on GALE in one of the following ways:
- Create a new account: GALE allows signing up using a valid email address. You can sign up to create a personal account or even set up your enterprise account in Kore AIi. After you sign up for the account, you automatically become the account’s admin, which allows you to invite other users to the account.
- Join an existing enterprise account: If your enterprise is already on Kore.ai, you can join the account in one of the following ways:
- Your enterprise account’s Admin sends you an invite. If you haven’t already received the invitation email, reach out to them for access.
- You can sign up using your enterprise email account. You will then be prompted to either join the enterprise network or create a personal account.
Steps to Sign Up and Activate Your GALE Account
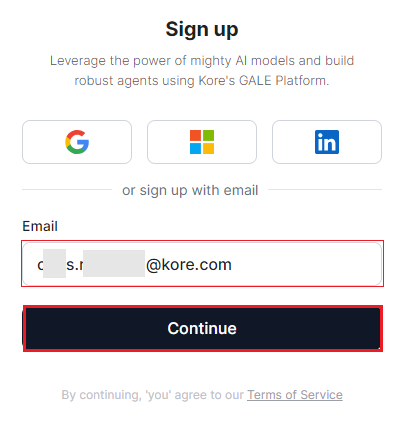
Alternatively, enter your email address and click Continue to sign up via email.
Note
You can sign in by entering the password if the email address is registered.
Important
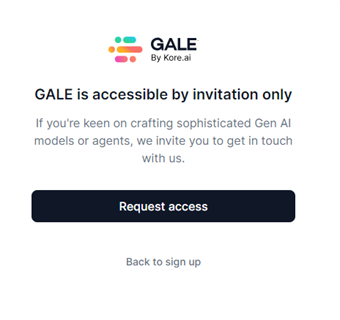
GALE is accessible by invitation only. If your email domain is different from Kore.ai, the system prompts you to request the Kore.ai admin for access.
Once the admin accepts your request via an invitation, you can complete the sign-up process.
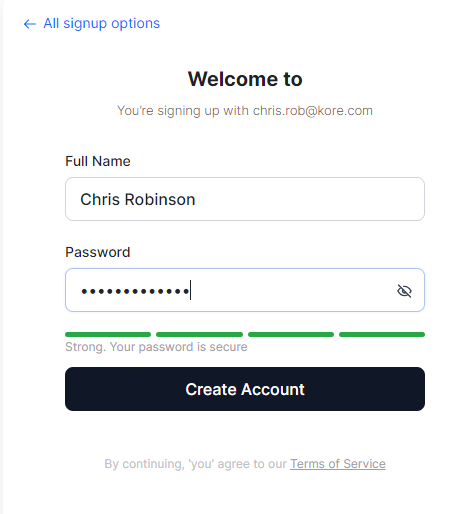
- To sign up via email, enter your Full Name and Password, and click Create Account.
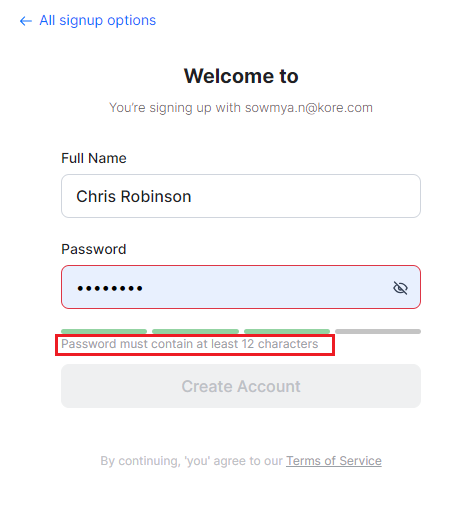
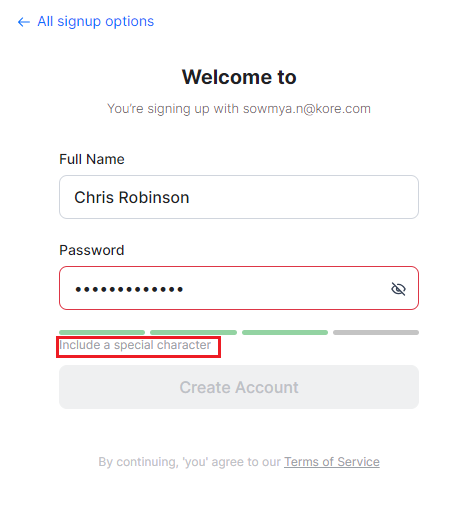
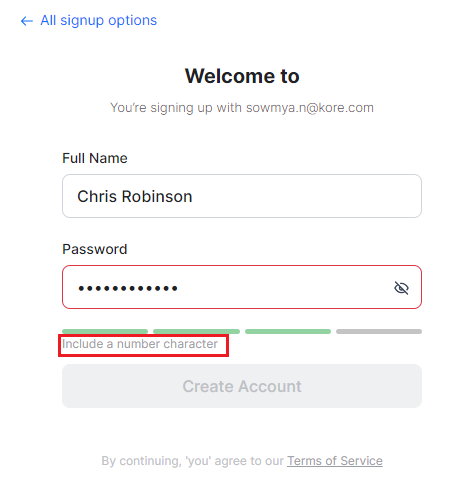
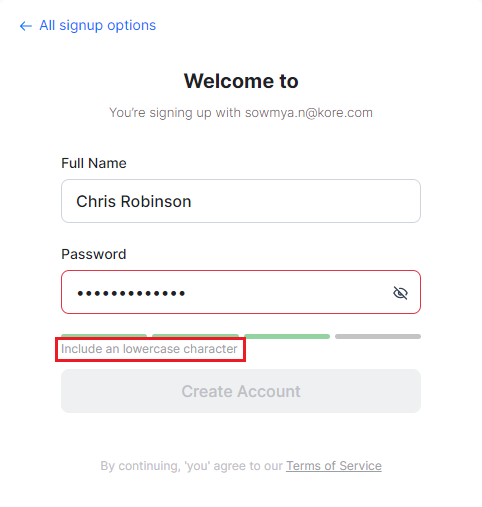
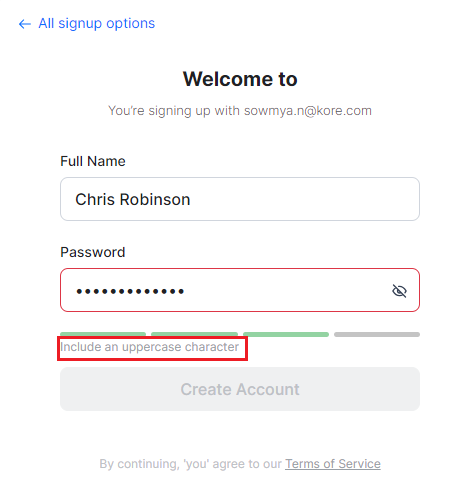
Password Validation
When signing in or resetting your account password, make sure to provide the following:
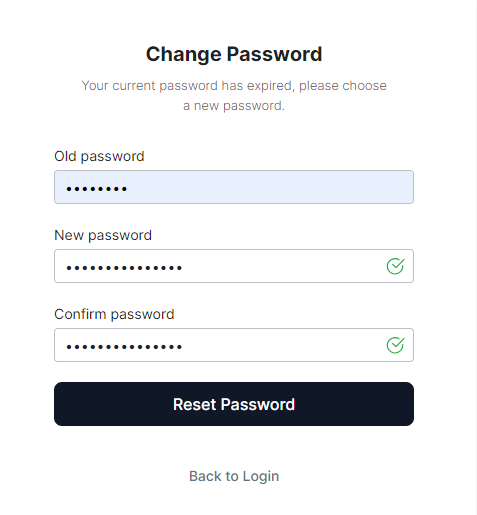
If the password is strong (ideal), the following message is displayed, and the Create Account or Reset Password button is enabled based on the scenario.
Account Activation
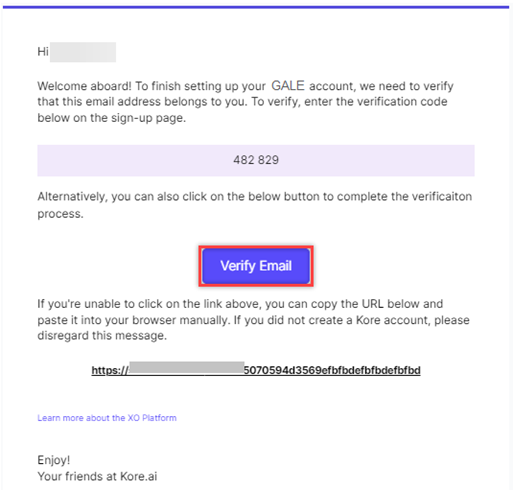
After you initiate the sign-up process, GALE sends an email to the address you provided. This email contains a verification link and a code to activate your account.
Look for the verification email from GALE in your inbox. If you don’t see it, check your spam or junk folder.
Do one of the following to validate your account:
-
Click the Verify Email button or click/copy and paste the verification URL into the browser. Upon verification, your account is created.
-
Enter the 6-digit verification code included in your email on the verification page.
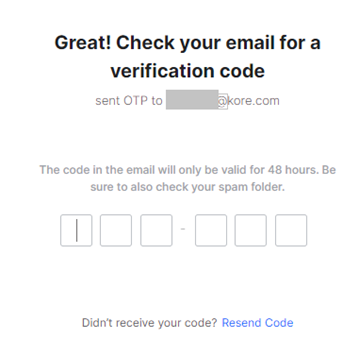
Entering a valid code completes the verification and signs you in automatically.
Expired or Invalid Links and Codes
Expired or invalid links don’t allow you to complete the account verification process as follows:
Expiration and Invalidity
Verification links and codes have an expiration time set at the application level. The system notifies you if you attempt to use an expired or invalid link or code.
Requesting a New Link/Code
If the verification link or code expires or becomes invalid, the system prompts you to request a new one. Follow the instructions to complete the verification process.
Sign in to GALE
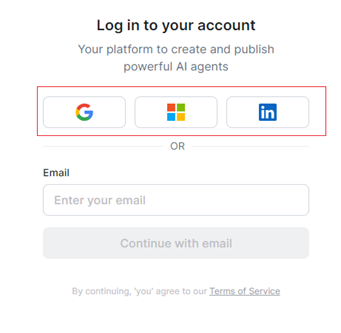
Once you sign up and activate your GALE account, you can sign in for the first time on the login page using one of the following methods:
Note
Please complete the email OTP verification to sign in successfully.-
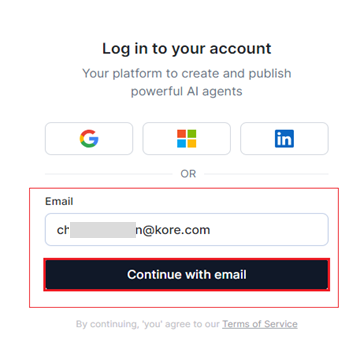
Click your Google, MS Office 365, or LinkedIn profile (account), and provide your credentials registered on the service for Single Sign-on (SSO) and authentication.
-
Enter your registered email ID and click Continue with Email.
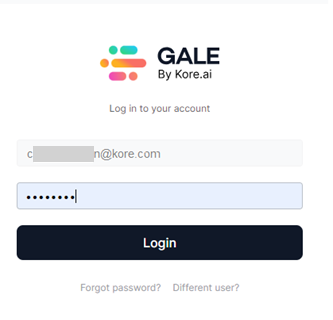
Then, enter your password and click Login.
Important
Once you create an account, you will receive 75 model credits and 10,000 agent runs by default to start using GALE's features.
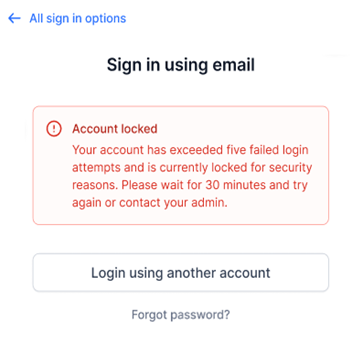
Failed Login and Account Locking
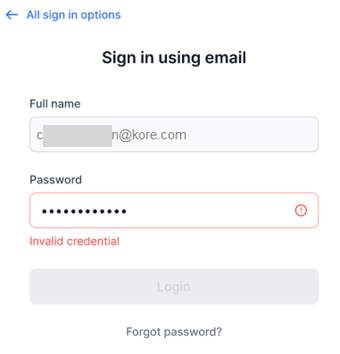
If you enter the wrong password when using email sign-in, the system displays an Invalid Credential message, preventing you from signing in to your account (of which you are the admin).
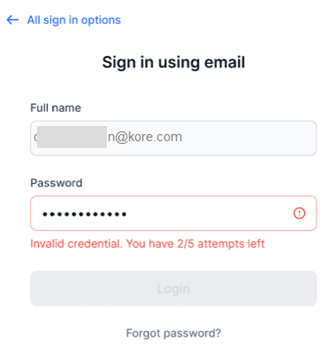
You are allowed up to 5 attempts to retry the correct password and log in.
Exceeding the fifth failed login attempt locks your account for 30 minutes, after which the account is unlocked automatically, and you can retry signing in.
An alternative way is to request the master admin to unlock your account.
When your account is locked, the status for you shows as "Locked" to all the admins who have added you to their account. This status update ensures that admins are aware of your restricted access and can unlock your account.
If you are the admin and want to unlock a user linked to your account, follow the instructions given here.
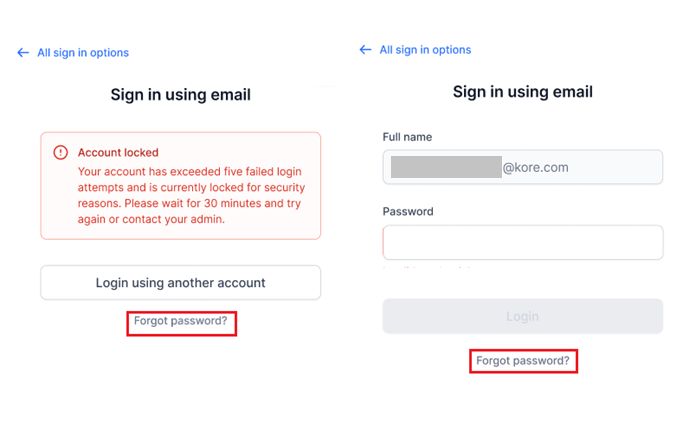
When your account is locked, you can attempt to log in using an alternative method by clicking Login using another account. This action redirects you to a page where you can sign in via your default SSO service, such as Google, Windows, or LinkedIn.
Reset Password
You can reset your password in the following scenarios:
- If you do not remember the correct password to log in to GALE.
- You want to change the password at regular intervals due to security reasons.
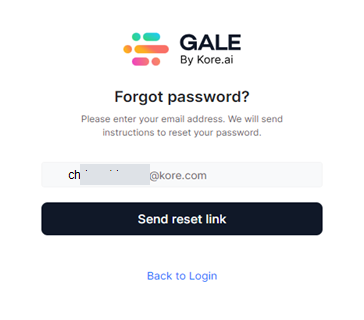
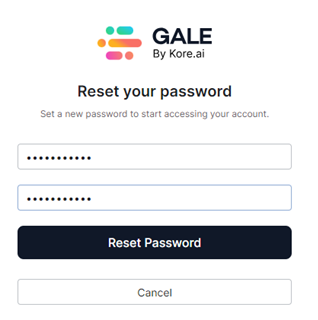
To reset, follow the steps below:
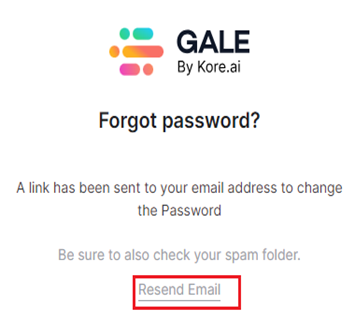
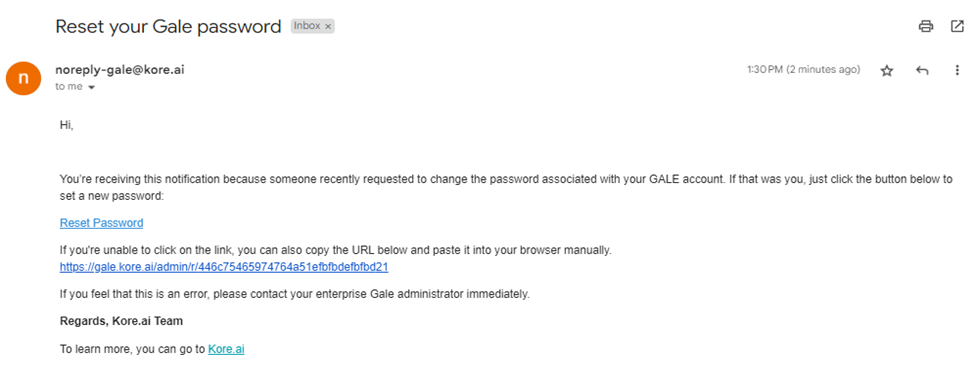
You will receive instructions via email on how to reset your password. Check your Spam folder to see if the email does not appear in your inbox. Click Resend email if you have not received it.
- Click the Reset Password link in the email, or copy and paste the URL into your browser.
- Enter the new password in the New Password and Confirm Password fields.
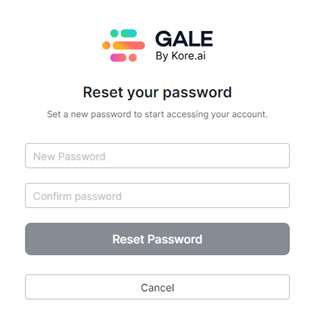
Please refer to the validation instructions here when resetting the password.
Note
If both the entries do not match, you cannot proceed.The password is reset successfully. On the Sign In page, enter the new password for your email account.
Change Expired Password
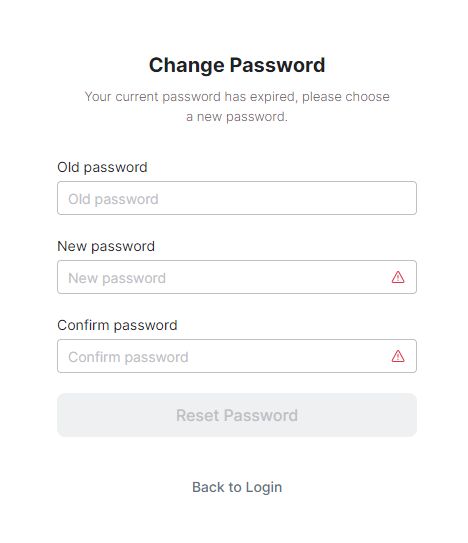
When your password expires after 90 days, the system redirects to the following page where you can change the expired password.
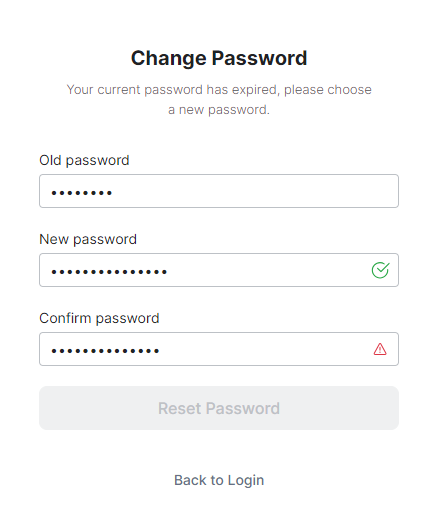
To change the password, enter the expired password in the Old Password textbox and follow Steps 4 and 5 in the previous section. Please ensure the password values in the New password and Confirm password fields match to enable the Reset Password button.
A mismatch in the New password and Confirm password fields displays an Alert icon against the mismatched field, while disabling the Reset Password button, as shown below:
GALE Landing Page
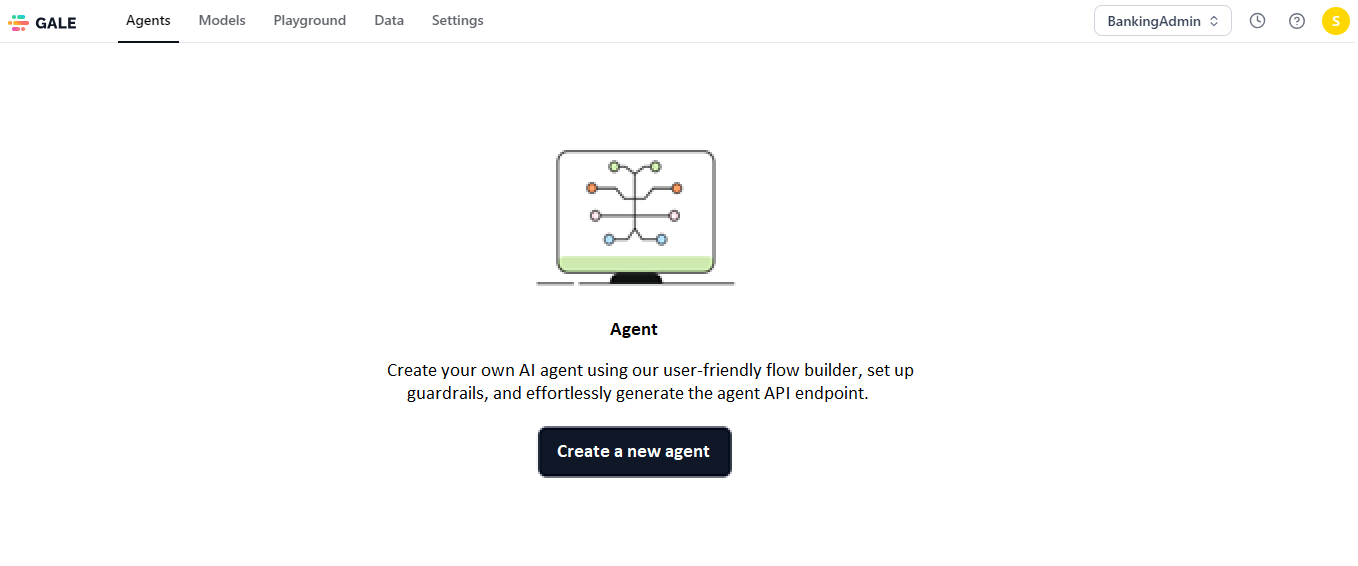
After signing in, you are redirected based on the number of accounts you have joined. If you have one account, the system will redirect you to the Agents section of that account’s UI. If no agents are added to your account, the following page is displayed.
Choose from Multiple Accounts
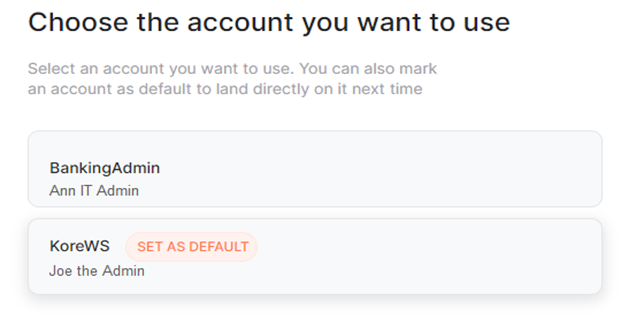
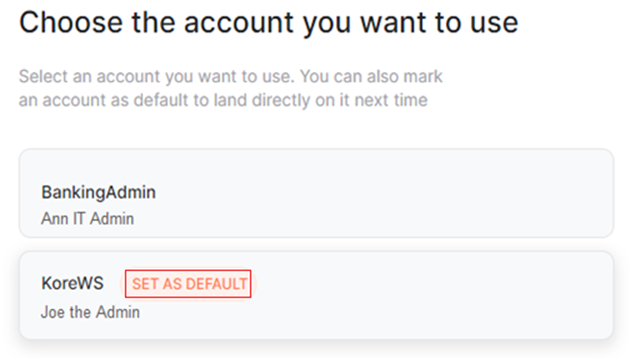
If you are a part of multiple accounts, you must choose the account you want to use in the window shown below:
Click the account you want to access. The system redirects you to the Agents section of the account you select.
Create an Account
Once you sign up on GALE, you must create an account to access and manage GALE’s features and offerings. Learn more about GALE accounts.
Note
- Each email address can only be associated with one GALE account.
- If you do not have sufficient model credits and agent runs in your account, you will have only limited access to modules and features.
Steps to Create an Account
To create an account, follow the steps below:
- Sign in to GALE using SSO or email.
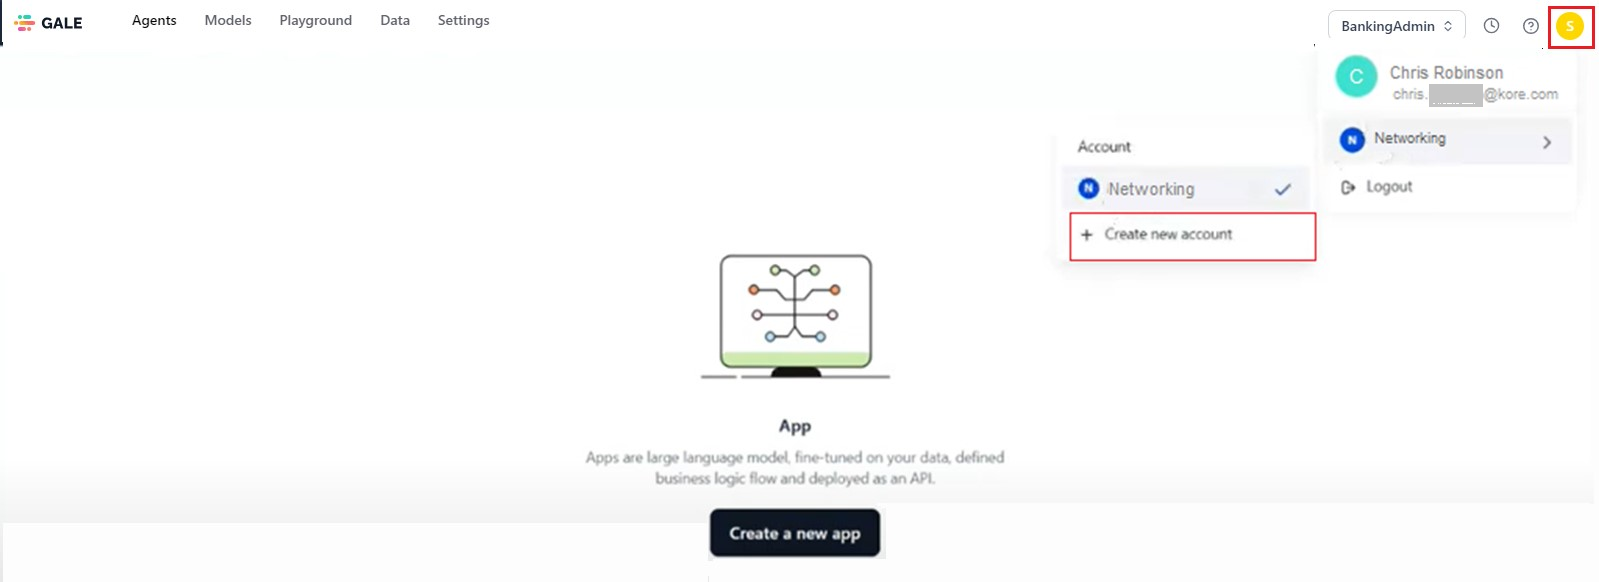
- Click the Account Profile icon on the top right corner.
-
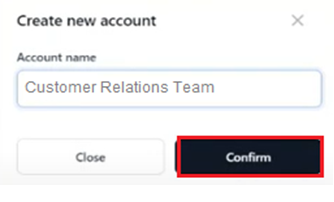
Enter the Account Name in the Create New Account window.
-
Click Confirm.
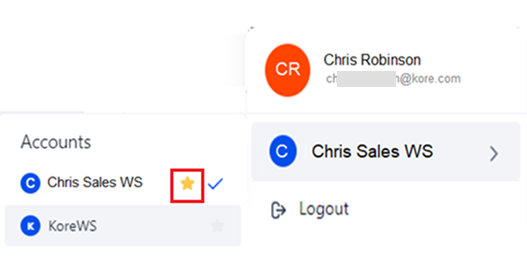
The new account creation is successful. The account you are currently using is identified with a check/tick icon. Click the Star icon to make this account your default.
Invite a User to Your Account
As an account owner, you can invite new users in your organization and collaborate with them. However, you cannot invite users to an account someone else owns.
To invite a user, follow the steps below:
- Click Settings on the top menu.
-
Click Invite.
- Enter the email address of the user you want to invite. To invite multiple users, type the first email address, press the Enter key, and enter the next email address.
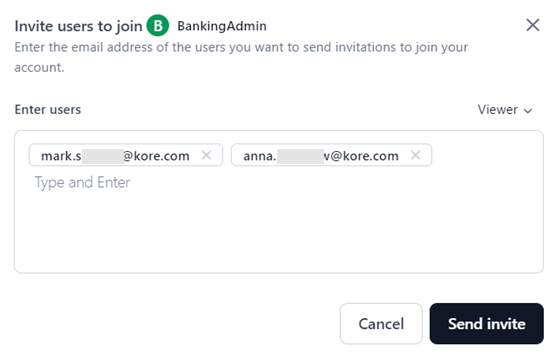
Note
Please note the following when adding an email address:
- The system does not accept a space in front, between, or after the mail ID.
- You cannot add just a word; a domain should be attached to it.
- An empty value is not accepted.
- You must correct every entered email before sending the invite, else the invite button is disabled.
- If there is an error then the email with the issue is highlighted.
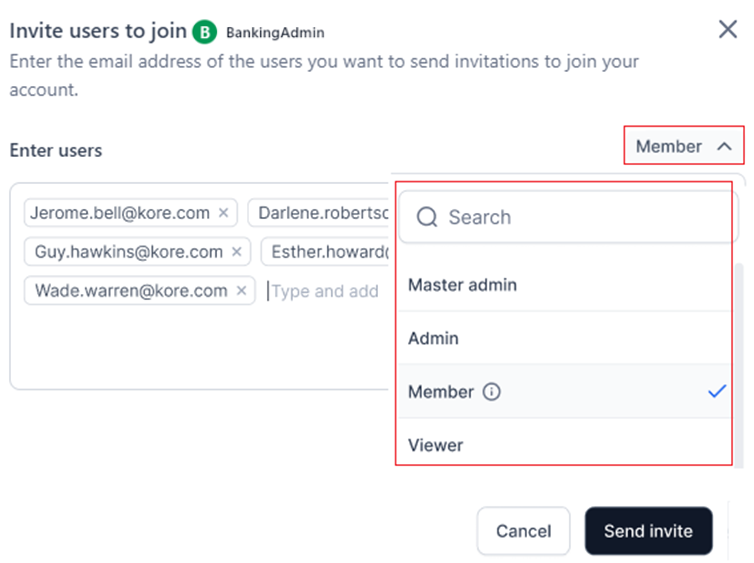
- Select an account-level system role from the dropdown list with the following options:
- Viewer (default): Users can only view the modules across the platform. This is the default selection. You can select another option from the dropdown list before sending the invite or change the role on the dashboard once the user is added.
- Master Admin: Users have complete control over agent and model management, user administration, integrations, security settings, and access to all core features and functionalities across all accounts.
- Admin: Users can access all the account permissions except removing other users, models, billing, and agents.
- Member: Users can create agents, add external models, and modify only S3 integration.
- Click Send invite.
A success message appears to indicate that your invitation has been sent.
Note
- An email invite to join your account is valid for 15 days. You must resend the invite to the user once it expires, as discussed in the next section.
- Until the recipient accepts your invitation to join, the user status is set to Inactive. Once the invitation is accepted, the status changes to Active.
Resend Email Invitation
An email invitation link remains valid for 15 days from the date it is sent. After this period, the link expires, and the user will no longer be able to join your account using it. In this case, you'll need to send a new email invitation with a fresh link.
On the Users dashboard of the Settings Console, an Alert icon appears in the Status column for the recipient, if their invitation link has expired. Hovering over the icon displays the message "Invitation link has expired."
To resend the invitation, click the Resend invite button.
This action automatically sends an invitation email with a new link to the user, causing the Alert icon and the Resend invite button to disappear for the user. The status remains set as Inactive until the user joins the account when it changes to Active.
A success message appears to indicate that your invitation has been sent.
The recipient receives the following invitation email.
Once the end user clicks the Open Invite button, the system redirects to the sign-in page. After signing in, the user can access your account, in addition to their account.
Make an Account your Default
When you make an account default, the system automatically redirects you to its UI where you can access the modules you work on regularly. To make an account default, follow the steps below based on the relevant scenario:
When Signing In for the first time
-
Sign in to GALE.
-
Hover over the required account and click Set as Default on the following page:
After Signing In to Your Account
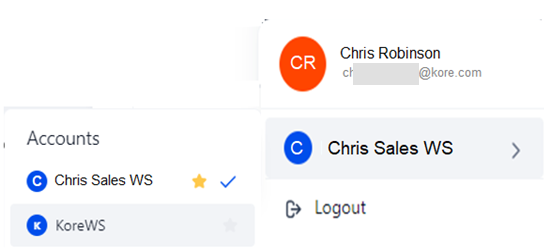
- Click the Account icon on the top right corner of the UI.
- Click the > icon to the right of your account name.
- Click the Star icon for the required account from the Accounts list.
Switch Account
When you are mapped to multiple accounts, you can switch to the required one after signing in. To switch between the accounts, follow the steps below:
- Click the Account icon on the top right corner of the UI.
- Click the > icon to the right of your account name.
- Select the account you want from the Accounts list.
Related Information
- Settings Console- Learn more about using the GALE admin features.
- Users- Manage users seamlessly in your account.
- Roles- Manage system and custom roles and permissions in your account.
- Billing- Manage resource consumption in your account, set limits and view usage trends.
- Single Sign On- Enable Single Sign-On (SSO) for fast and secure account access through your configured Identity Provider (IDP), while excluding designated users.
