Configure an Agent
You can modify your agent's general details, such as its name and description, asynchronous configuration, and environment variables. You can also undeploy, and delete the agent if it's not in use.
Sync/Async Mode Setup
You can set the sync/async mode configuration for the agent endpoint. If you change the mode, you must redeploy the agent. The key difference is that synchronous mode blocks the client until the response is received, while asynchronous mode allows the client to continue working while the integration processes the request.
Steps to enable and configure the asynchronous mode:
-
On the Agents tab, click the the Agents for which you want to modify the configuration. The Agent Flow page is displayed.
-
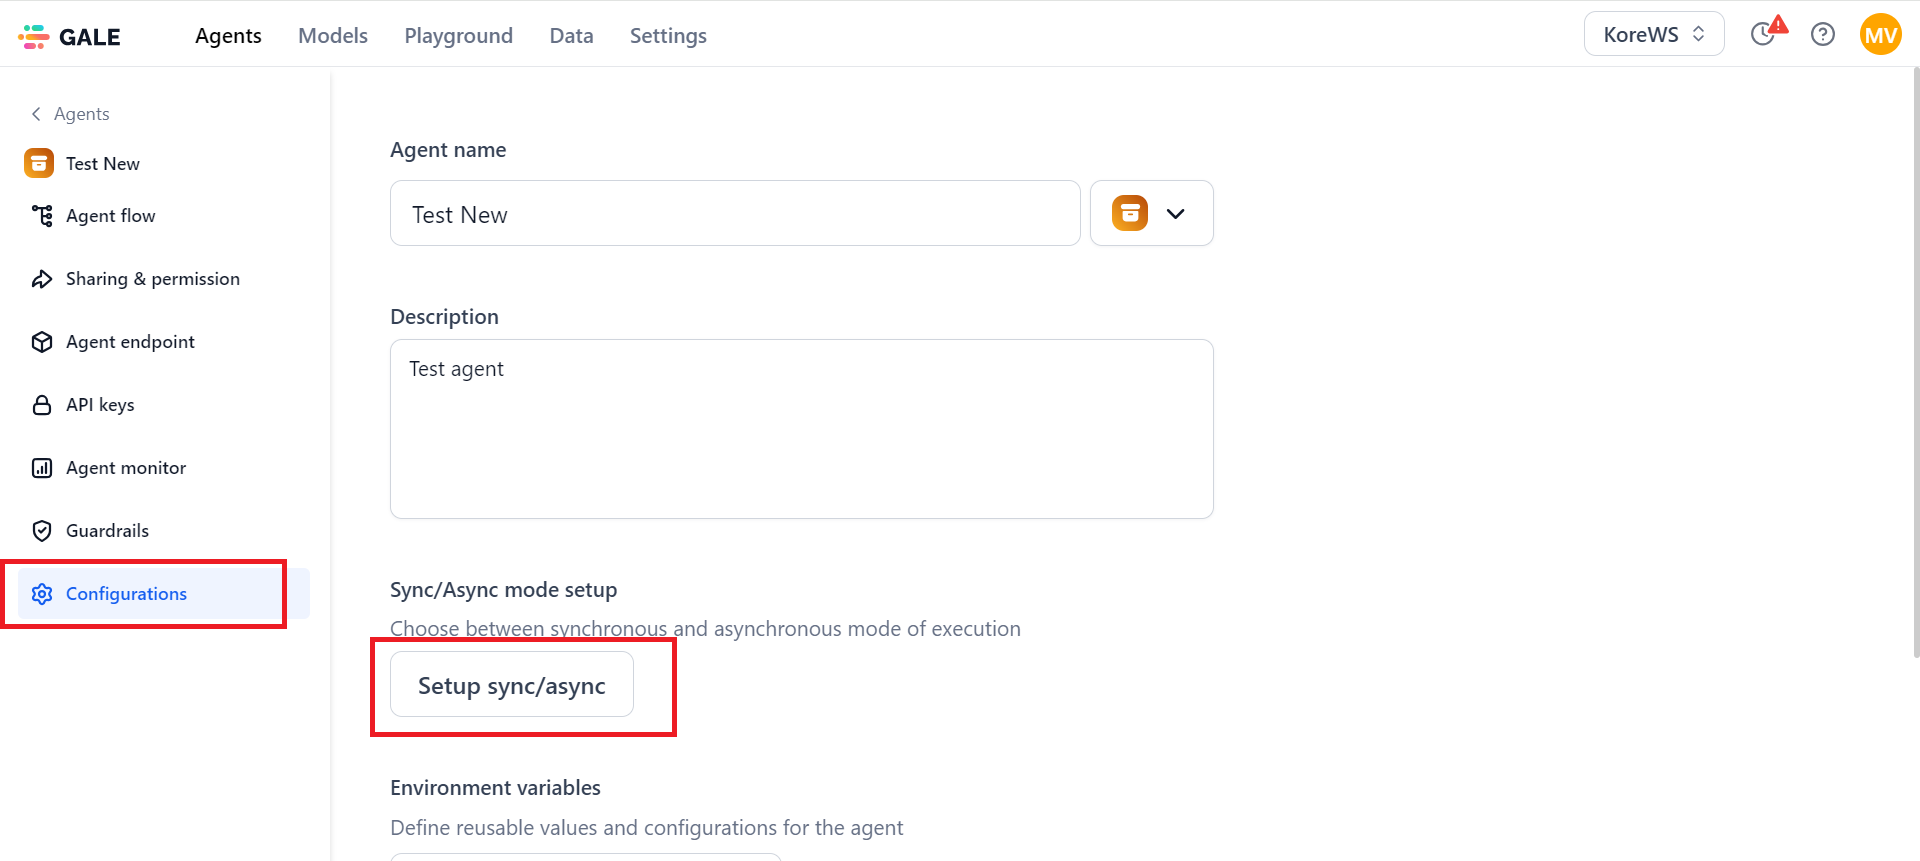
Click Configurations in the left navigation and then click Setup sync/async.
-
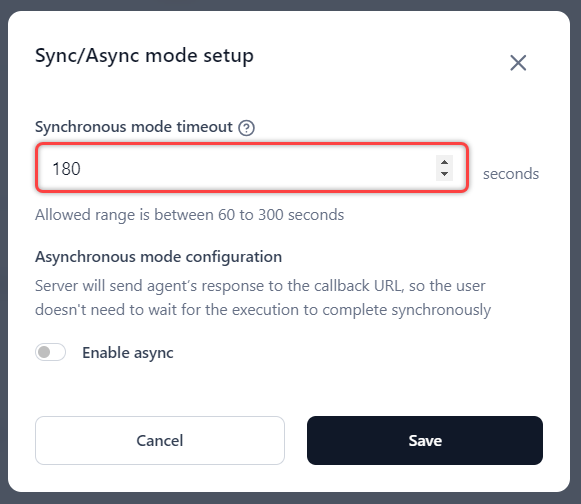
The Sync/Async mode setup pop-up displays with async mode disabled by default.
-
Synchronous mode timeout: The allowed range is 60 to 300 seconds (5 minutes). The default is 180 Seconds (3 minutes). The endpoint will trigger a timeout error if the request is not completed within the selected time frame.
-
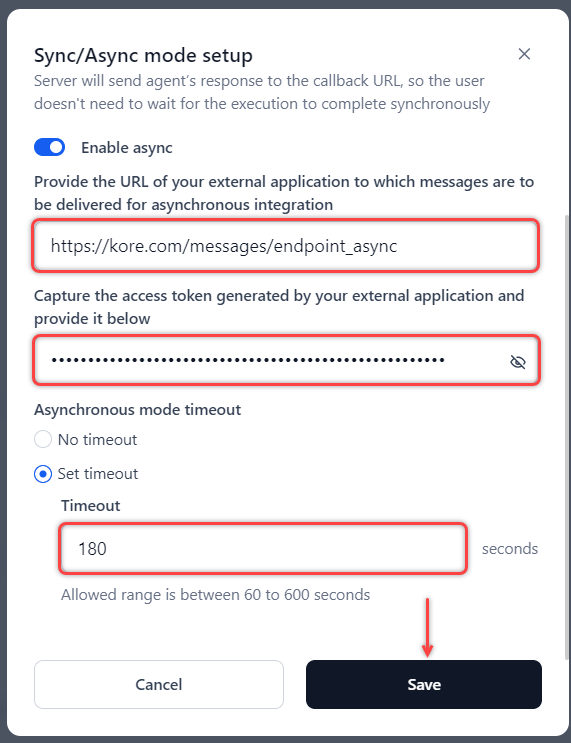
Asynchronous mode configuration: Turn on the Enable async toggle and do the following:
- Provide the URL of your external application to which messages are to be delivered.
- Enter the access token generated by the external application.
- Set the Asynchronous mode timeout duration:
- Click Save.
Note
Timeout precedence: Agent timeout > Node timeout > Model timeout.
-
-
If you have changed the mode, you must redeploy the agent: Go to Agent endpoint in the left navigation and click the Deploy button on the top-right corner of the page.
Manage Environment Variables
You can define reusable values and configurations for the agent using Environment variables. Those values can be used by different nodes in the agent flow.
Add an Environment Variable
Steps to add an environment variable:
-
On the Agents tab, click the the Agents for which you want to modify the details. The Agent Flow page is displayed.
-
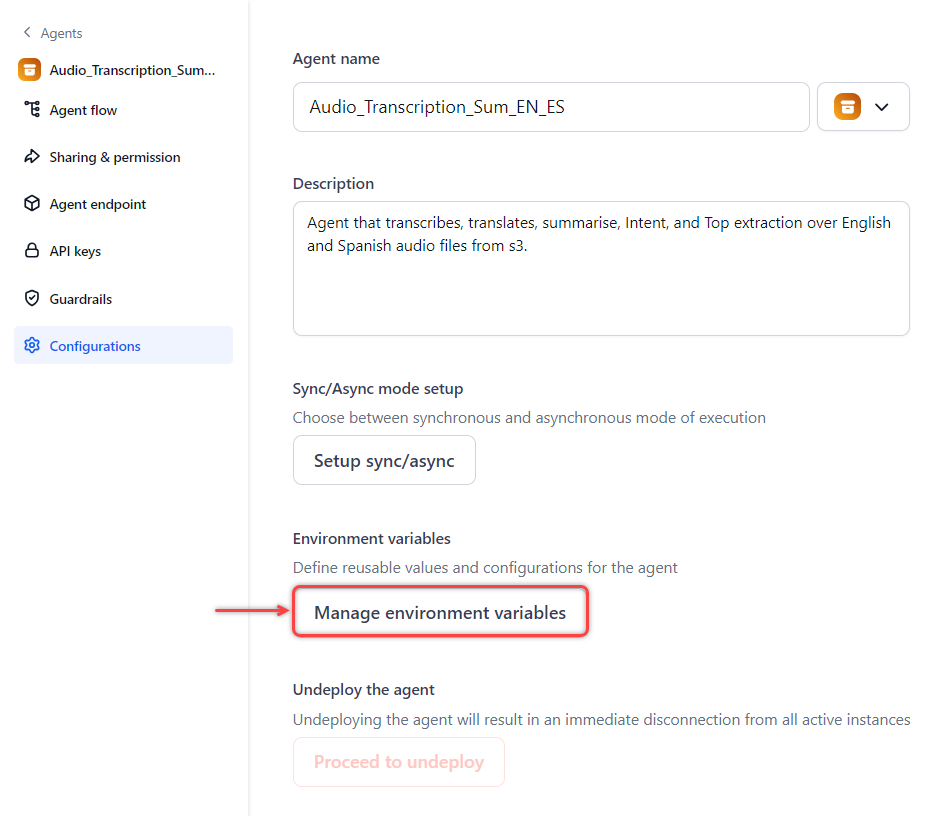
Click Configurations in the left navigation and then click Manage environment variables.
-
The Create environment variable dialog box is displayed. Click Add or Add variable.
-
Specify the following information on the Add variable dialog box:
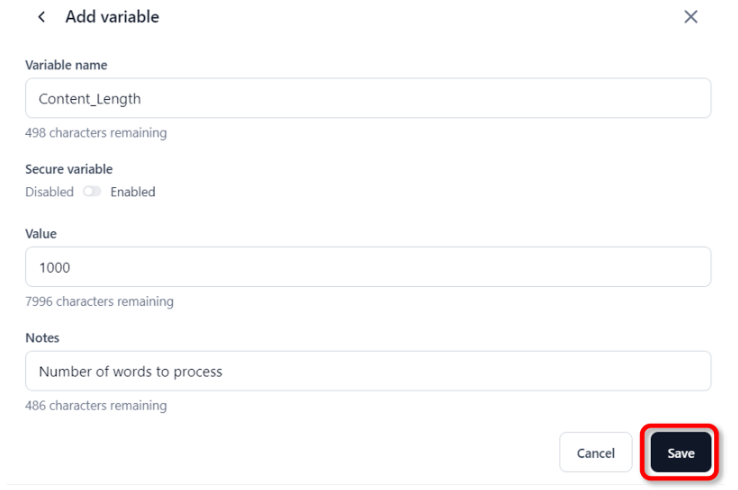
- Variable name: Provide a descriptive name for the variable.
- Secure variable: Use the toggle to enable security for the variable. (If you are enabling the security, read the onscreen information carefully to understand the impact.)
- Value: Enter the desired value for the variable.
- Notes (optional): Enter any notes about how the variable should be used or its purpose.
-
Click Save. The created variable is listed on the Create environment variable dialog box.
Edit or Delete an Environment Variable
Steps to edit or delete a variable:
-
Click the three dots icon corresponding to the Name of the variable to edit the details of the variable or Delete to delete a variable.
Undeploy the Agent
You can undeploy the agent if it's no longer in use. Undeploying the agent will result in an immediate disconnection from all active instances. Click Proceed to undeploy on the Configurations page and follow the on-screen instructions.
Delete the Agent
You can delete an undeployed agent. Deleting the agent will remove all the associated data. Click Proceed to delete on the Configurations page and follow the on-screen instructions.
