The Platform offers pre-built integrations with popular business applications to exchange data. Configure and enable actions for ServiceNow, Salesforce, Zendesk, HubSpot, and others. Each integration provides a full conversation flow definition, a low-code API interface, pre-built response mapping, and dialog task templates.
The Actions module is available under App Settings > Integrations > Actions.
How to Use Actions
- Authorize a developer or user with single-click authorization.
- Enable an integration to exchange data between systems during dialog task execution.
- Create dialog tasks using preconfigured templates supported by the integration.
Actions Enablement
By default, your AI Agent doesn’t exchange data with any integration until you authorize one or more actions. Once enabled, actions allow the agent to perform operations in third-party systems.
Authorization Types
The platform supports OAuth 2.0, Basic Auth, and API Key authentication.
| Type | Description |
|---|
| OAuth v2 | Secure authorization for web, mobile, and desktop apps. See Setting Up Authorization using OAuth v2. |
| Basic HTTP Auth | Username and password style authentication via a base64-encoded Authorization header. See App Authorization Overview. |
| API Key | Token generated or provided by a web service to identify and authenticate the incoming request. See Setting Up Authorization using an API Key. |
An email notification is sent to all app developers when an authorization token expires for any pre-built action integration. The integration moves to an error state on expiry, and service calls fail at runtime with the message “Something went wrong” displayed to the end user.
Available Actions
Go to App Settings > Integrations > Actions and click an action to open its configuration panel.
| Action | Description | Templates | Auth Type | Docs |
|---|
| Asana | Projects, users, and tasks | 5 | Basic Auth | Learn more |
| Azure OpenAI | General query answering | 1 | Basic Auth | Learn more |
| BambooHR | HR software for SMBs | 7 | Basic Auth | Learn more |
| Bitly | URL shortening | 1 | Basic Auth | Learn more |
| Confluence | Create and view pages or blogs | 1 | Basic Auth | Learn more |
| DHL | Locations and shipment tracking | 2 | Basic Auth | Learn more |
| Freshdesk | Create, view, update, search, and delete tickets | 6 | Basic Auth | Learn more |
| Freshservice ITSM | Create, view, update, search, and delete tickets | 6 | Basic Auth | Learn more |
| Google Maps | Locations and places | 2 | Basic Auth | Learn more |
| Here | Location search by text | 1 | Basic Auth | Learn more |
| HubSpot | CRM lead management | 10 | Dev OAuth and OAuth | Learn more |
| JIRA | Create, view, update, and delete issues | 5 | Basic Auth | Learn more |
| Microsoft Graph | Events, to-do lists, and email | 5 | Basic Auth | Learn more |
| OpenAI | Answer generation and skill extraction | 2 | API Key OAuth | Learn more |
| Salesforce CRM | Leads, opportunities, and CRM functions | 7 | Dev OAuth and OAuth | Learn more |
| Shopify | Customers, products, and orders | 6 | Basic OAuth | Learn more |
| ServiceNow | Digital workflow management | 10 | Basic OAuth | Learn more |
| Stripe | Payments and payouts | 5 | Basic OAuth | Learn more |
| Twilio Verify | SMS verification | 3 | Basic OAuth | Learn more |
| Zendesk | Ticket create, view, search, and manage | 5 | Basic OAuth | Learn more |
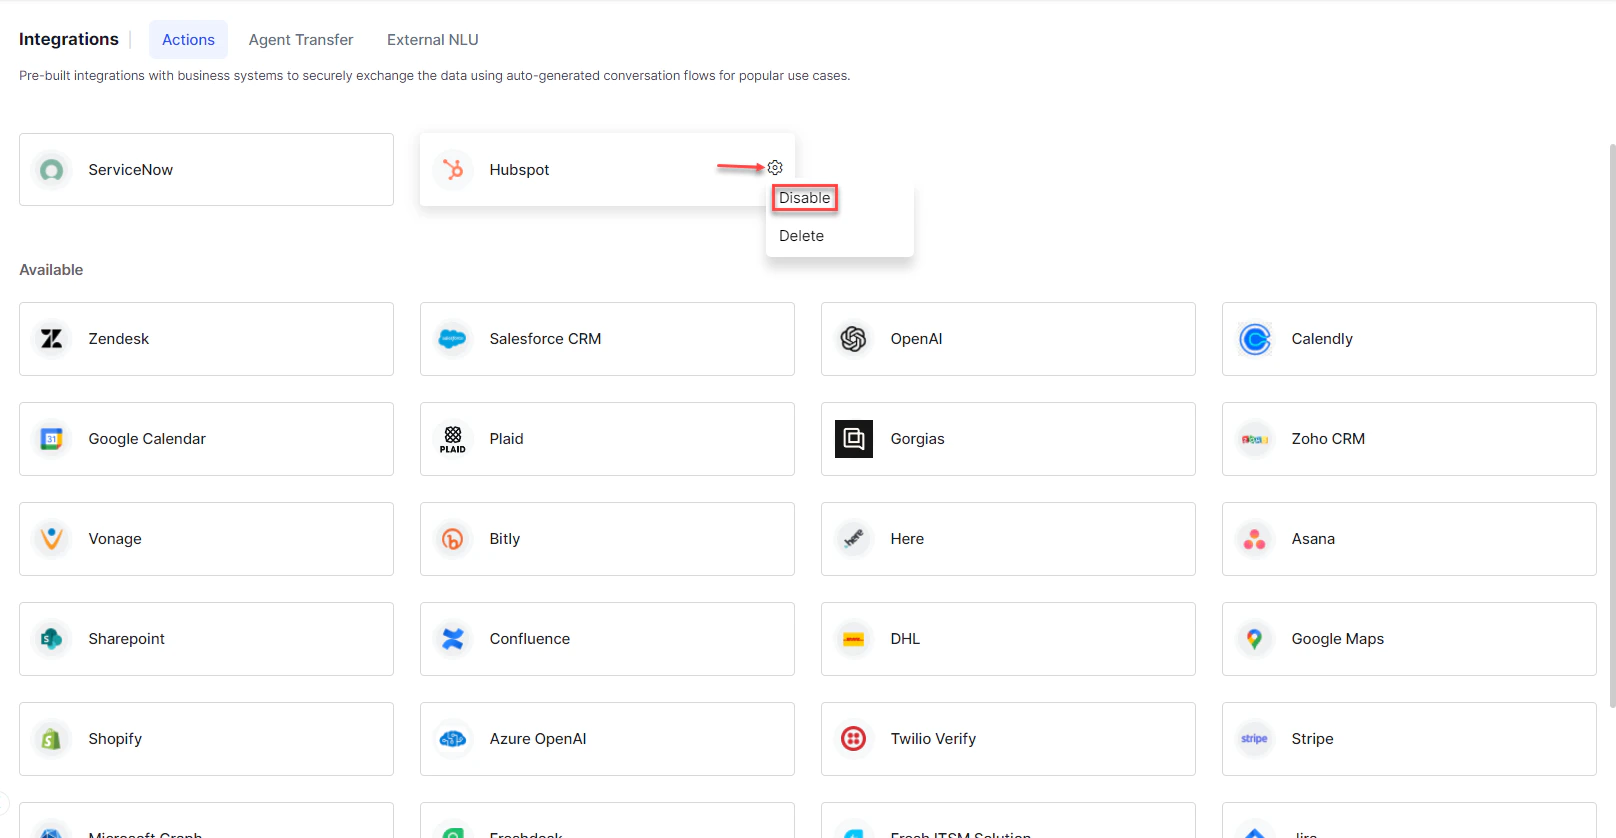
Disabling or Deleting Actions
Disable an Integration
Disabling changes the status from enabled to disabled but retains authorization configurations.
- Go to App Settings > Integrations > Actions.
- Hover over the integration and click the Settings icon.
- Click Disable.
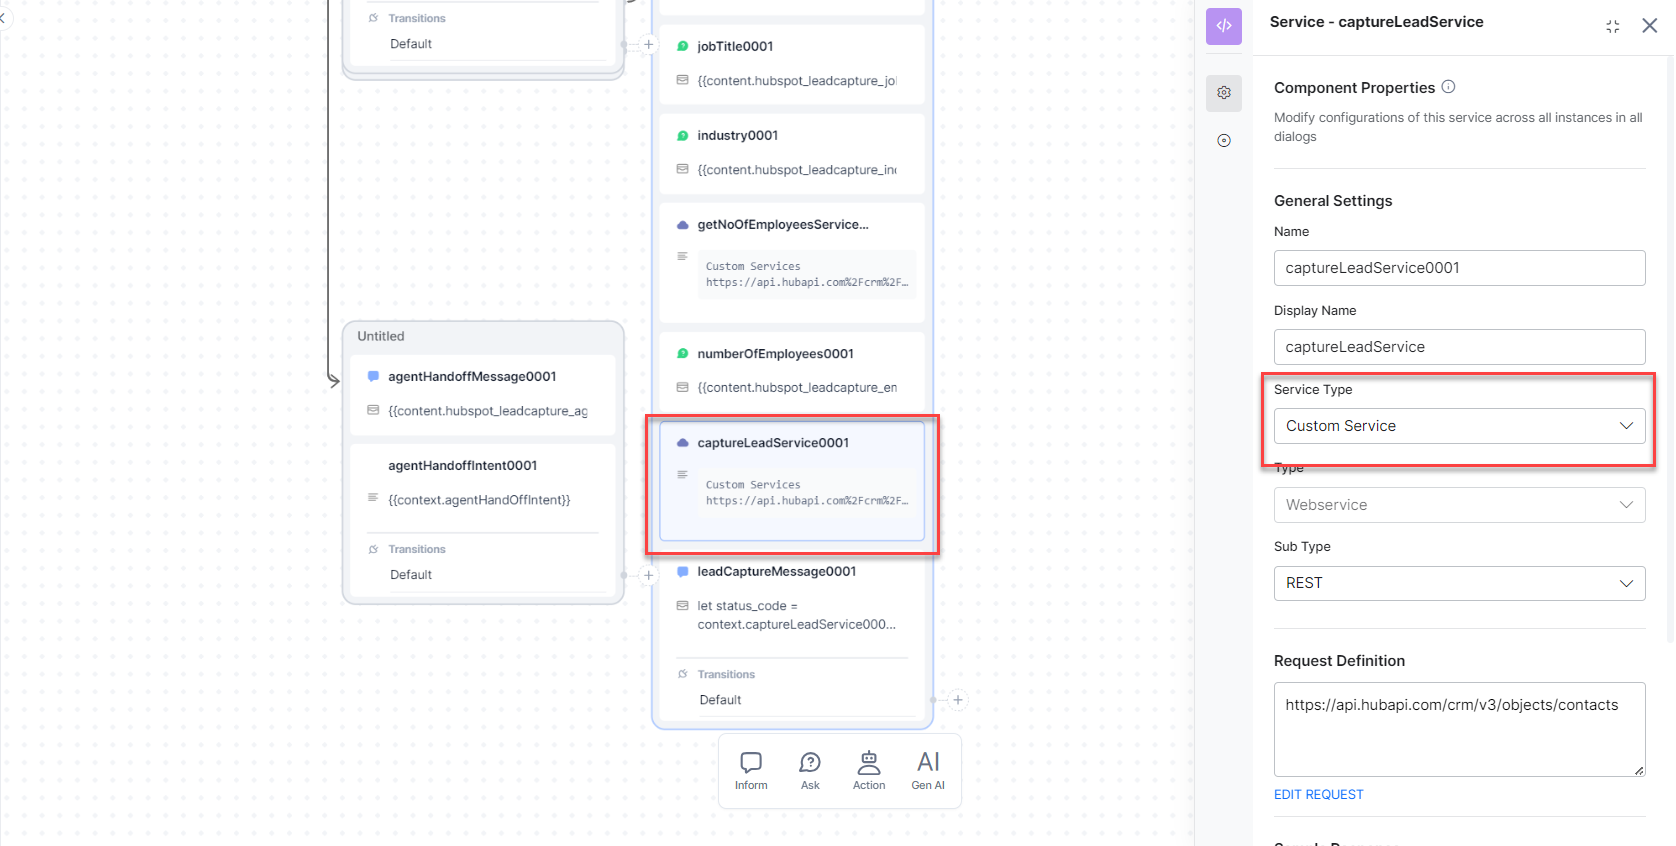
 Once disabled, the service node status changes from Integration Service to Custom Service.
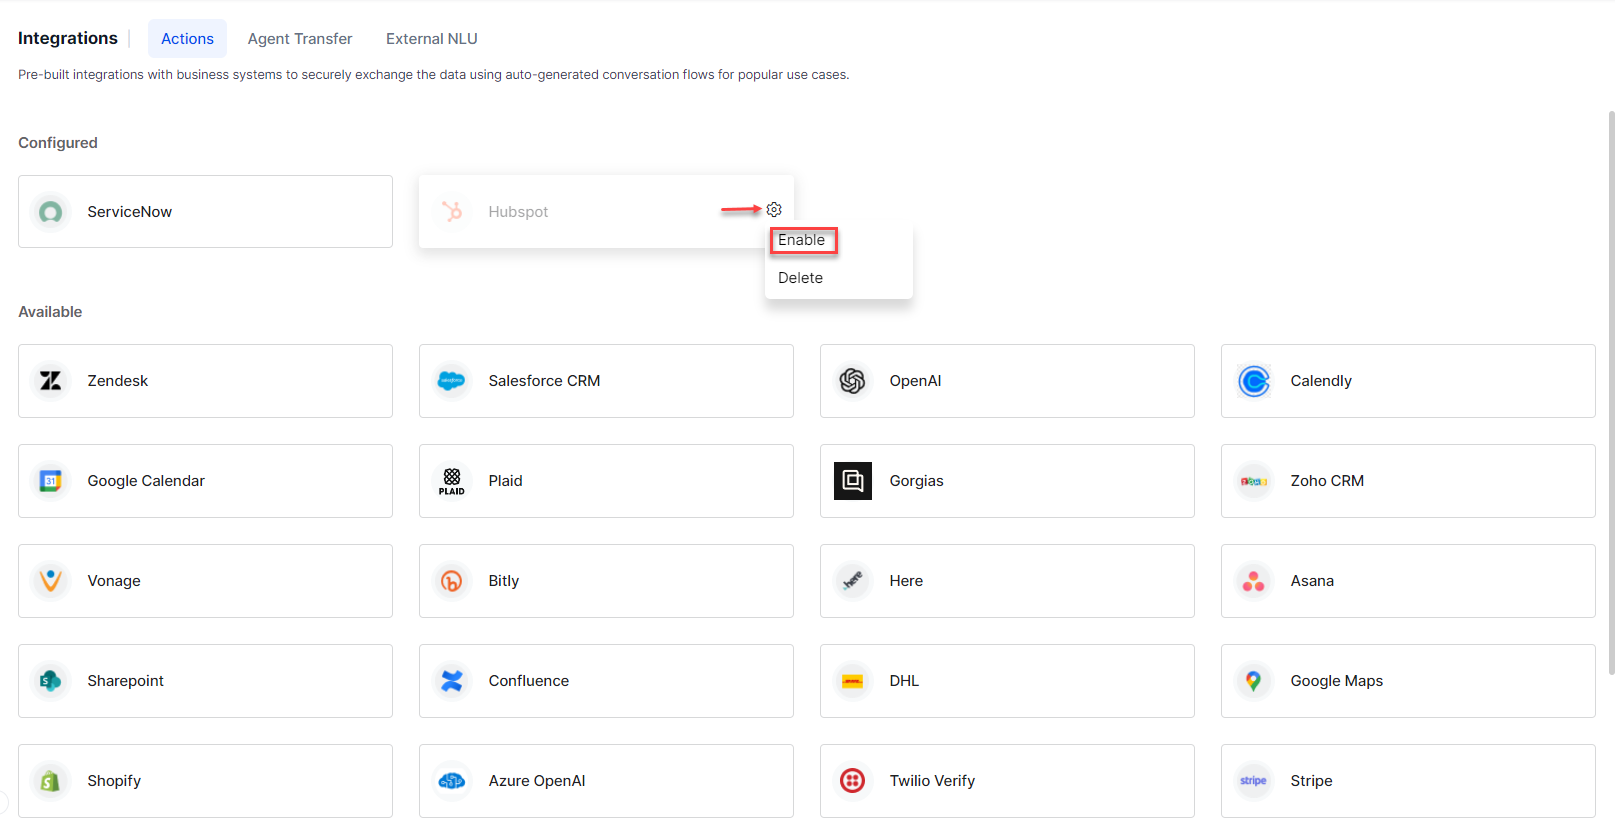
 To re-enable, hover over the action, click Settings, then re-authorize with your external integration credentials.
Delete an Integration
- Go to App Settings > Integrations > Actions.
- Hover over the integration and click the Settings icon.
- Click Delete.
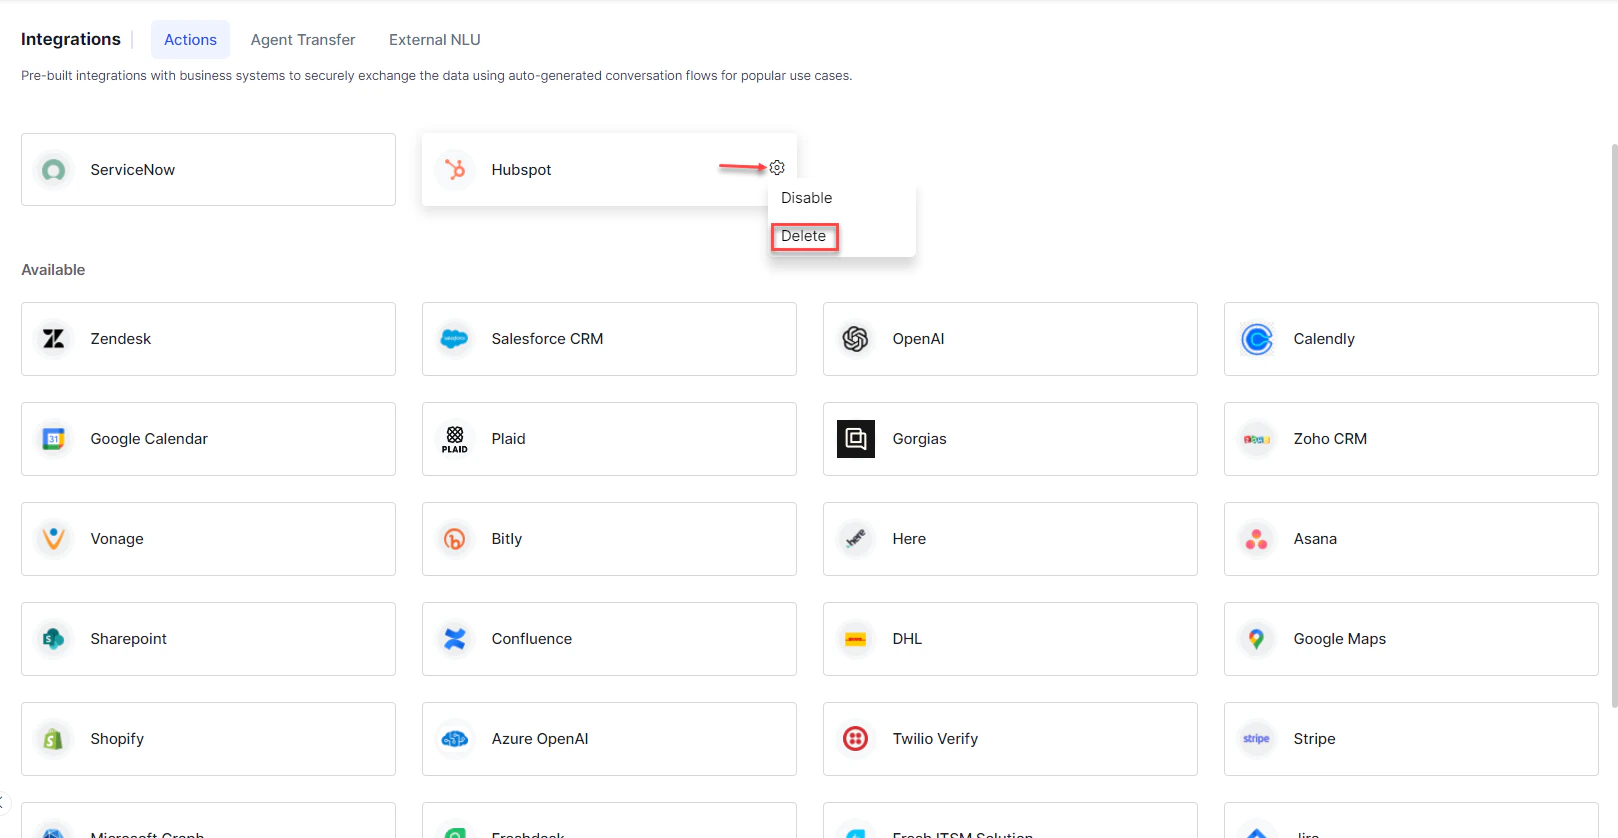
Deletion is permanent and can’t be undone. All authorization configurations for the deleted integration are removed.
Resources

