Shared Responsibilities
NICE CXOne Admin
- ACD Configuration: CXOne customers are responsible for creating and mapping skills within the ACD system to ensure proper routing of interactions.
- Campaign Setup: Customers must set up campaigns, including specifying routing and agent availability, on the CXOne platform.
- Agent Assist Hub Configuration: CXOne customers are responsible for configuring the Agent Assist Hub settings within NICE Studio.
Kore.ai Admin
Provide Studio Script for Voice: Kore.ai will assist in setting up the Studio Script to ensure seamless integration with the CXOne platform.Prerequisites
- NICE CX administrators with access to a NICE CX account, privileges to set up the following configurations, and the ability to receive calls on the agent desktop.
- NICE CX Studio installed on your windows device.
- Agent Assist Hub enabled for your account. Contact your NICE CX representative. Note that this requires an extra license cost.
- Access to Kore Agent AI application and familiarity with creating and configuring a Kore AI Agent.
- Kore.ai App credentials such as Agent AI Widget URL, Bot ID, Client ID, Client Secret, Account ID, and SIP URI.
- Ensure that Voice Interaction Streams are enabled via NICE.
Definitions
| Section | Key | Definition | Reference |
|---|---|---|---|
| NICE CX Integration Hubs > Add Agent Assist App | Agent AI URL | The domain of Agent AI. | - If it is legacy Agent AI, the URL is https://agentassist.kore.ai. - If it is UXO, the URL is https://platform.kore.ai. - If it is on-prem, the URL is the origin where your Agent AI is hosted. |
| NICE CX Studio > Import the Voice Script and Configure Parameters | AgentAssistWidgetURL | URL that points to the Agent AI widget. For example: https://agentassist.kore.ai/koreagentassist-sdk-v3/UI/agentassist-iframe.html | Channels > Chat section of the Agent AI configuration portal. |
| NICE CX Studio > Import the Voice Script and Configure Parameters | BotId | A unique identifier assigned to an AI Agent. | Channels > Chat section of the Agent AI configuration portal. |
| NICE CX Studio > Import the Voice Script and Configure Parameters | ClientId | An identifier provided to a client application. | Channels > Chat section of the Agent AI configuration portal. |
| NICE CX Studio > Import the Voice Script and Configure Parameters | ClientSecret | A secret key or password associated with the ClientId. | Channels > Chat section of the Agent AI configuration portal. |
| NICE CX Integration Hubs > Add Agent Assist Hub | AccountID | A unique identifier assigned to an account. | Channels > Chat section of the Agent AI configuration portal. |
| NICE CX Integration Hubs > Add Agent Assist Hub | Kore Voice Gateway (KVG) | For SaaS in the US region, the value is wss://savg-webserver.kore.ai.For on-prem, refer to the corresponding host. |
| Region | Agent AI URL | UXO URL | WSS URL | DNS |
| US | https://agentassist.kore.ai | https://platform.kore.ai | wss://savg-webserver.kore.ai | @savg-us-prod-sbc-in-nlb-0d9a4c651955ff47.elb.us-east-1.amazonaws.com |
| JP | https://agentassist-jp.kore.ai | https://jp-platform.kore.ai | wss://jp-savg-audiosocket.kore.ai | @savg-jp-prod-int-nlb-3989d946fc1ced3b.elb.ap-northeast-1.amazonaws.com |
Configuration Steps
This section explains the configuration steps needed to integrate Kore Agent AI with NICE MAX Desktop.Step 1: Nice CX Integration Hubs > Add Agent Assist Hub
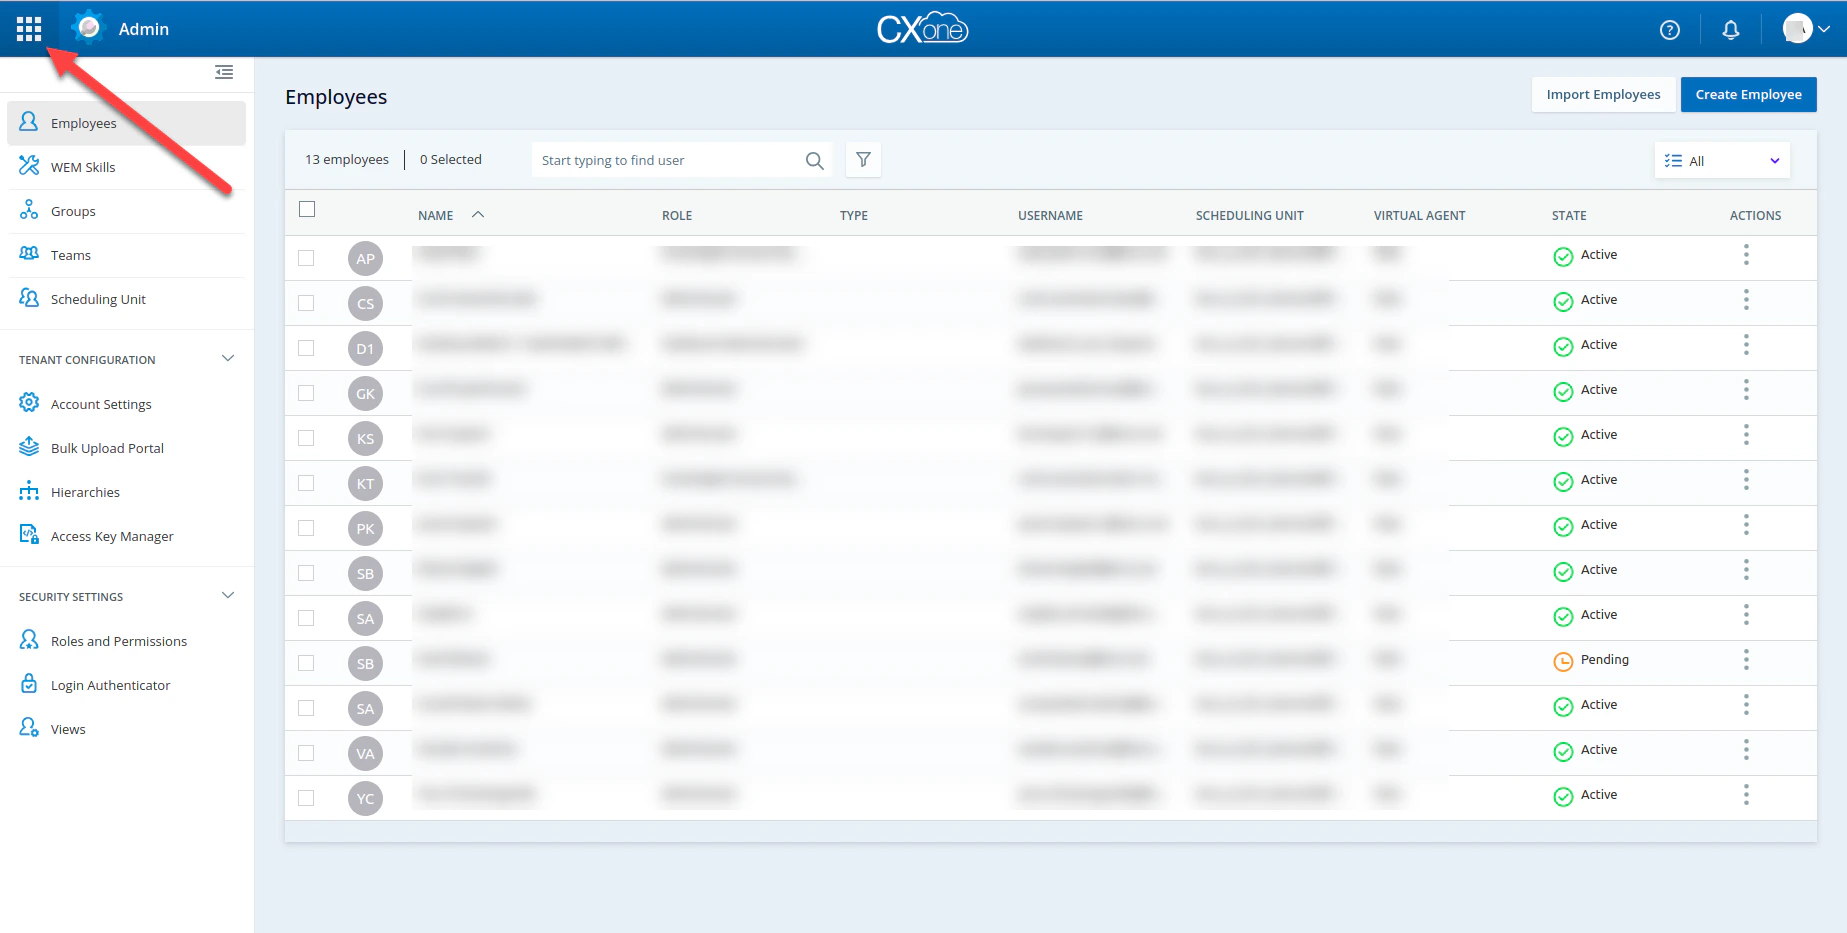
- Sign in to your NICE account with the user name and password provided by the NICE customer support.
-
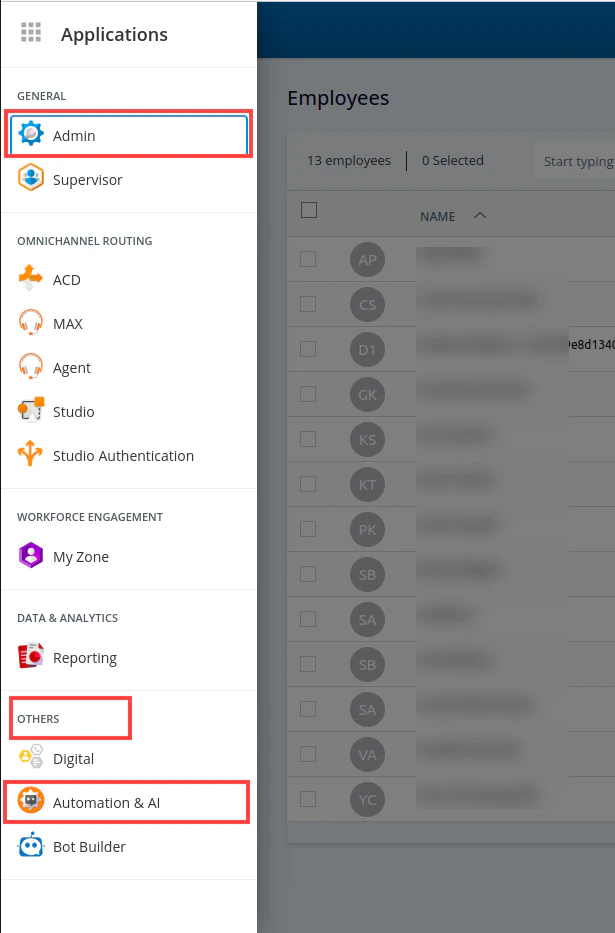
Click the Applications Launcher button.
-
A menu opens from the left side of the page. Click OTHERS > Automation & AI.
-
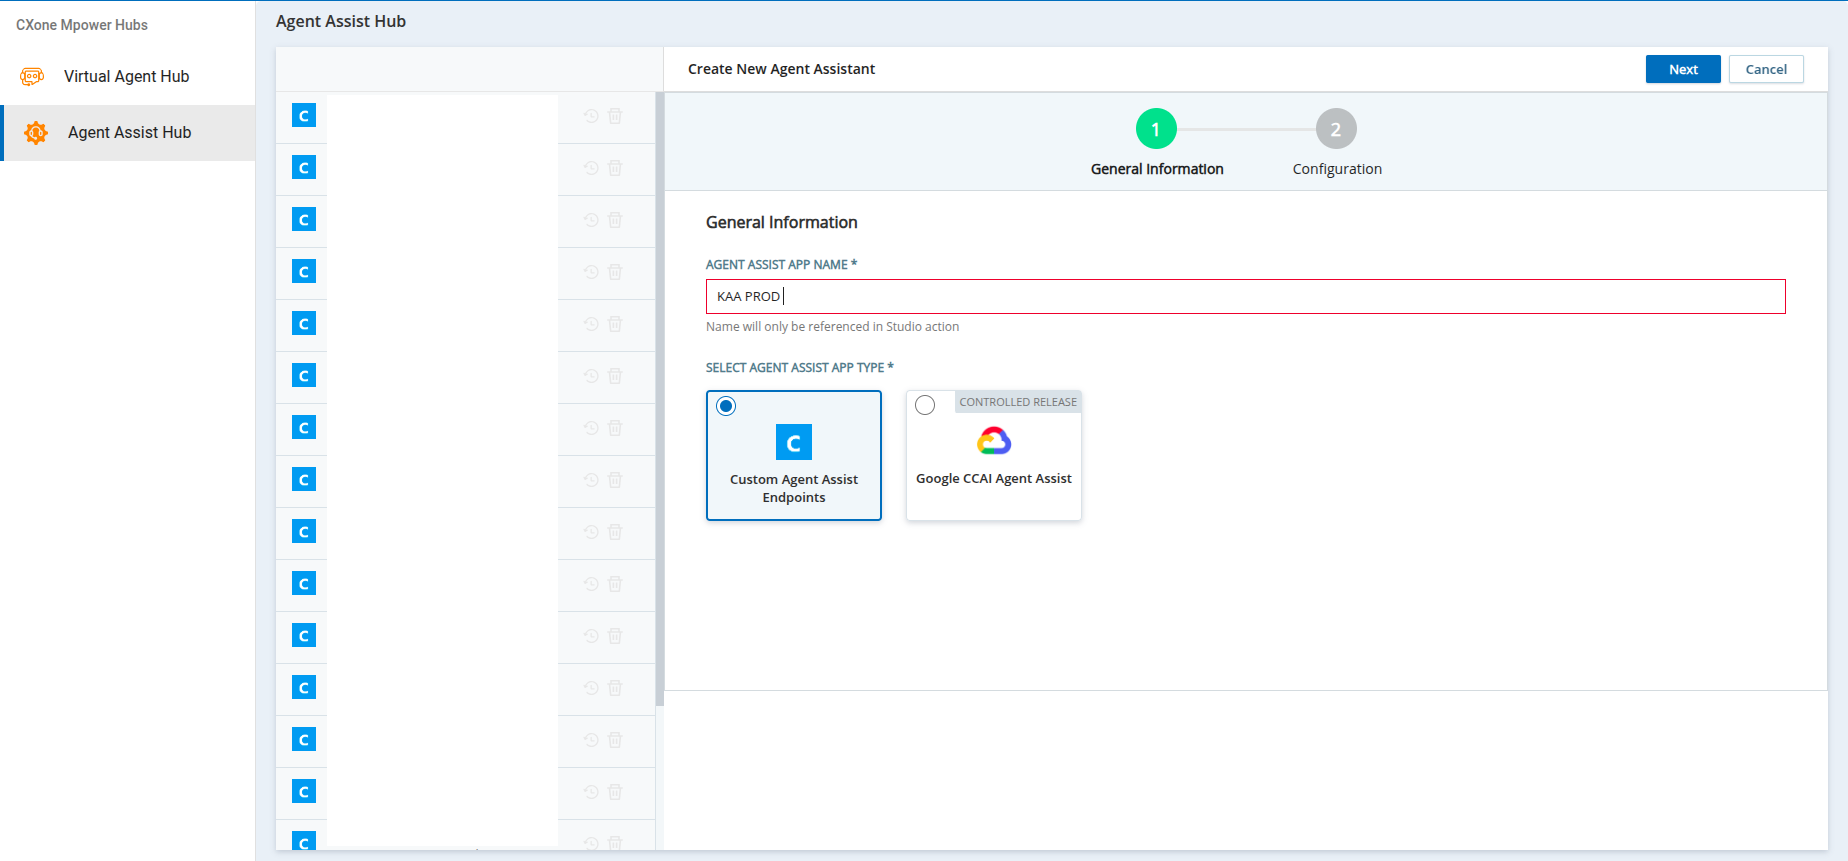
Click Agent Assist Hub > Add Agent Assist App.
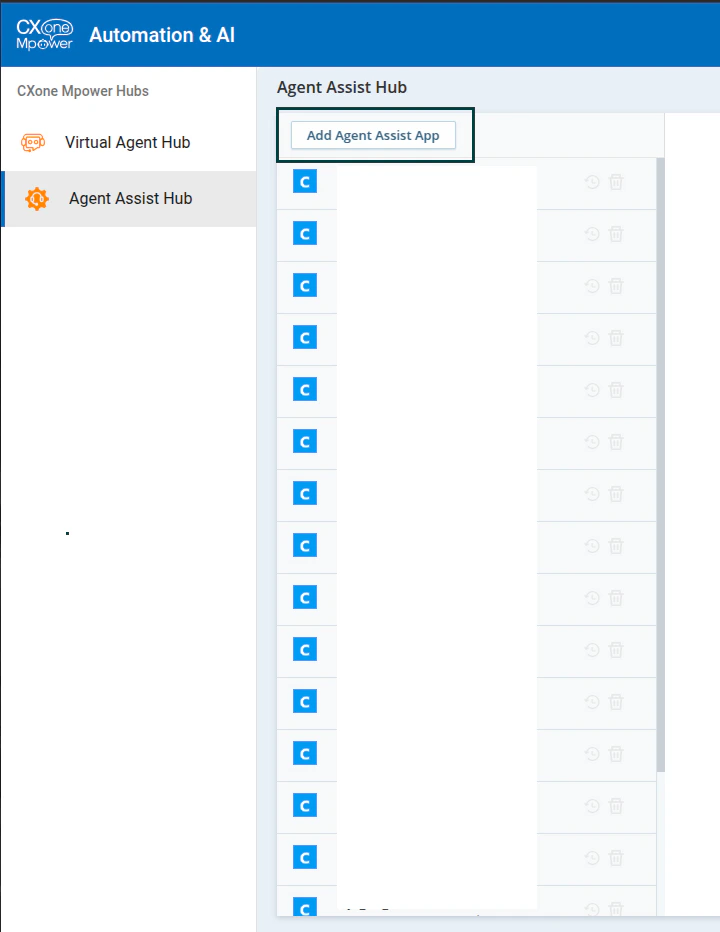
- Enter the name of the Agent Assist App in the AGENT ASSIST APP NAME field.
- Select Custom Agent Assist Endpoints.
-
Click Next.
-
Add the following settings with config parameters:
- Agent UI Option: No Assist Panel shown to agent
- App Title: Kore AA (this is not a visible UI)
-
Participants: Both
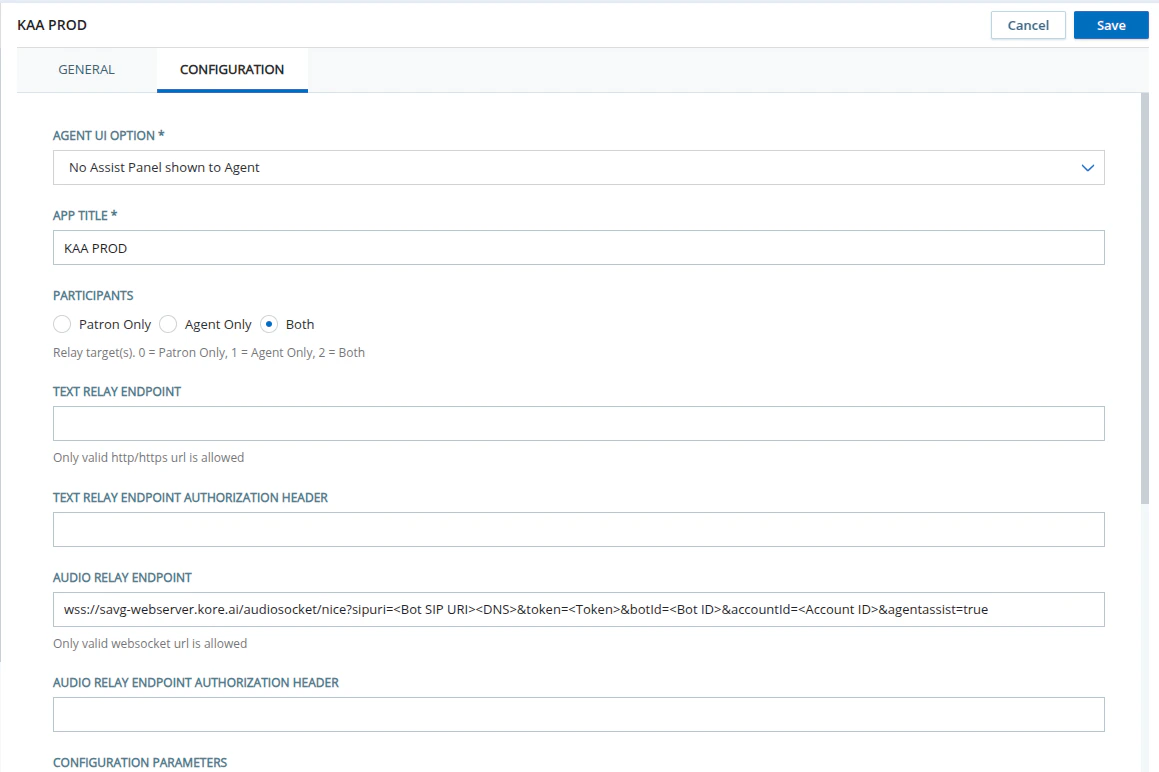
-
Audio Relay Endpoint:
{Kore Voice Gateway(KVG)}/audiosocket/nice?sipuri=<Bot SIP URI><DNS>&token=<Token>&botId=<Bot ID>&accountId=<Account ID>&agentassist=true-
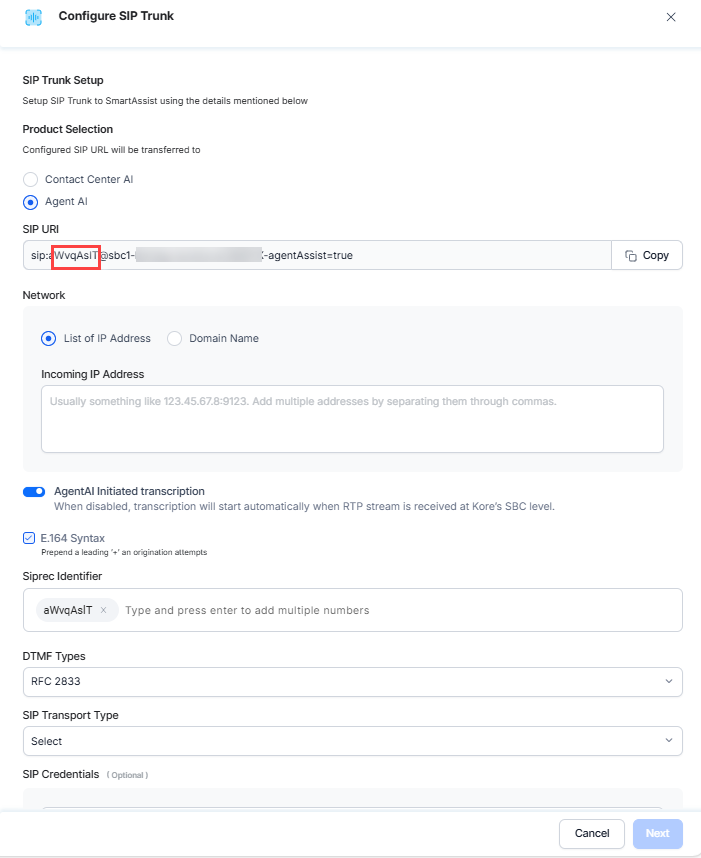
Bot SIP URI: Agent AI > Flows & Channels > Channels > Voice Gateway > SIP Numbers > Configure SIP Trunk page.
-
Bot ID and Account ID: Agent AI > Flows & Channels > Channels > Digital > Web/Mobile Client page.

-
Token: Create a JSON Web Token on jwt.io with the following details:
- Payload:
{"appId": <Bot Client ID>} - Header:
{"alg": "HS256","typ": "JWT"} - Secret: Bot Client Secret.
- Payload:
-
Bot SIP URI: Agent AI > Flows & Channels > Channels > Voice Gateway > SIP Numbers > Configure SIP Trunk page.
- Click Create.
Step 2: NICE CX Studio > Import the Voice Script and Configure Parameters
- Download the script for voice from the Kore.ai NICE integration repository.
- Open the NICE CX Studio app from your desktop.
- Click File > Import from File.
-
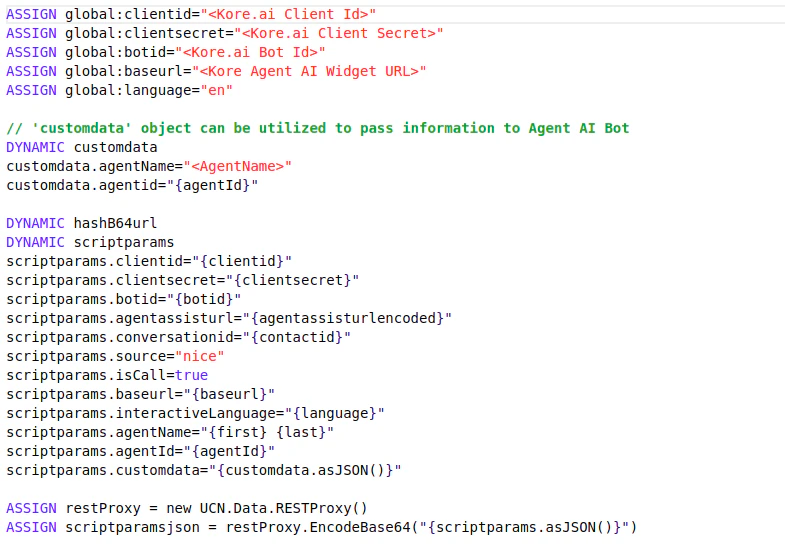
Select the downloaded script for voice. It looks like the following screenshot:
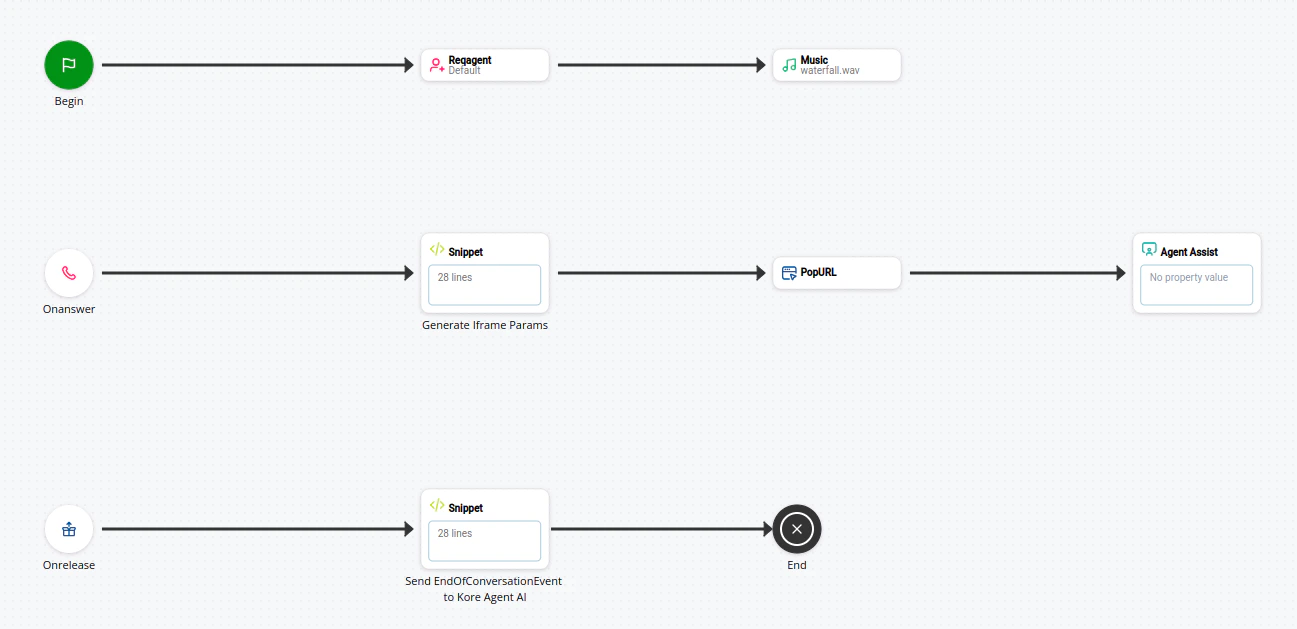
-
Double-click the Generate Iframe Params tile.

-
Update the values for the corresponding parameters:
- Kore.ai parameters:
- Bot Client ID
- Bot Client Secret
- Bot ID
- Agent AI Widget URL
- Bot Language Code - “en” is set as the default language. Refer to this doc to provide the language code for your AI Agent’s language.
- Custom Data: The “customdata” object in the script can be used to pass information to the Kore AI Agent. During runtime, this custom data is accessible in the UserContext of the AI Agent. Refer to “Access Custom Data in Agent AI Bot” for instructions on how to access custom data in the AI Agent.
customdata.agentName="Agent"andcustomdata.agentID="1234" - Kore.ai parameters:
-
Double-click the PopURL tile.

-
In the PopURL, update the URL with the following values:
3.
{Agent AI URL}/integrations/nice/iframe/?params={scriptparamsjson}4. Tab Title: Kore AgentAI (change as per your requirement) 5. Pop Destination: Contact Panel (it will be preset for imported script) -
Double-click the Agent Assist tile.

-
Select the checkbox against the Agent Assist instance you created in the above step.
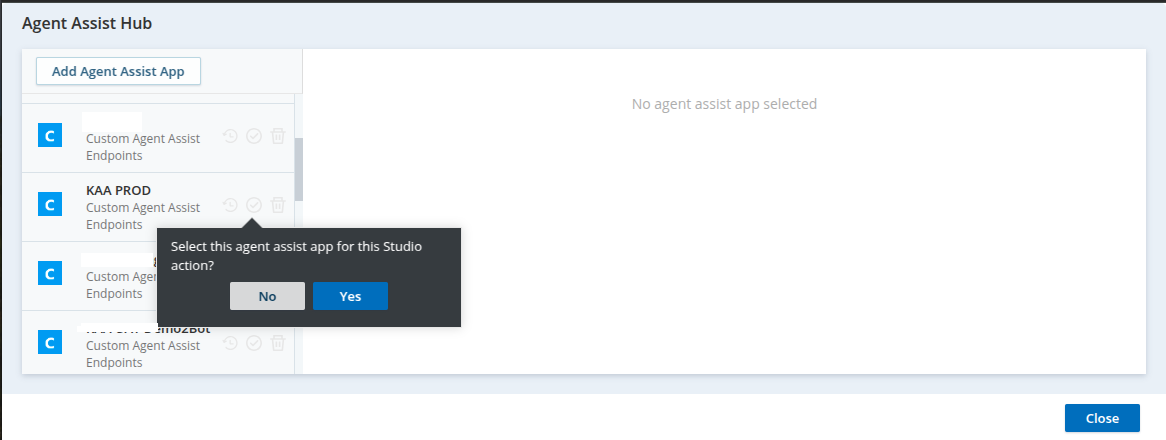
-
Click Yes.
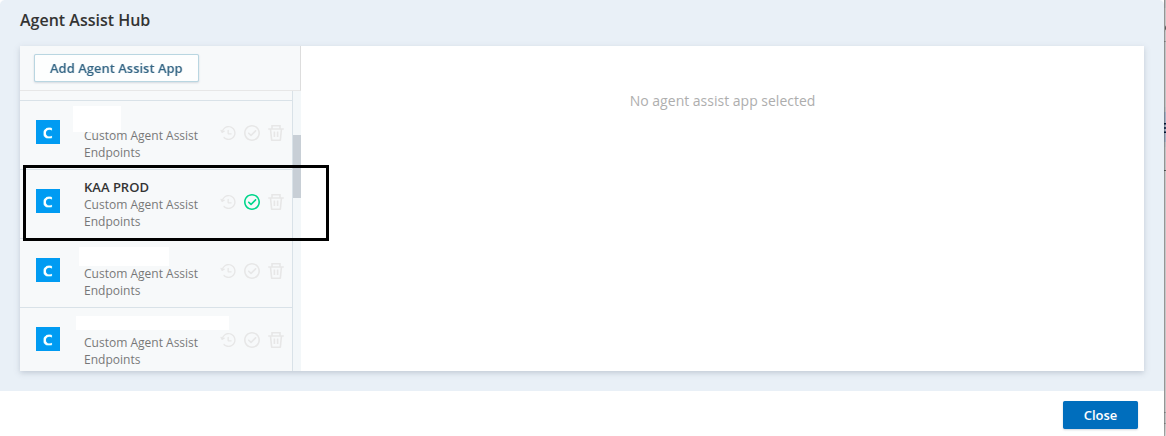
-
After selecting Agent Assist, click the close button on the bottom-right corner of the page.
Do not click the “X” button to close the window as this will not save the changes.
Step 3: NICE CX Setup > Attach Point of Contact with Voice Script
- Go to the NICE home page.
- Click the Application Launcher button.
- Click ACD.
- Click Points of Contact.
- Click the number you want to attach with AgentAssist.
- Click Edit.
- Change the script based on your needs.
-
Click Done to save it.
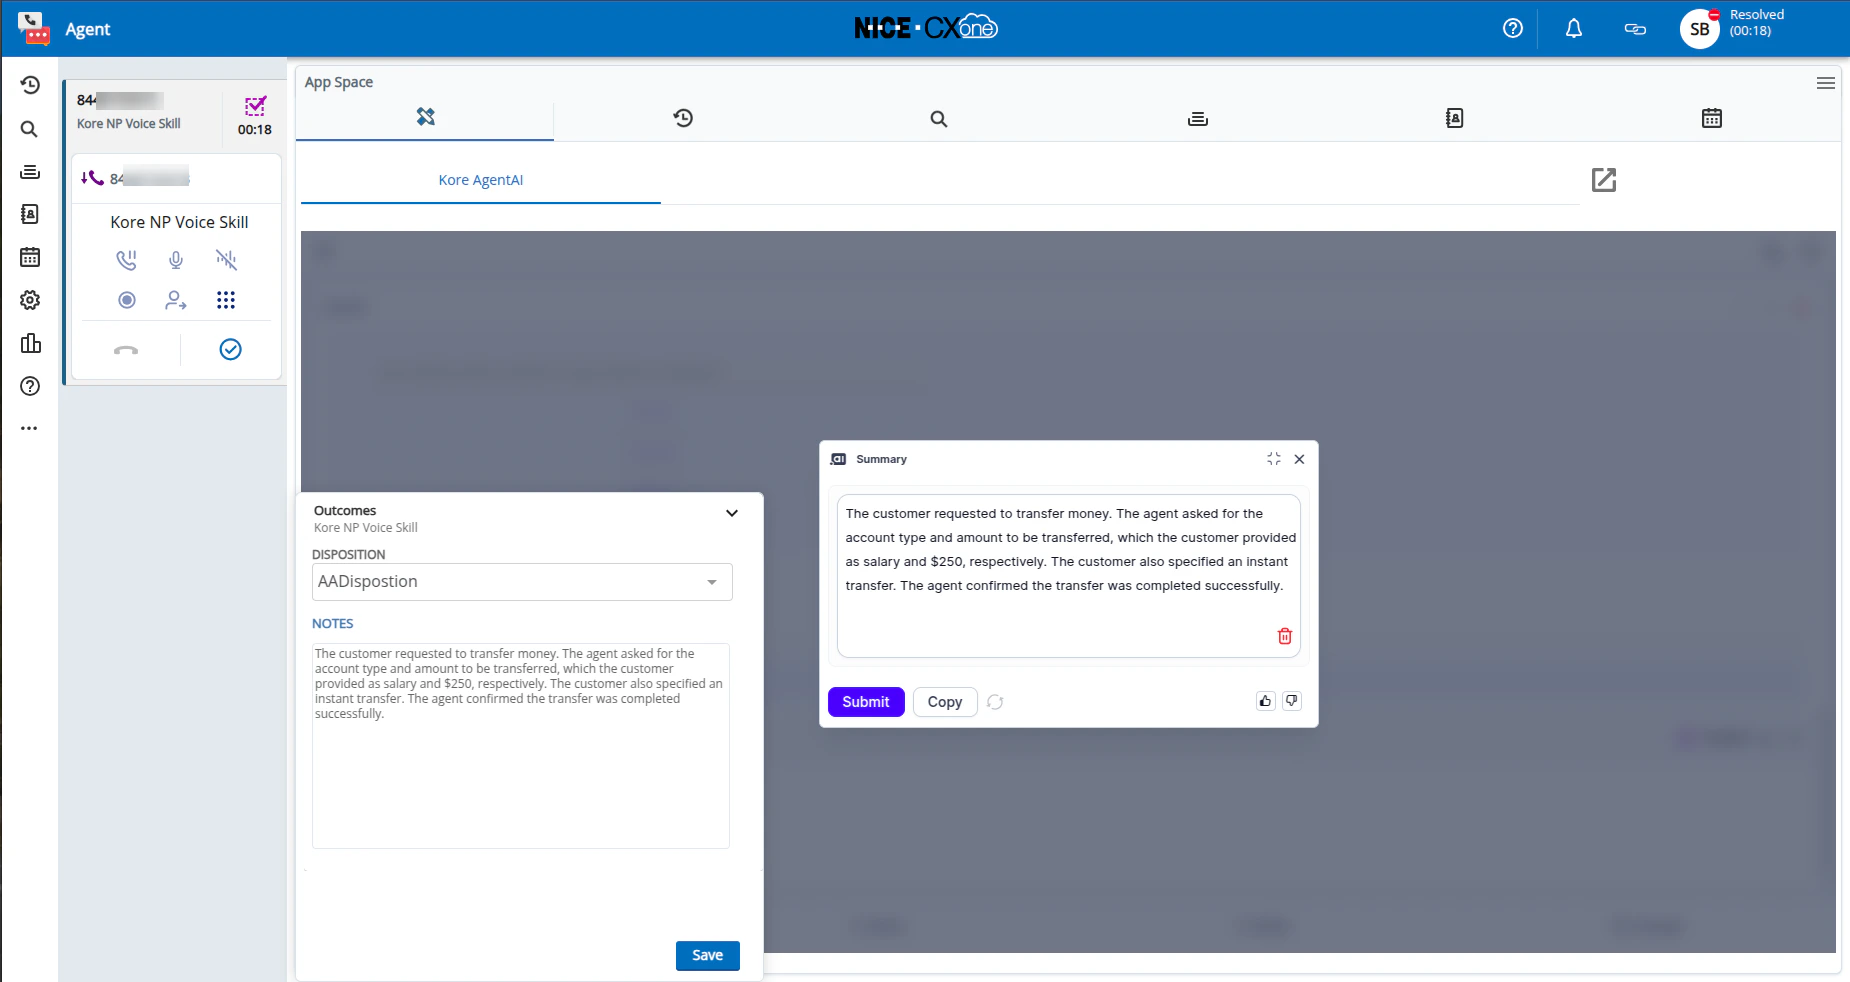
To view the summary pop-up in the Agent AI widget, you must assign a disposition to the skill. If you don’t, the voice screen automatically closes once the session ends.
Voice Simulation
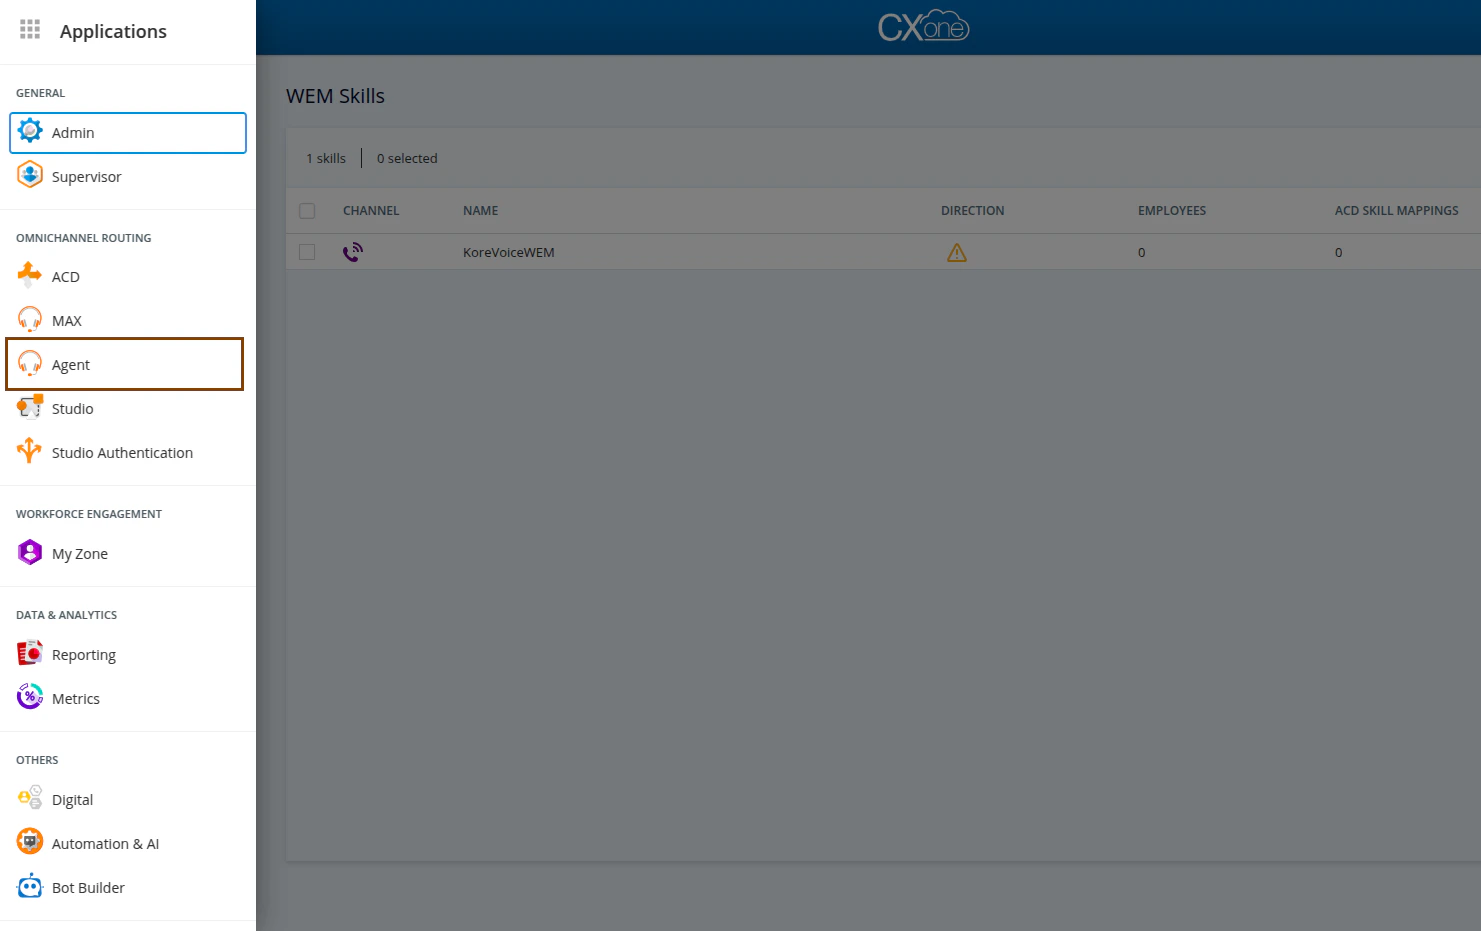
- Go to the NICE home page.
-
Click Application Launcher > Agent.
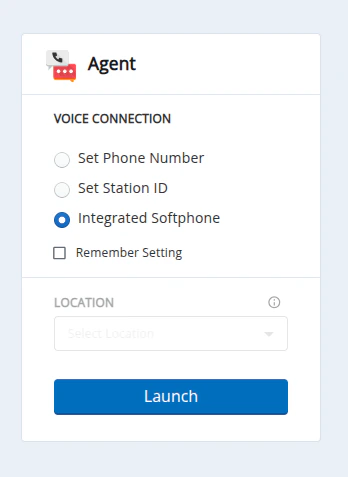
-
Select Integrated Softphone, and click Launch.
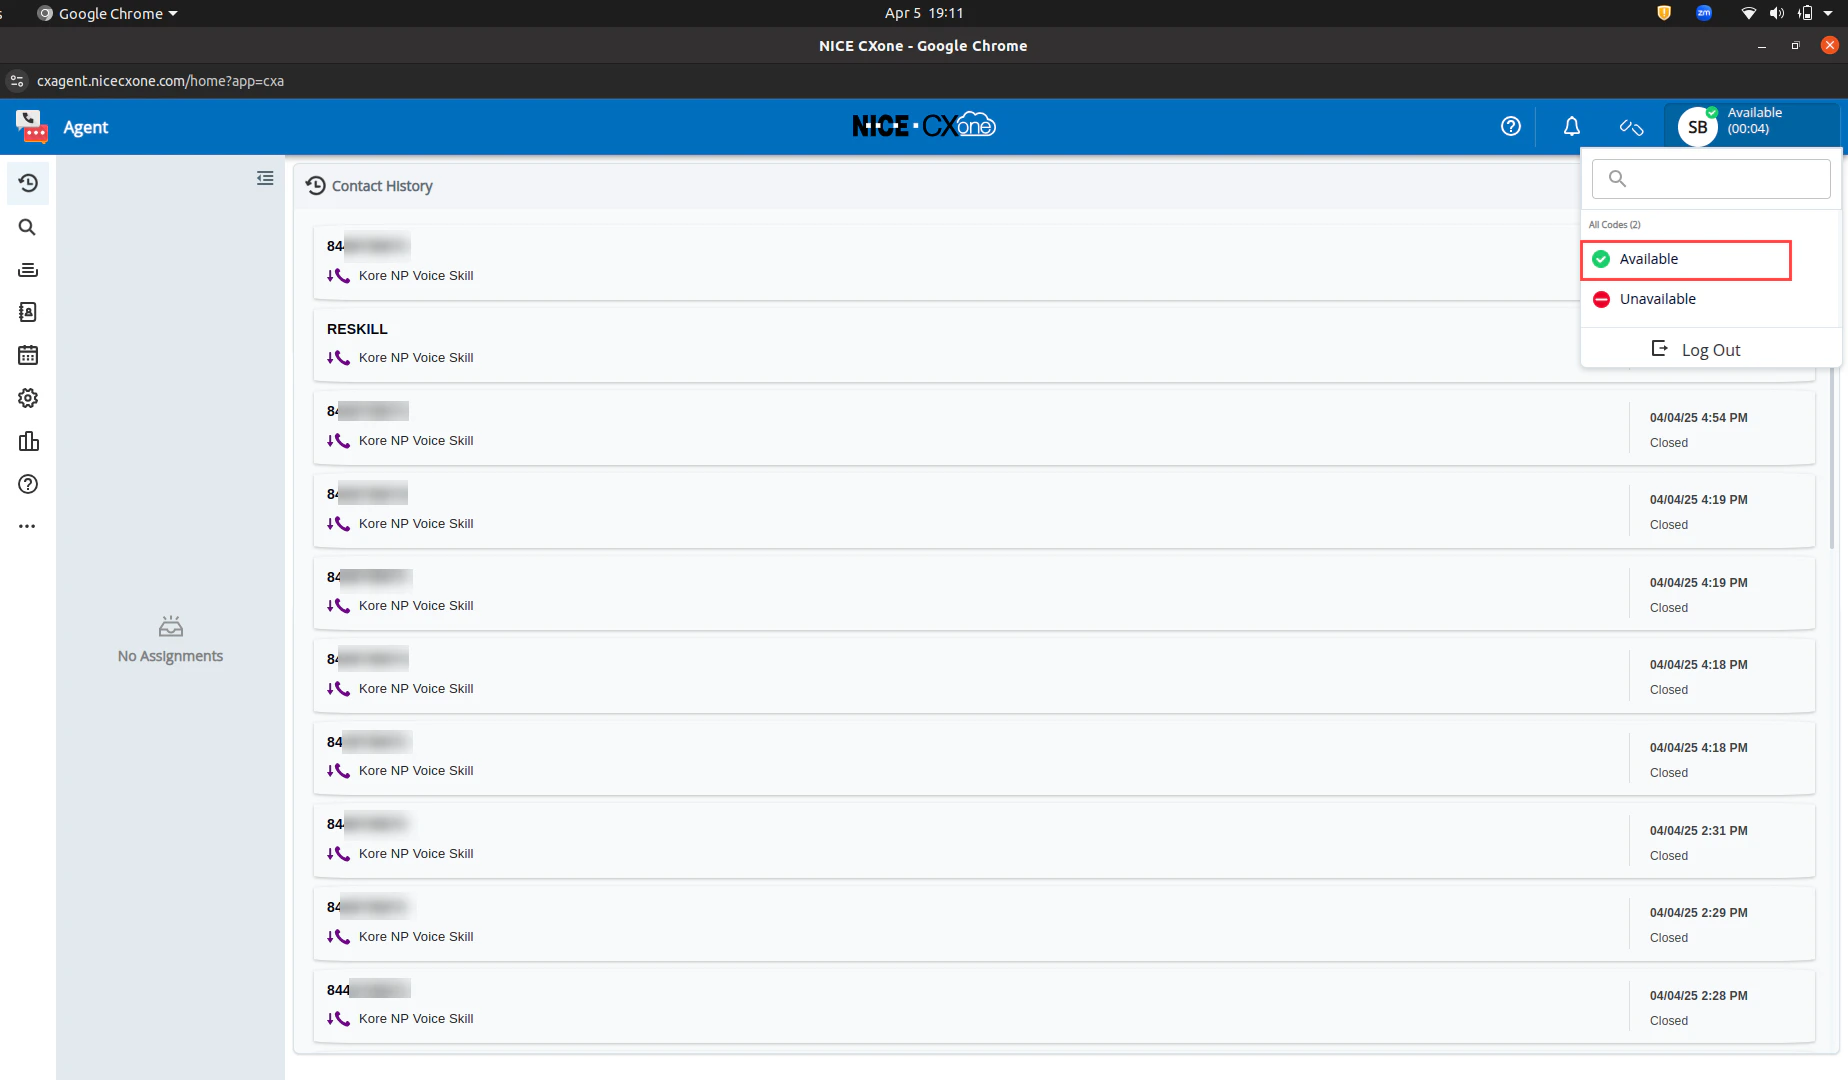
-
Change the status to Available.
- Go back to the NICE home page, and click Application Launcher > ACD.
- Click Points of Contact.
-
Click the Voice Point of Contact you have created.
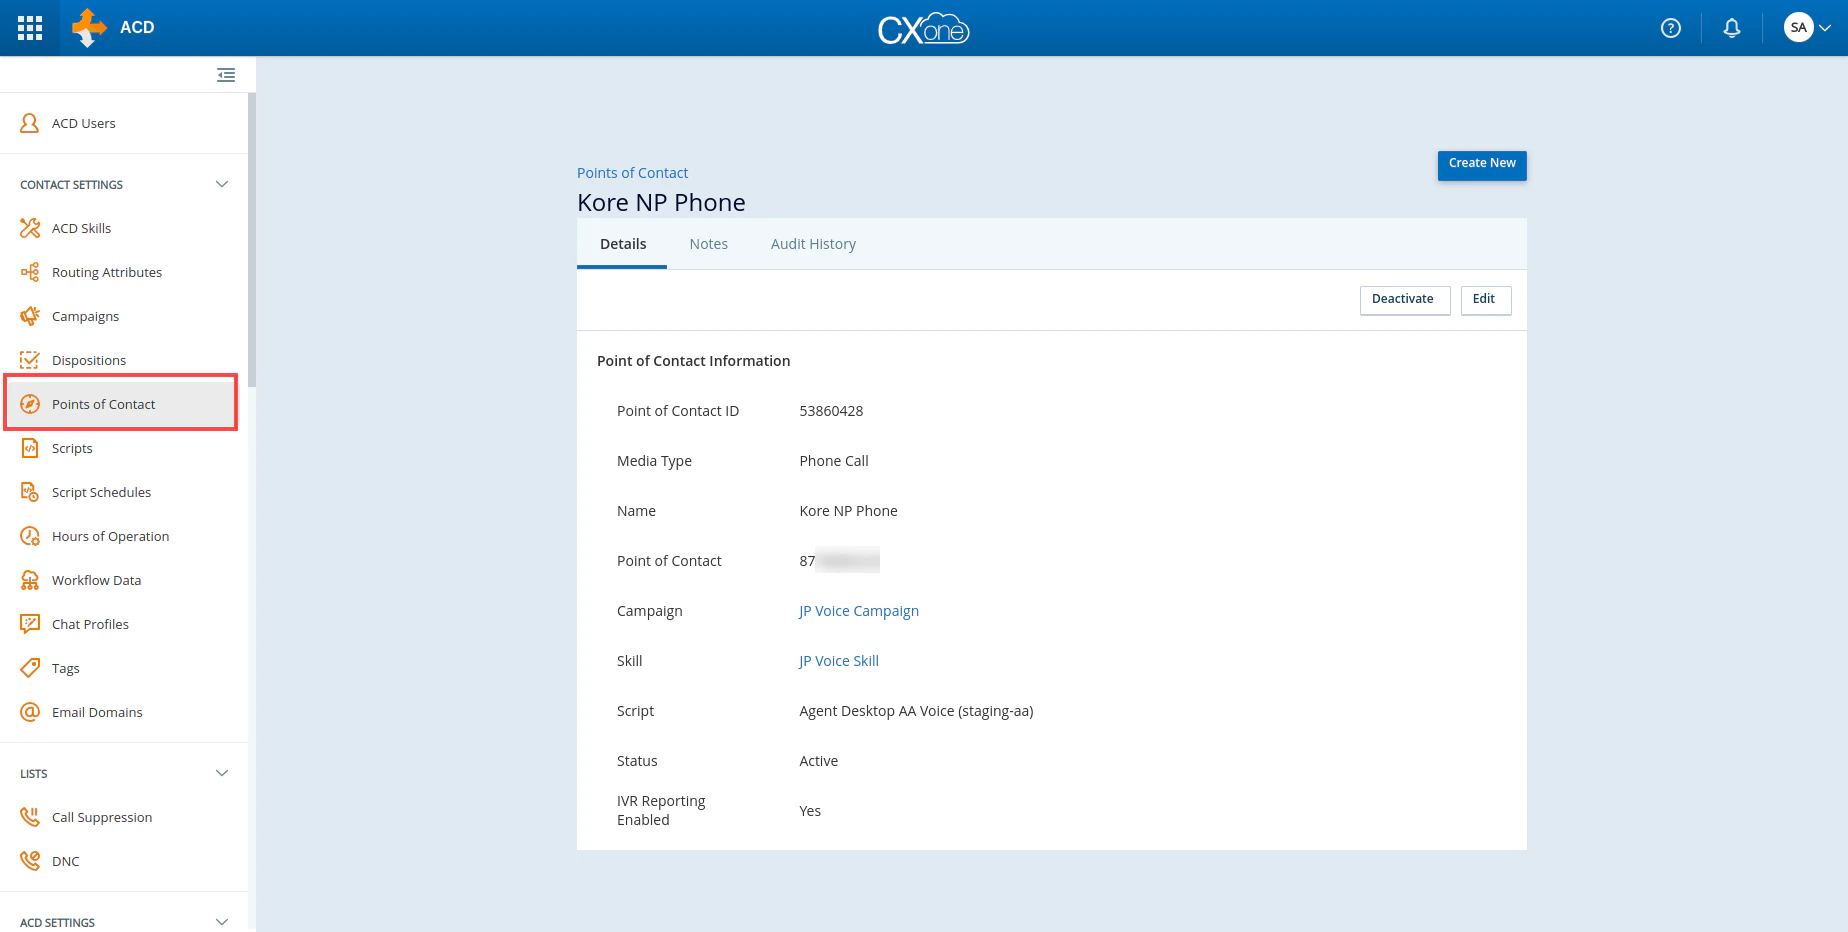
- Copy the Phone Number, and initiate the call.
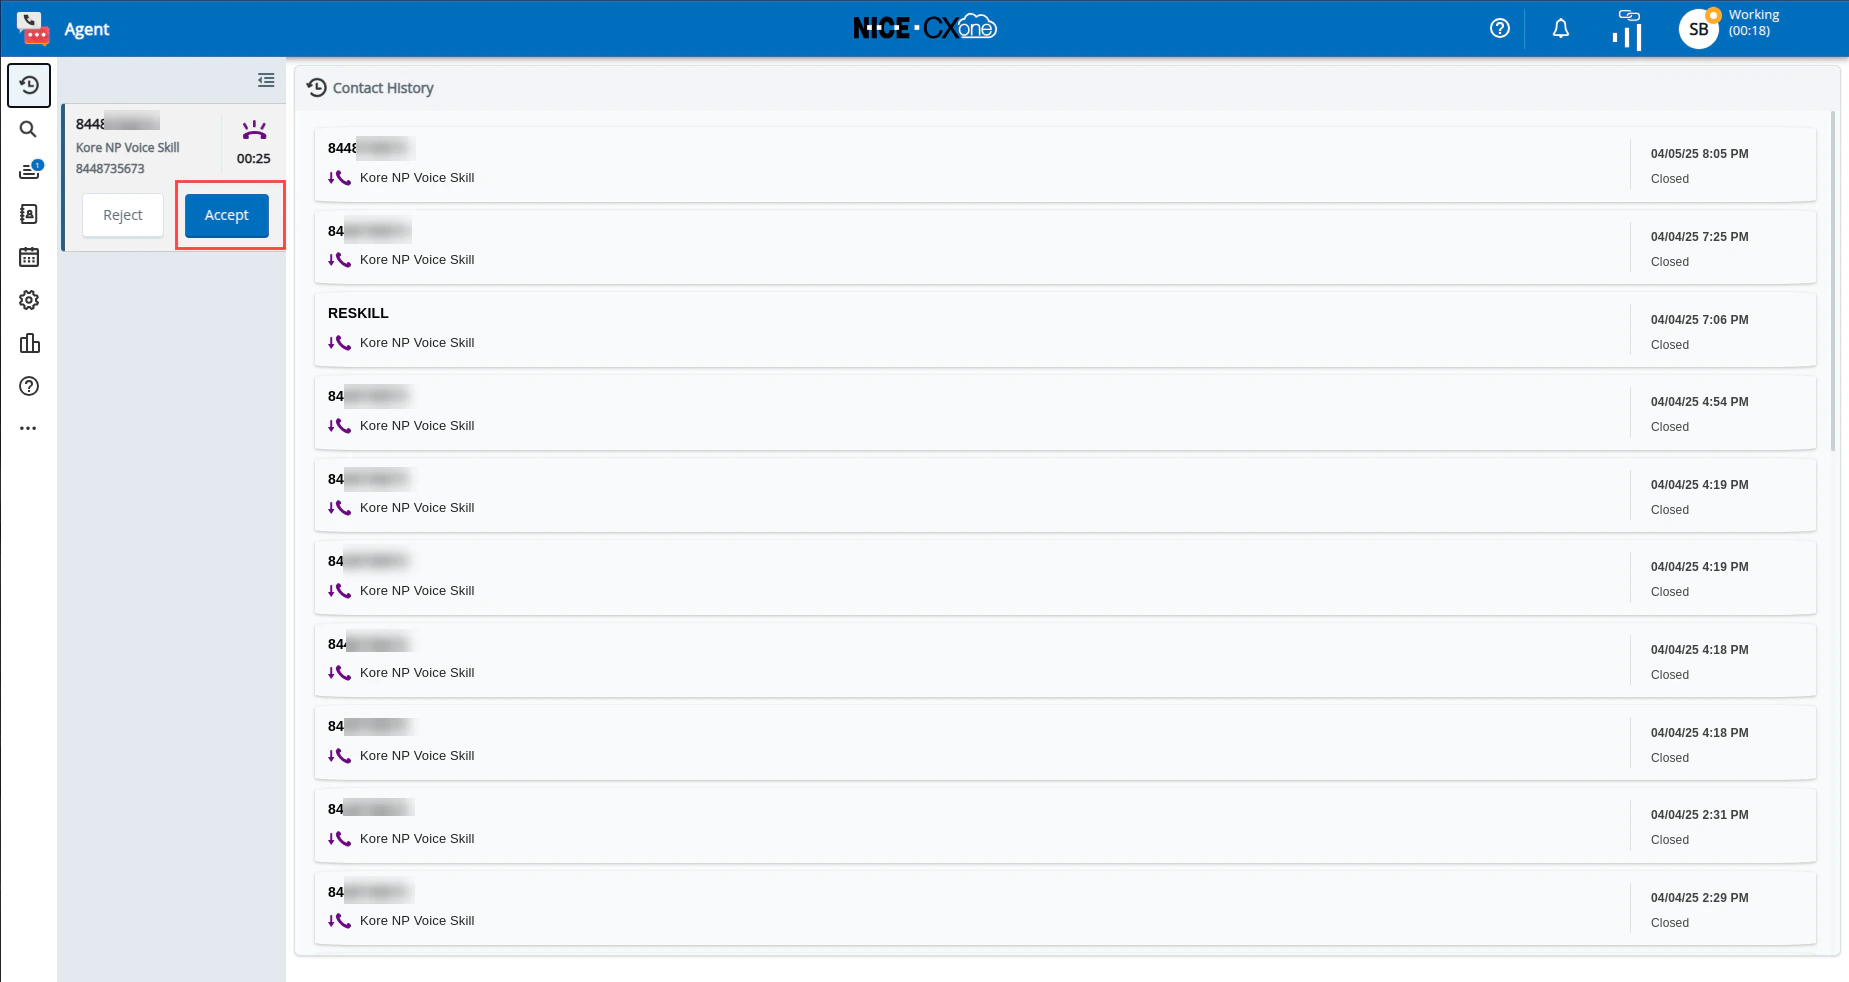
-
A voice request appears on the NICE Agent desktop. Click Accept.
-
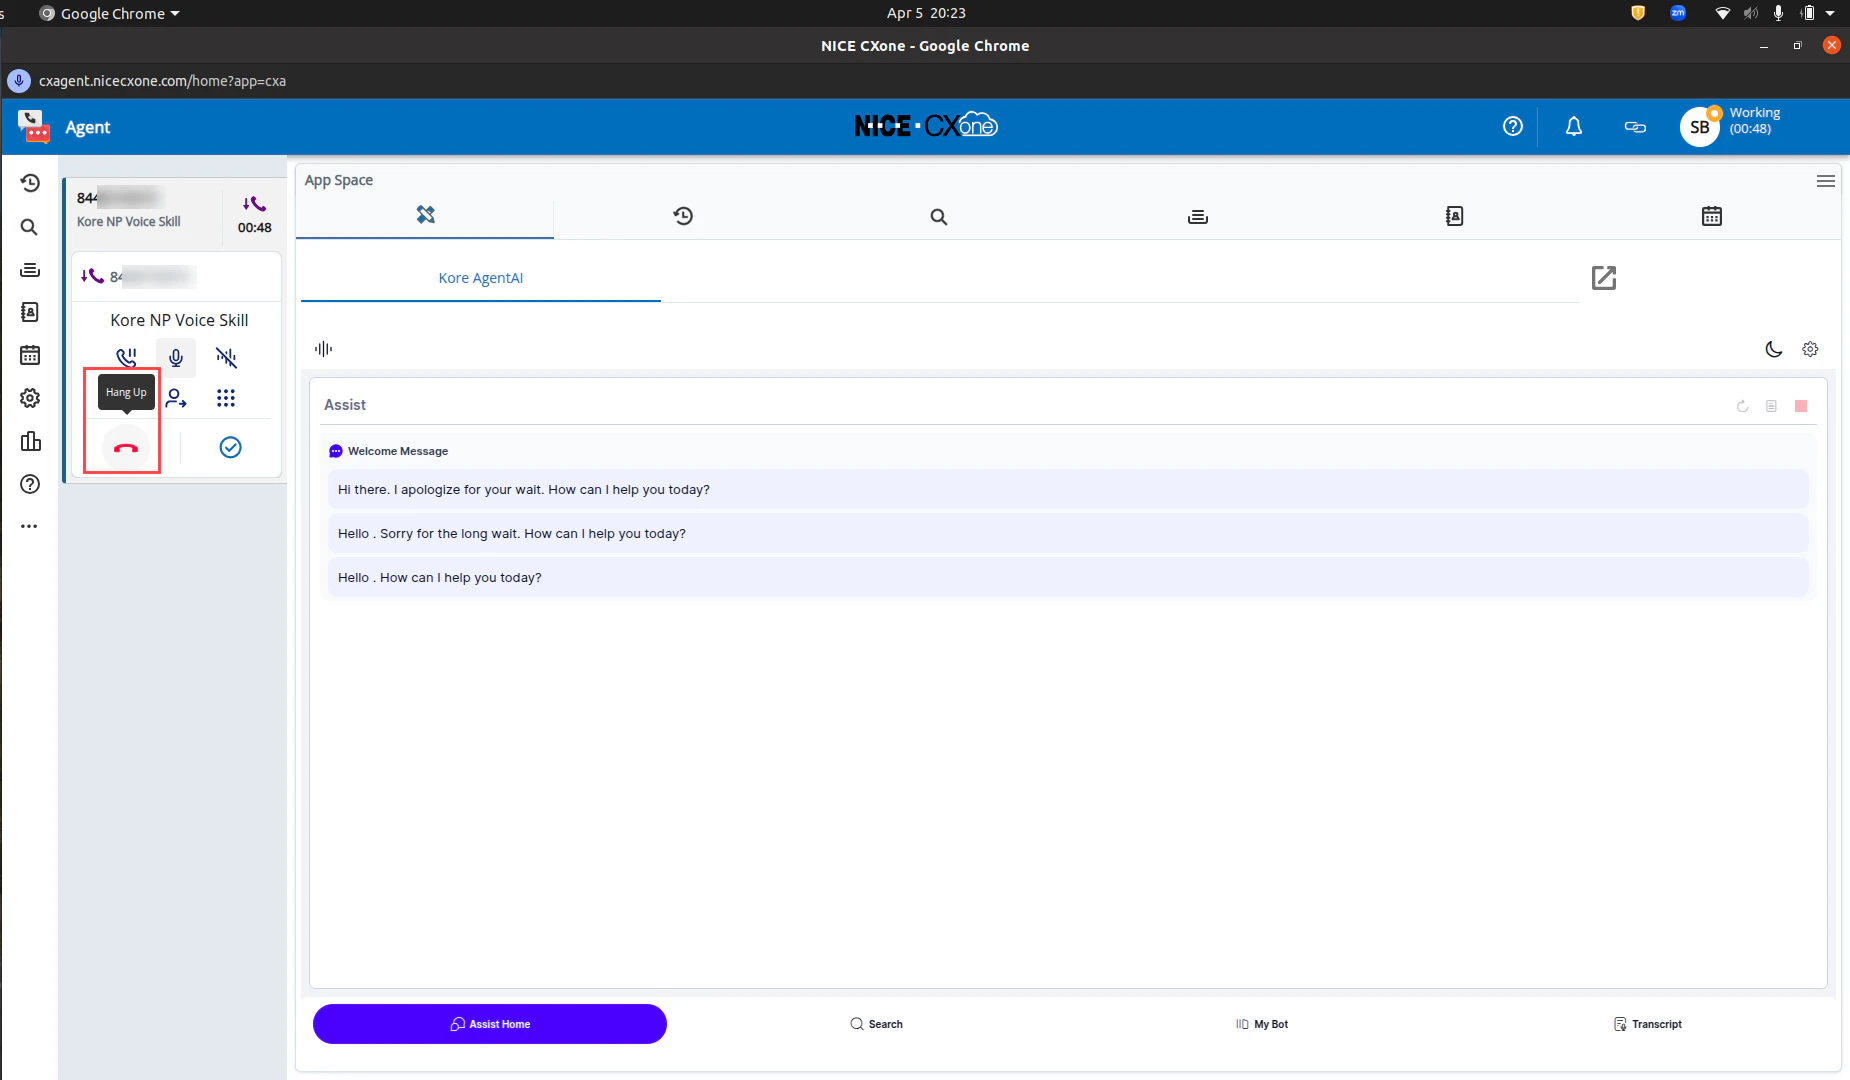
The Kore AgentAI widget loads inside the contact panel.

-
Click Hang Up to disconnect the call.
-
The Call summary pop-up gets triggered at the end of the call session.
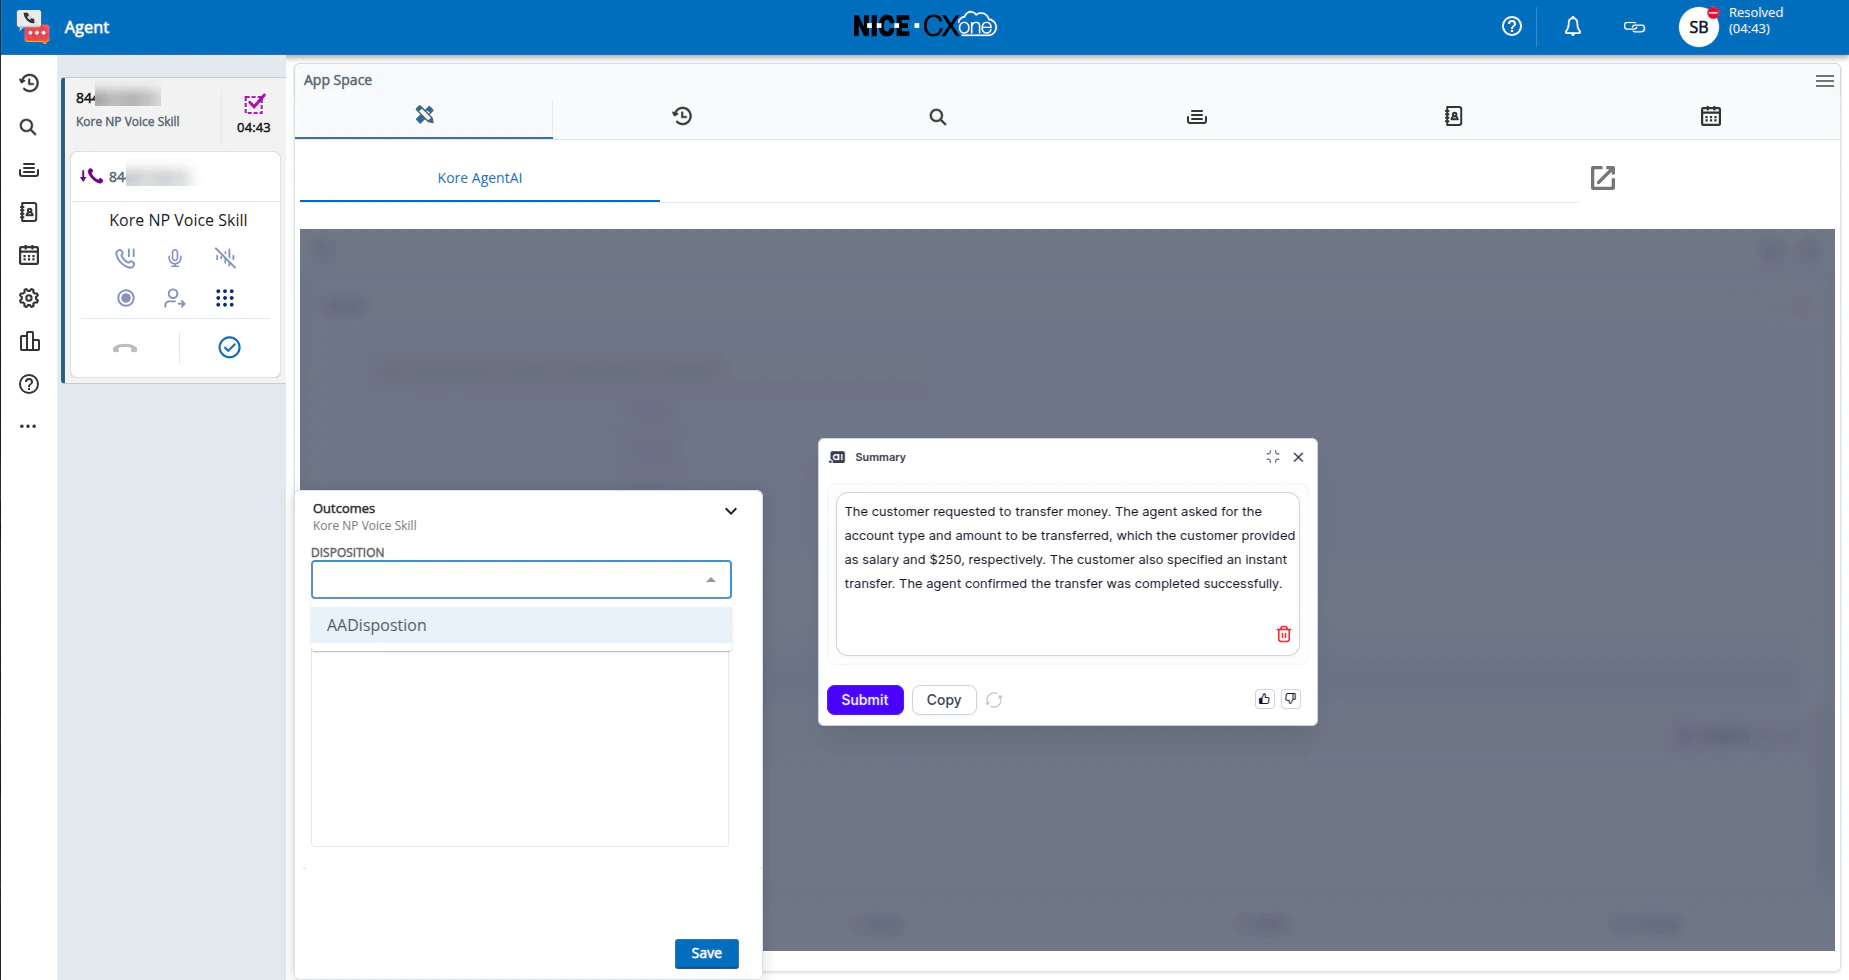
- Select the disposition, copy the summary, and paste it in the NOTES for future reference.
-
Click Save > Close.