

Conditional Flows
Conditional Flows let you define what happens during three common routing scenarios:
Contact Center AI provides default voice and chat flows for Out of Hours and No Agents Available. You can replace or customize these defaults.
For each channel, you can independently configure fallback messages for No Agent Available and Out-of-Office Hours scenarios . In both cases, the system presents the fallback message to the customer only when no queue-specific configuration exists for the conversation. Queue-specific configurations always take precedence.
Voice Flows
Out of Operational Hours
Plays a voice message to callers who contact support outside business hours.- Select Default Out of Operational Hours Voice Flow to open the flow in the Flow Builder.
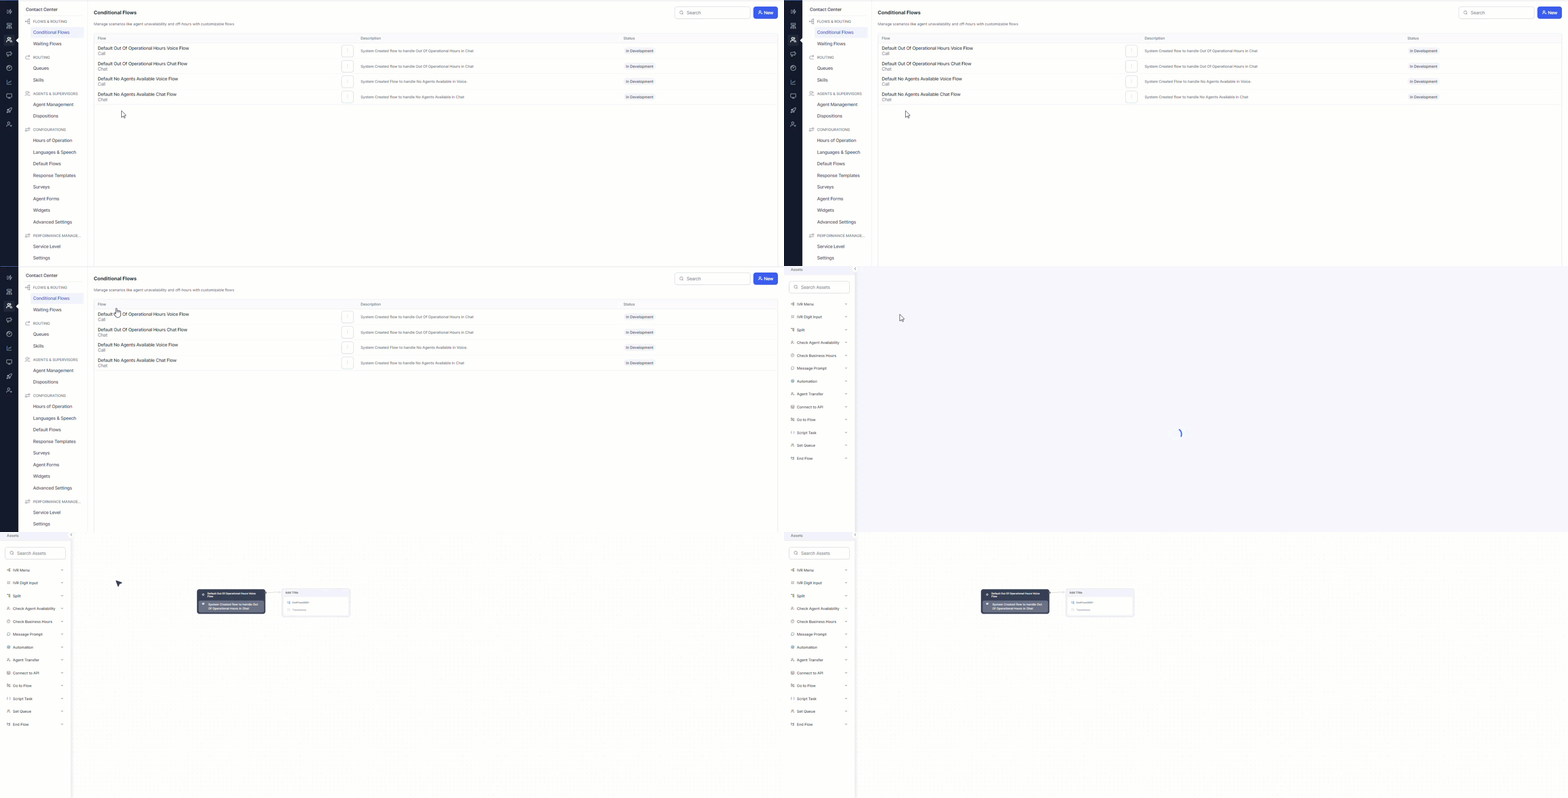
- In the End Flow node’s General Settings, edit the default message, change the language, or add messages using + Add Another.
- The system uses the message from the configured conditional flow.
- If no flow is configured, a non-editable backend default plays.
- Administrators can override the default by creating a conditional flow and attaching it to the experience flow.
No Agents Available
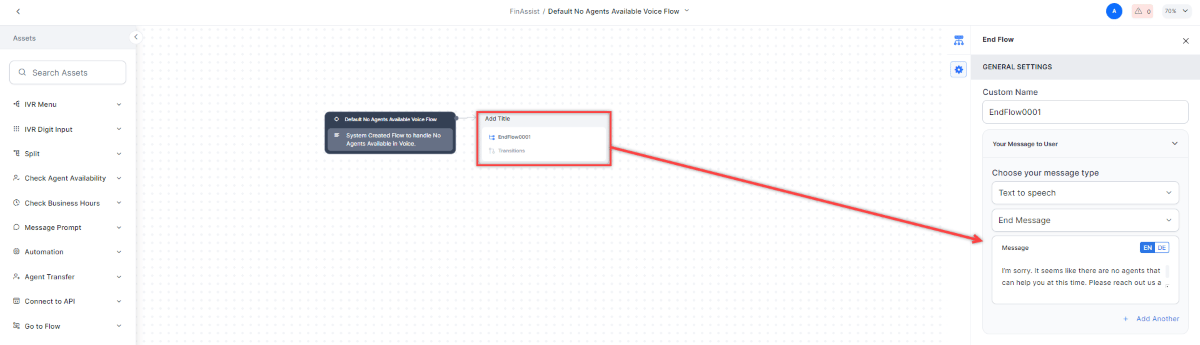
Plays a message when online agents lack the skills required for the conversation.- Select No Agents Available Voice Flow to open the flow in the Flow Builder.
-
In the End Flow node’s General Settings, edit the message, change the language, or add messages using + Add Another.
- Create a conditional flow.
- Add an End Flow node.
- Configure a custom message to play in that scenario.
If the conversation waiting for the Last Handling Agent is moved to the No Agents Available or Out-of-Office Hours flow, then it follows the routing behavior configured in the queue.
Click-to-Call
Click-to-Call lets website visitors start a voice call directly from the chat widget, providing a seamless escalation path from bot to live agent.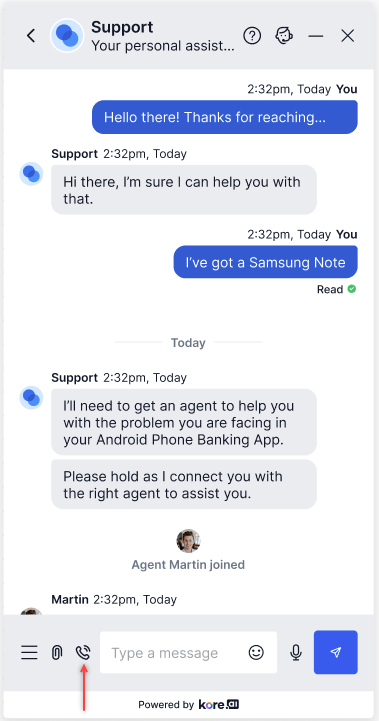
- Before interacting with the bot.
- During an active bot conversation.
- During a live chat (the chat agent receives a closure notification and moves to After Call Work).
The Click-to-Call flow appears in Conditional Flows only after it’s enabled in Theme & Design.
- Click-to-Call launches a flow in the Flow Builder.
- A default flow is published automatically. It includes an Agent Transfer node and the message: “Please wait while we connect you to an agent.”
- Removing the Agent Transfer node triggers a warning before publishing.
- Script nodes
- Message prompts
- Business hours checks
- Queue assignments
- Agent availability checks
- Agent transfers
- End Flow node
- Administrators can create multiple Click-to-Call flows for different use cases.
- Each flow has a unique Flow ID.
- Developers pass the Flow ID in the Web SDK configuration or SDK headers to control which flow triggers.
- SDK headers can pass user metadata (such as page URL) to support conditional logic.
- Get the Flow ID from the Flow Builder.
- Add the Flow ID and any required headers (user ID, session ID, page name, page URL) to the Web SDK configuration.
- Deploy SDK updates.
Modifications to SDK source code are made at your own risk. Custom modifications may not receive full support in future SDK updates.
- The customer clicks the Call button in the chat widget.
-
A confirmation pop-up appears. The customer selects Confirm.
- If the customer switches to Click-to-Call during a live chat, the chat agent moves to After Call Work (ACW).
-
The system initiates a voice call to the contact center.
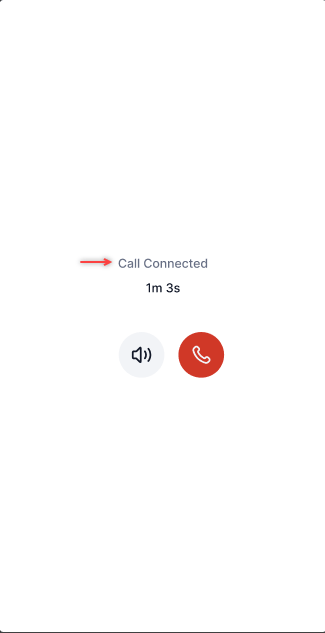
- Context (chat transcript, user ID, session ID, page URL) is passed to the agent.
- The call routes through the configured Click-to-Call flow.
Chat Flows
Out of Operational Hours
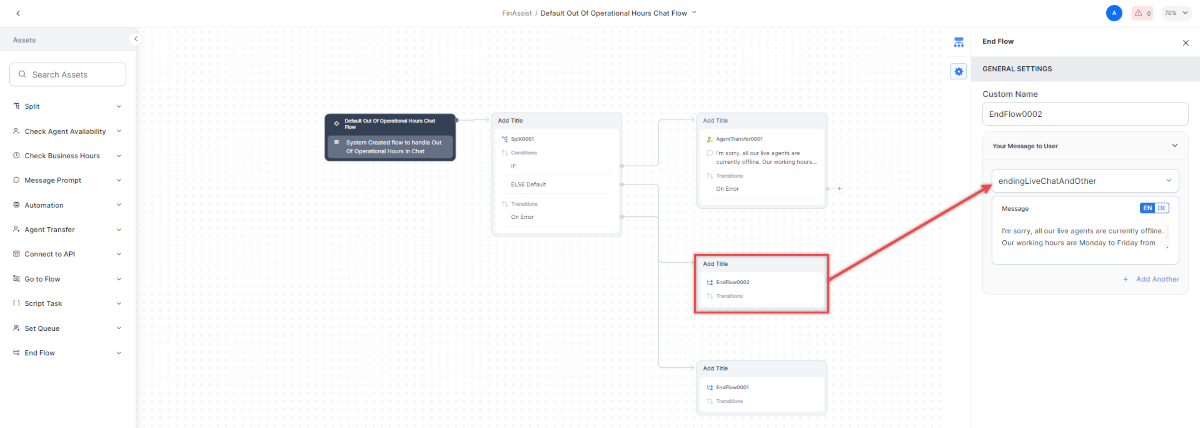
Sets the auto response message sent during non-business hours for automated and live chats. Messaging (automated chat): In the General Settings tab, MessagingAT is selected under Your Message to User. Edit the message, change the language, or add messages using + Add Another. Select the In Queue Flow to add the customer to an agent’s waiting queue.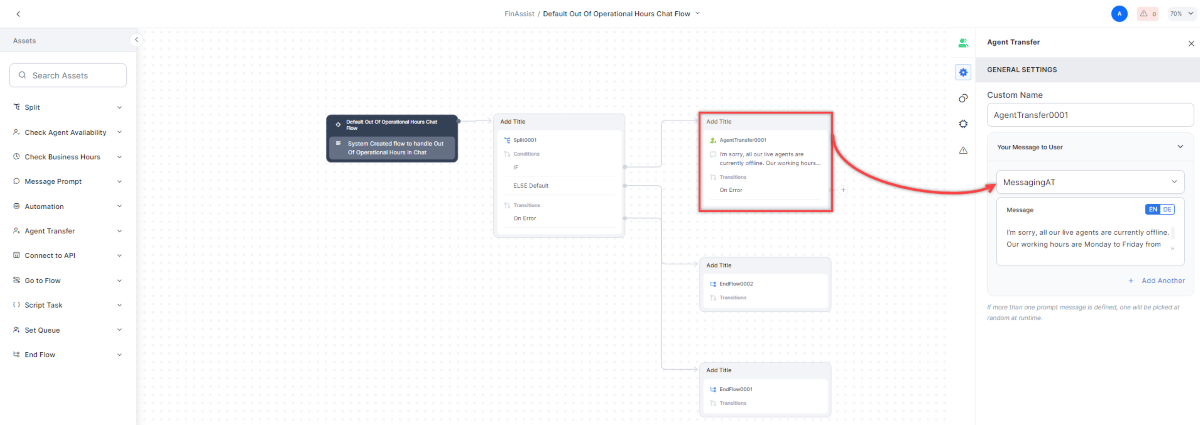
No Agents Available
Sets the message sent when no agents with the required skills are available. Select No Agents Available Chat Flow to open the configuration. Messaging (automated chat): In the General Settings tab, messagingEnd is selected under Your Message to User. Edit the message, change the language, or add messages using + Add Another. The chat ends after the message is displayed.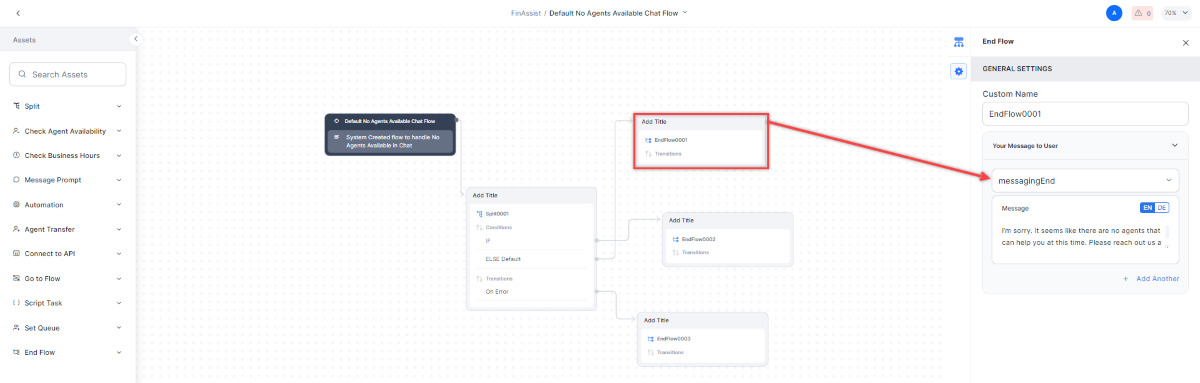
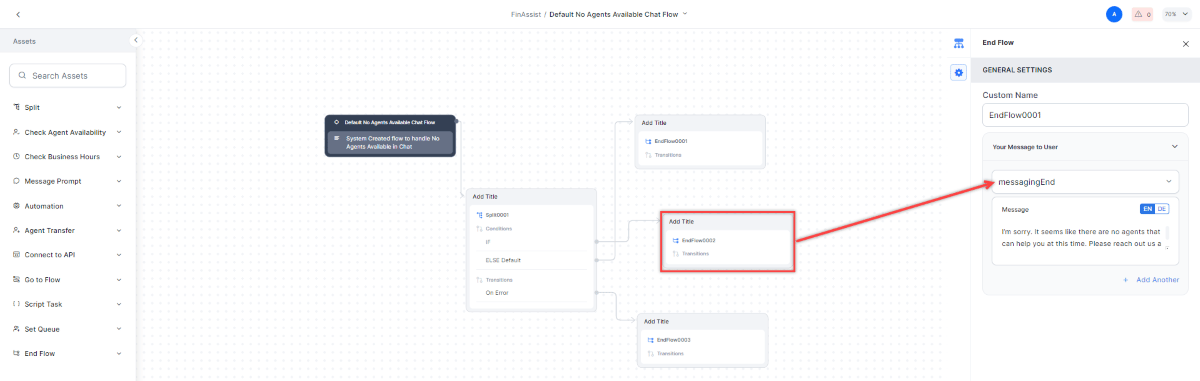
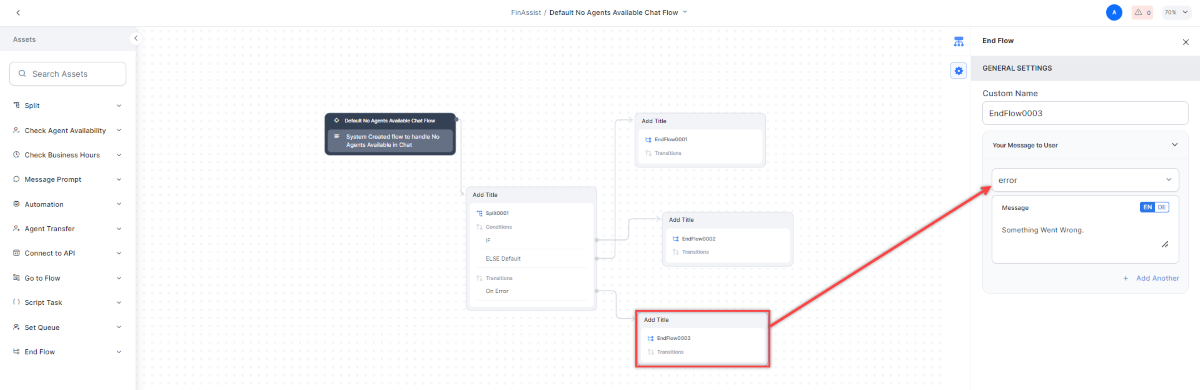
If the conversation waiting for the Last Handling Agent is moved to the No Agents Available or Out-of-Office Hours flow, then it follows the routing behavior configured in the queue.
In Queue Transfer Flow
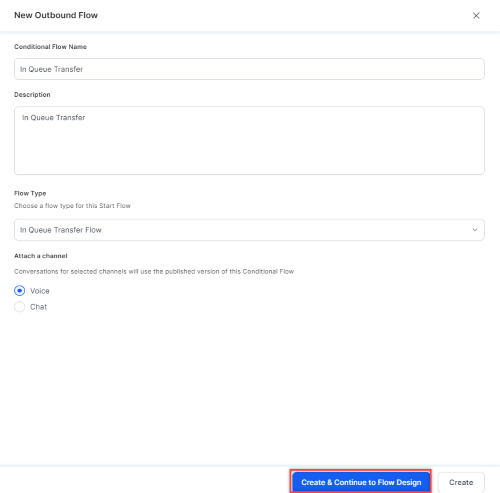
Routes a conversation to the queue where agents have the required skills, triggered when the conversation enters a queue before agent assignment. Steps to create an In Queue Transfer Flow:- Select New.

- In the New Outbound Flow window, enter a Conditional Flow Name and Description.
- Select In Queue Transfer Flow from the Flow Type dropdown.
- Select the Channel (Voice or Chat) and select Create & Continue to Flow Design.
- In the Waiting Experience tab, select a flow from the In Queue Flow dropdown.
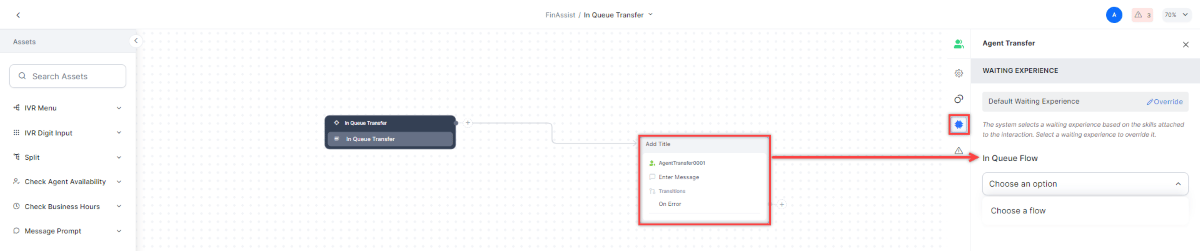
You can also create custom Conditional Flows for No Agents Available and Out of Hours by following steps 1-4 above.
Manage Conditional Flows
Update a flow: Select the (⋮) icon next to the flow and select Update. Delete a flow:- Select the (⋮) icon next to the flow and select Delete.
- In the confirmation pop-up, select Delete.
Deleted conditional flows can’t be restored. Default flows can’t be deleted.
Fallback Messages
If a conversation doesn’t match any queue-specific configuration, the system displays a fallback message to the customer. You can configure fallback messages for No Agent Available and Out-of-Office Hours scenarios. To configure the fallback message:- Select Fallback Messages in the upper-right corner.
- Select Call, Chat, or Email Experience tabs as required and turn on the Enable Fallback Message for No Agent Available or Enable Fallback Message for Out-of-Office Hours toggle.
- Enter the fallback messages and select Save.
Waiting Flows
Waiting Flows let you customize the experience for customers waiting in queue — for both voice and chat channels. What you can configure:- Routing rules based on agent skills, queues, or skill + queue combinations.
- Routing rules based on agent skills.
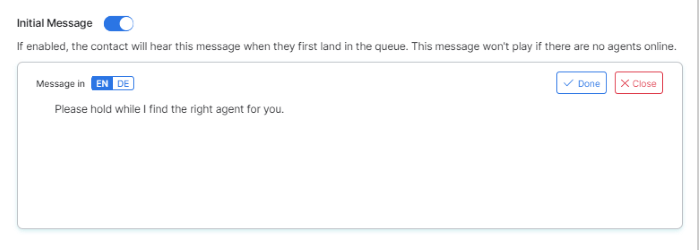
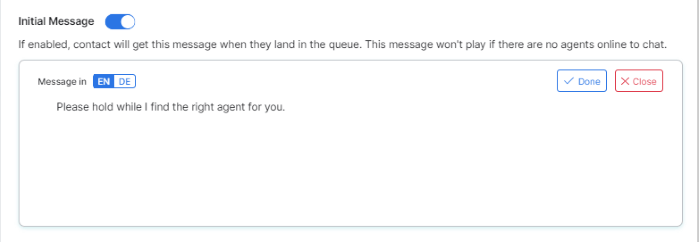
- Initial messages when a request enters a queue.
- Hold audio for calls.
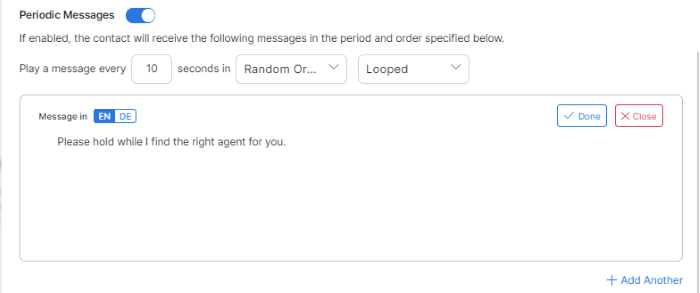
- Periodic messages for calls and chats.
- Callback when wait time exceeds a limit.
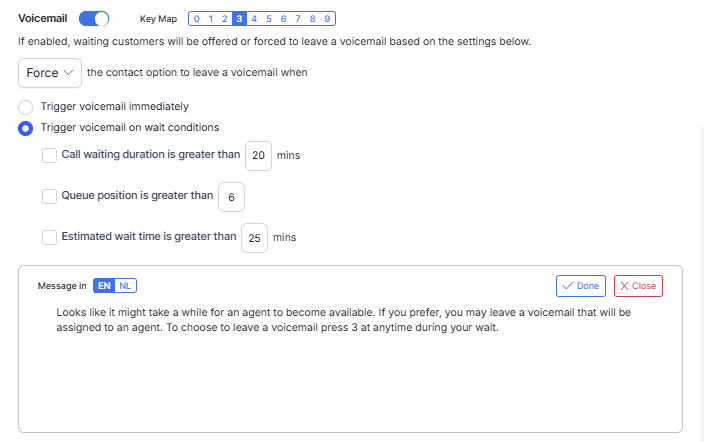
- Voicemail when wait duration, queue position, or estimated wait time exceeds a threshold.
Add a Waiting Experience
- Go to Flows & Routing > Waiting Flows.
- Select + New Waiting Experience.
- Configure the three tabs: Configuration, Call Experience, and Chat Experience.
Configuration Tab
Name and Description: Enter a Name and a brief Description for the entry. Routing Rules: Define which conversations use this Waiting Experience. Conditions can be based on Skill, Queue, or a combination of both.
Supported condition types:
How the system selects a Waiting Experience:
- Filters all entries whose routing conditions match the conversation — based on skill, queue, or skill + queue as configured.
- Sorts by number of routing rules (descending) — more specific entries take priority.
- If two entries have the same number of rules, the system selects the one created earliest.
Existing skill-only configurations continue to work without modification. Queue-based conditions are additive and do not affect entries that use skill conditions only.
Call Experience Tab
Configures the in-queue experience for voice calls.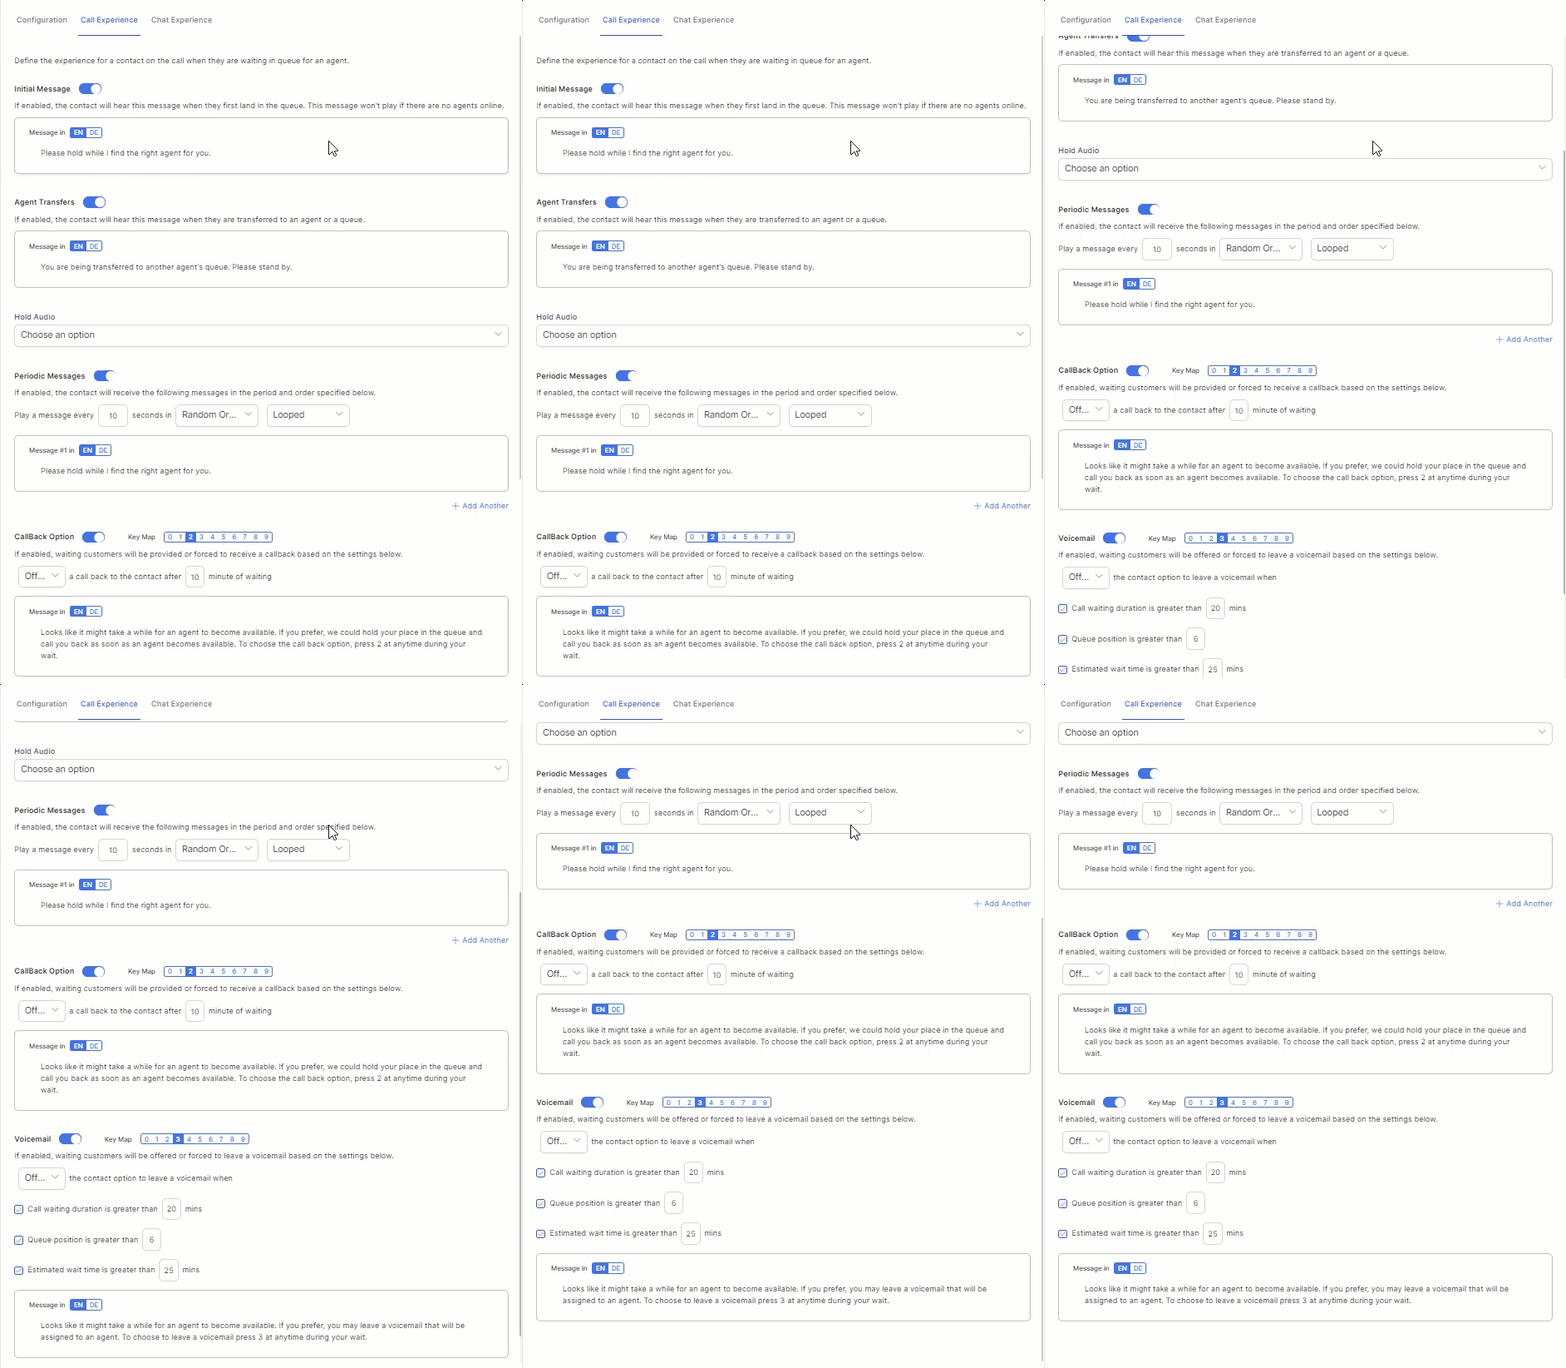

- Set the interval in seconds.
- Set the play order: Random or Sequential.
- Set the playback type: Once or Looped.
- Edit the message text and language. Select ✔ to save or x Close to discard.
- To add another message, select + Add Another.
- To remove a message, select the Delete icon next to it.
- Turn on the Callback toggle.
- Set the digit key customers press to request a callback. Choose Offered or Forced.
- Edit the callback message. Select ✔ to save or x to discard.
- Confirm the caller ID number from which they are calling.
- Enter an alternate callback number, including country code.
- Verify the entered number before final confirmation.
- Complete the callback request using either Dual-Tone Multi-Frequency (DTMF) keypad input or voice input.
- Callback offer: When the queue wait threshold breaches, callers are offered a callback option. For example: Looks like it might take a while for an agent to become available. To choose the callback option, press 1 at any time during your wait.
- Number verification: The system reads the caller’s phone number digit-by-digit and lets caller to confirm the number or enter a different number for a callback.
- Alternative number entry: If the caller chooses to provide alternate number for callback, they are prompted to enter a complete phone number, including the country code.
- Alternative number confirmation: The system reads back the entered number and prompts the caller to confirm or re-enter it.
- Final confirmation: The system reads the confirmed callback number for the callback request and the caller can disconnect the call.
- Agent callback: When an agent becomes available, the system initiates the callback request using the confirmed number.
- The system supports both DTMF and Voice Input.
- Callers can retry number entry if validation fails.
- If number capture fails after the configured retry limit, the system follows the configured fallback behavior in the dialog flow.
- Existing callback failure handling behavior remains unchanged.
Enable this feature only if callers need to confirm or provide an alternate callback number. Otherwise, we recommend leaving it disabled, as it adds additional steps to the callback flow and may impact the caller experience.
- Call wait duration exceeds
xminutes. - Queue position exceeds
x. - Estimated wait time exceeds
xminutes.
- Turn on the Voicemail toggle.
-
Set the digit key that customers press to leave a voicemail. Choose Offered or Forced.
-
Edit the voicemail message. Select ✔ to save or x to discard.
Chat Experience Tab
Configures the in-queue experience for chat interactions.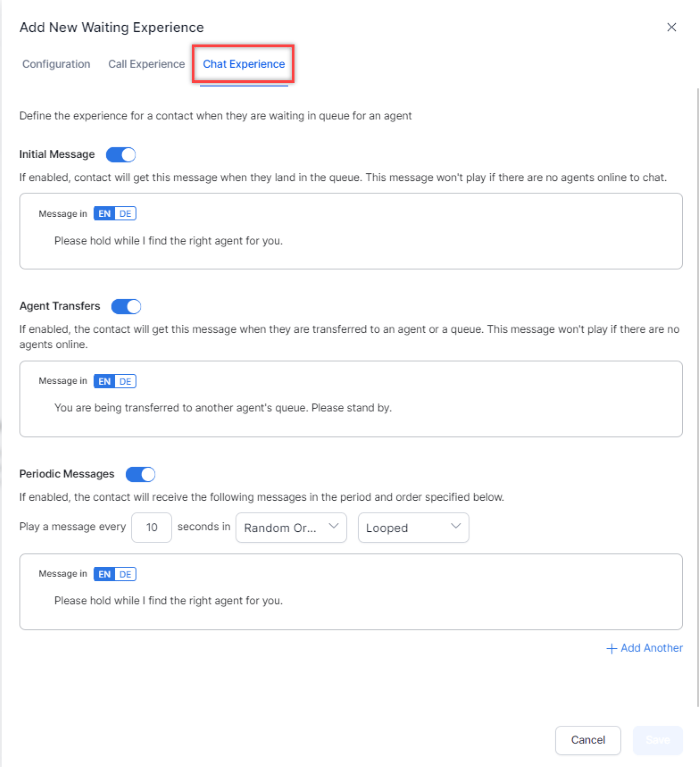
- Set the interval in seconds.
- Choose Random or Sequential display order.
- Choose Once or Looped.
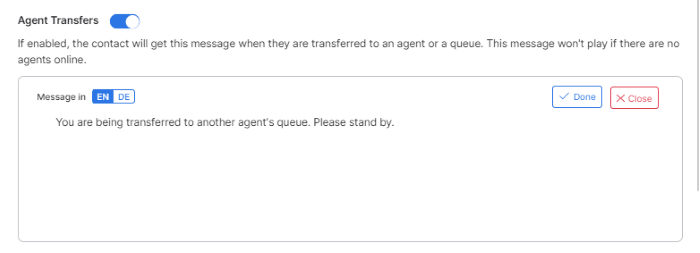
- Edit the message text and language. Select ✔ Done to save or x Close to discard.
- To add another message, select + Add Another.
- To remove a message, select the Delete icon next to it.
Email Experience Tab
Configures the in-queue experience for email interactions.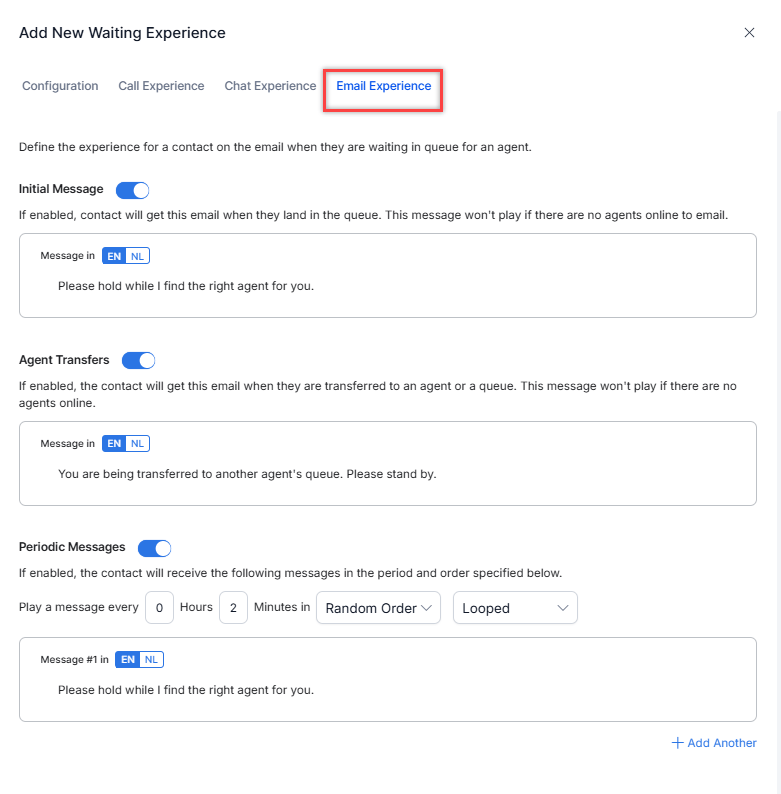
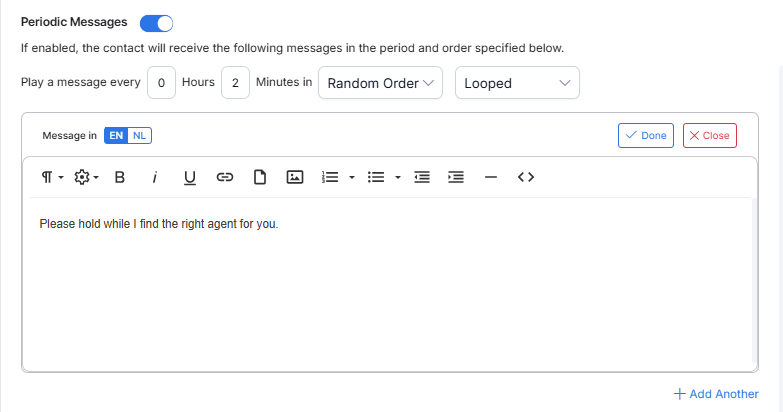
- Set the interval in seconds.
- Choose Random or Sequential display order.
- Choose Once or Looped.
-
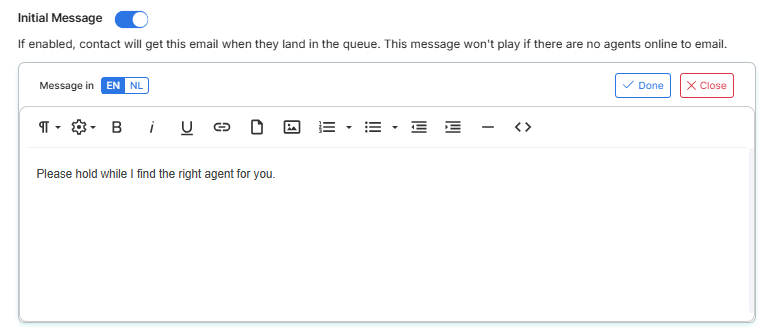
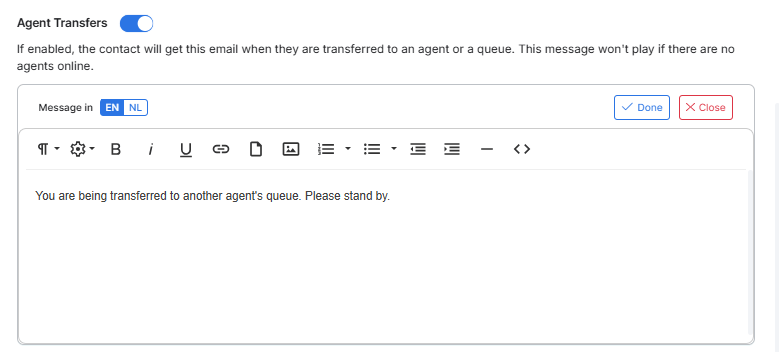
Edit the message text and language. Select ✔ Done to save or x Close to discard. To add another message, select + Add Another. To remove a message, select the Delete icon next to it.
Edit a Waiting Flow
- In the Waiting Flows list, select the Edit icon for the entry.
- Modify the configuration as needed and select Save. A success confirmation message appears.
Delete a Waiting Experience
- In the Waiting Flows list, select the Edit icon for the entry.
- Select the Delete icon.
- Select Yes to confirm.
Deleted Waiting Flows can’t be restored. Proceed with caution.
Debug and Troubleshoot
The Debug window lets you inspect NLP details, execution logs, and session variables for a chat interaction. Select the Debug icon in the upper-right corner of the chat window to open it.