

Illustration with an Example
Consider a Banking App trying to address the following scenarios: This document gives a detailed step-by-step approach to achieving all the above-mentioned scenarios using – Digital Views (Panels, Widgets), Widget SDK and Web/Mobile Client.Prerequisites
- App building knowledge
- A Banking App with a Get Balance dialog as mentioned below.
-
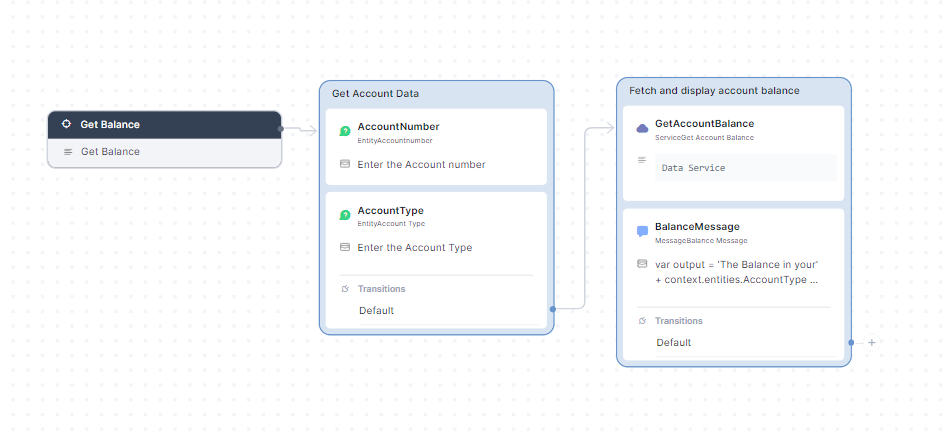
Get Balance – Dialog task prompting the user for their Account Number and Account Type and displaying the available balance in the account.
Configurations
Let’s consider each of the following configuration scenarios:- Dialog Task to display balance in a given account using Widget SDK channel.
- Widgets to trigger the above dialog task and a Panel set with the widgets.
- Panel to hold a widget displaying static JSON template message.
Message Template
First, the Dialog task which would be triggered from the Widget should have a message definition for the Widget SDK channel.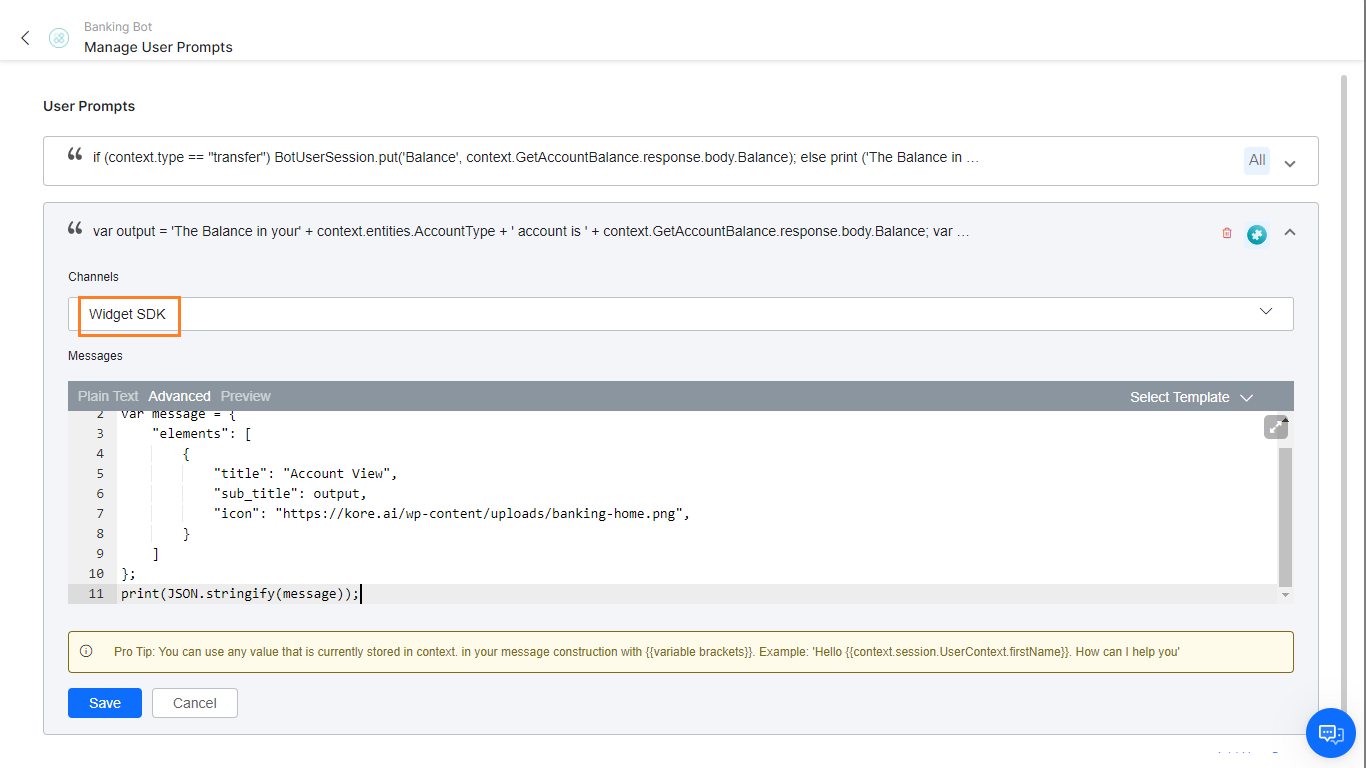
Widgets Configuration
You can configure the following widget types:Dialog Task Widgets
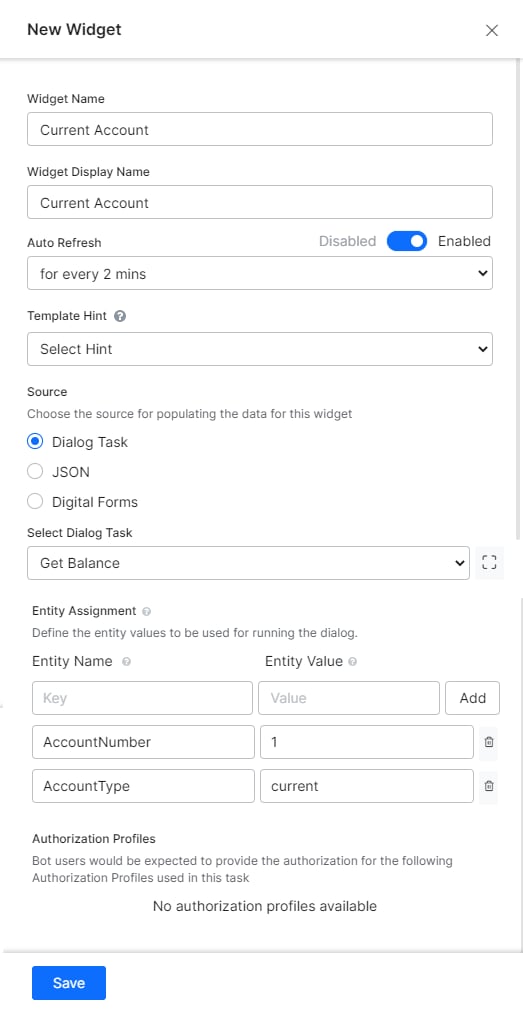
We’ll be creating two Widgets to trigger a Dialog Task. Current Account: First, let’s see how to configure a Widget to display balance from the current account of the user with the steps below:- Navigate to Automation AI > Use Cases > Digital Skills > Digital Views.
- Click the Create Widget button.
- Give a Widget Name and a Display Name.
-
Set the Source, we’re triggering Dialog Task, hence select Dialog Task.
- Select Dialog Task as Get Balance, as per our use case.
-
In the Entity Assignment, set the following entities (you can select from the drop box that appears as you type) as per the Dialog Task requirement:
- AccountType to current;
- AccountNumber to 1.
- Save the widget.
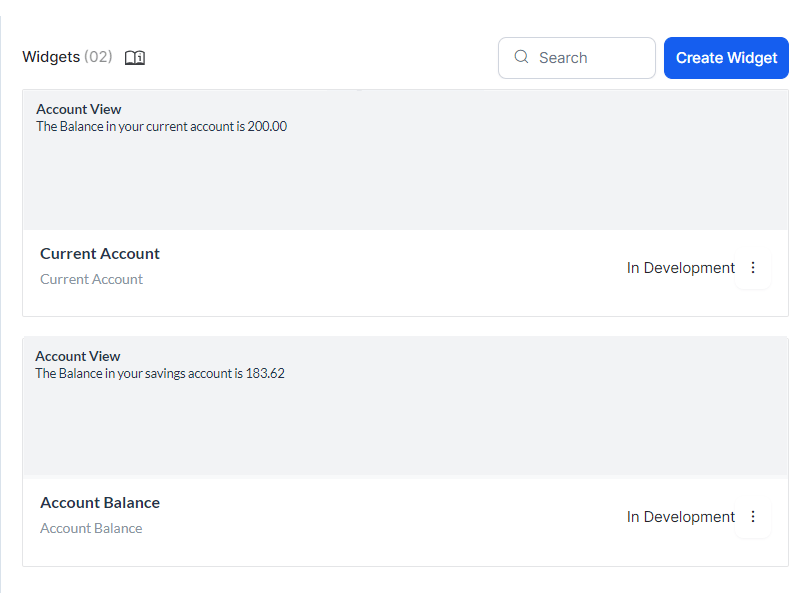
- Edit the widget and click Run & Preview to see the widget output.
- Save as preview will set the output as the thumbnail against the widget.
Panel Configuration
The Widgets thus created need to be attached to a Panel for runtime display and execution.- Click the Create Panel button to create a Panel.
-
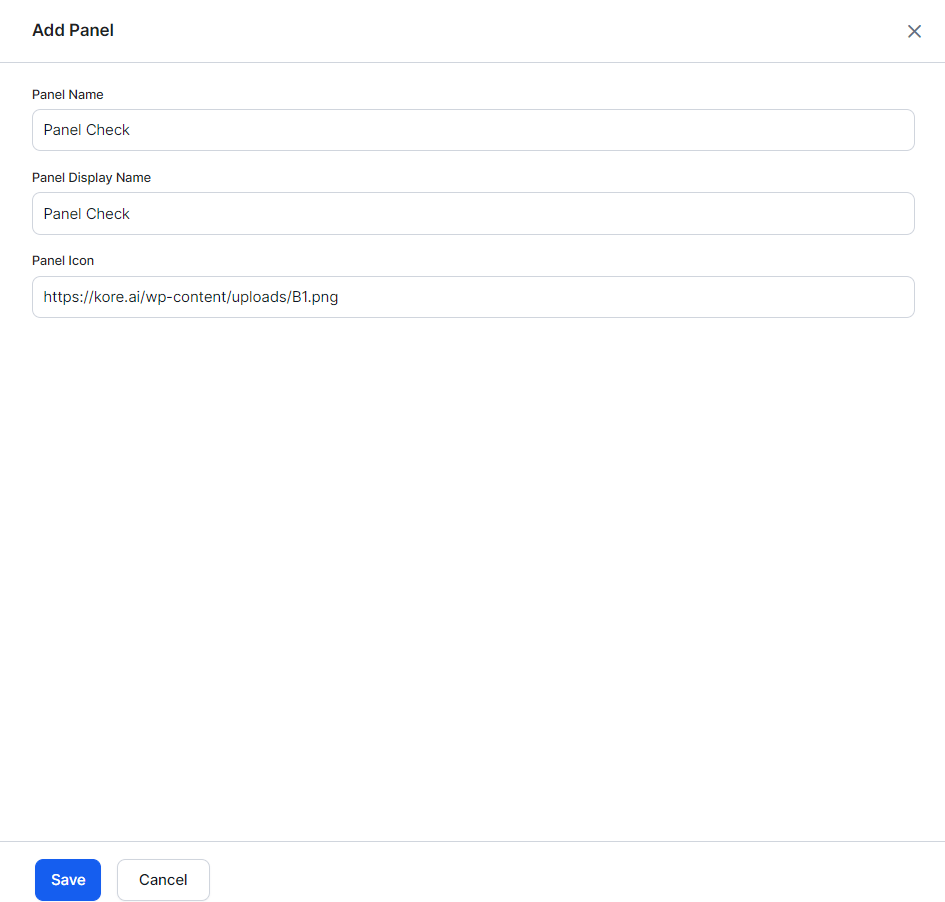
In the New Panel window, enter Panel Name, Display Name and a URL for Icon.
-
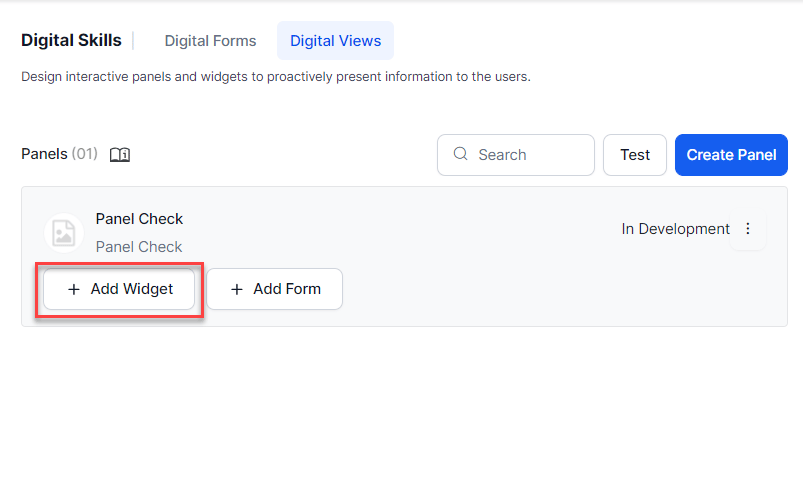
Click the Add Widget button to open the Panel Management window.
-
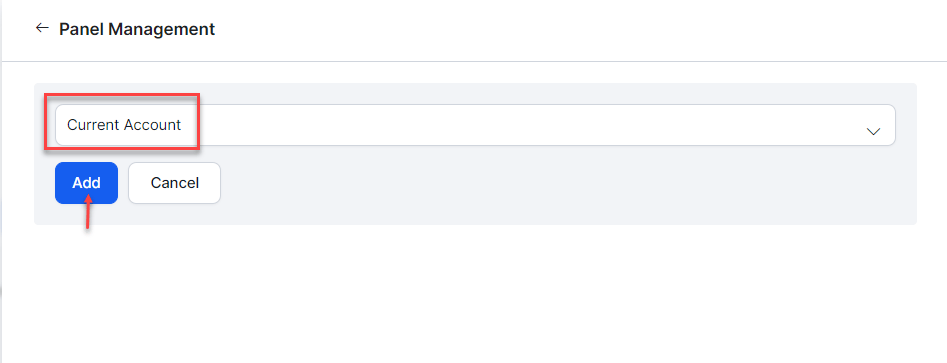
Use the Add Widget to select and add the Widgets that we want to display, in this case Account Balance and Current Account widgets.
-
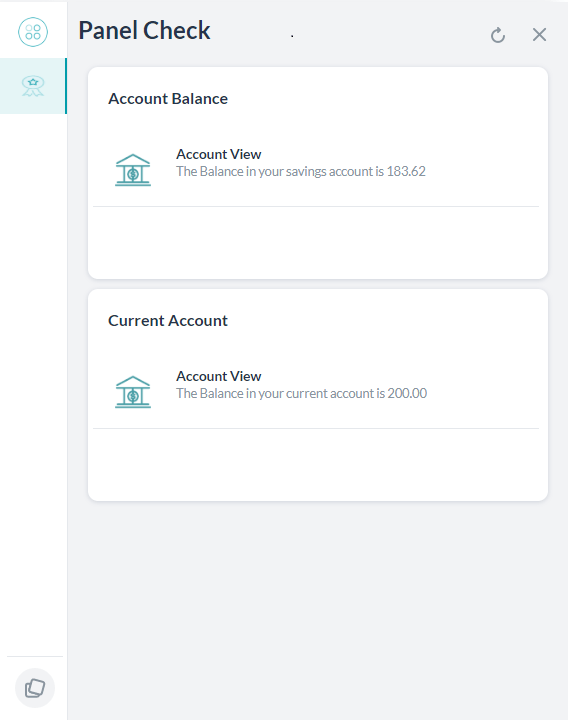
Click the 3-dot menu icon on the panel, and select the Test option from the menu to see the widgets in action.
Panel with JSON Widgets
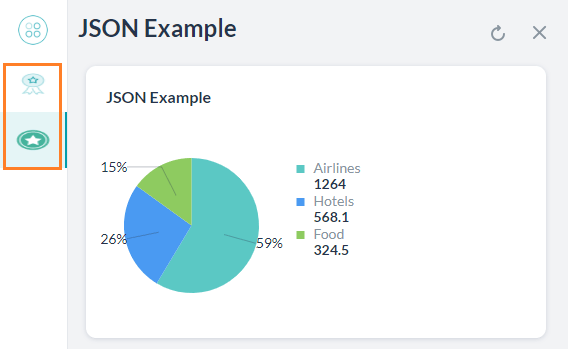
We’ll see how to create Widgets with static JSON content. We’ll use a JSON to display a pie chart.- Click Create Panel to create a new panel and name it JSON Example.
-
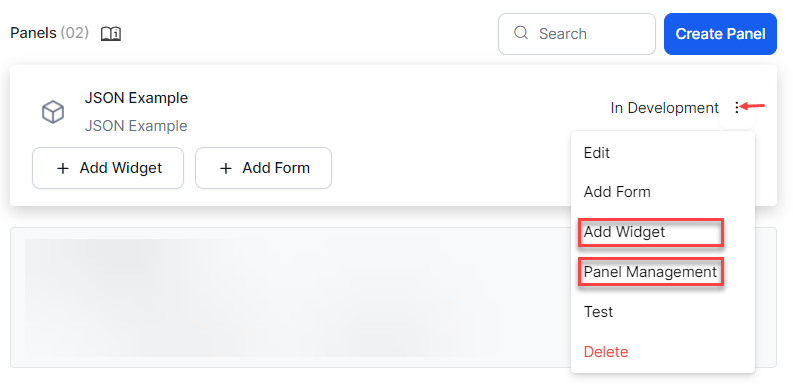
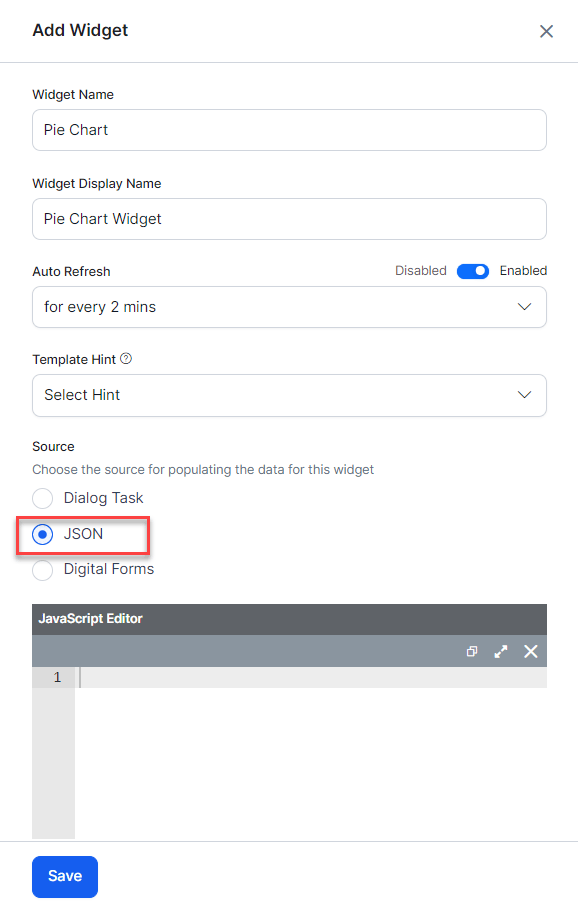
Use the 3-dot icon and select Panel Management from the menu, there you’ll find the option to Add Widget. Click on that.
-
Enter the following in the JavaScript Editor. This is a message template to display a pie chart with a break up for amounts spent under various heads like travel, food, and accommodation. For more on supported message templates, refer here.
- Save the new widget.
- Click on Create Panel to create a new panel and name it JSON Example.
-
Click the 3-dot menu icon on the panel. Select the Add Widget or Panel Management option and add the above created Pie Chart widget.
-
Test the panel and you’ll see the panel icons, click on each to see the widgets within them in action.
Publish
To publish the App first enable channels:- From left navigation menu, select Channel for publishing. For our use case we’ll select both Web/Mobile Client and Widget SDK channels.
- Select the channels and from Configurations tab, make a note of the Bot Name, Bot Id, Client Id and Client Secret.
- From left navigation menu, select Publish option. Under Tasks & languages section, ensure that the Widget and Panels we developed are selected for publication.
- Proceed with the Publish.
Hosting
We’ll be hosting the Panels in the web/mobile client. Click here for more details on the Widget SDK usage.- Download the Kore.ai Widget SDK, go to this link, and then click Download.
- Extract all files to the …/SDKApp/sdk folder.
- Open the above SDK folder, and traverse to UI folder.
-
Open the
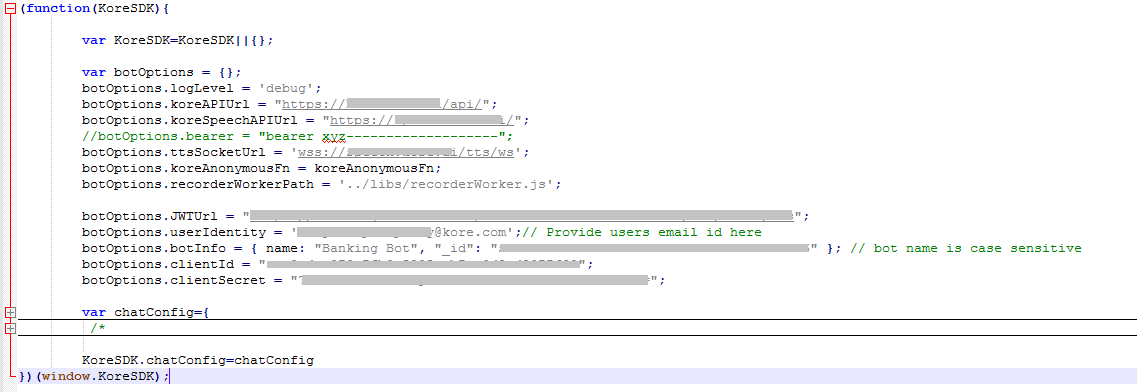
kore-config.js -
Configure your
botOptionswith the ‘web/mobile client’ channel configurations copied in above section.botOptions.botInfobotOptions.clientIdbotOptions.clientSecret
-
Make other changes as per your requirements.
-
Open the
kore-widgets-config.js -
Configure your
botOptionsWizwith the ‘Widget SDK’ channel configurations copied in above section.botOptionsWiz.botInfobotOptionsWiz.clientIdbotOptionsWiz.clientSecret
-
Make other changes as per your requirements.
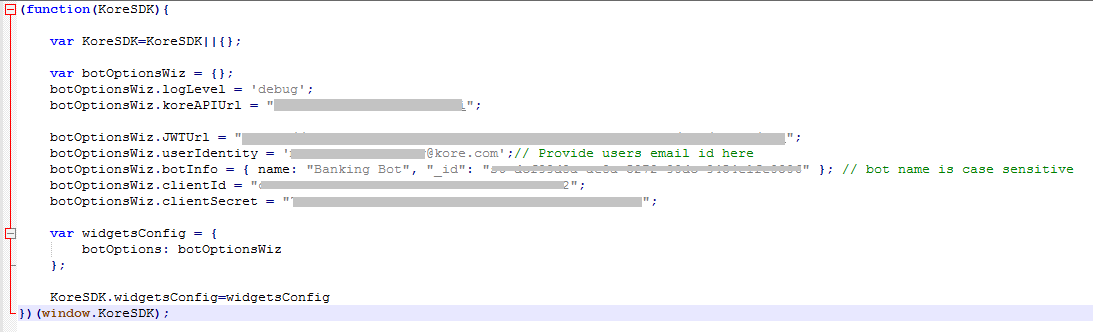
-
Open the
index_widgets_chat.htmlfile in the browser and see the chat window along with the widgets.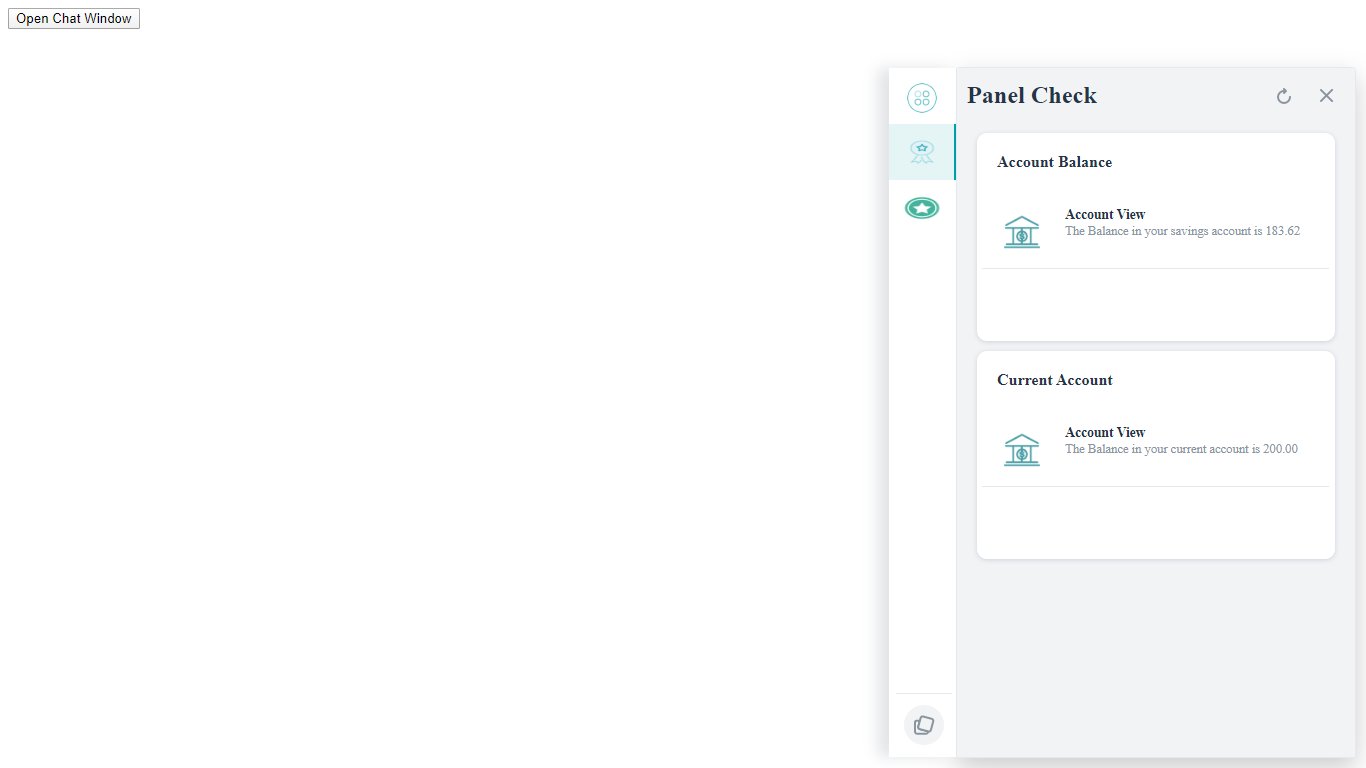
-
If you want to host the Panels individually use the
index_widgets.htmlfile. See the GitHub for hosting the same in your web site.