

Prerequisites
Before starting, confirm:- Full Conversation Intelligence permissions — only users with complete access can configure taxonomies.
- Advanced Topic Discovery enabled — Taxonomy Builder requires the GenAI-powered topic discovery feature.
- Business structure mapped — understand your organizational hierarchy and customer interaction types.
Users with view-only permissions can see configured taxonomies but can’t make changes. Users without the required permissions can’t access Taxonomy Builder.
Access Taxonomy Builder
Navigate to Quality AI > Configure > Taxonomy Builder.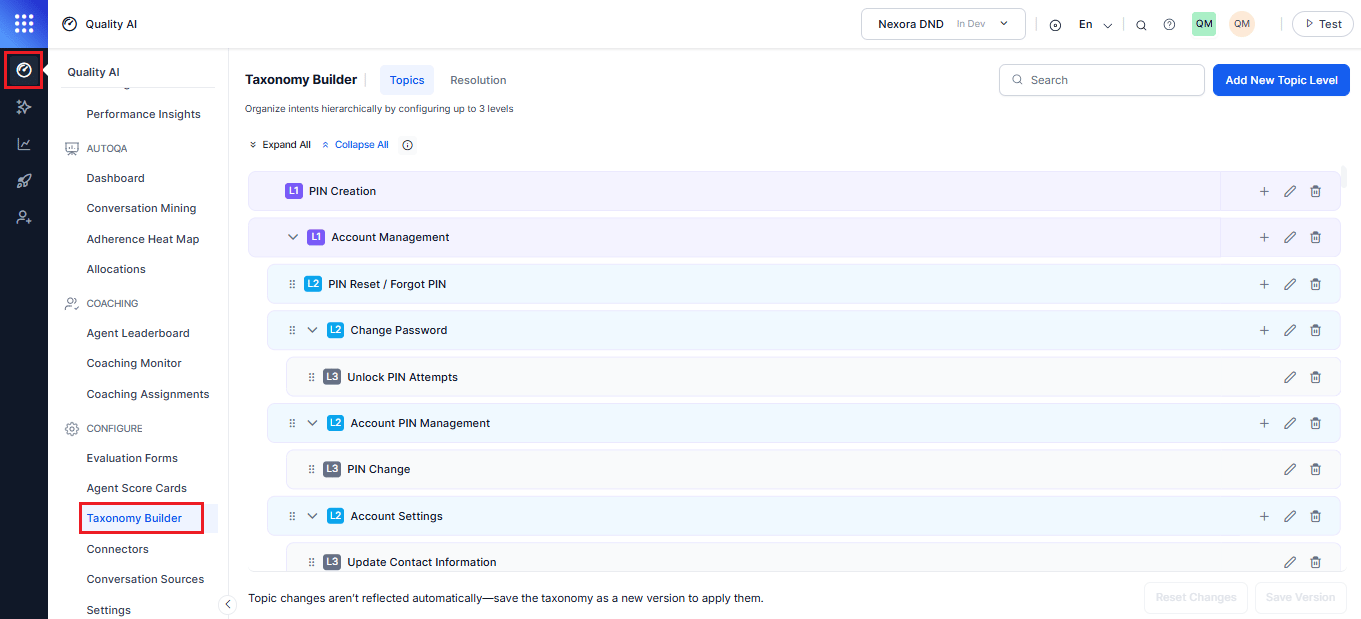
Interface Overview
Hierarchy Tree View
- Displays the full taxonomy in a collapsible tree.
- Shows L1, L2, and L3 topics with color coding and indentation.
- Includes expand/collapse controls for parent topics.
Action Buttons
Topic Hierarchy and Visual Representation
Auto parent assignment: When you add an L2 topic from an L1 node, the system assigns that L1 as the parent automatically. The same applies for L3 under L2.
Create Topics
Add a Level 1 Topic
-
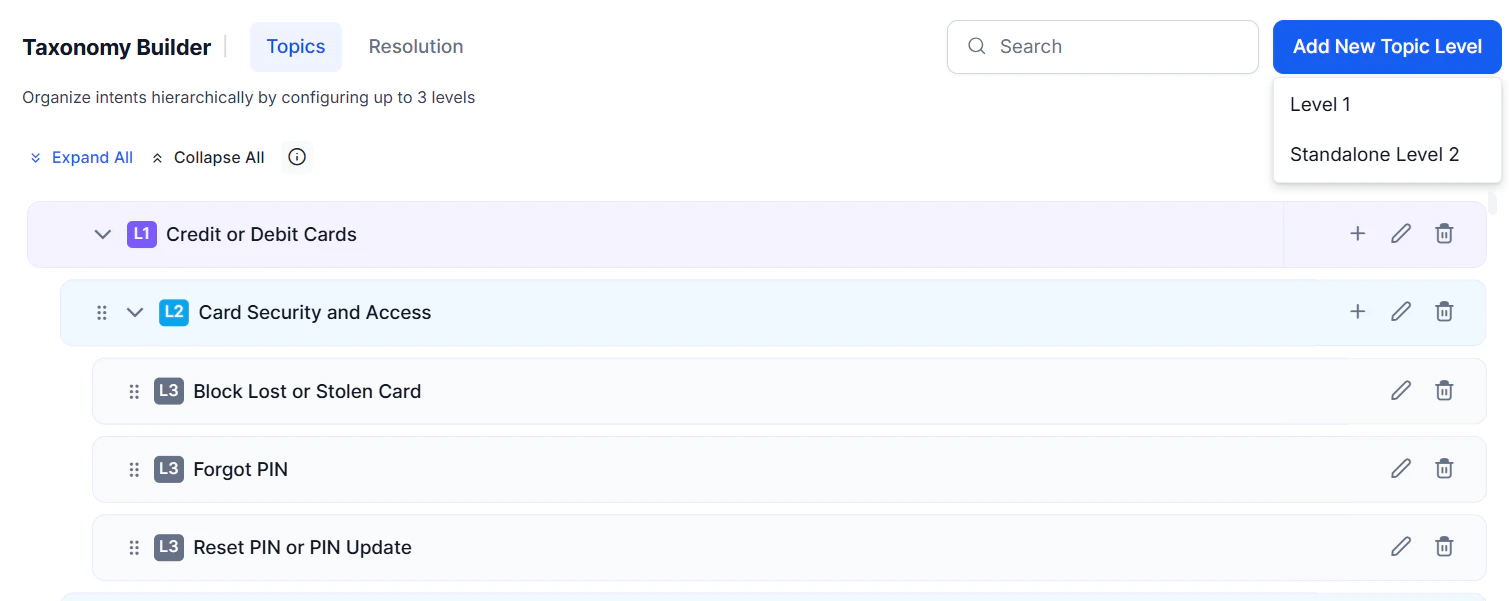
Select Add New Topic Level.

-
Select Level 1.
-
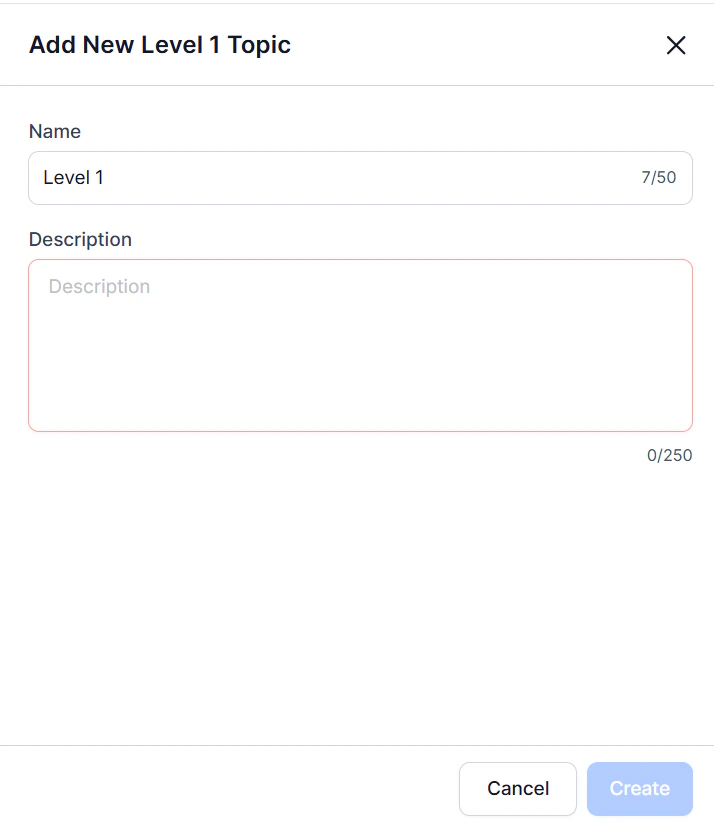
Enter:
- Name (required, max 50 characters)
- Description (required, max 250 characters)
-
Select Create.
Add a Level 2 Topic
-
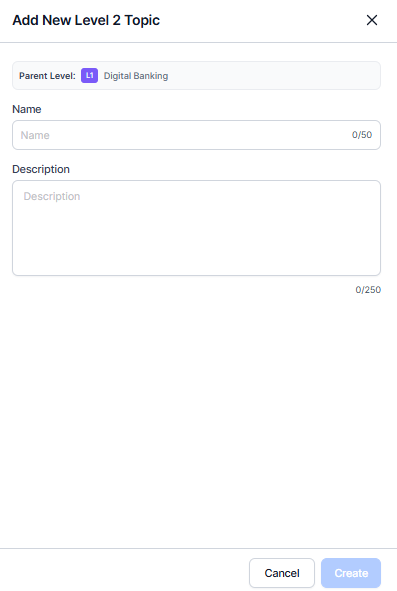
Select + Add Level 2 under the desired L1 topic.
When you initiate from an existing L1 node, the system preselects that L1 as the parent.
-
Enter:
- Name (required, up to 50 characters)
- Description (required, up to 250 characters)
- Parent Category — assign to an L1, keep the preselected L1, or set as Standalone L2.
-
Select Create.
Add a Standalone Level 2 Topic
- Select Add New Topic Level.
- Select Standalone Level 2.
- Enter a Name (up to 50 characters) and Description (up to 250 characters).
-
Select Create.
Standalone L2 topics support flexible taxonomy structures without requiring a full three-level hierarchy.
Add a Level 3 Topic
-
Select + Add Level 3 under the desired L2 topic.
 The system preselects the L2 parent from which you initiated the action.
 -
Enter:
- Name (required, up to 50 characters)
- Description (required, up to 250 characters)
- Check the resolution detection option to track successful or unsuccessful outcomes (enabled by default).
- Select Create.
Resolution Tracking
By default, resolution detection is enabled for L3 topics. Disable it for informational topics that don’t require resolution tracking — such as balance inquiries, rate information requests, or general knowledge questions.Edit Topics
- Locate the topic in the taxonomy tree.
-
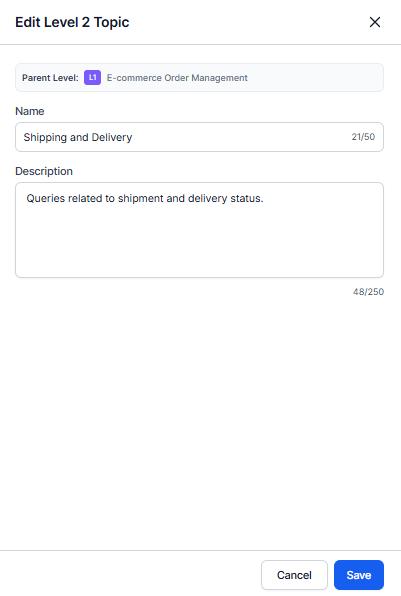
Select Edit.
-
Update the following fields:
-
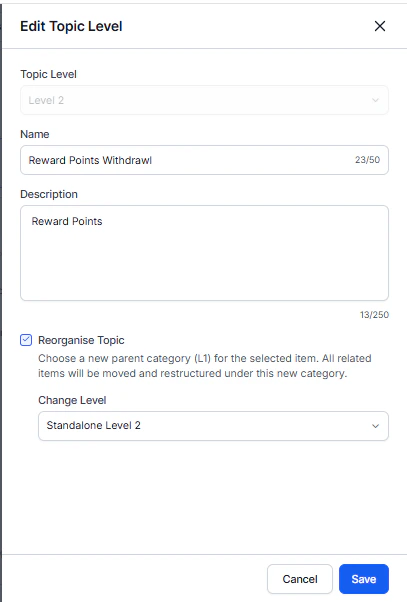
To reorganize, check Reorganize Topic and select a new parent or hierarchy level. All child topics move automatically.
- Select Save.
Character counters update in real time. You can’t save if character limits are exceeded.
Reorganize Topics
Use the reorganization feature to move topics to different parent categories or change hierarchy levels.- In the Edit Topic Level modal, check Reorganize Topic.
- Select the new parent category or hierarchy level from the Change Level dropdown.
- Review the explanatory text before confirming.
- Select Save to confirm, or Cancel to discard.
When you reorganize a topic, all child topics move with it automatically. The system validates against duplicate names in the destination. This action can’t be undone — verify the new structure before confirming.
- Existing conversation classifications under this topic.
- Reports and dashboards that reference this topic’s hierarchy path.
- Filters and saved views that use the current topic location.
- Historical data analysis that depends on topic organization.
Permitted Topic Movements
Topic Conversion Options
Make as L1: Topic becomes a top-level business category with no parent. Existing child topics move with it. Make Standalone L2: Topic remains Level 2 but no longer belongs to any Level 1. Child topics remain unchanged.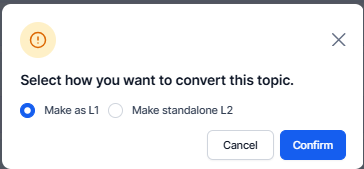
Restricted Movements
Duplicate names restriction: The system prevents duplicate names within the same hierarchy level and parent. If a conflict is detected, rename one topic before proceeding.
Delete Topics
- Locate the topic to delete.
- Select Delete.
- Review the confirmation dialog — it shows the topic name, level, number of child topics, and the impact on conversation classifications.
- For L1 and L2 deletions, type the topic name to confirm.
- Select Delete to proceed, or Cancel to abort.
Deletion Effects by Level
L1 Deletion: Removes the entire branch — all associated L2 and L3 subcategories.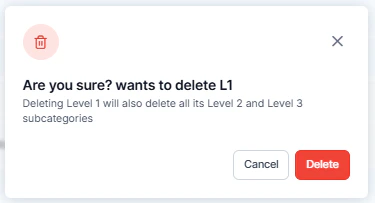
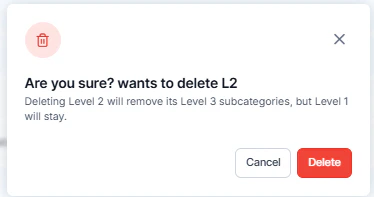
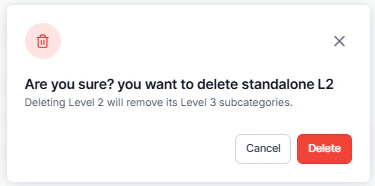
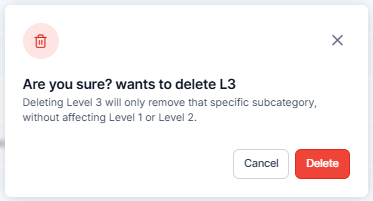
The system keeps historical data but removes all references to deleted topics. Reports and dashboards may show gaps in historical data.
Organizing Your Taxonomy
Drag and Drop
- Drag topics to new positions within the hierarchy.
- Valid drop zones are highlighted during the drag.
- Invalid operations are clearly indicated.
- Preview the new structure before confirming.
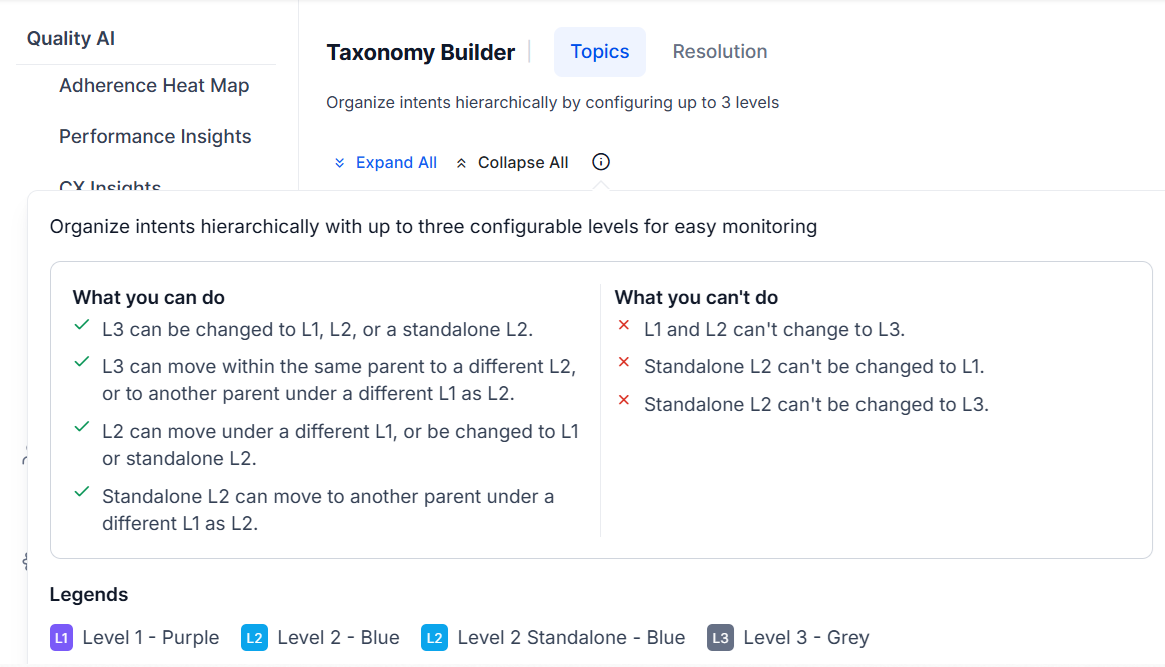
- Hover over the info (ⓘ) icon for guidance.
Save and Version Management
Save Taxonomy Changes
When you save changes, a confirmation dialog appears: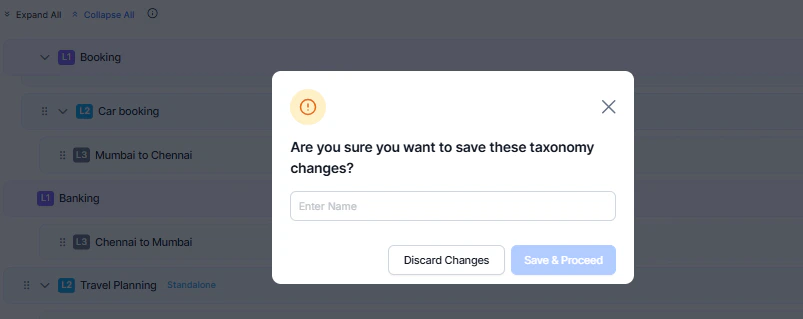
Changes take effect only after confirmation. Once deployed, future conversations use the new taxonomy. Historical conversations retain their original classifications. This action can’t be undone, though you can create another version reverting changes.
Reset or Revert Changes
The Reset Changes and Save Version buttons are enabled whenever unsaved changes exist. Saving disables them automatically. Reset Changes: Opens a Revert Changes confirmation pop-up. Discards all recent changes and restores the taxonomy to its last saved state. Save Version: Saves the current changes and updates the taxonomy to the latest version.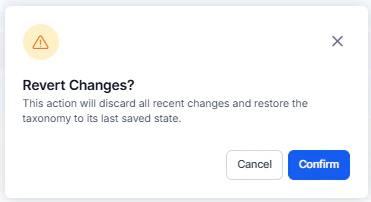
This action affects only unsaved changes. Previously saved versions remain unchanged.
Resolution Configuration
Navigate to Taxonomy Builder > Resolution Configuration tab.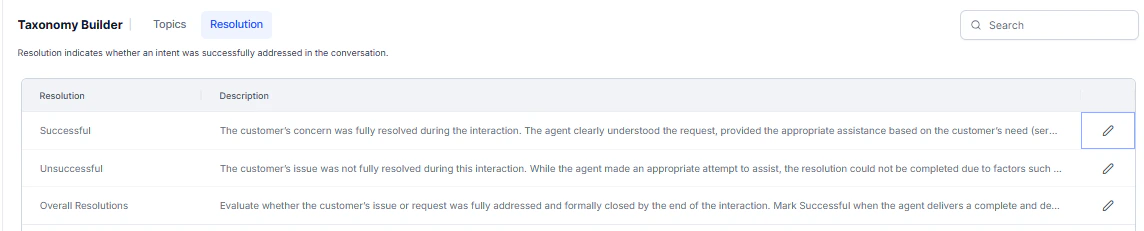
Configure Holistic Resolution Assessment
When Overall Contact Level Resolution is selected in Settings, additional options appear:- Go to Taxonomy Builder > Resolution Configuration.
- Locate the Contact-Level Resolution section.
-
Customize the prompt descriptions that guide the LLM:
- Successful Resolution — define what constitutes a resolved contact. Include criteria such as: addressed the primary contact reason, satisfied the customer’s main concern, completed necessary follow-up.
- Unsuccessful Resolution — define what constitutes an unresolved contact. Include criteria such as: primary issue unaddressed, customer expressed dissatisfaction, escalation or callback required.
These custom descriptions ensure the LLM evaluates contacts according to your organization’s quality standards and resolution expectations.
Resolution Types
Version History
Access Version History from the Topic Discovery dashboard:- View the current version and the three most recent previous versions.
- Previous versions display data only up to their respective update dates.
Example: Banking Sector Taxonomy
Phase 1: Business Structure
Phase 2: Topic Descriptions
L1 example: “All customer interactions related to individual banking services, including personal accounts, loans, and credit products. Covers day-to-day banking needs for retail customers rather than business or commercial services.” L2 example: “Credit card-related inquiries including new applications, existing account management, payment processing, rewards programs, and account modifications. Excludes debit card issues.” L3 example: “When a customer encounters problems making credit card payments, including failed online payments, payment processing delays, payment method changes, or autopay setup issues. Include phrases such as ‘payment won’t go through,’ ‘card got declined for payment,’ or ‘need to change payment method.’”Phase 3: Resolution Configuration Strategy
Enable resolution tracking for:- Service Requests (account changes, product applications, cancellations)
- Problem Resolution (technical issues, billing disputes, service restoration)
- Transaction Support (payment assistance, transfer issues, account access)
- Balance Inquiries (simple information requests, no follow-up needed)
- Rate Information (interest rate questions, fee schedules)
- Confirmation Calls (appointment confirmations, routine notifications)
Phase 4: Version Deployment
- Complete all taxonomy modifications.
- Review changes in preview mode.
- Create a new version with a descriptive name and change summary.
- The system applies the new taxonomy to future conversations automatically.
- Historical data remains classified under previous taxonomy versions.