

Configuration Steps
- Step 1: Retrieve the ServiceNow Instance URL
- Step 2: Create a New Queue
- Step 3: Enable the ServiceNow Agent
- Step 4: Switch to UI16 Theme
- Step 5: Install Required Plugins
- Step 6: Create a User with agent_admin Role
- Step 7: Create a Group and Add the User
- Step 8: Define the Host URL in the REST Message
- Step 9: Define Outbound REST Message Requests
- Step 10: Define Outbound REST Business Rules
- Step 11: Testing Configuration
Step 1: Retrieve the ServiceNow Instance URL
- Log in to your ServiceNow account with admin credentials. The URL format is:
https://devXXX67.service-now.com. - Copy the Instance URL for use in Step 3.
Step 2: Create a New Queue
- Log in to your ServiceNow account.
-
Navigate to Connect > Support Administration > Queues and click New.
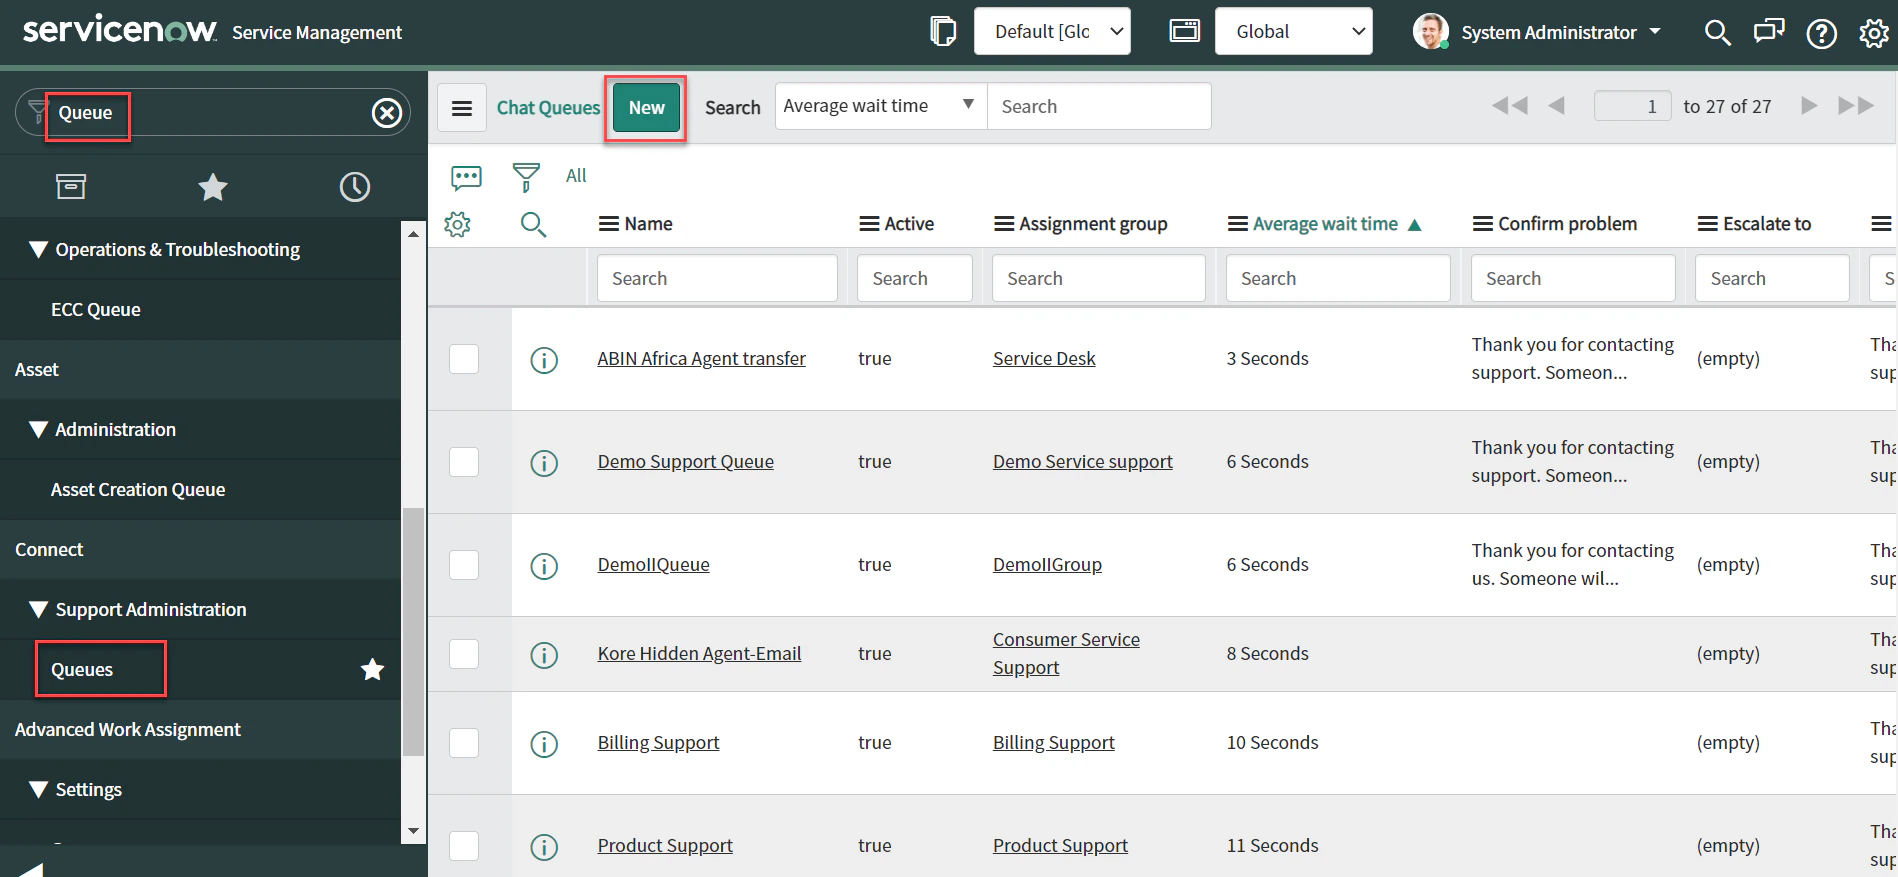
-
Enter the queue Name and select Consumer Service Support in the Assignment group field.
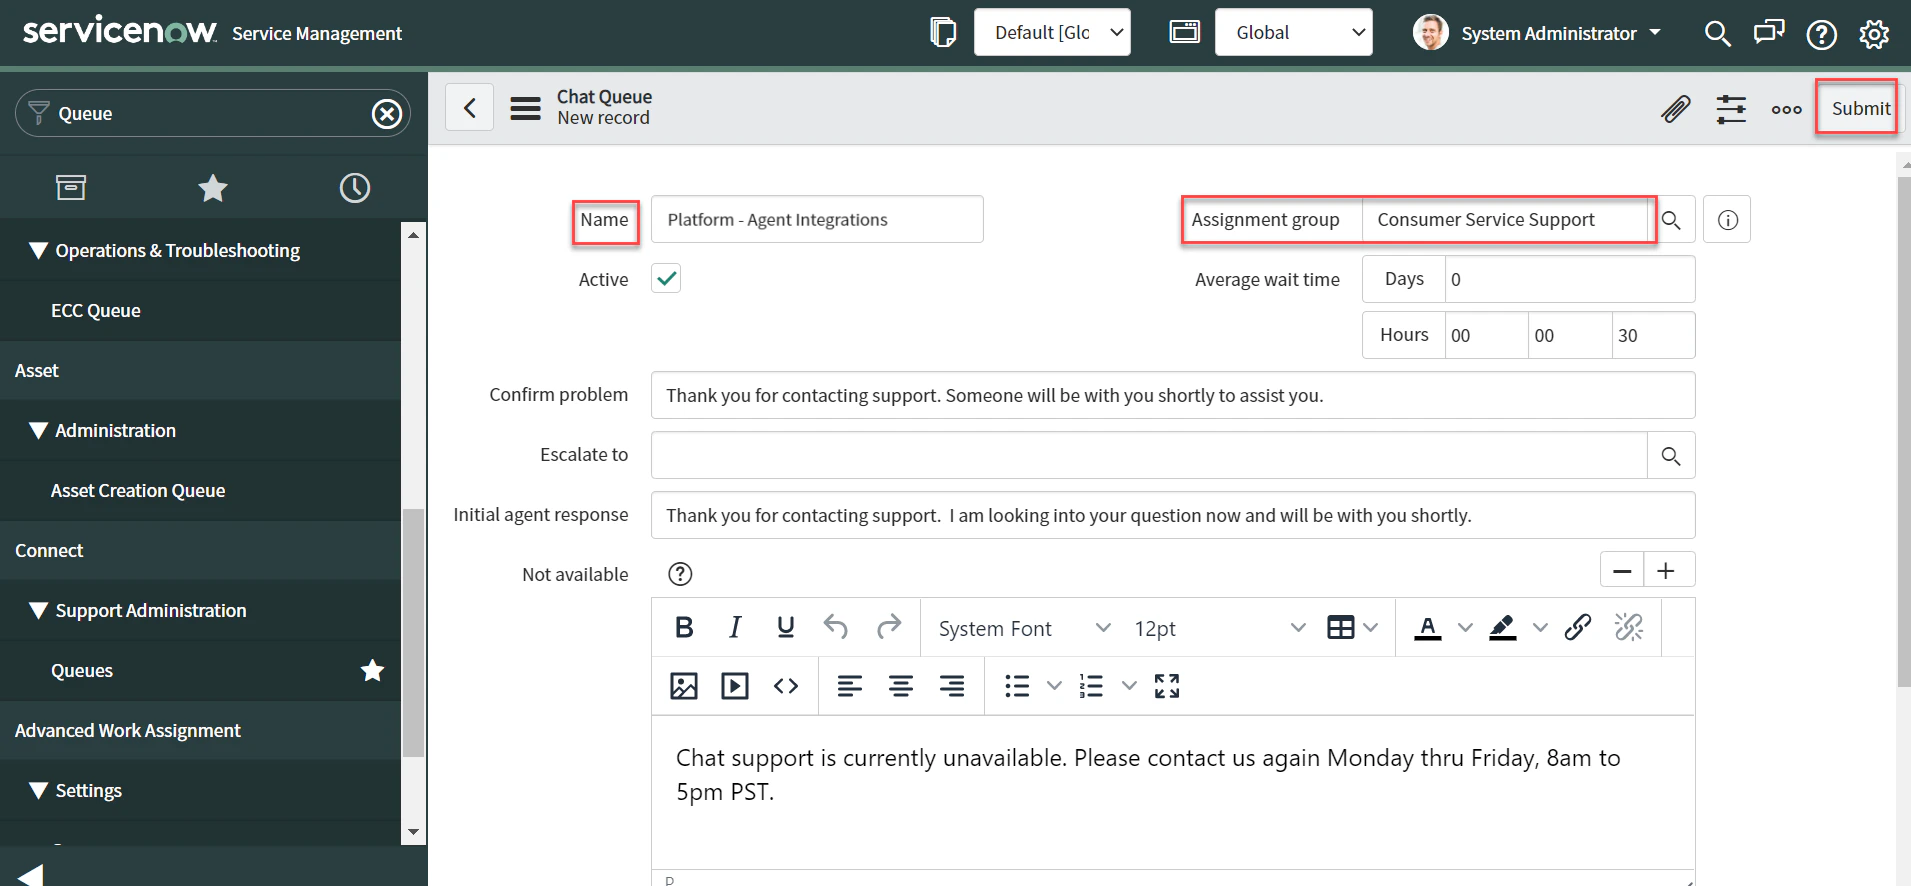
-
In the Chat Queue Entries section, click New and assign a user.
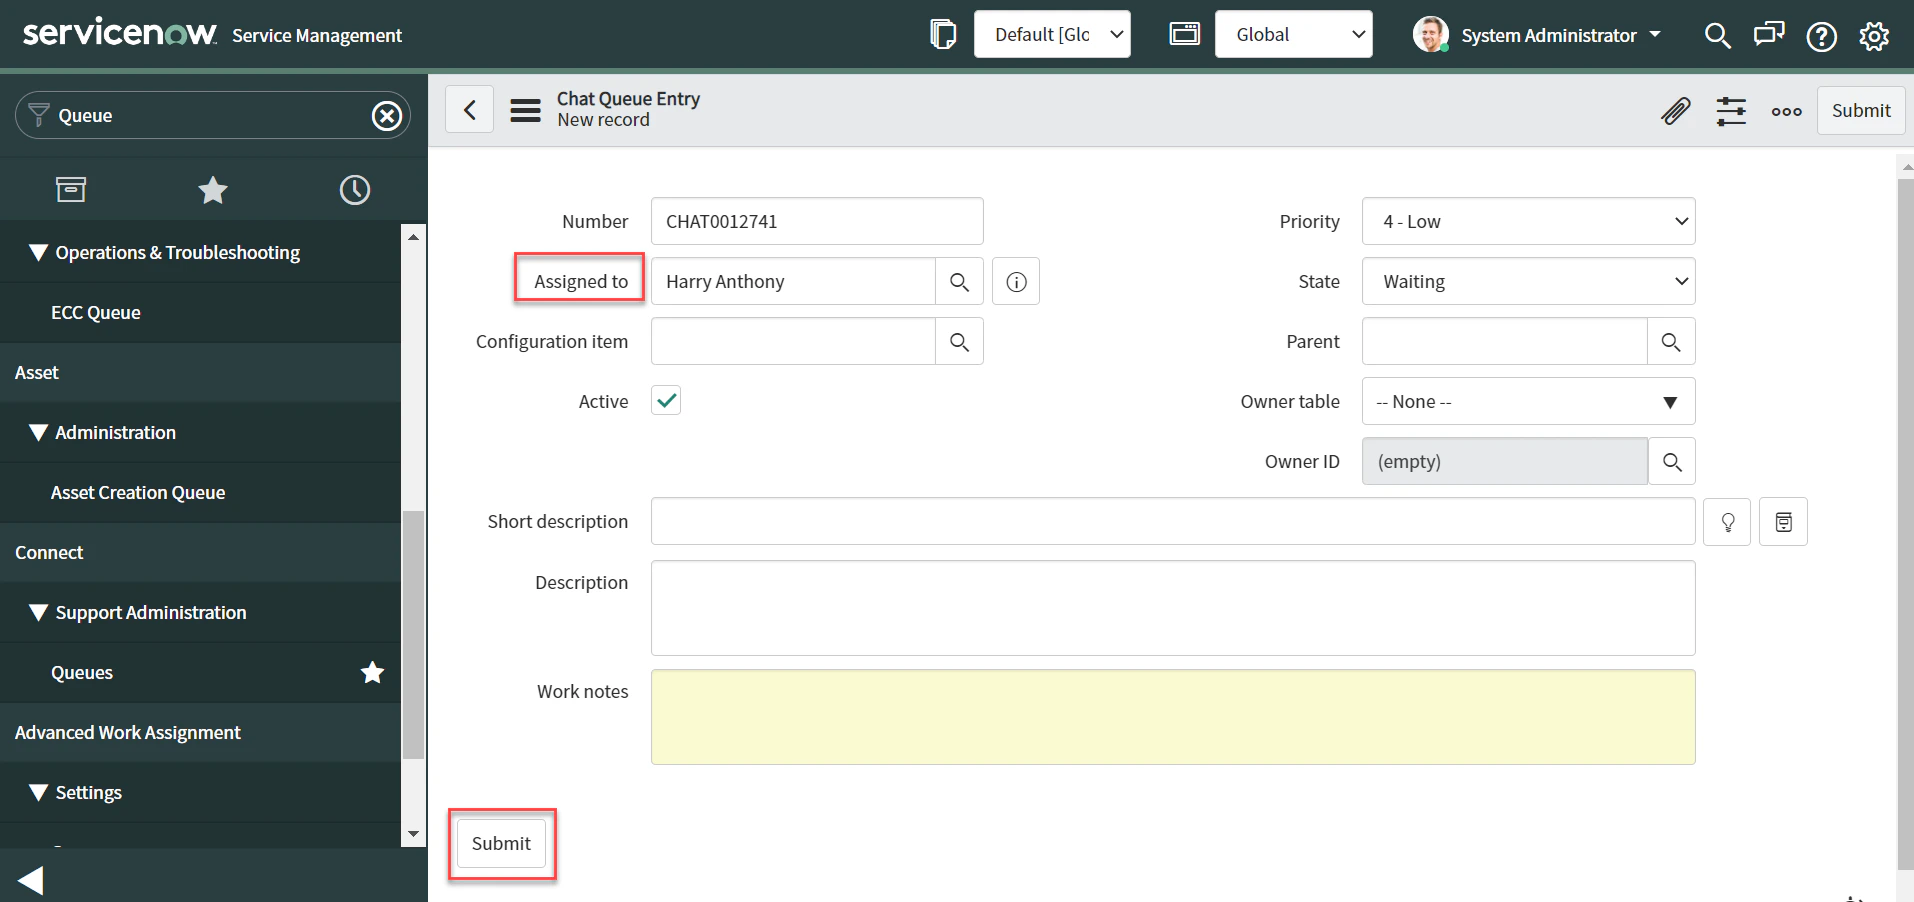
- Click Submit to save the queue entry, then Submit again to save the queue.
-
Copy the Queue ID.
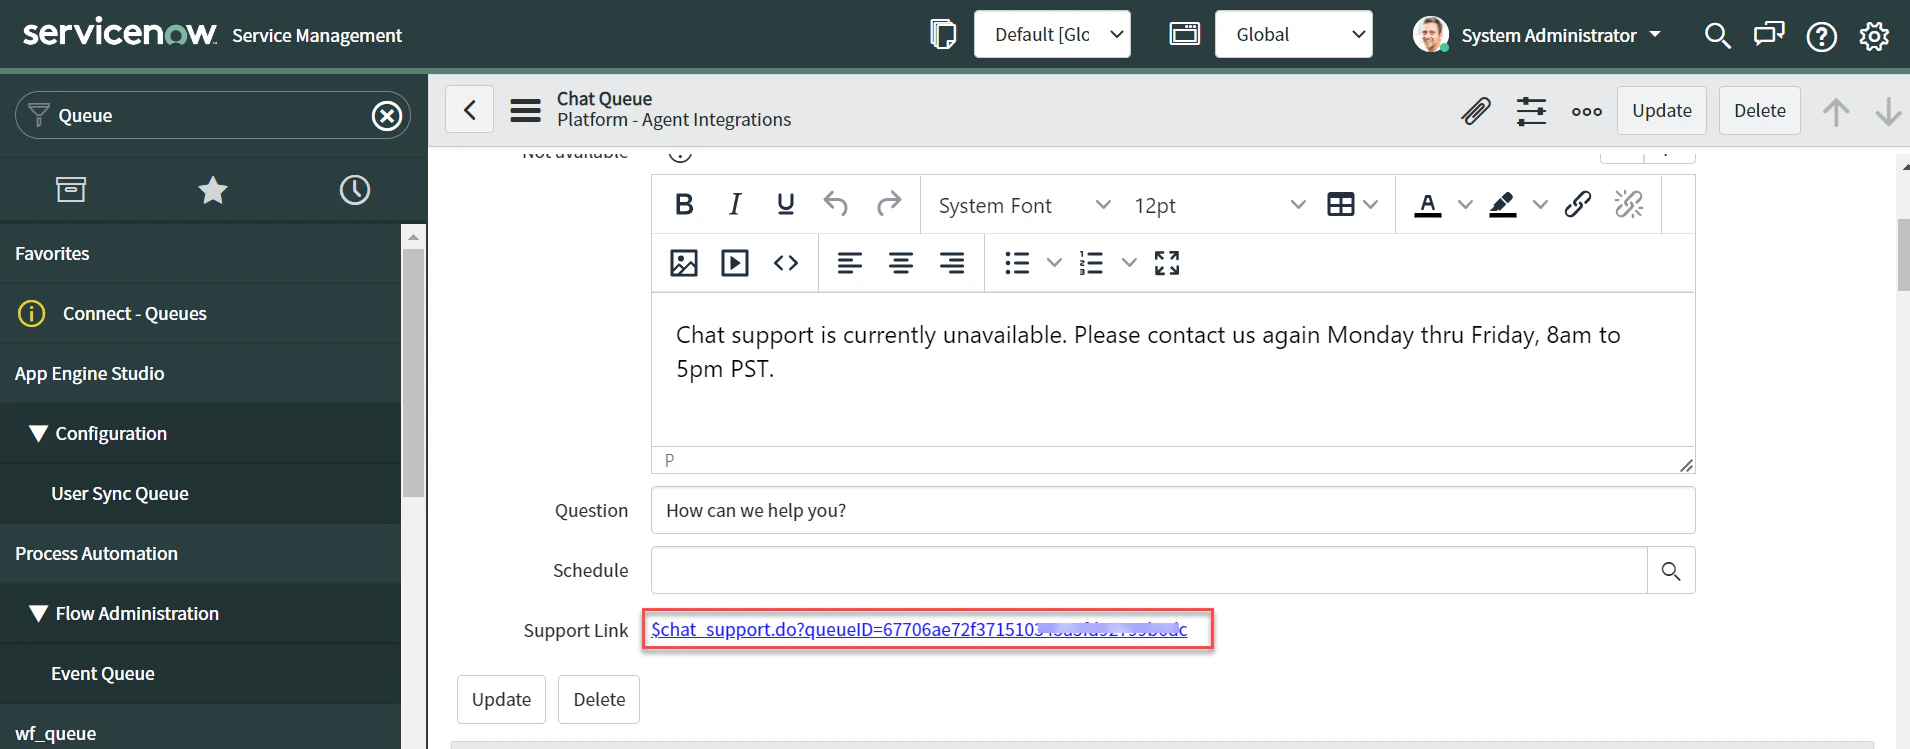
Step 3: Enable the ServiceNow Agent
- Log in to the Platform.
- Select the AI Agent to configure.
- Navigate to App Settings > Integrations > Agent Transfer and click ServiceNow.
-
On the Configurations tab, choose an authentication method:
Option 1: Basic Auth
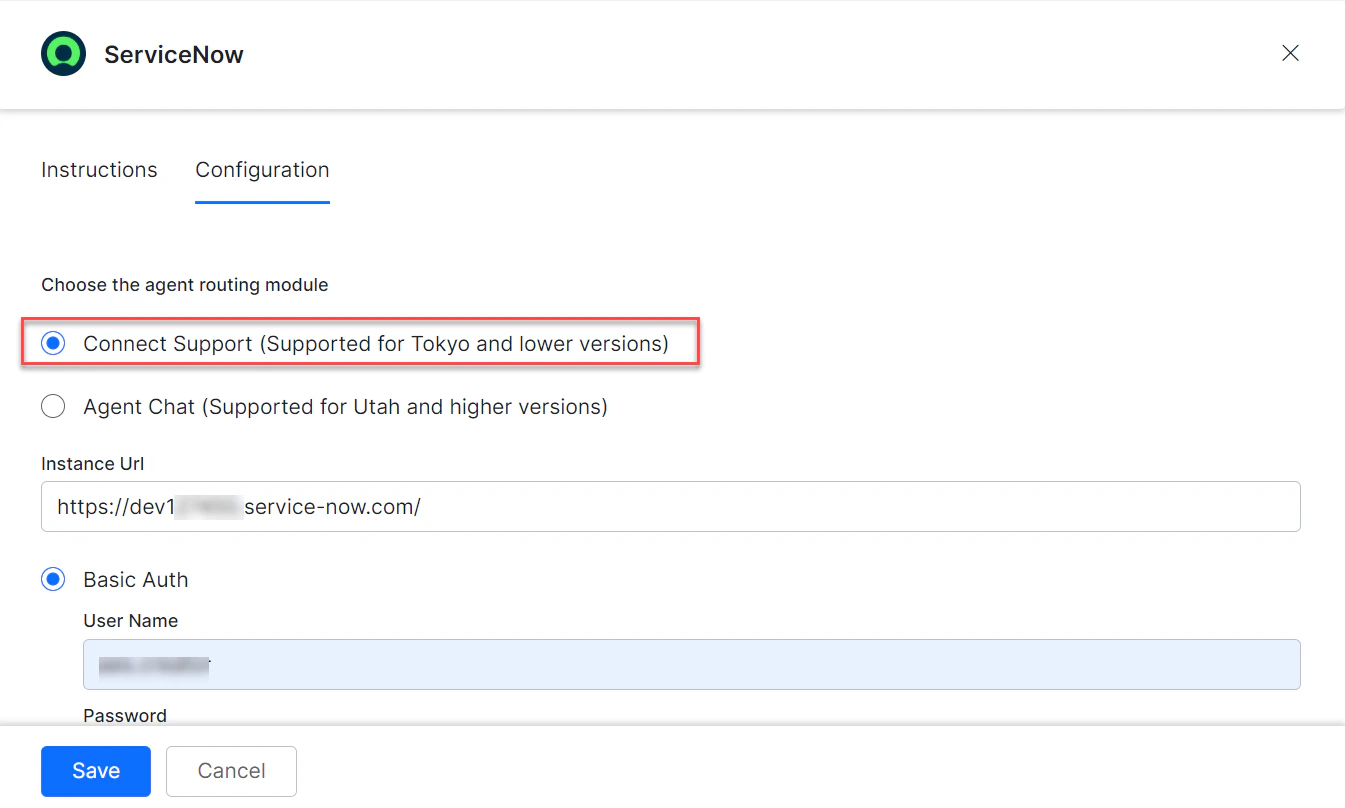
- Select Connect Support (Supported for Tokyo and lower versions).
- Select Basic Auth.
-
Enter:
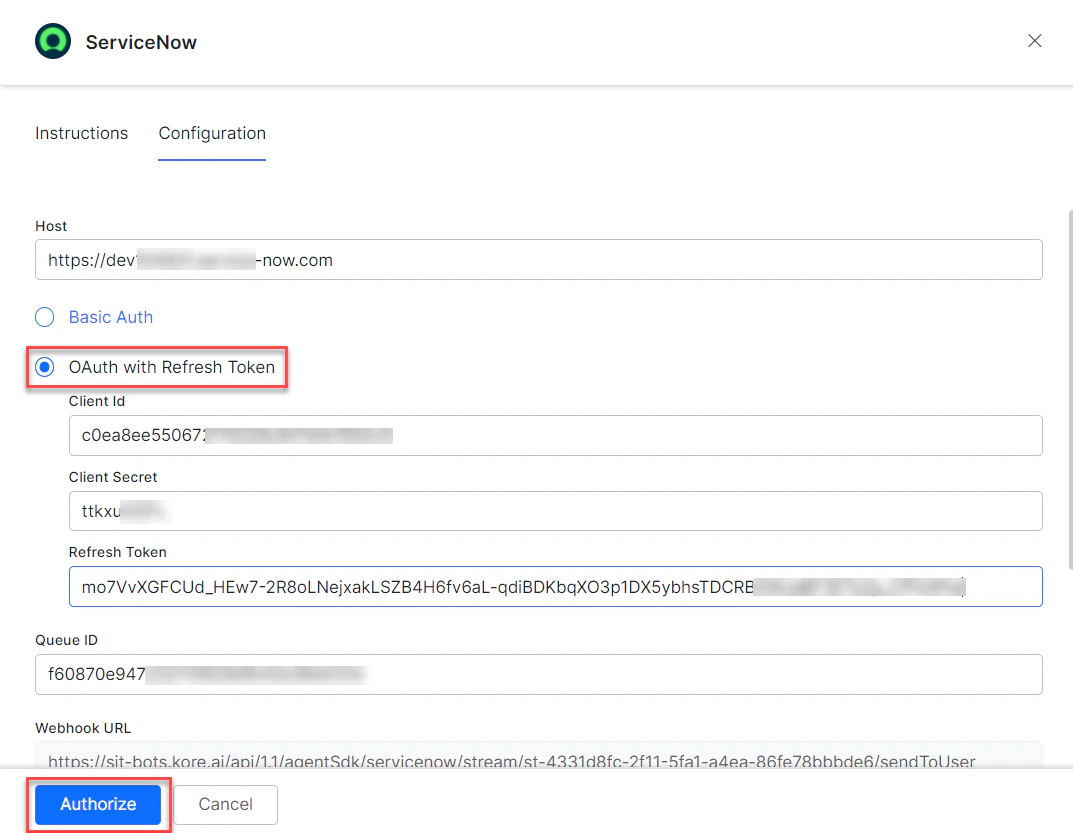
- Select Connect Support (Supported for Tokyo and lower versions).
- Select OAuth with Refresh Token.
-
Enter:
- Click Authorize to authenticate.
-
To make ServiceNow the default agent, enable Default Agent System for all app channels.
This option is enabled only when multiple agents are configured.
-
Click Configure to map channels.
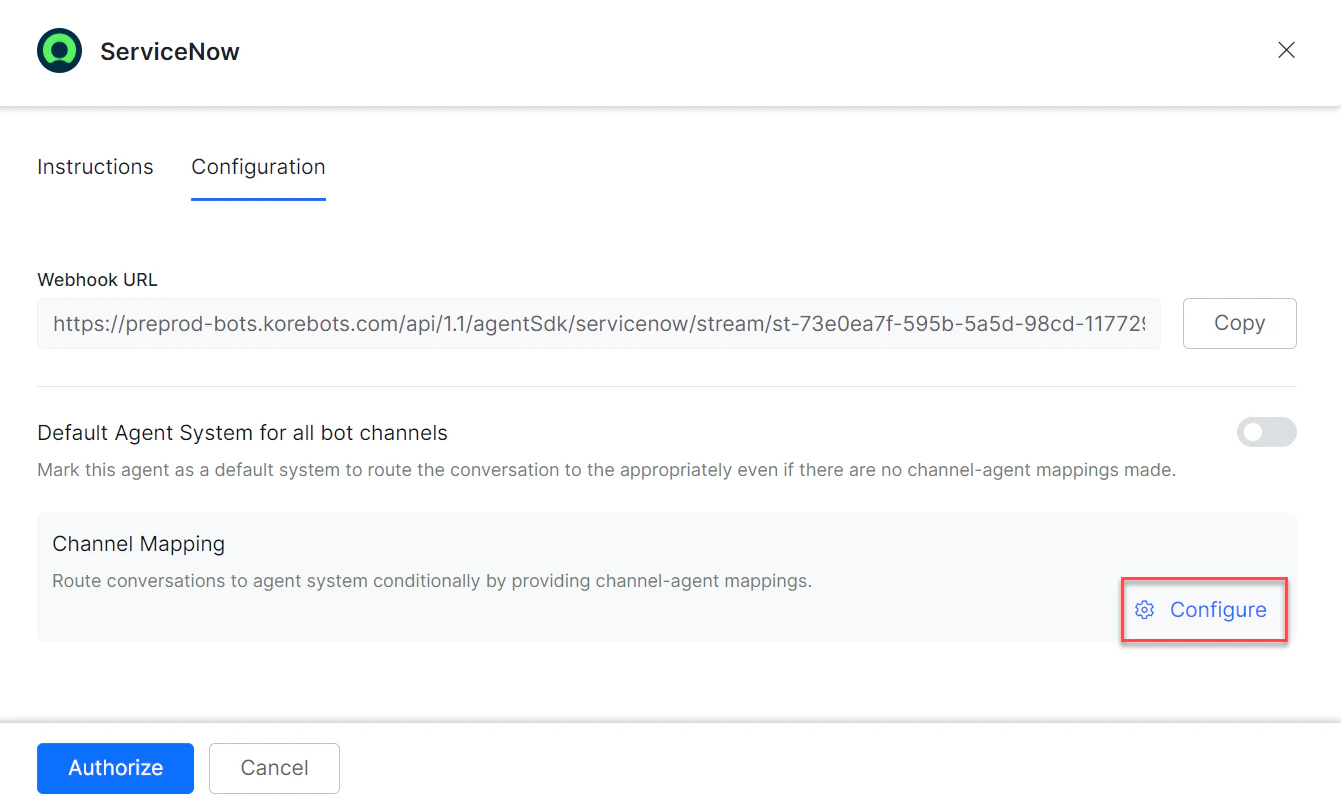
-
Select channels to map to the ServiceNow agent.
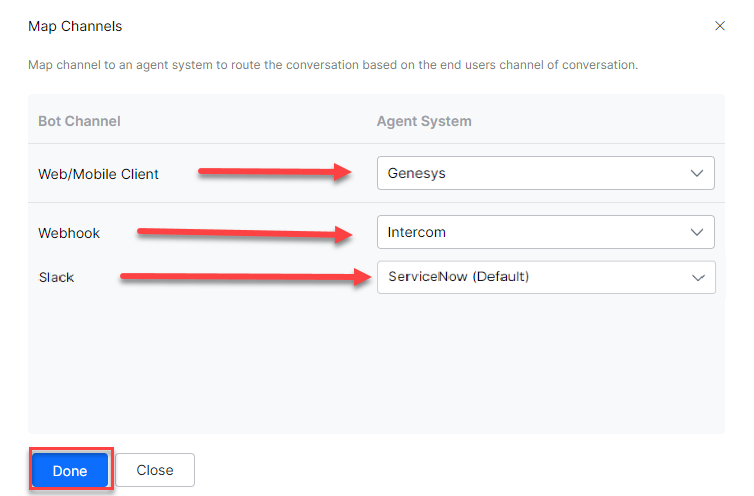
- Click Done, then Save.
- Publish the app. See Publishing your App.
Step 4: Switch to UI16 Theme
- Log in to ServiceNow with admin credentials.
-
Navigate to System Properties and click New.
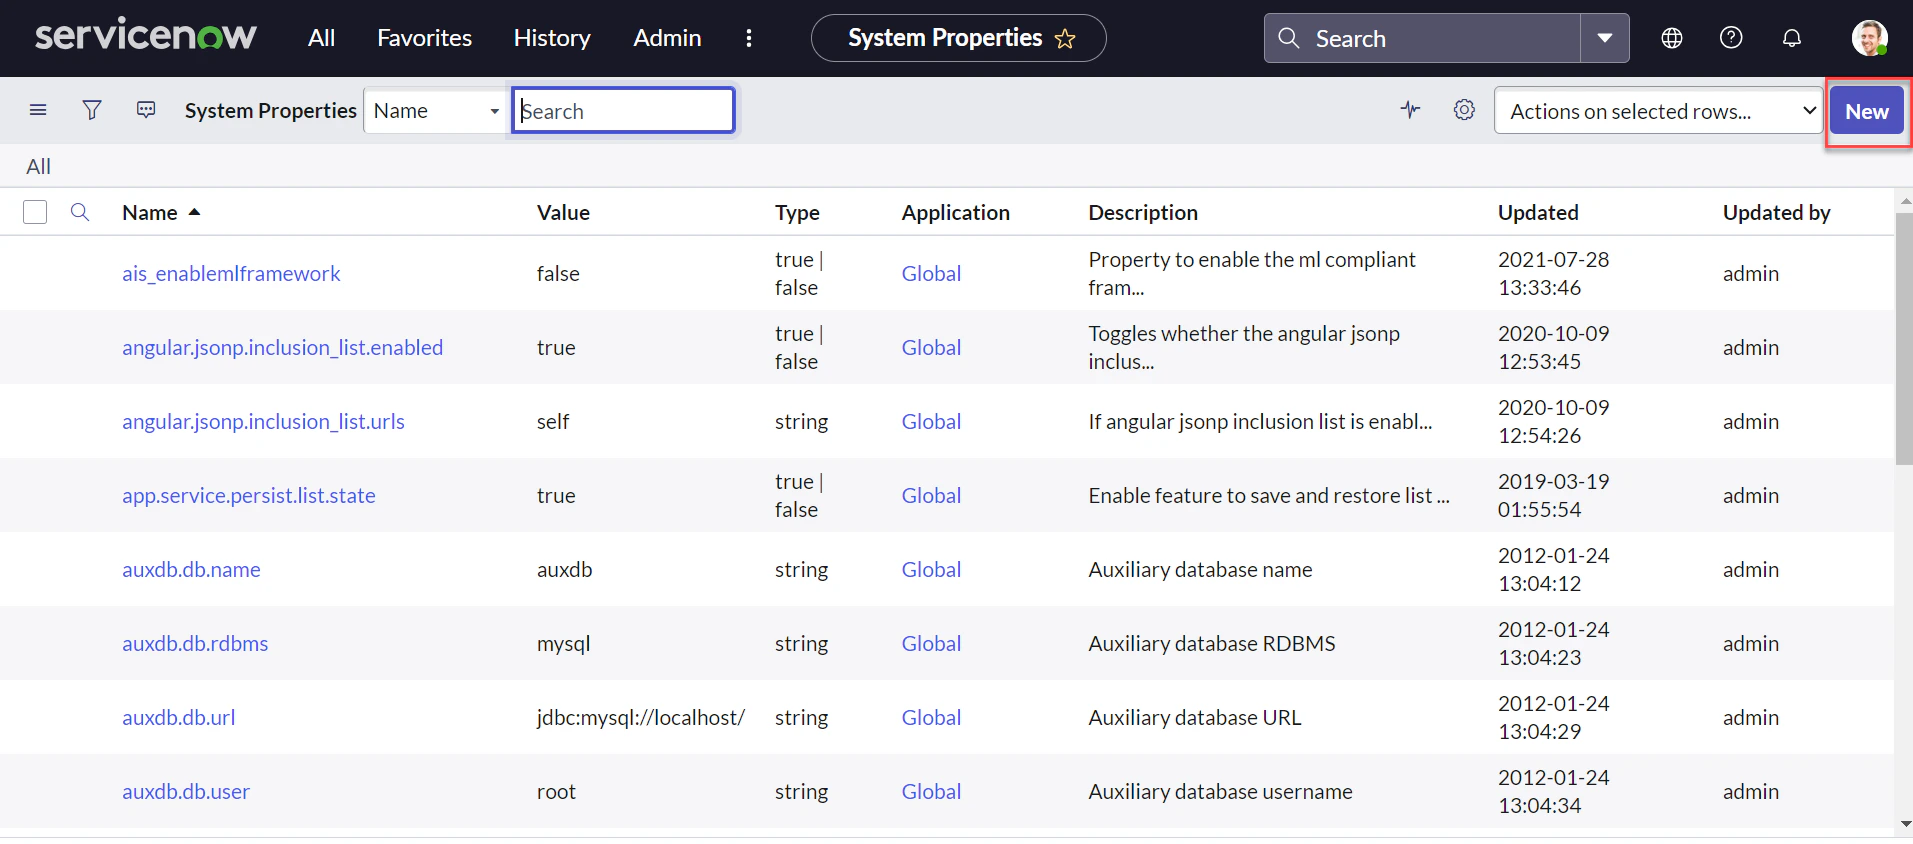
-
Enter the property
glide.ui.polaris.on_off_user_pref_enabled, set type totrue|false, and click Submit. This property allows toggling between “Next experience and UI16” and classic experience.
 -
Click the System Admin profile and select Preferences.
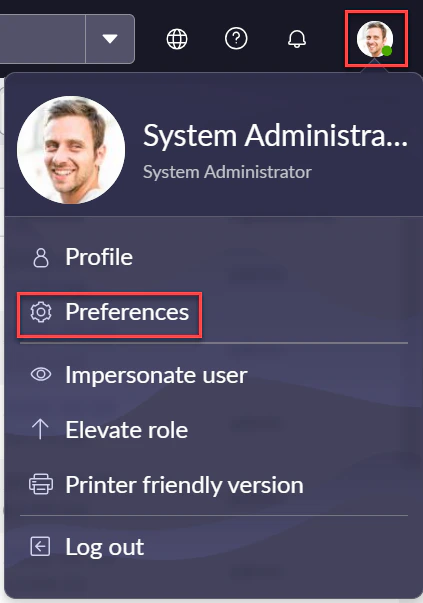
-
Enable Turn off Next experience.
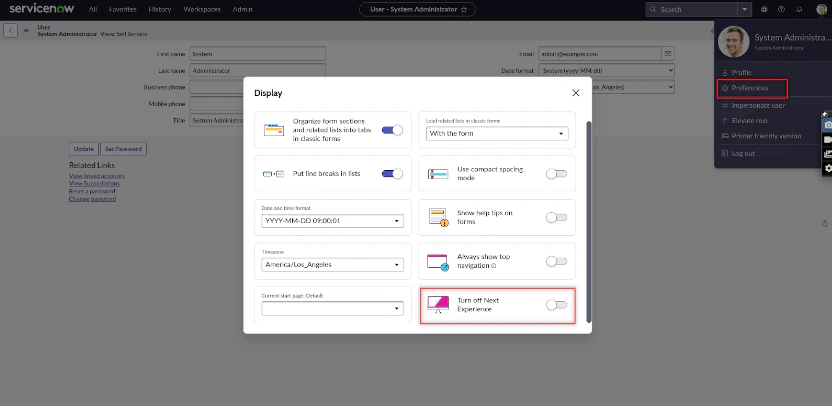
-
The view switches to UI16 theme.
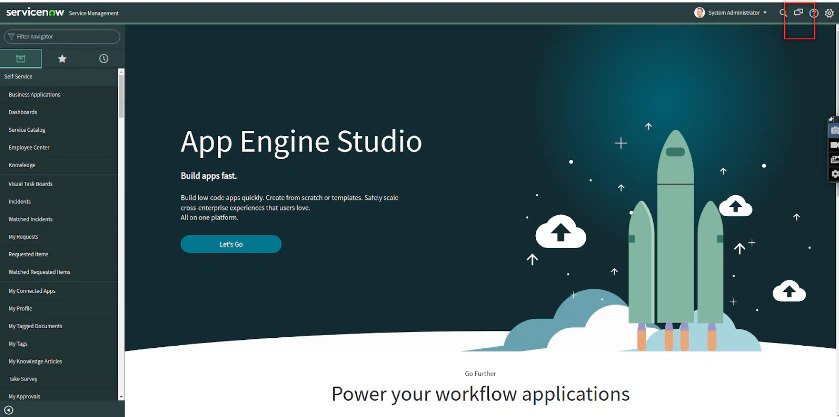
Step 5: Install the Required Plugins
- Log in to the ServiceNow Developer instance with admin credentials.
-
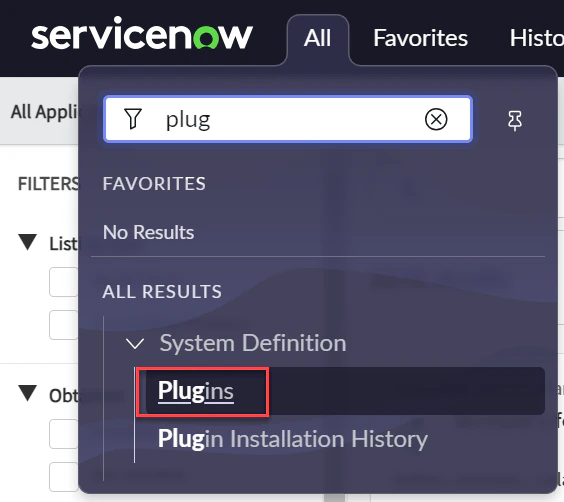
Navigate to System Definition > Plugins from the left menu.
-
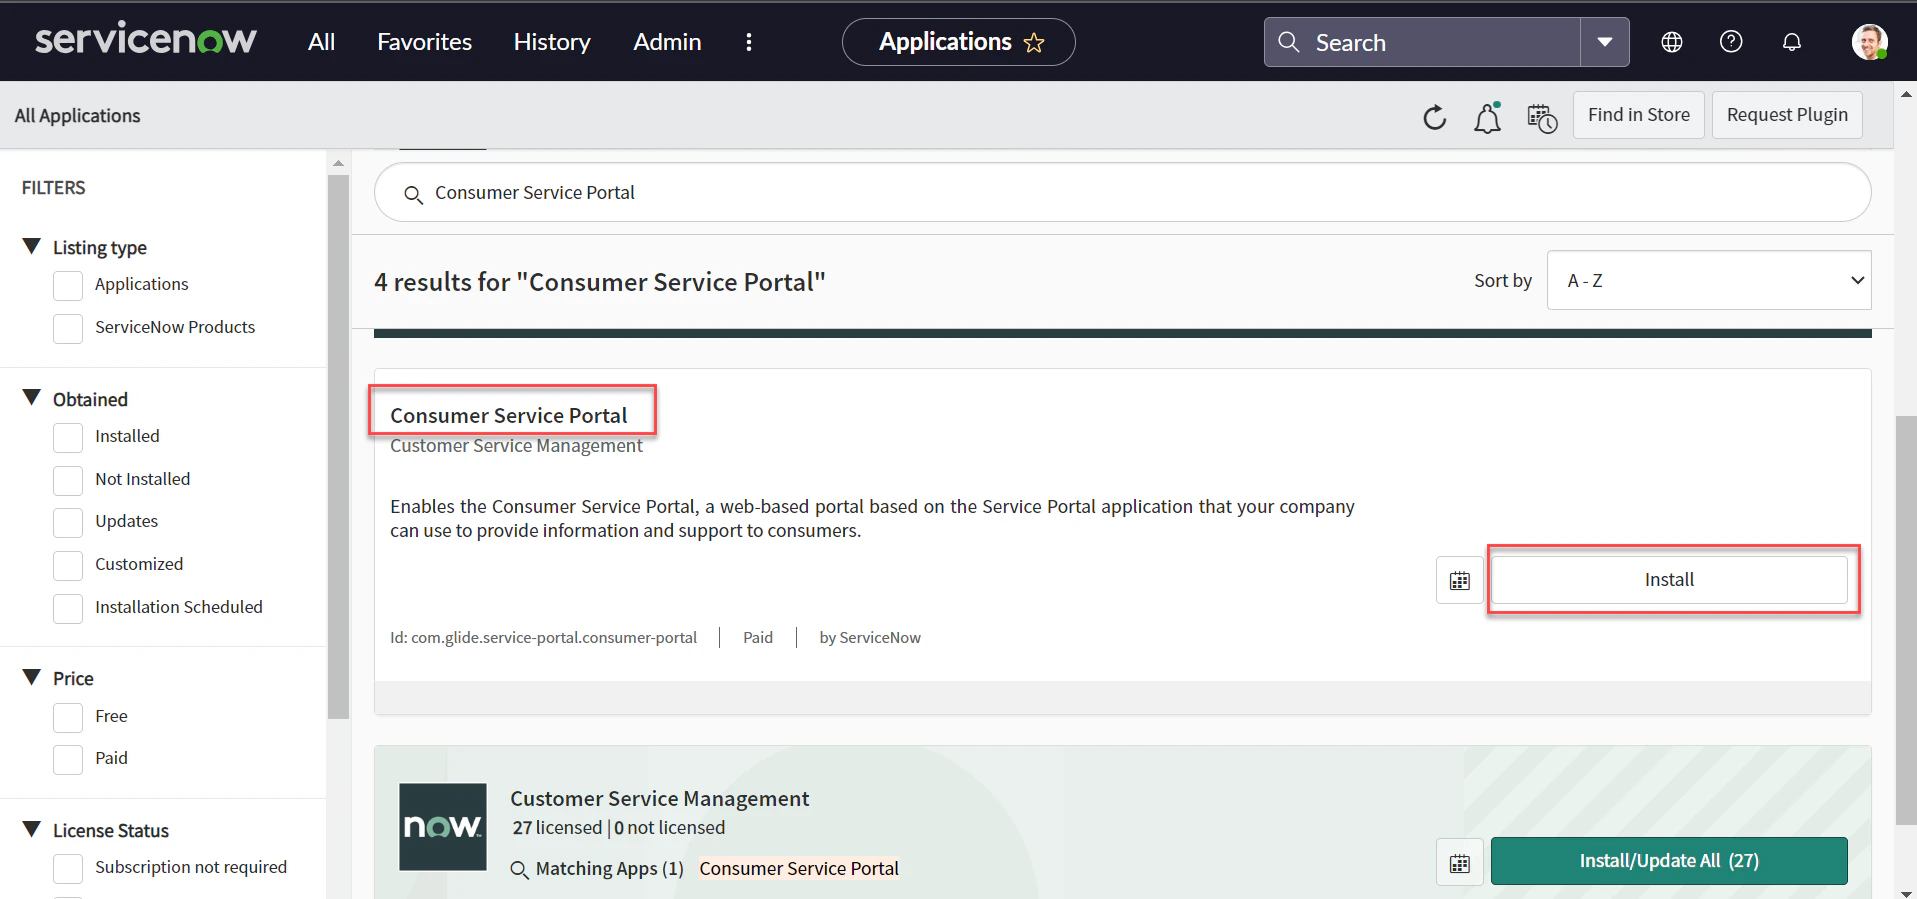
Search for and install the Consumer Service Portal plugin.
-
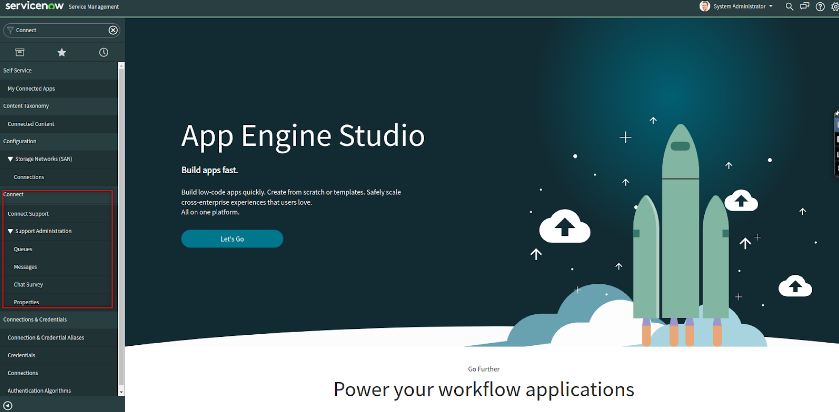
After installation, the Connect support menu item appears in the left navigation.
Step 6: Create a User with agent_admin Role
- Log in to the ServiceNow instance with admin credentials.
-
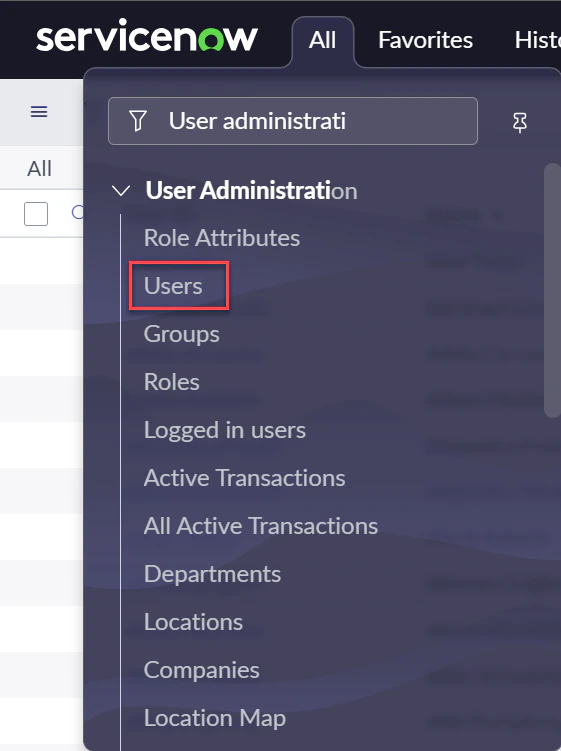
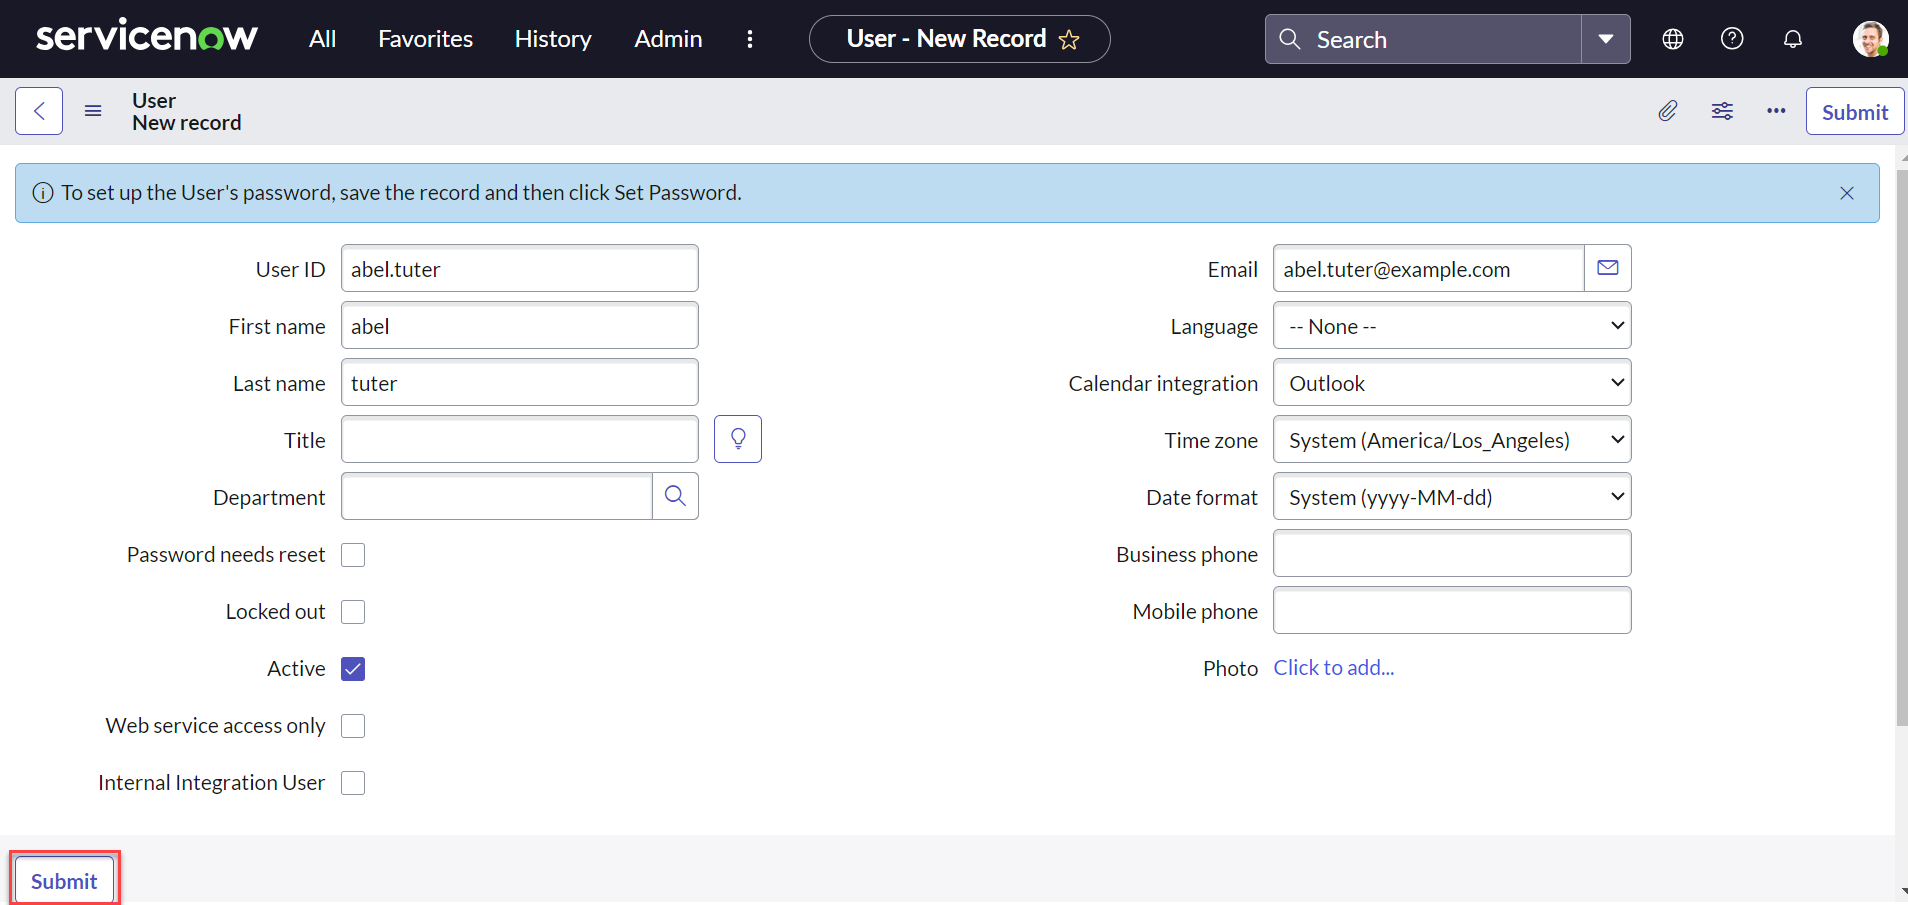
Navigate to User Administration > Users > New.
-
Fill in the user details and click Submit.
-
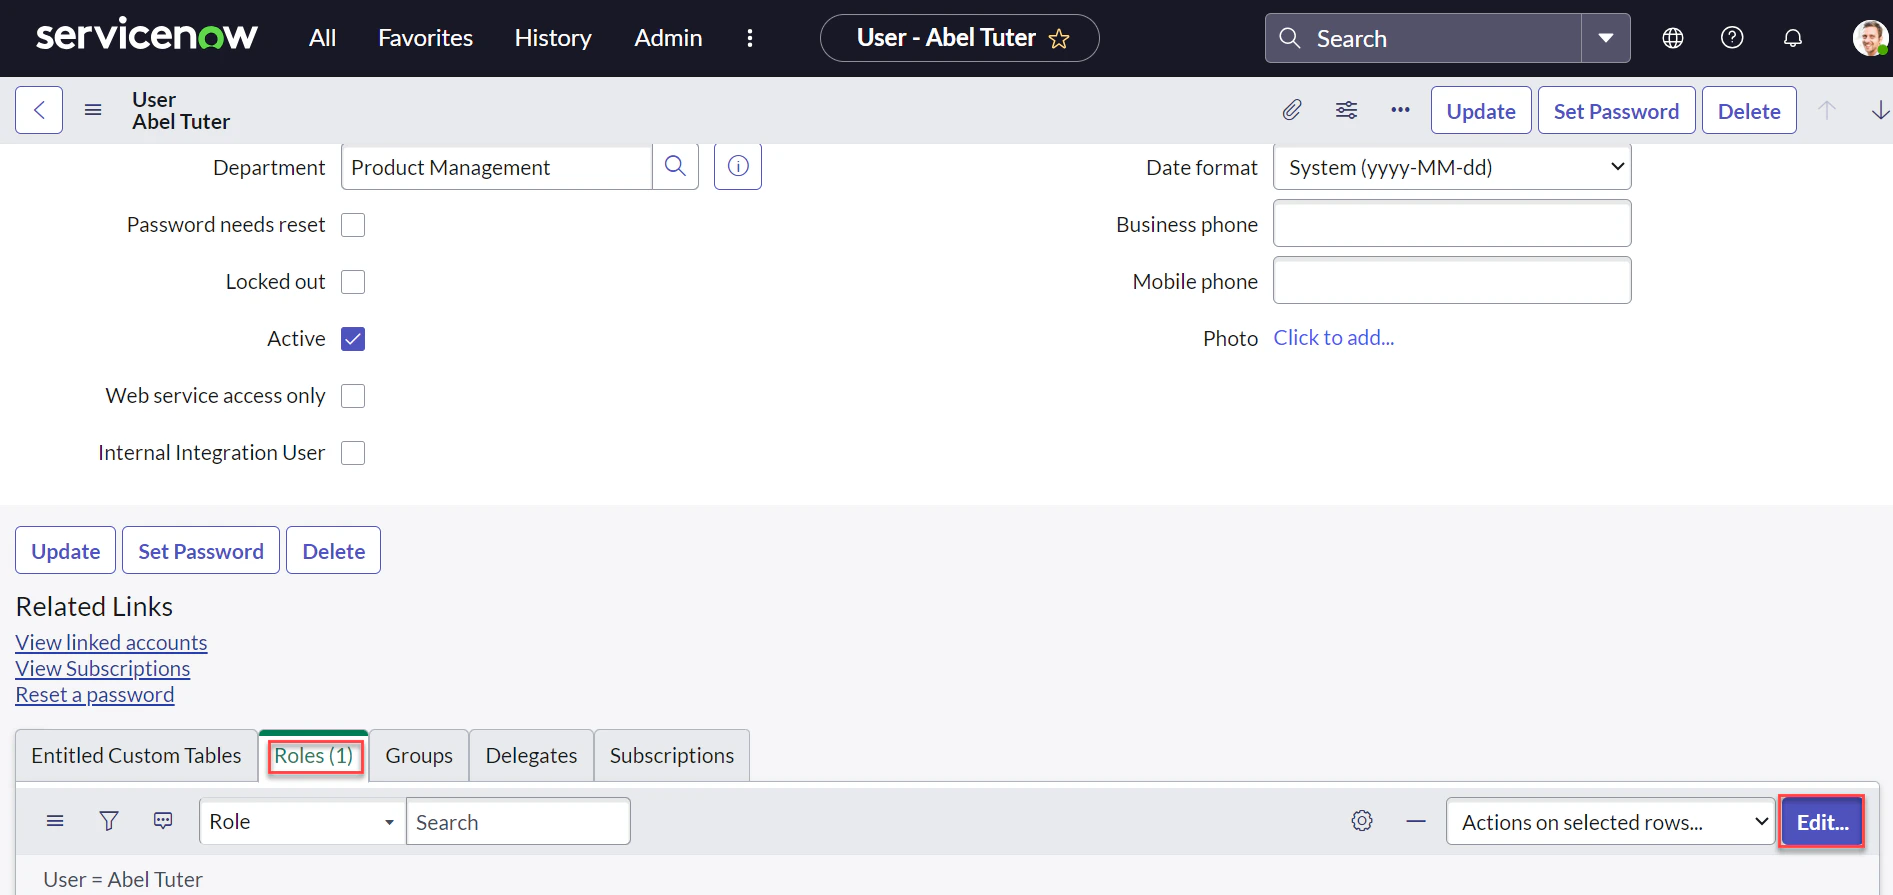
Select the Roles tab and click Edit.
-
Search for and add the agent_admin role to the user.
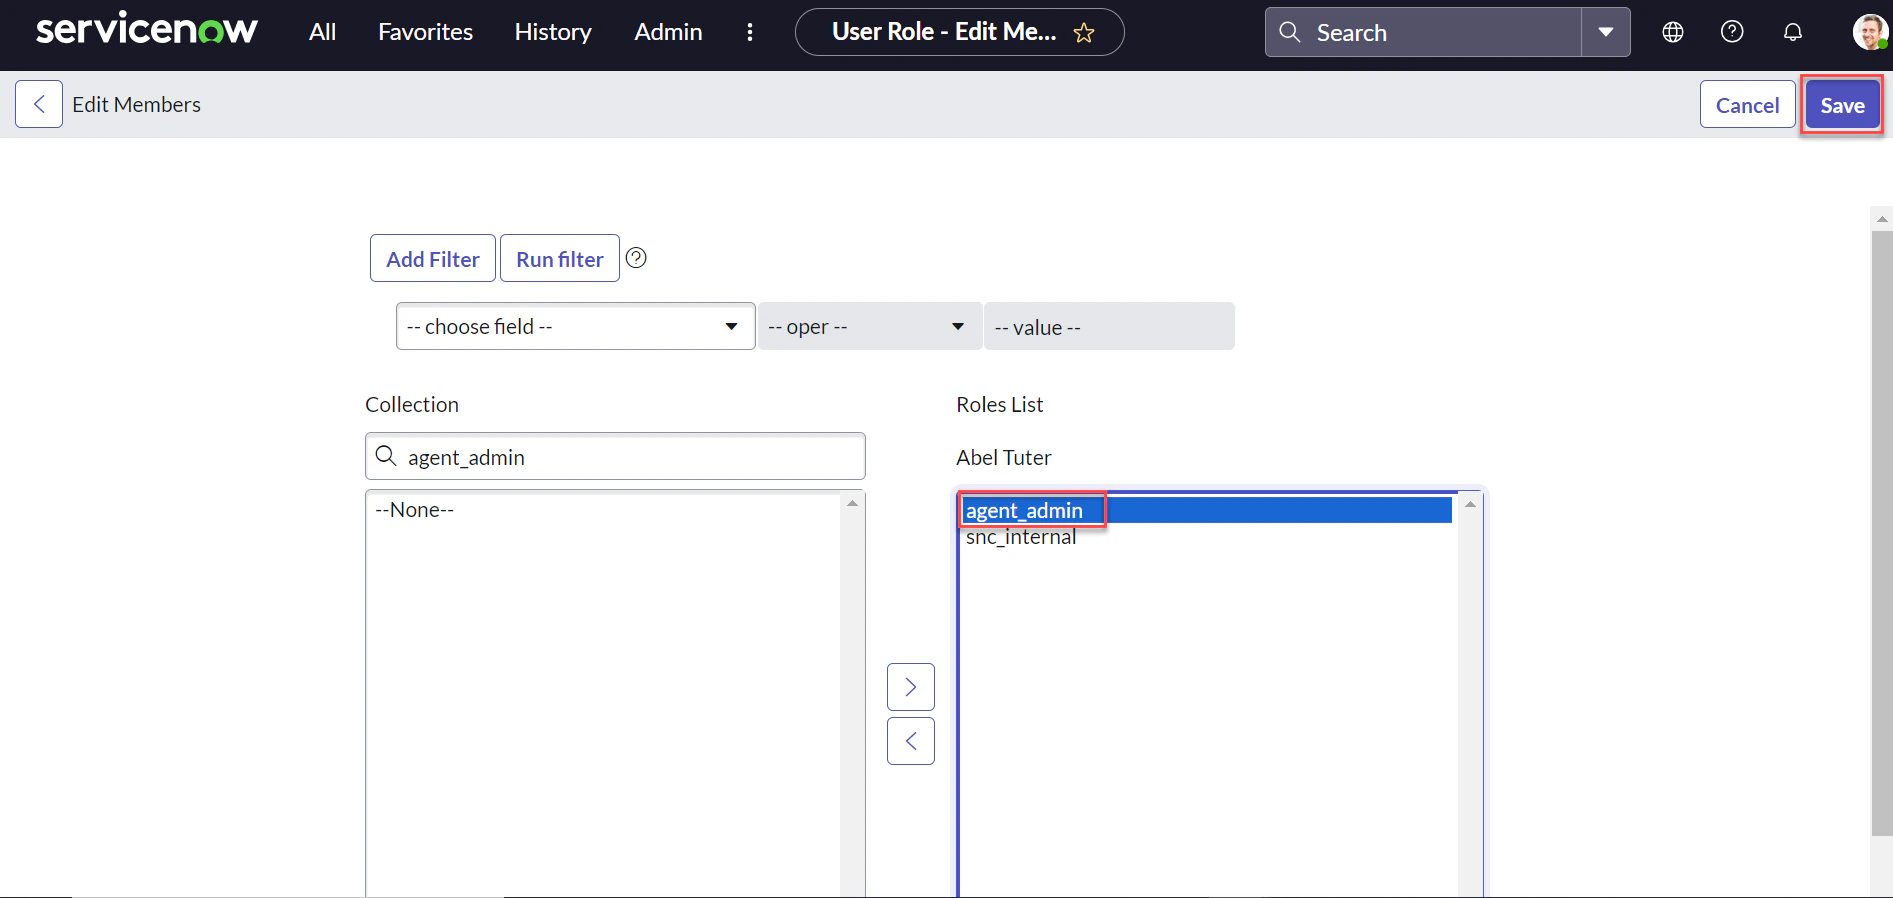
- Click Save.
Step 7: Create a Group and Add the User
-
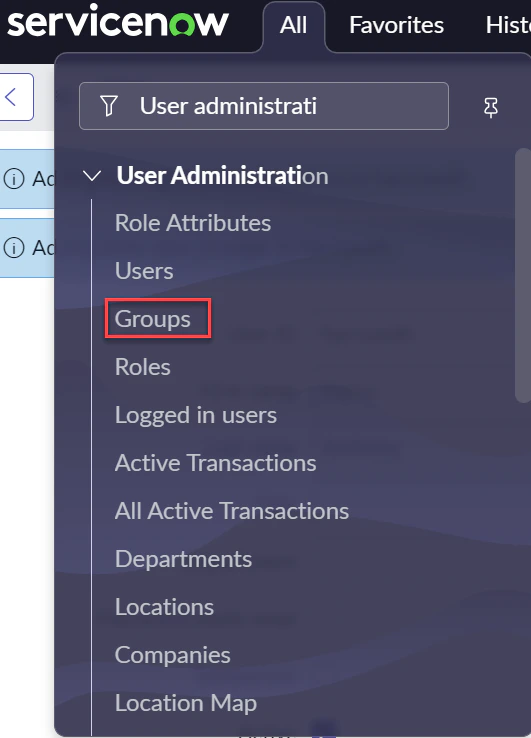
Navigate to User Administration > Groups.
-
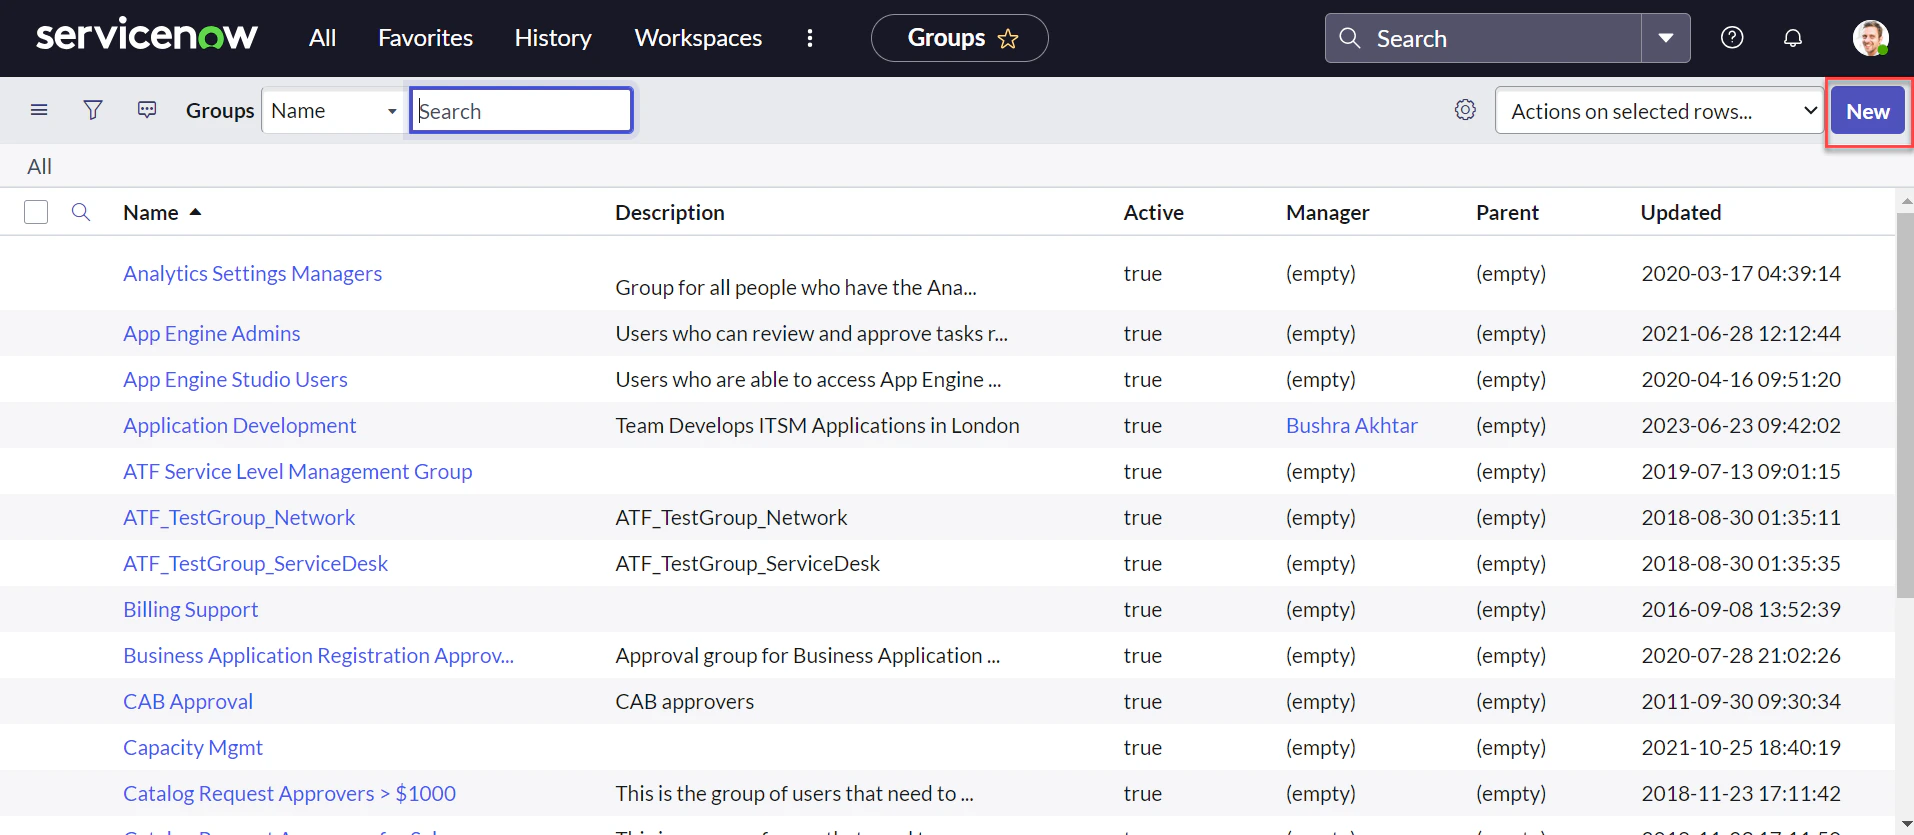
Click New.
-
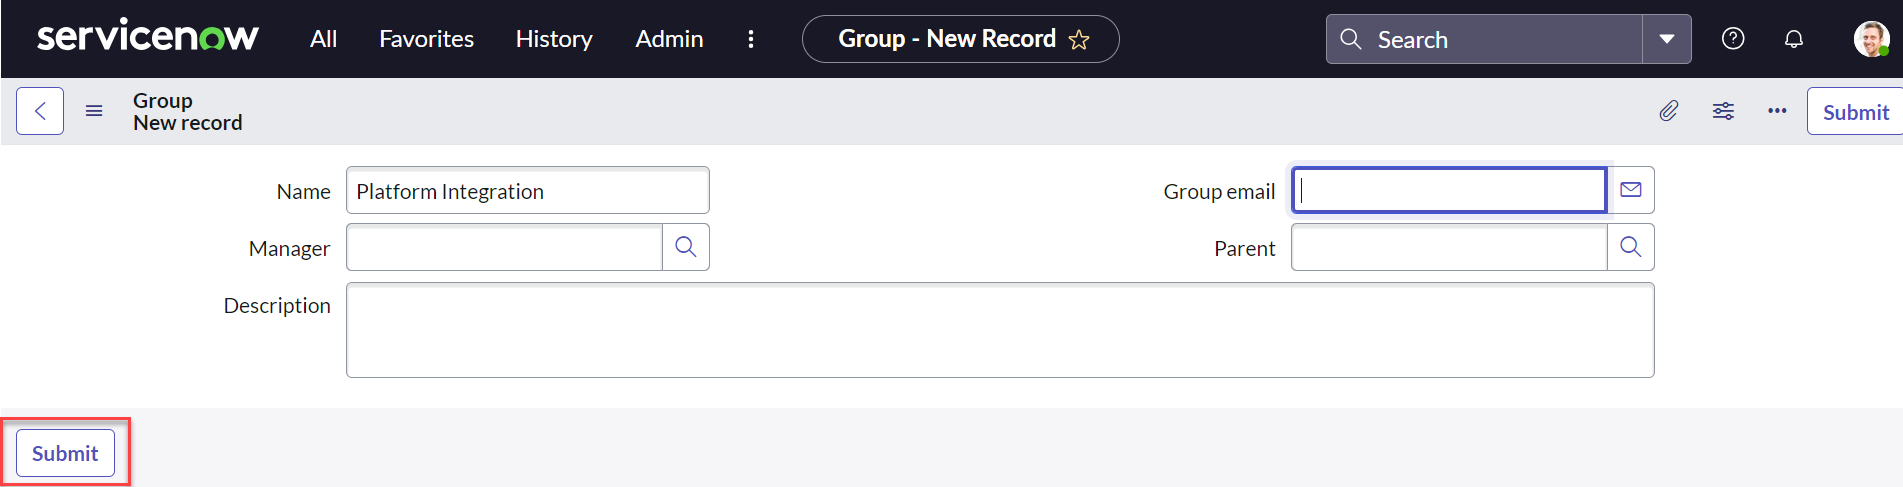
Fill in the group details and click Submit.
-
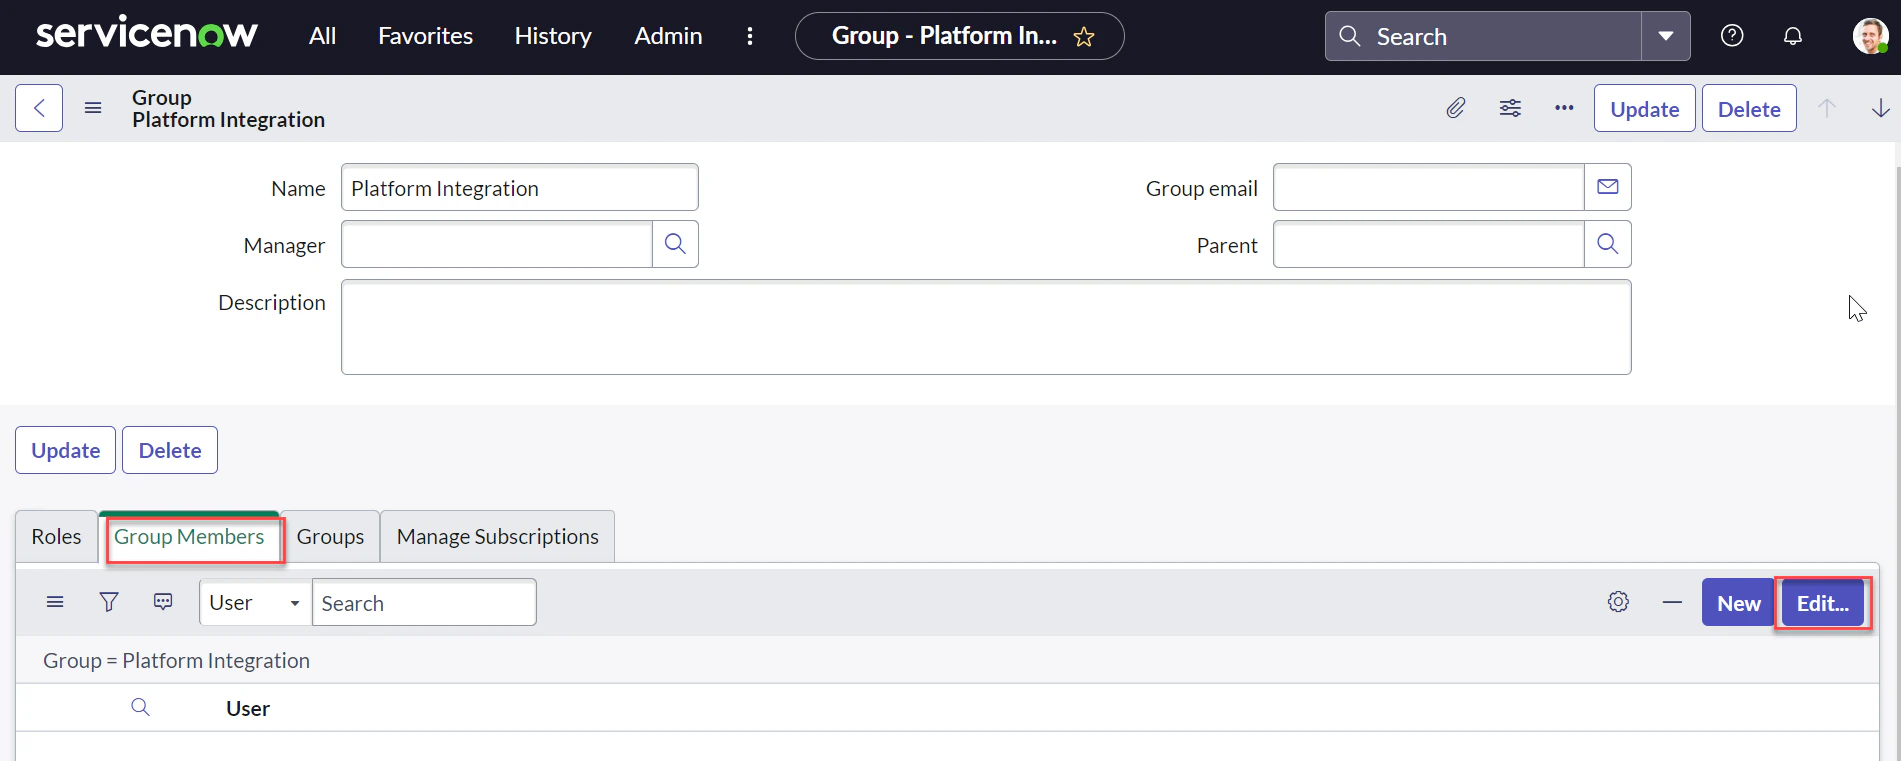
Edit the group, scroll to the Group Members tab, and click Edit.
-
Select the agent from Step 6 and add them to the group.
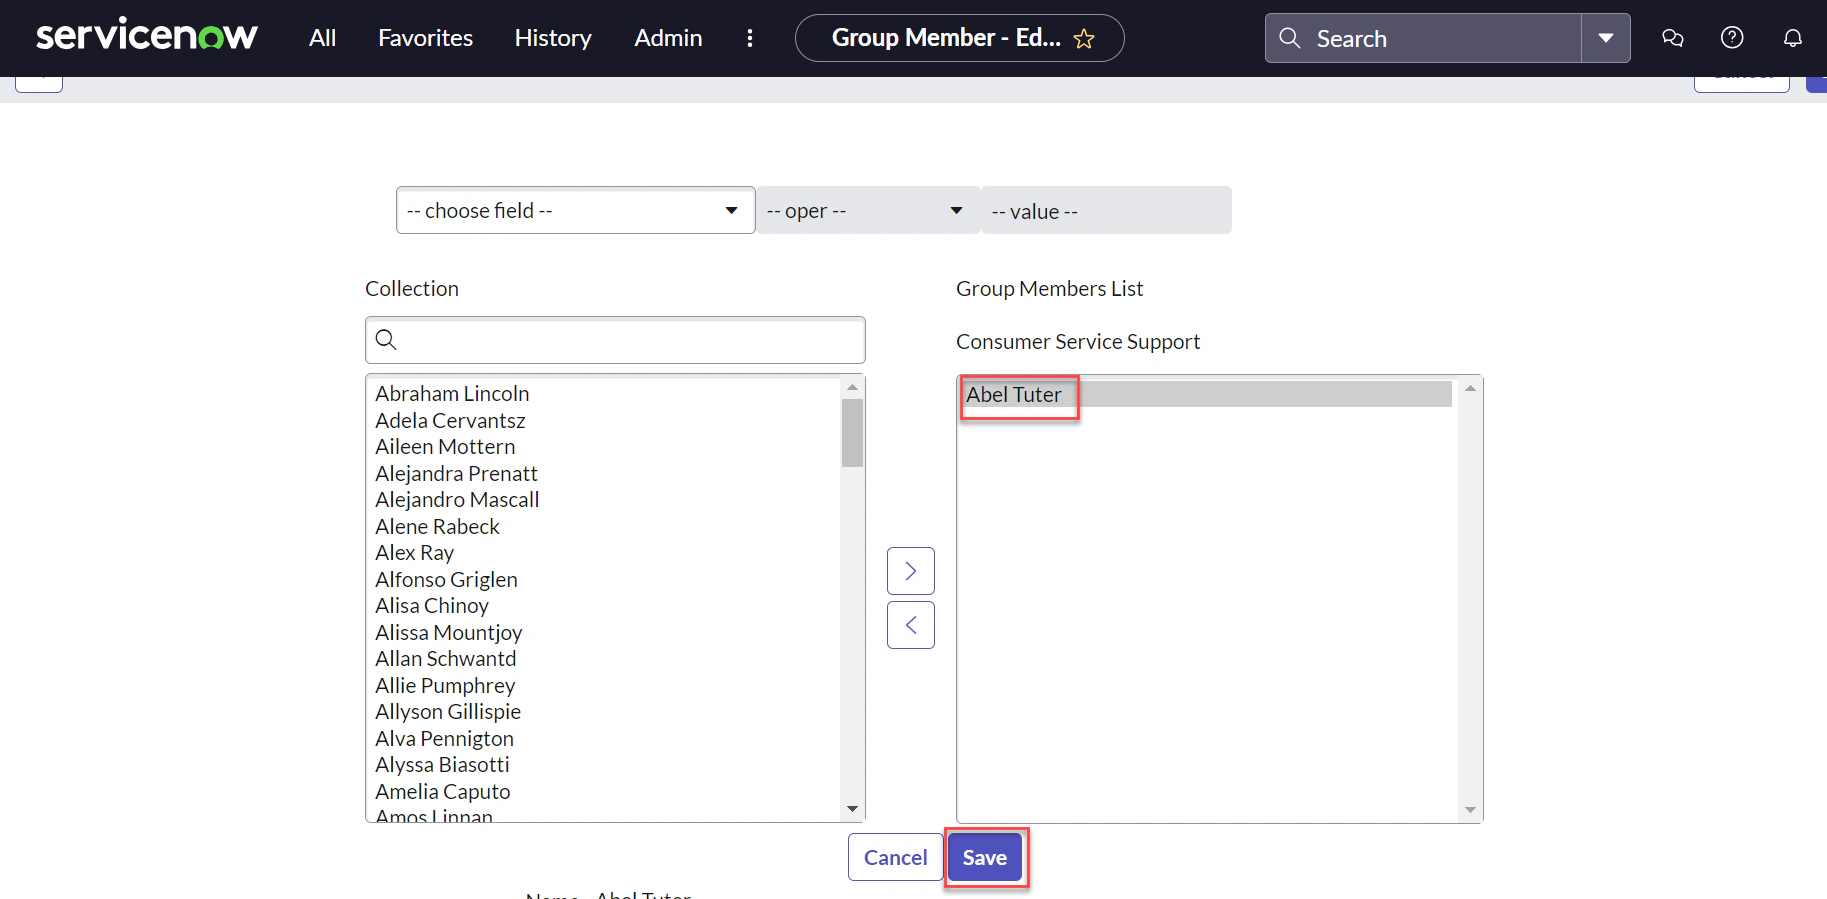
- Click Save.
Step 8: Define the Host URL in the REST Message
- Log in to your ServiceNow account.
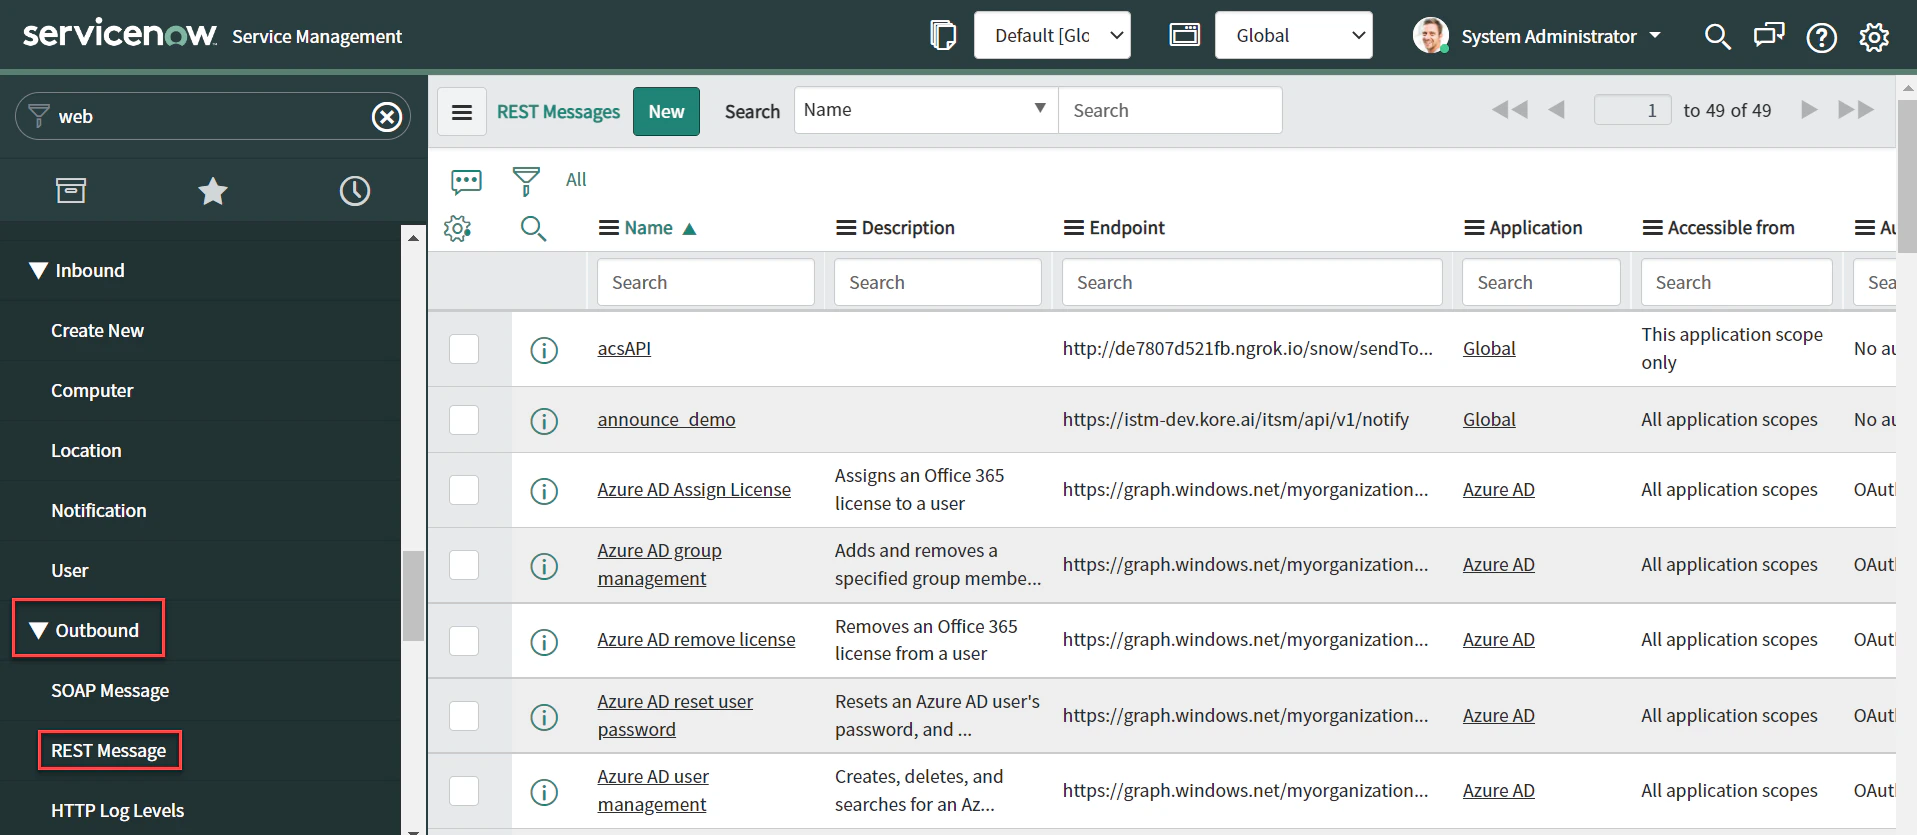
- Navigate to System Web Services > Outbound > REST Messages from the left menu.
-
Click New to create a new REST Message.
-
Copy the Webhook URL from the Platform AI Agent configuration page and paste it into the Endpoint URL field.
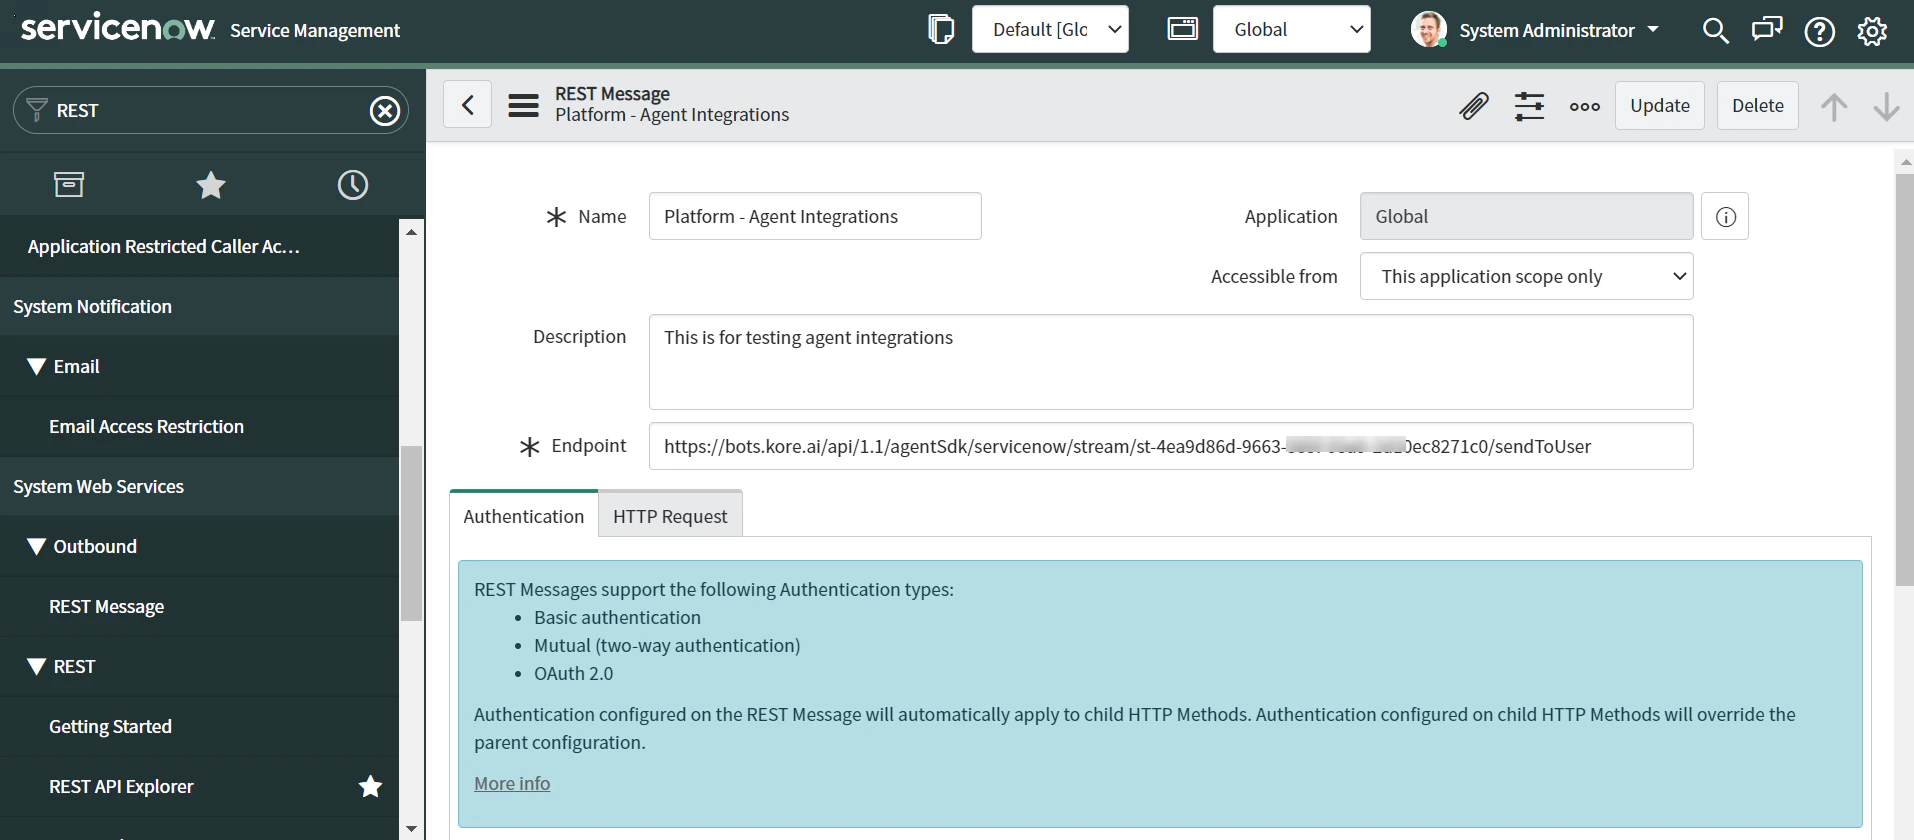
- Click Save.
Step 9: Define Outbound REST Message Requests
- Navigate to System Web Services > Outbound > REST Messages.
-
Select the REST Message for Platform agent integrations (for example,
Platform - Agent Integrations).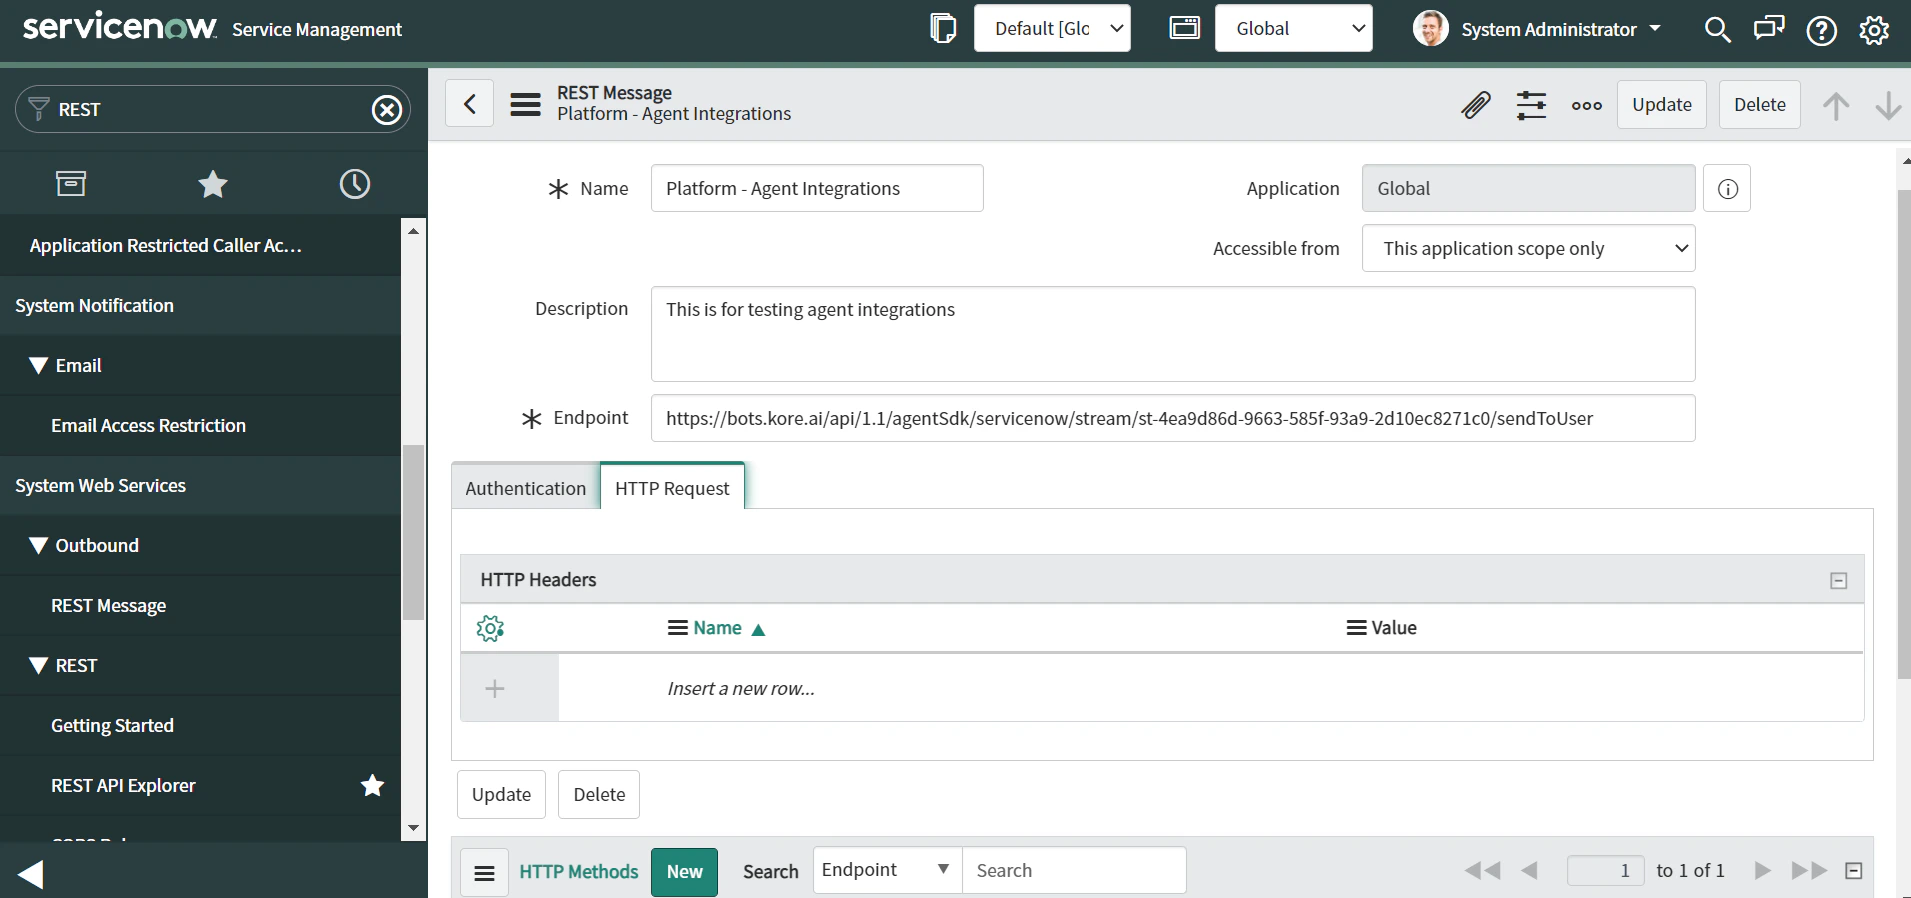
-
Enter the API details including the endpoint URL (Callback URL from the Configurations page) and HTTP method.
This endpoint is how ServiceNow sends agent messages to the user.
-
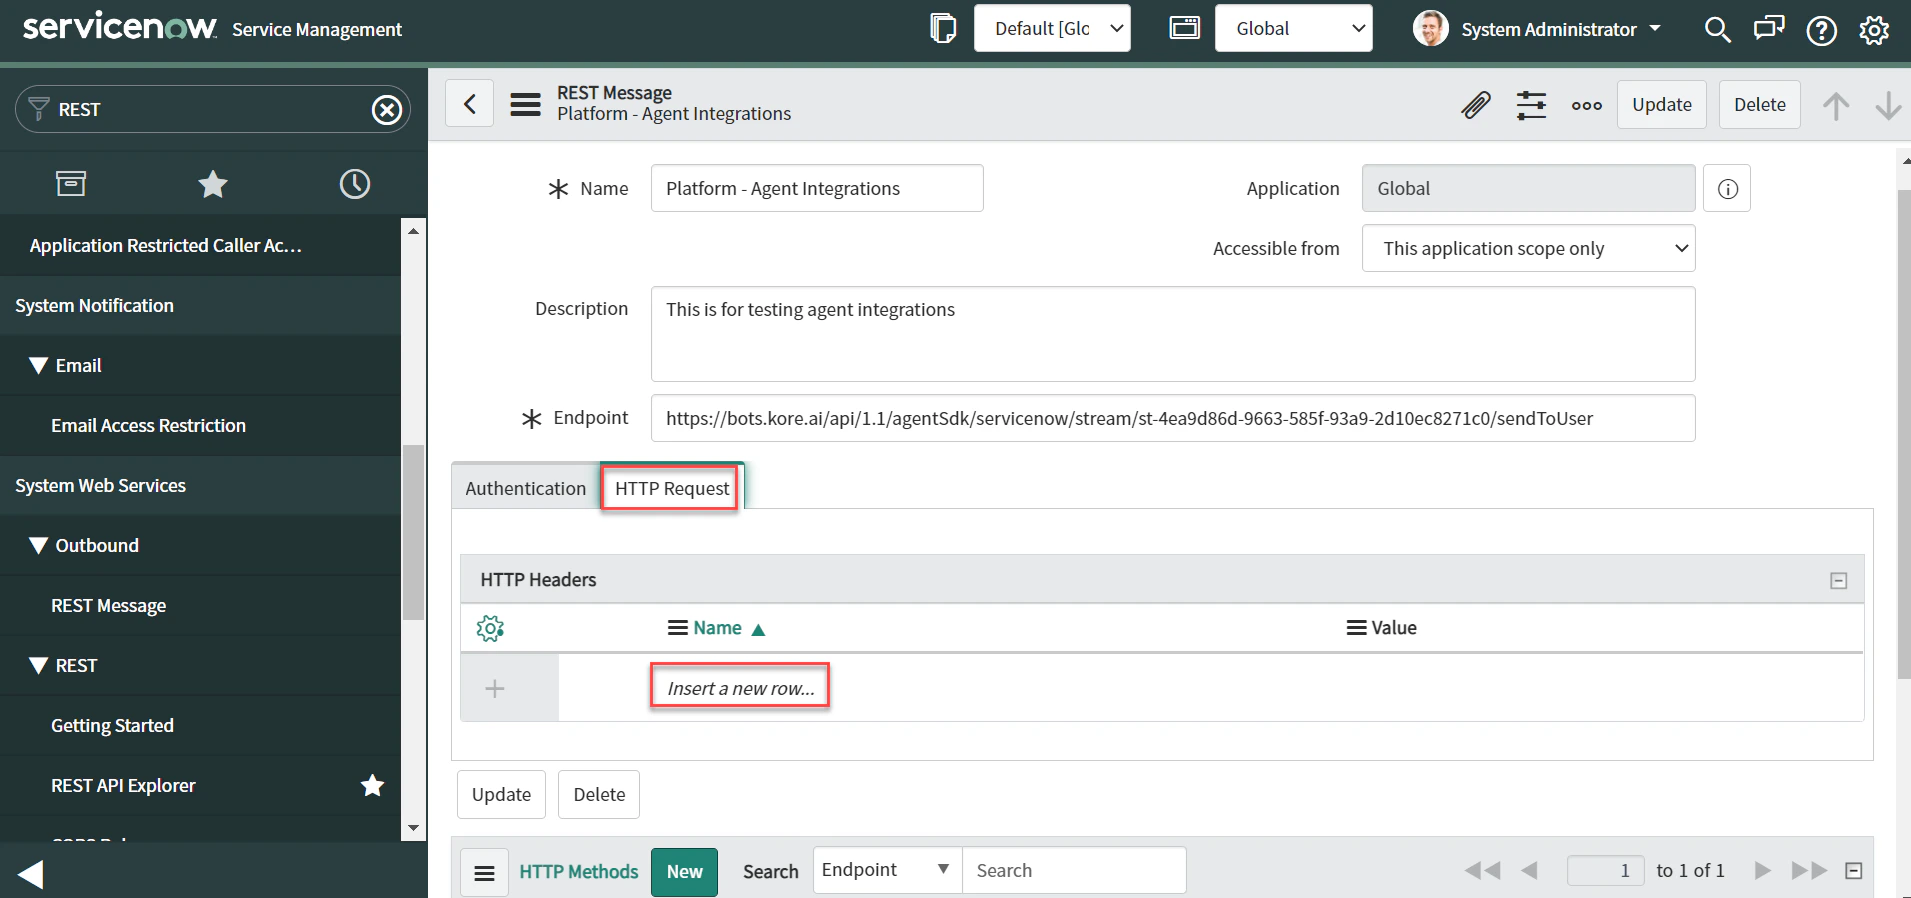
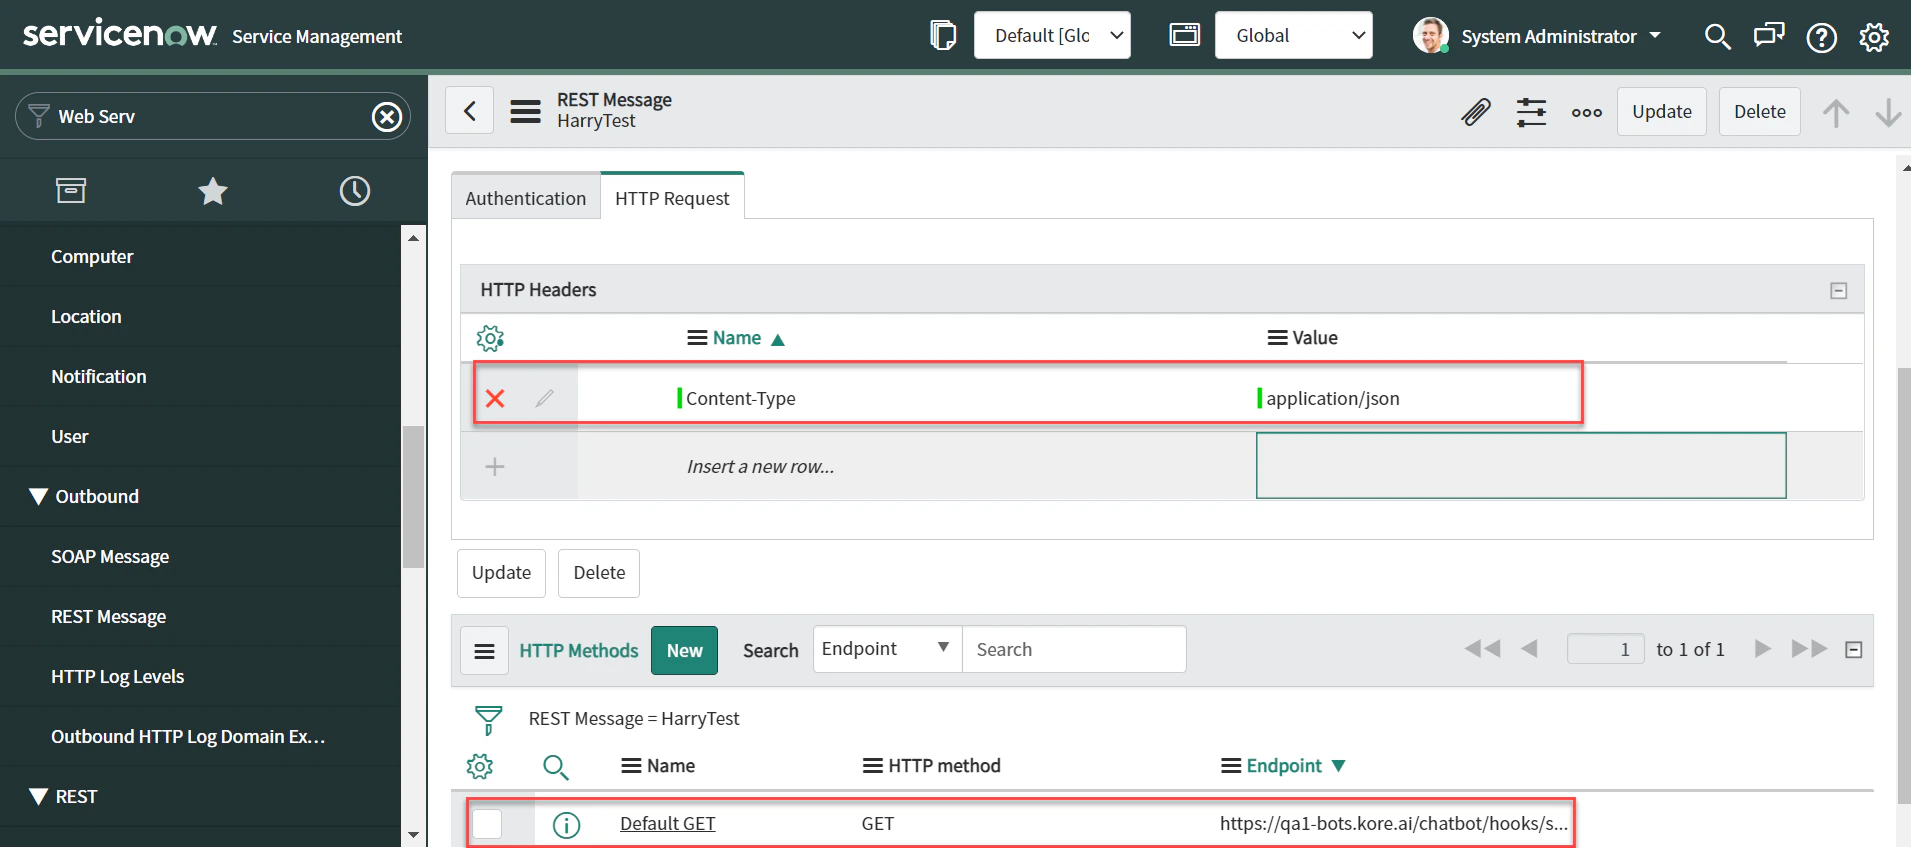
Click the HTTP Request tab and select Add New Row.
-
Add:
- HTTP Header:
Content-Type: application/json - Method:
POST— paste the Webhook URL in the Endpoint field.
- HTTP Header:
- Click Update.
Step 10: Define Outbound REST Business Rules
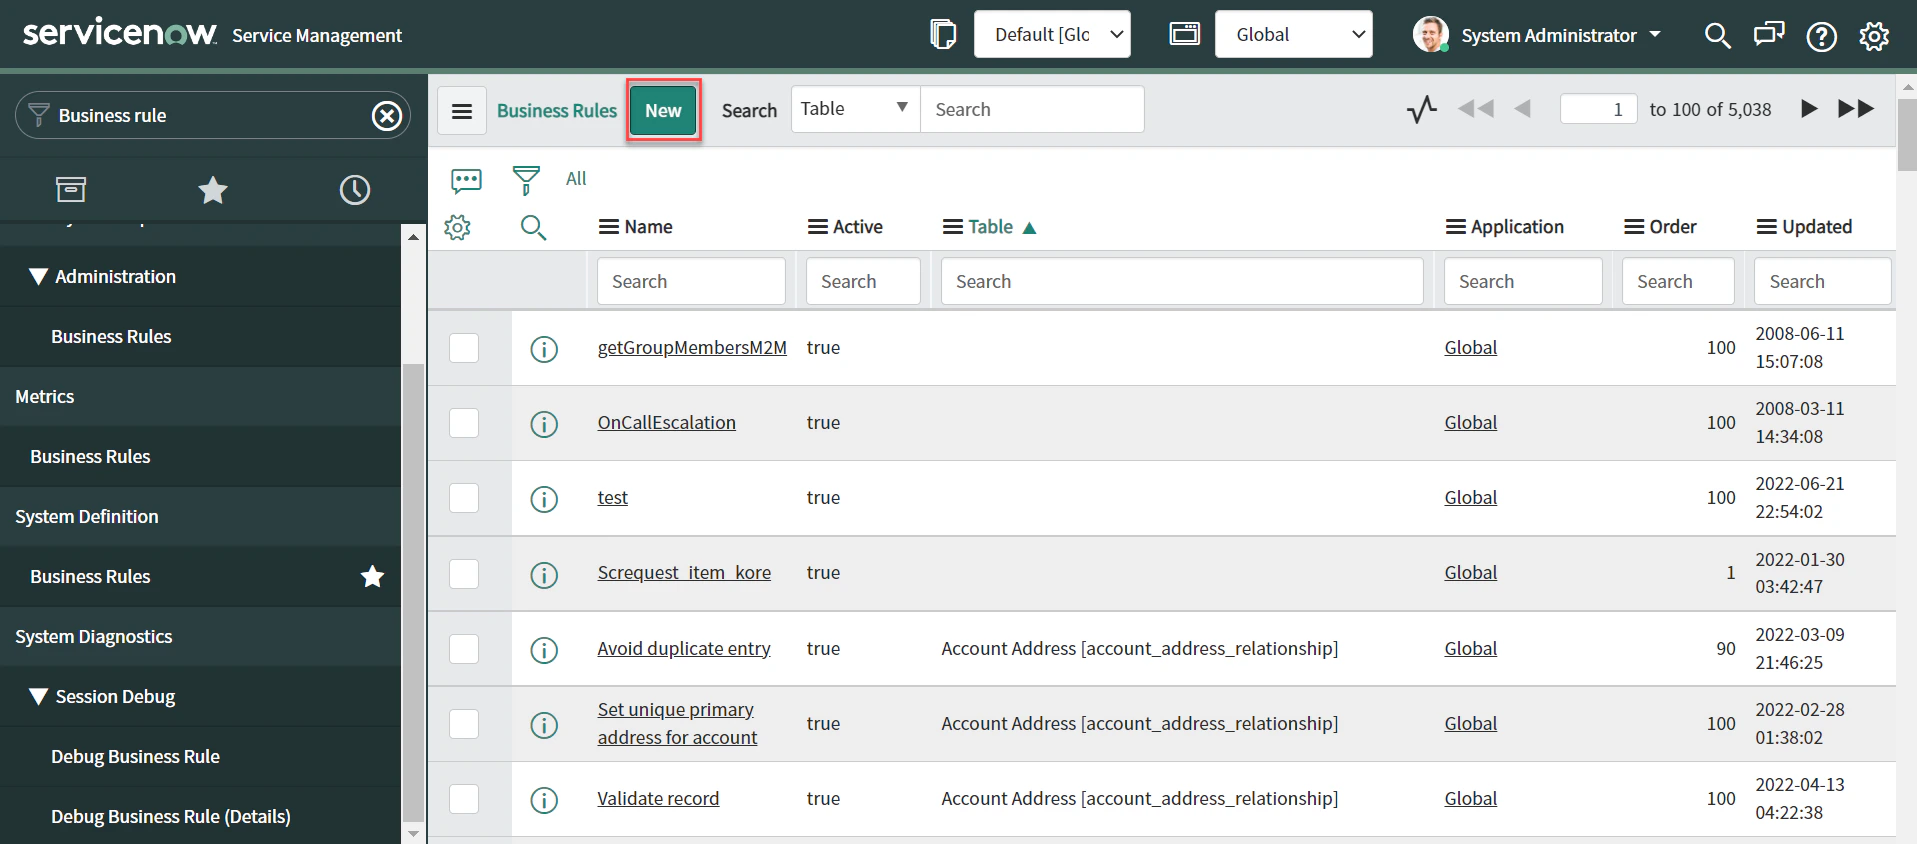
- Navigate to System Definition > Business Rules.
-
Click New.
-
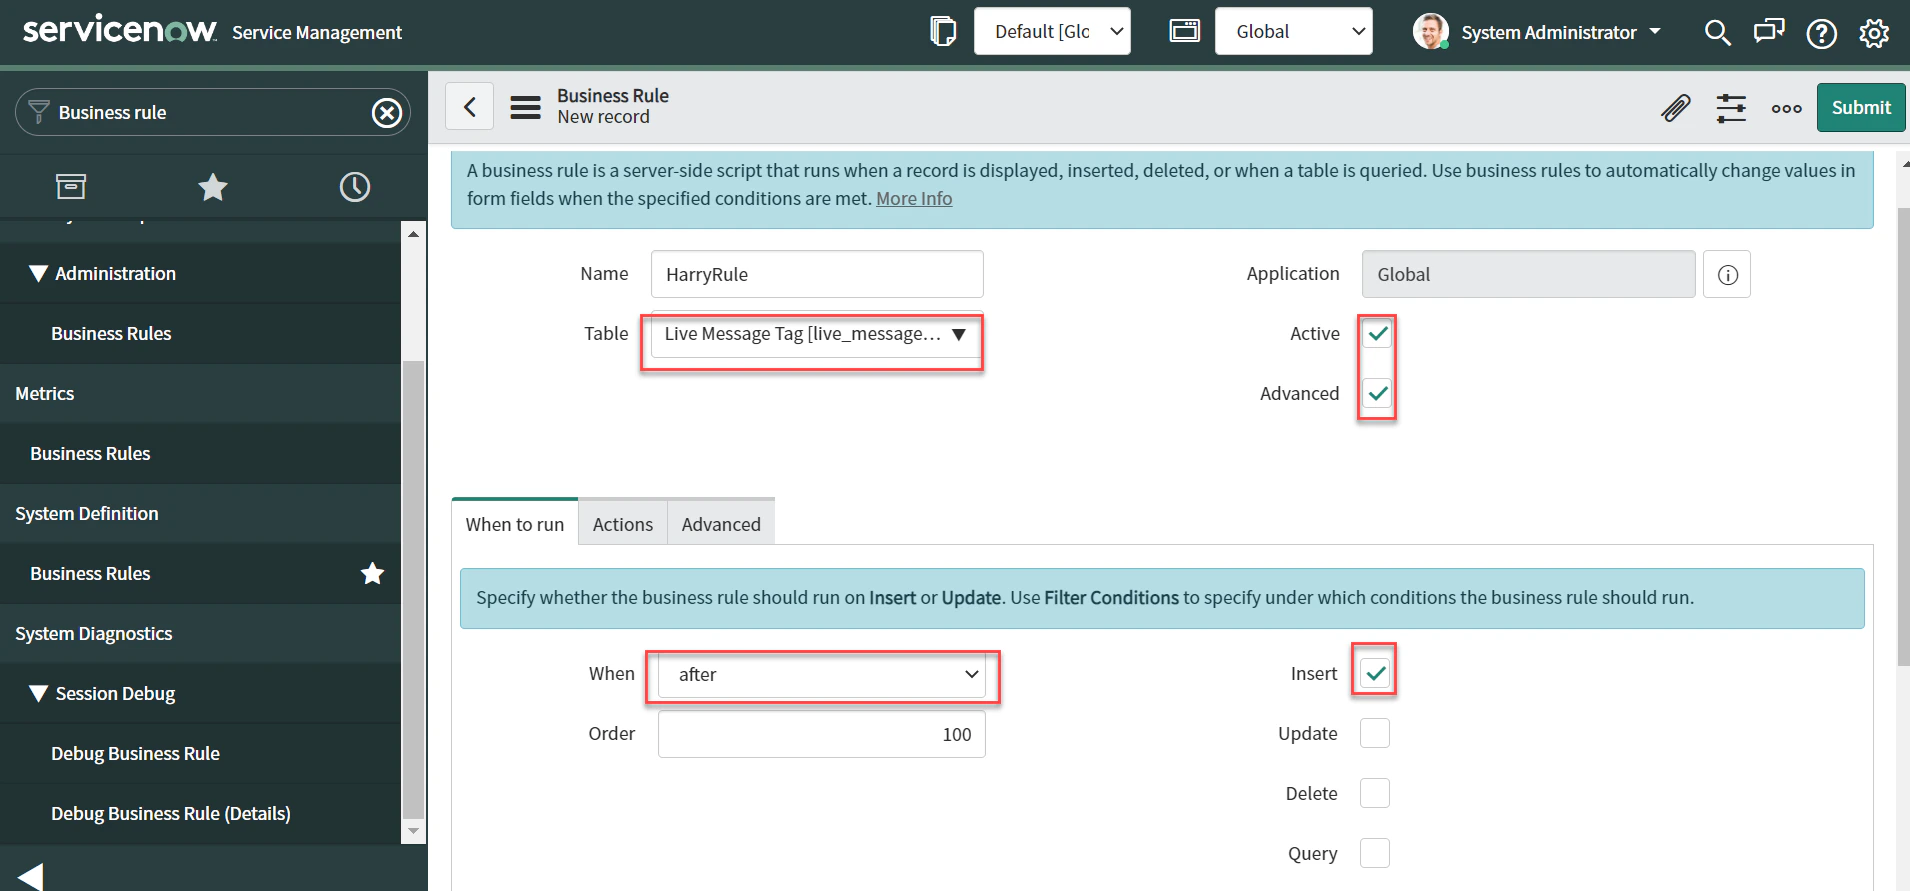
Enter the following details:
- Name: Enter a name.
- Table: Select
live_message. - Enable Active and Advanced checkboxes.
- In the When to run tab: set When to
afterand select Insert. - Add Filter conditions: execute if
created byisn’tAI Agent_interface.
-
On the Advanced tab, add the following code and click Submit:
This code is optional. Use it if you encounter issues during execution. This business rule executes the API configured in the REST Message.
Step 11: Testing Configuration
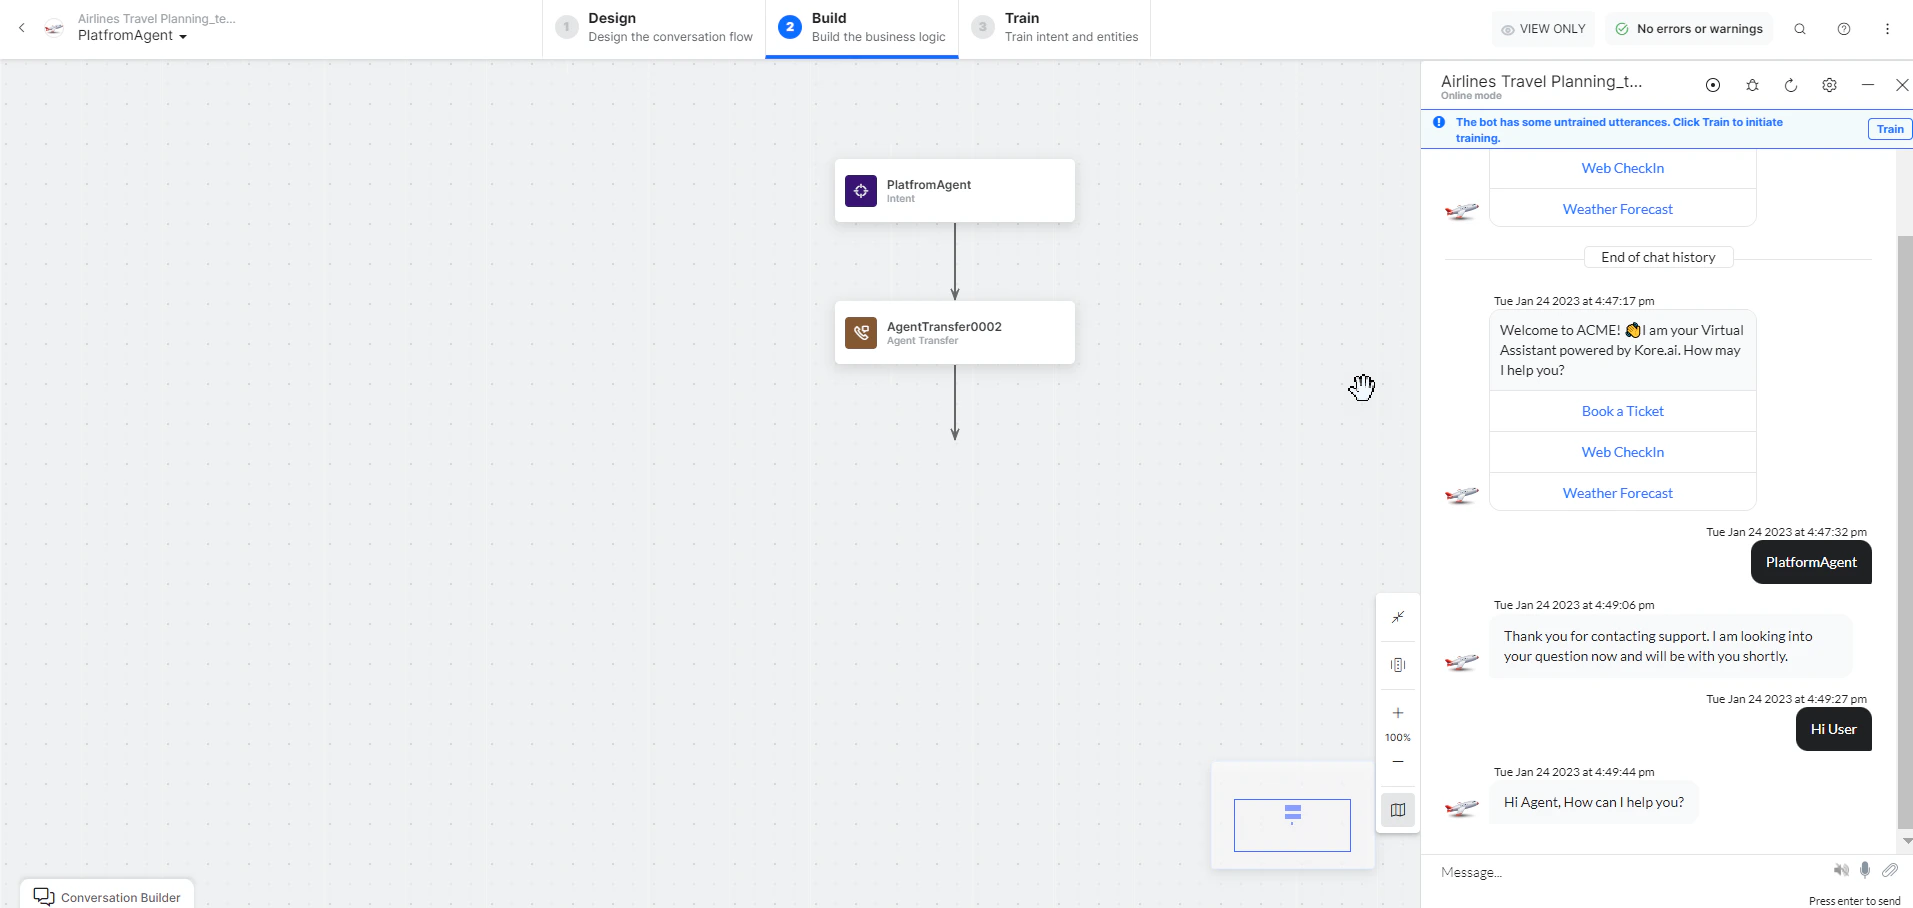
- Open the AI Agent with ServiceNow enabled.
-
Create an Agent Transfer Node task (for example,
Platform Agentwith aUserAgentnode). See Agent Transfer Node.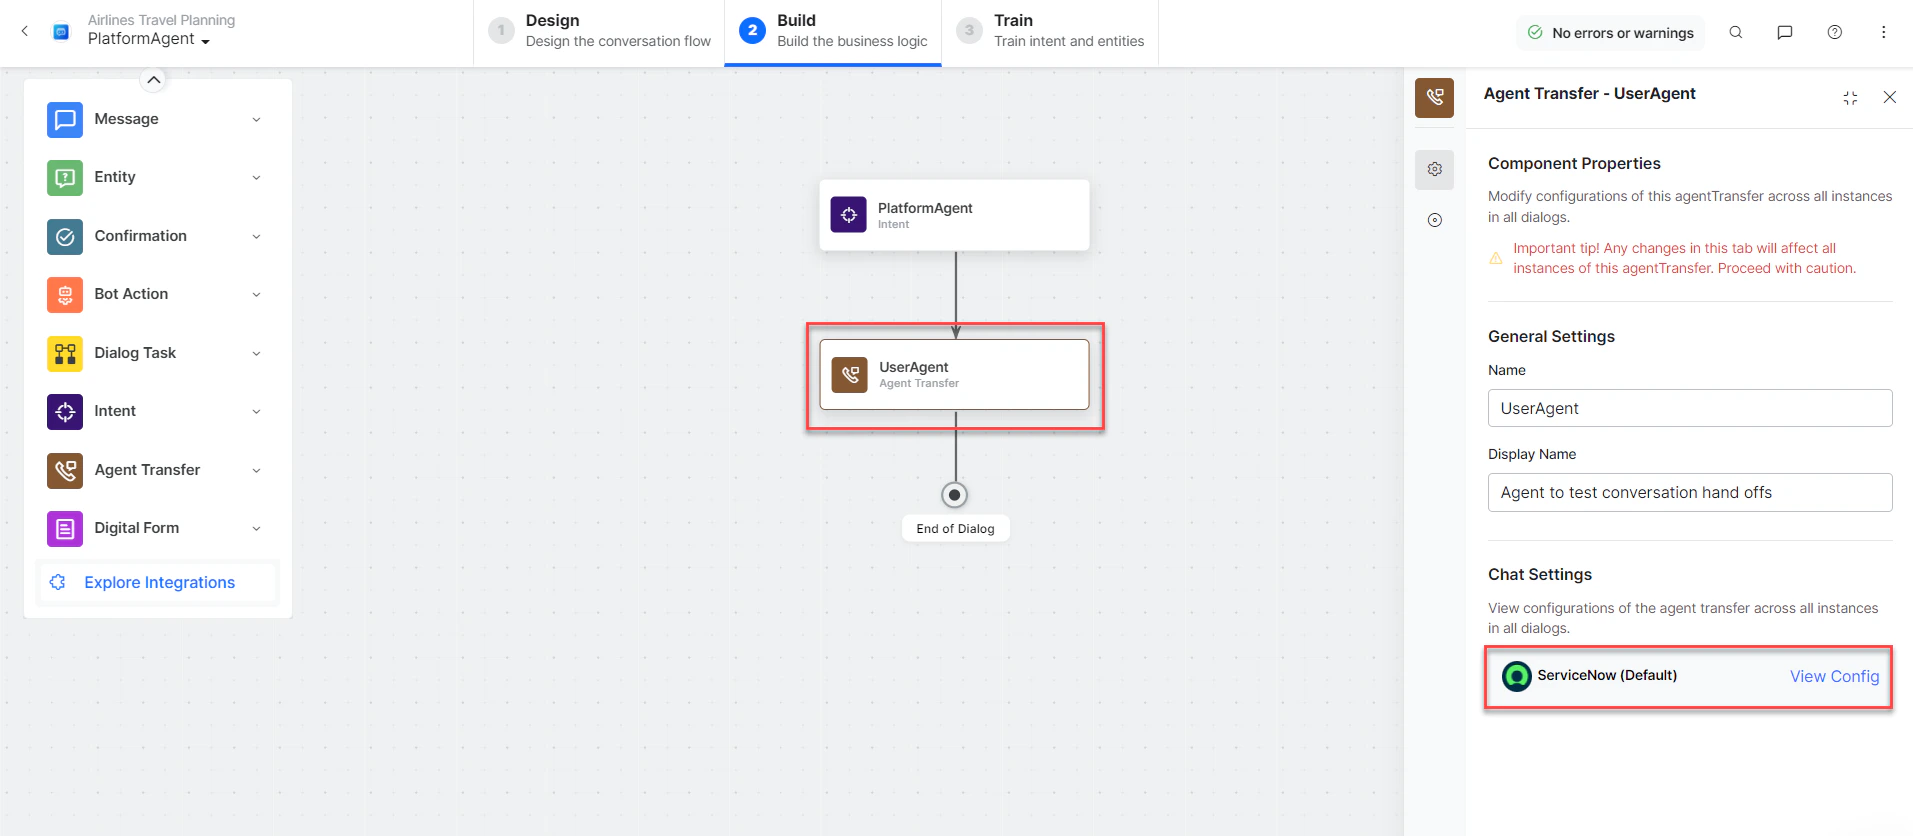
- Click Talk to Bot and enter Help.
-
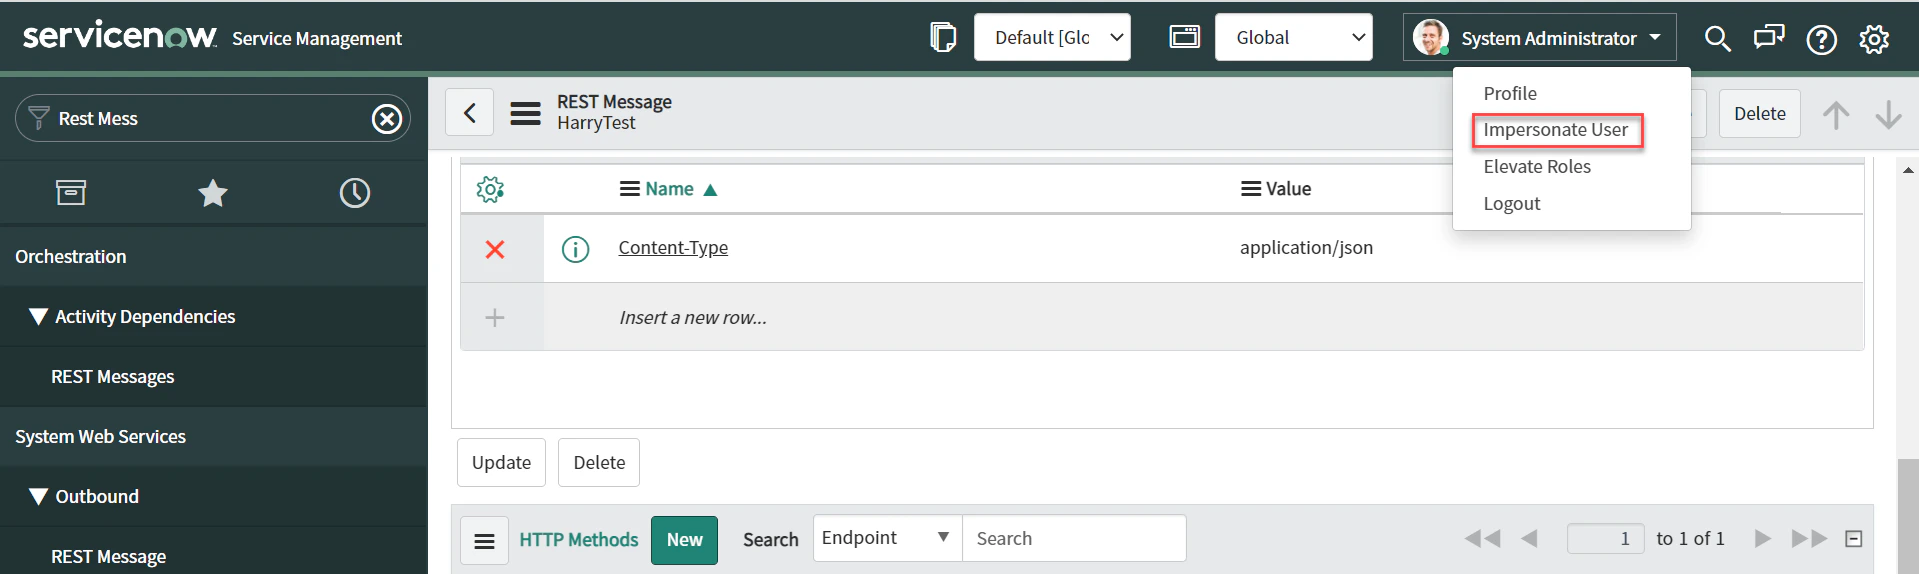
Log in to ServiceNow, go to Profile, and select Impersonate User.
-
Select the username created (for example,
Abel Tuter).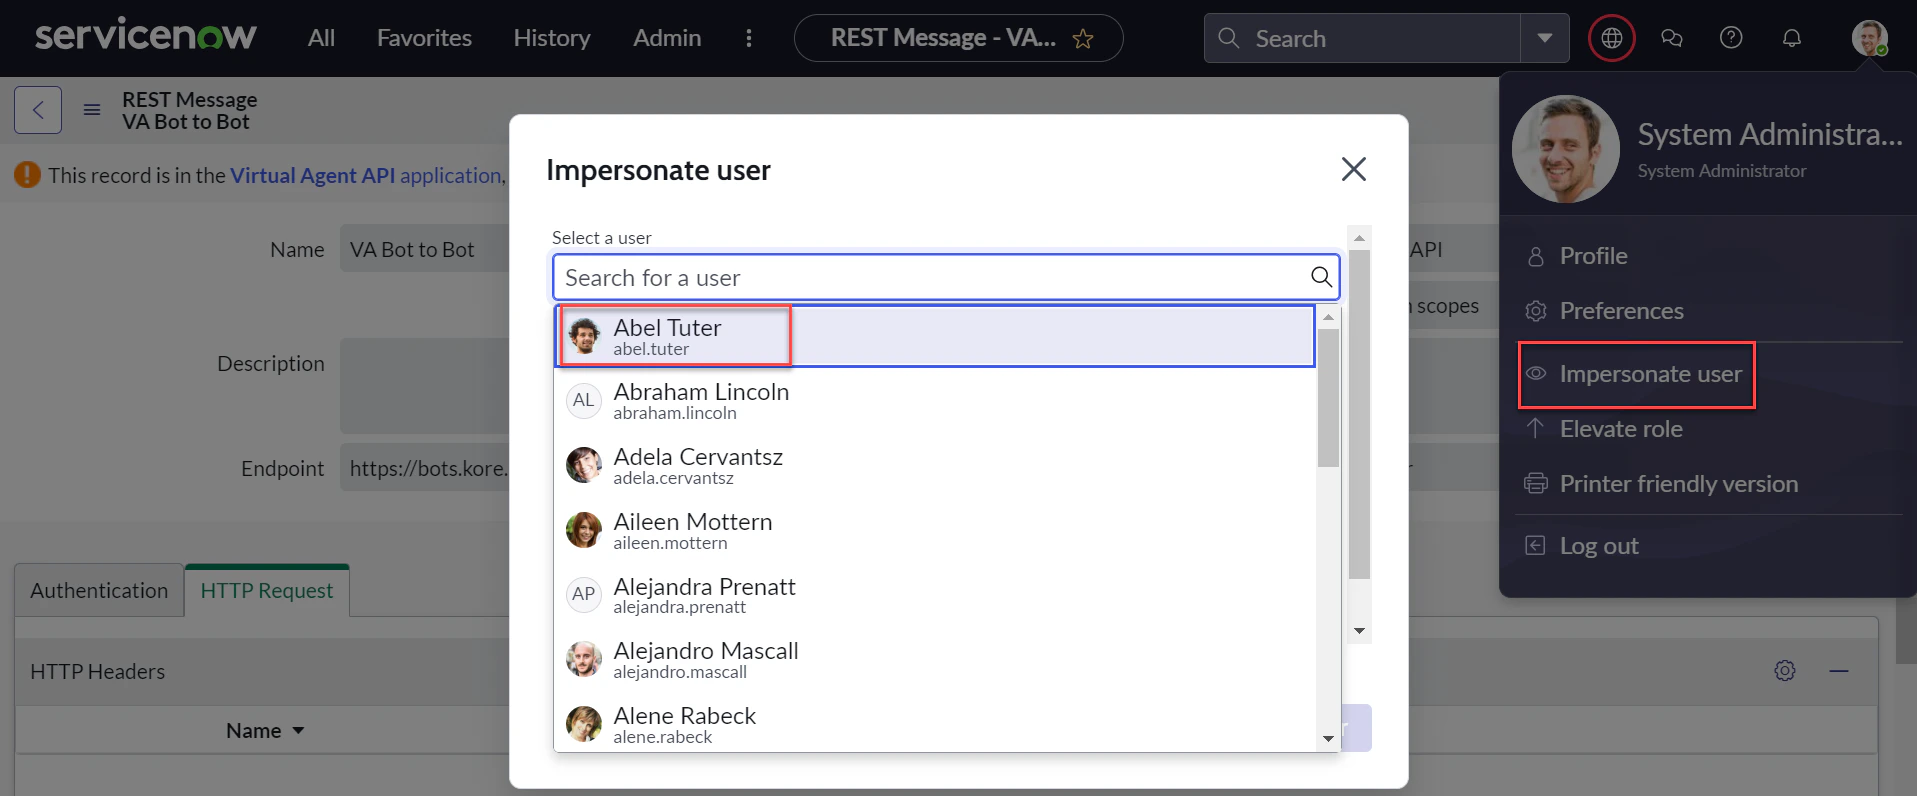
-
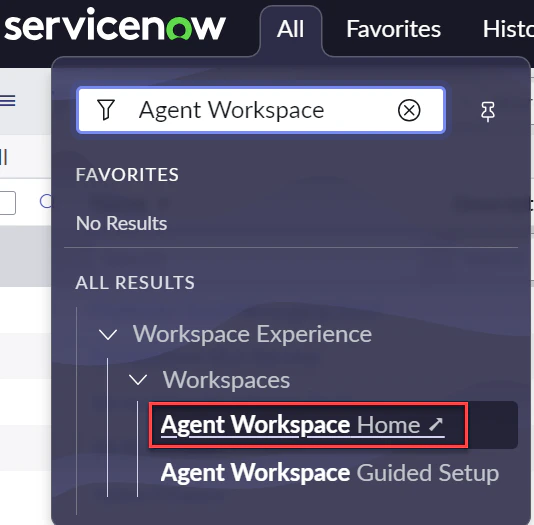
Navigate to Workspace Experience > Workspaces > Agent Workspace Home.
-
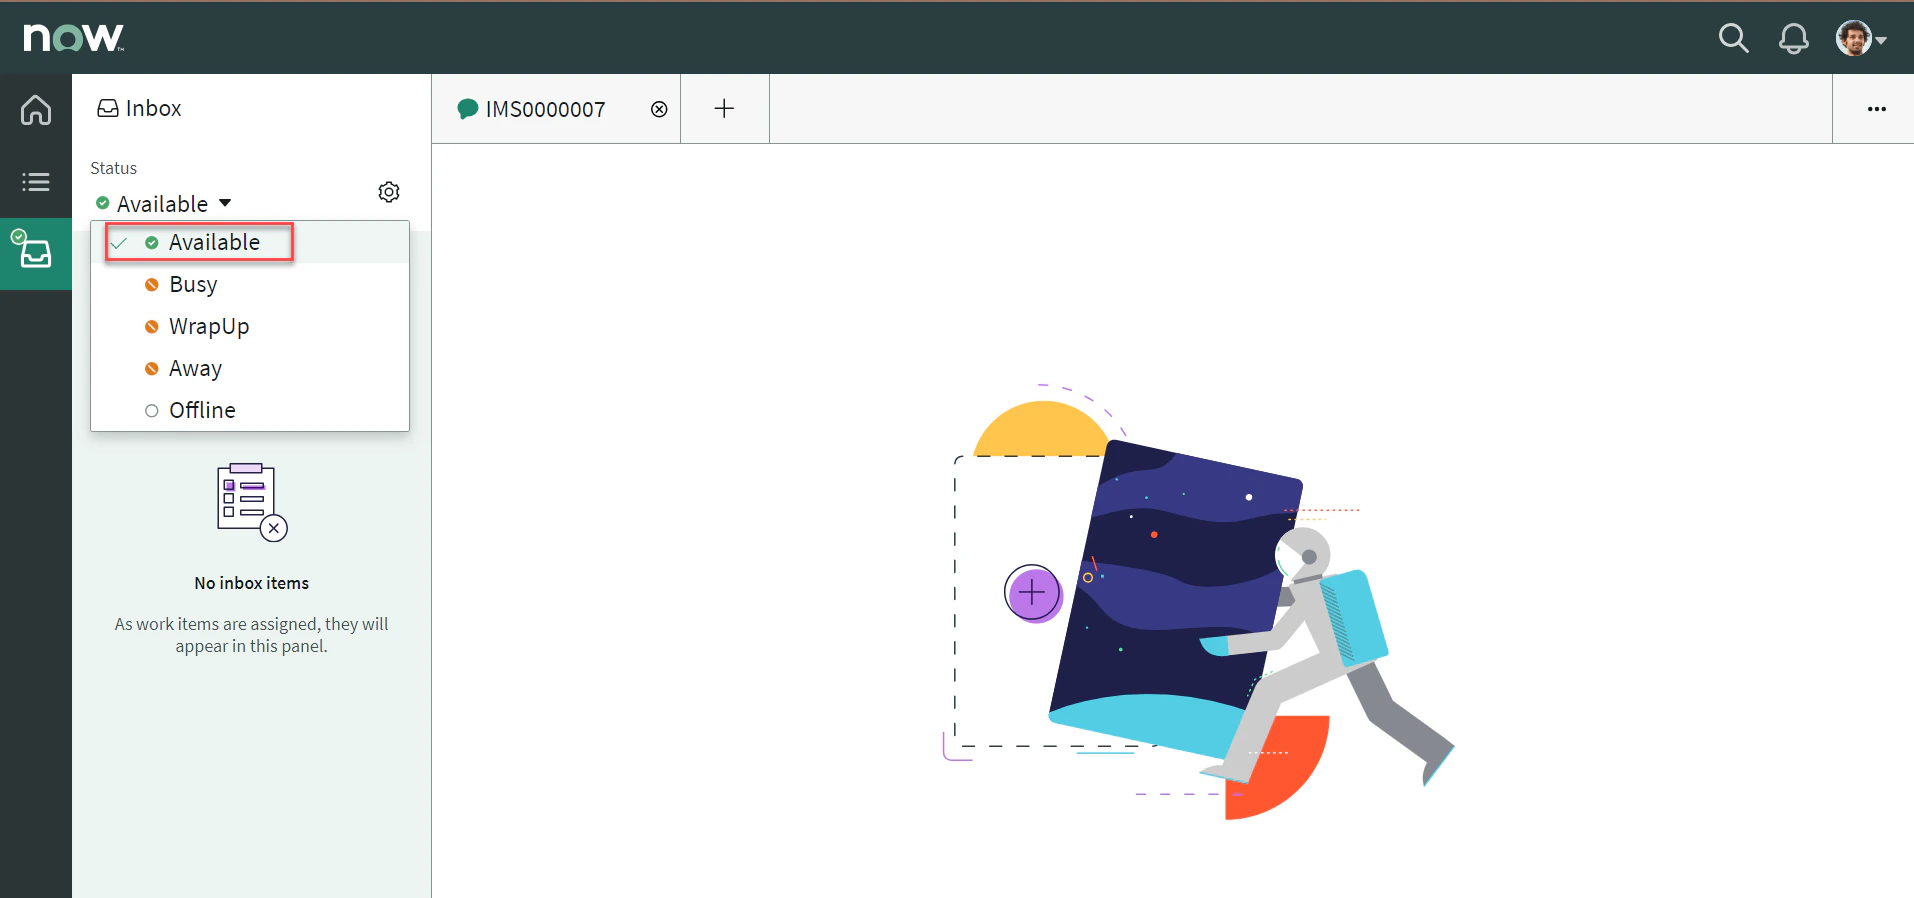
In the Agent Workspace, select Inbox and set Status to Available.
-
When the user initiates chat, the conversation transfers to the ServiceNow agent and the connection is established.
Additional Capabilities
Enable Attachment Sharing with Live Agents
- Log in to ServiceNow with admin credentials.
- Navigate to System Properties > sys_cs_provider_application.list > Configure > Form Layout.
-
In the Trusted Media Domains field, enter the domain for sending and receiving attachments.
 This feature supports only Tokyo versions.