

Shared Responsibilities
For details, see Shared Responsibilities and follow only the responsibilities that apply to digital chat.NICE CXOne Admin
See NICE CXOne Admin for further details.Kore.ai Admin
Provide the Studio script for digital chat: The support team provisions the Studio script required for the NICE CXone digital chat integration.Prerequisites
Before starting with this integration guide, verify that you have the following:- A NICE CXone administrator account. The account must be allowed to create digital automatic call distribution (ACD) skills, configure digital points of contact, configure digital chat channels, import/edit studio scripts, and assign agents who have the necessary roles and permissions to accept digital chat interactions in Agent Desktop.
- NICE CXone Studio installed on a supported Windows computer. NICE CXone Studio is the application used to import and edit the integration script.
- Access to Kore.ai Agent AI, with permission to create or configure an AI agent.
- The following information from the Kore.ai administrator or support team:
- Agent AI widget URL: The web address used to open the Agent AI panel.
- Bot ID: Identifies the AI agent that will assist the human agent.
- Client ID: Identifies the NICE CXone integration.
- Client Secret: A private key used to authenticate the integration.
- Digital chat Studio script: The script that connects NICE CXone to Agent AI.
Definitions
See Definitions for more details.Configuration Steps
Complete the following steps in order:- Import and configure the digital chat script in NICE CXone Studio.
- Create a digital ACD skill in NICE CXone.
- Create a digital chat channel.
- Connect the chat channel to the correct skill and studio script.
- Test the integration from the customer chat entry point.
- Verify that the Agent AI widget, transcript, custom data, and conversation summary work correctly.
This guide applies only to digital chat. Do not configure voice-related settings such as SIP URI or Audio Relay Endpoint.
Import and Configure the Digital Chat Script in NICE CXone Studio
The Studio script connects NICE CXone to Agent AI and defines the following:- Which AI agent to use.
- How to authenticate with Agent AI.
- Which language to use.
- Which chat conversation to connect to.
- What additional information to send to Agent AI.
Import the script
- Download the JSON Studio script Kore.ai provides for digital chat.
- Open NICE CXone Studio on your Windows computer or access Nice CXone Cloud.
- Select File > Import from File.
- Select the downloaded JSON file.
-
Select the Snippet tile to open the script editor.

-
Update the following parameters:
- Kore.ai parameters:
- Bot Client ID: clientId
- Bot Client Secret: clientSecret
- Bot ID: botId
- Agent AI Widget URL: baseUrl
- Bot language code:
language. The default value isen. See Supported Languages for supported AI agent language codes.
- Custom data: Use the custom data object to pass additional context to the AI agent. At run time, the data is available in the AI agent’s UserContext. See Access Custom Data in Agent AI Bot for instructions.
- Add one key-value pair per line to the custom data object. For example: 6. customdata.agentName=“Agent” 7. customdata.agentID=“1234”
- Kore.ai parameters:
- Select Apply in the Snippet Editor.
- Select Save in the upper-right corner of Studio.
Create a Digital ACD Skill in NICE CXone Setup
An ACD skill is a routing category. It helps NICE CXone decide which agents should receive a chat.- Go to the NICE CXone home page.
- Select the Application Launcher in the upper-left corner.
- Select ACD.
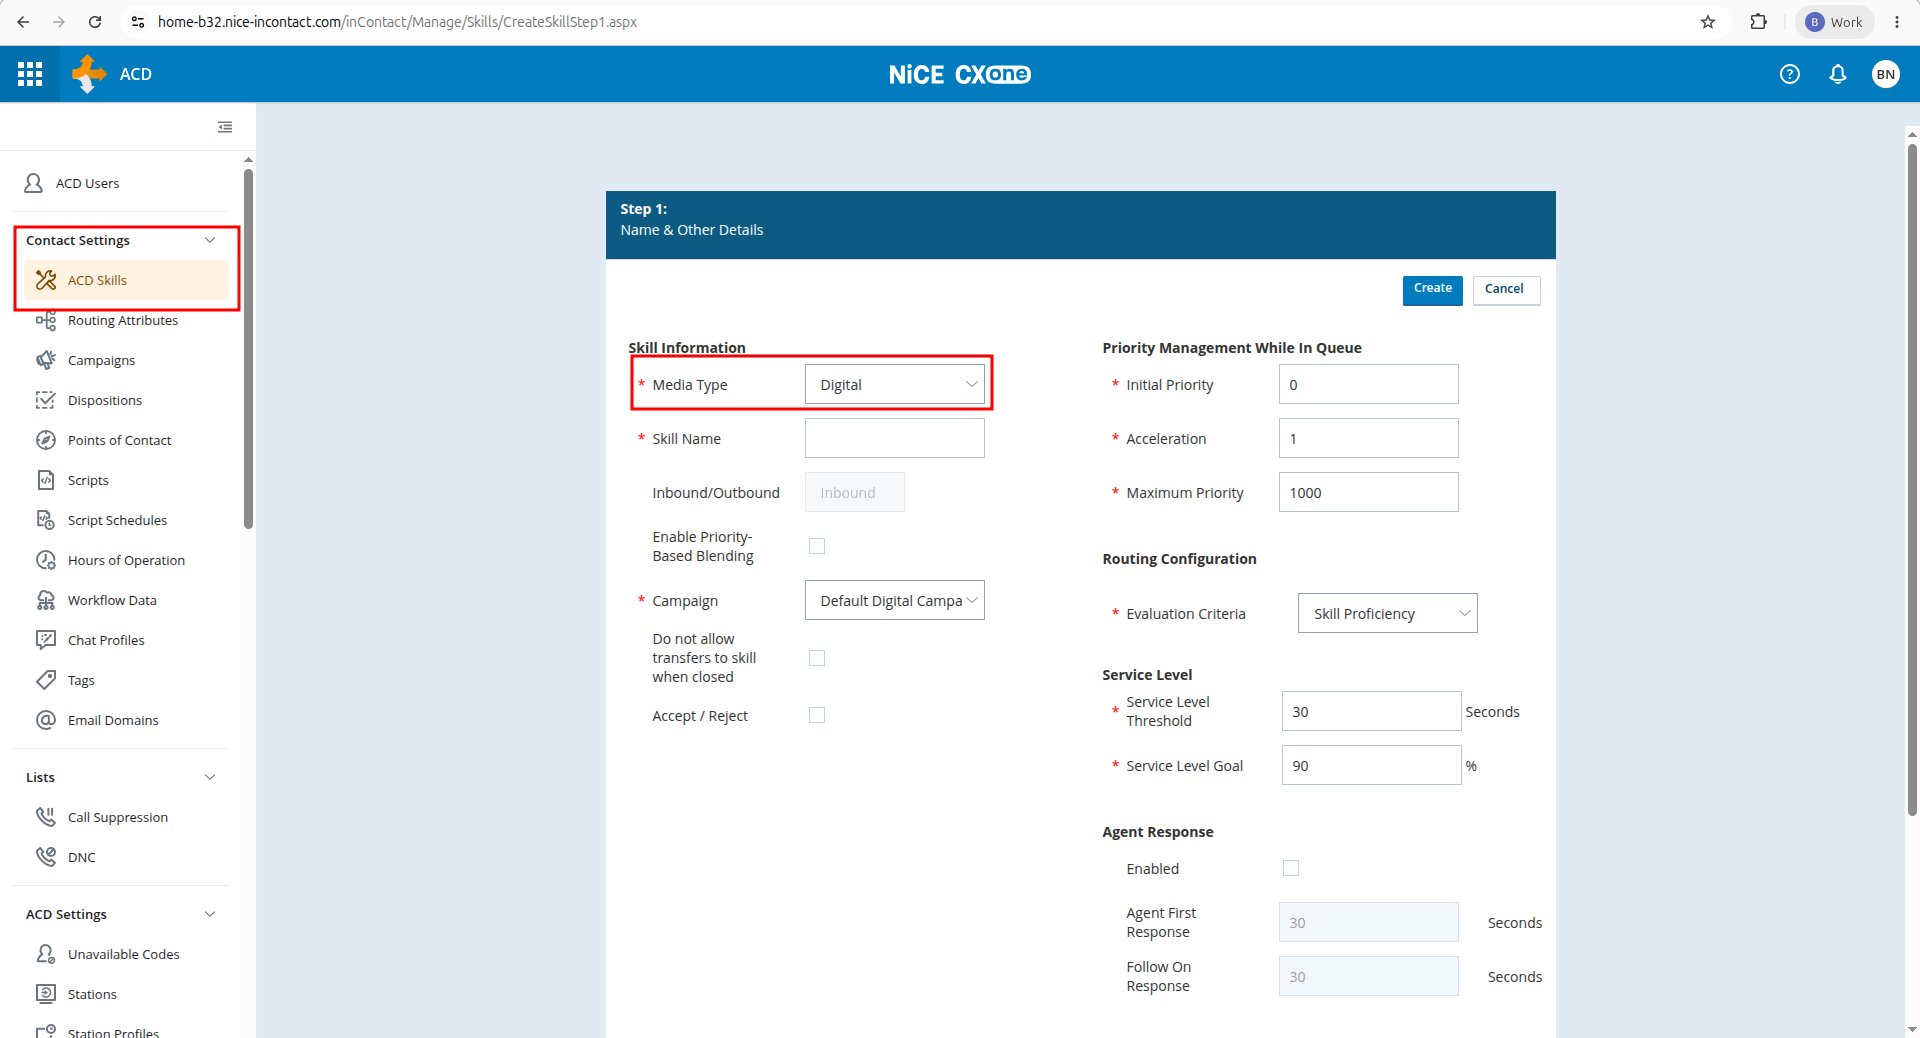
- Under Contact Settings, select ACD Skills.
- Select Create New > Single Skill.
- Set Media Type to Digital to handle text-based chats instead of phone calls.
- Select the appropriate Campaign.
- Select Create.
Configure a Digital Chat Channel in NICE CXone Setup
The digital chat channel is the customer-facing entry point where chats begin. Connect the channel to both the Studio script and the ACD skill.- On the NICE CXone home page, select the Application Launcher > ACD.
- Select Digital > Points of Contact Digital.
-
Select the Chat tile.
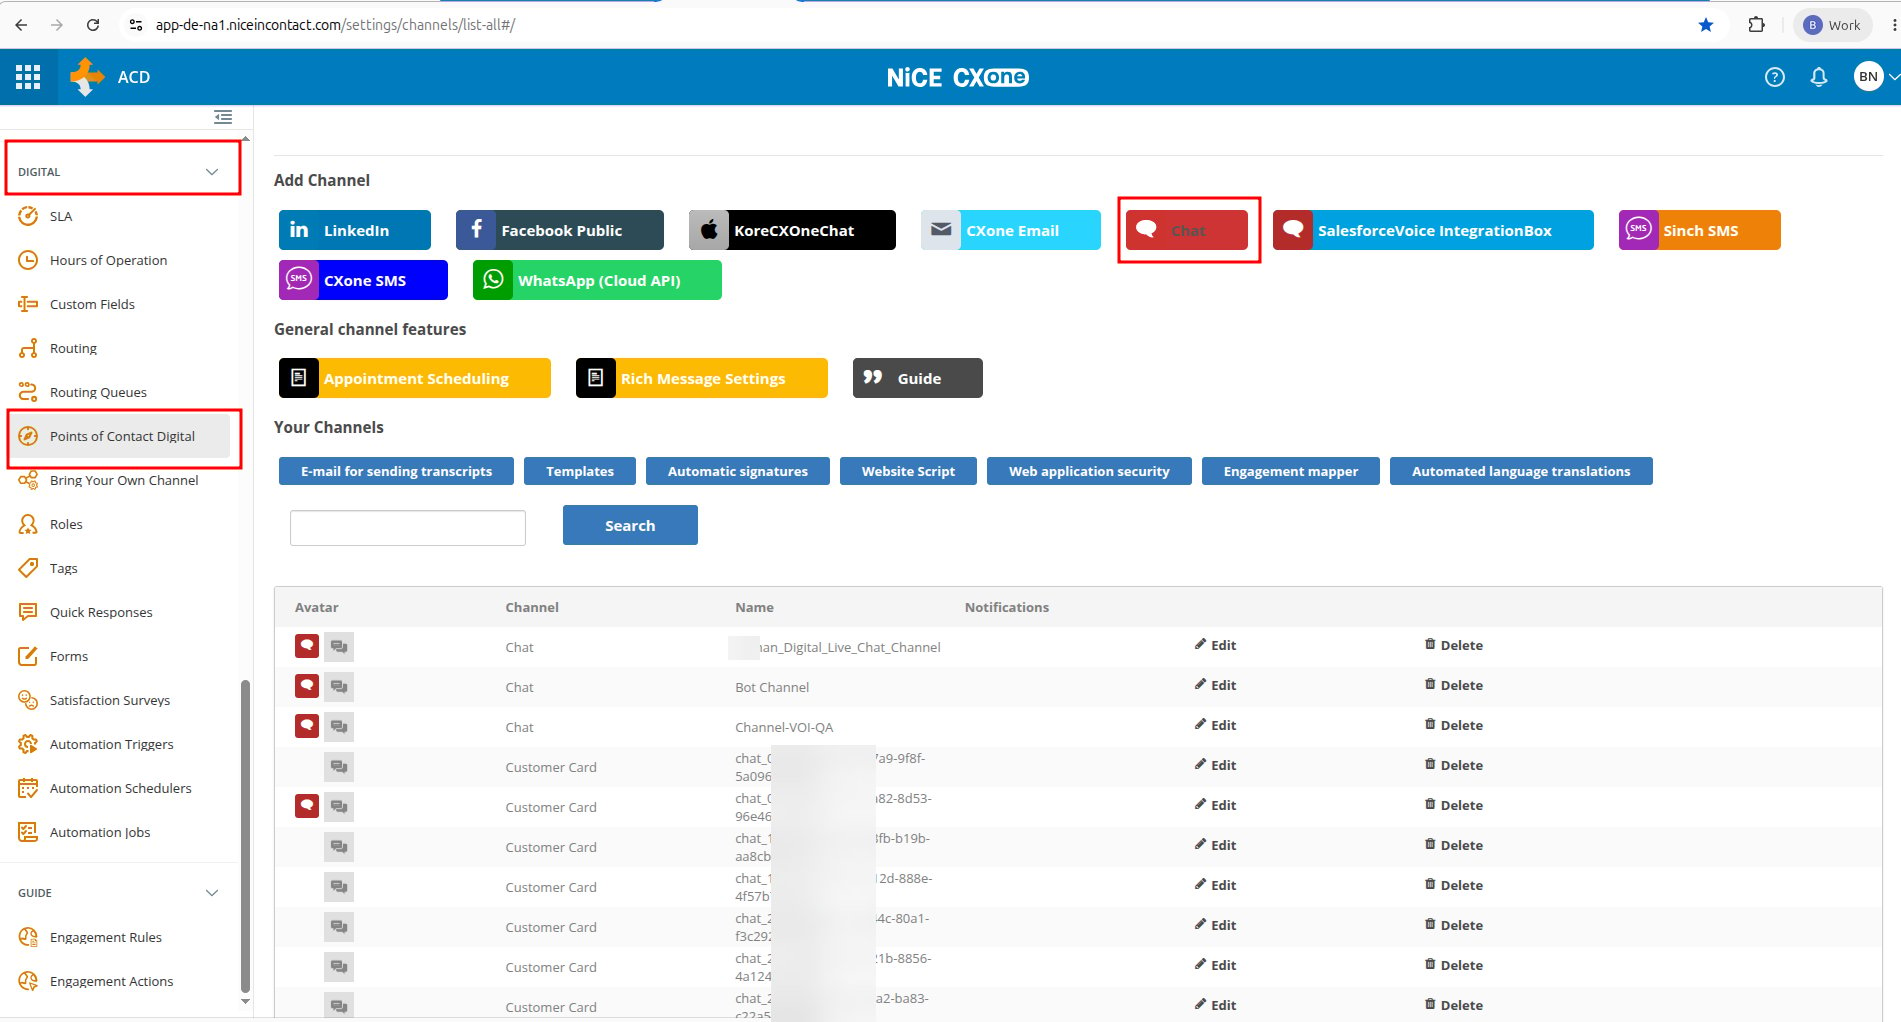
- Select Create Messaging Channel.
- Enter a name in the Channel name field.
-
On the Points of Contact Digital page, select Edit for the channel you created.
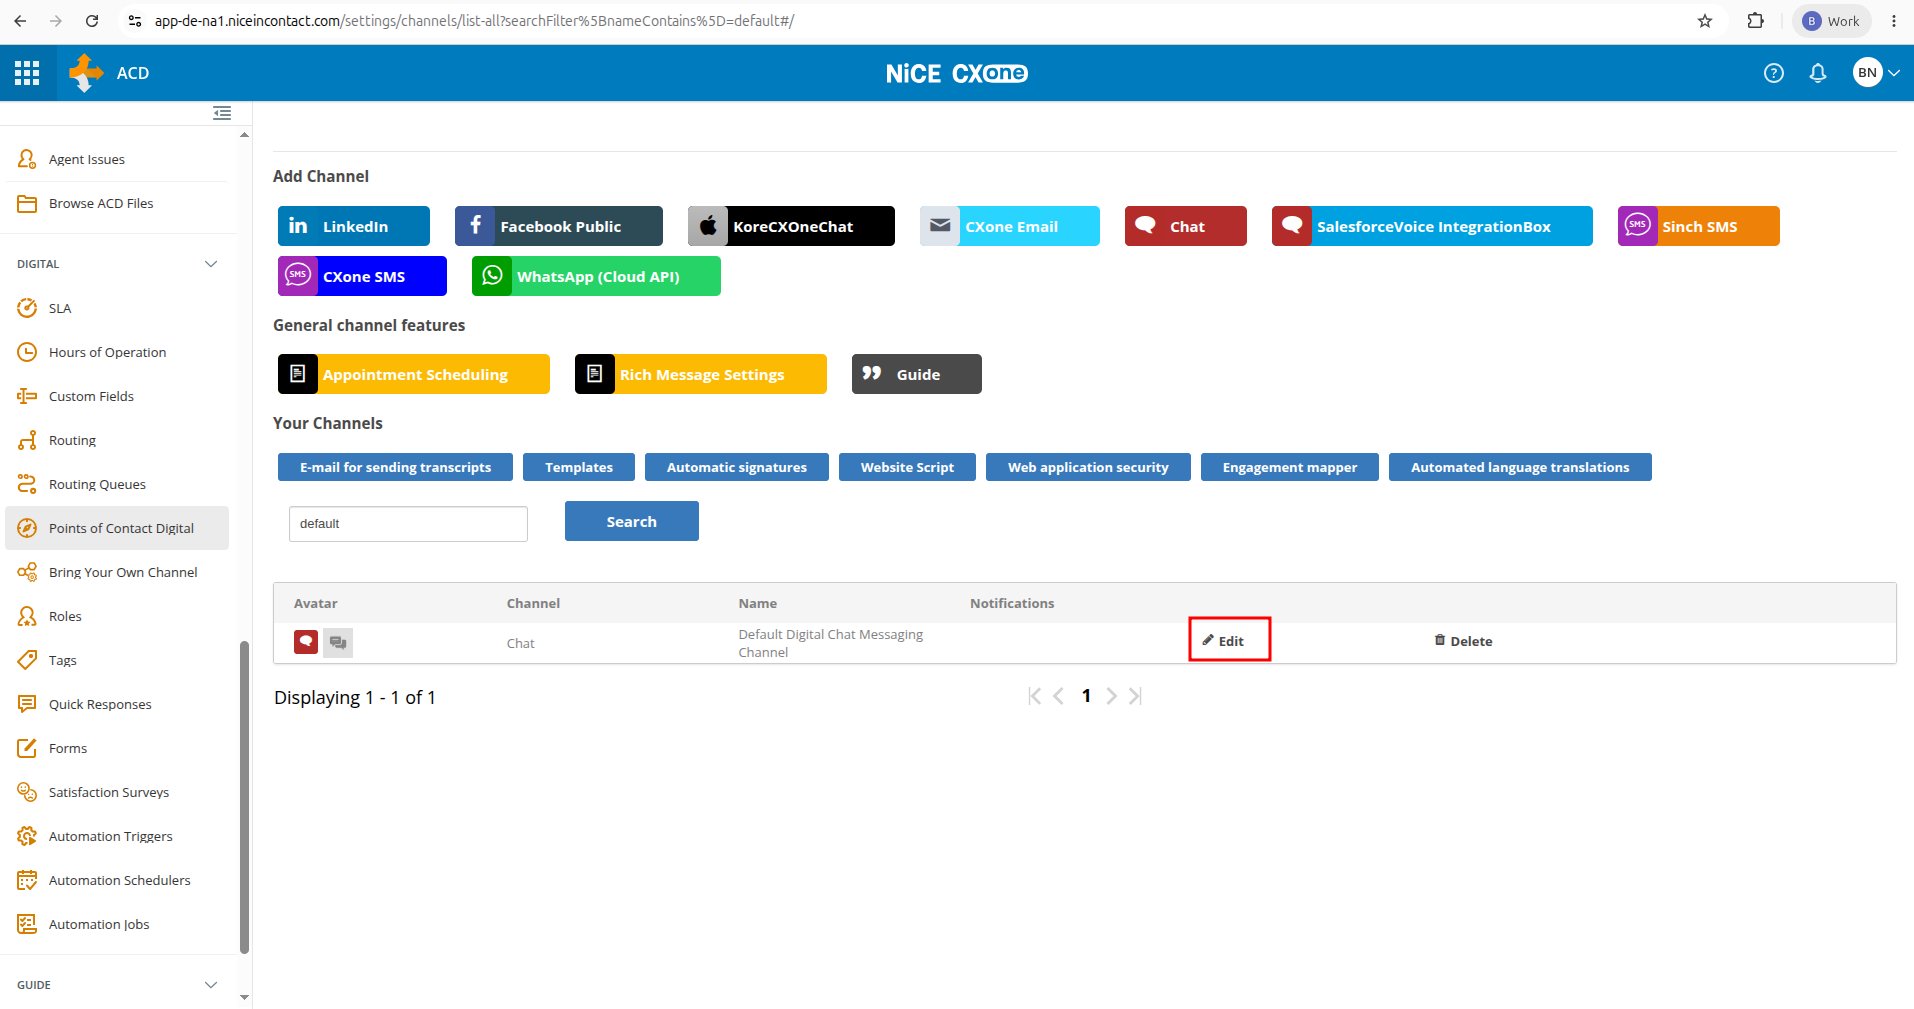
- Select the studio script and default skill for the channel.
-
Select Save.
Assign at least one disposition to the digital ACD skill. A disposition is the outcome the agent selects when the conversation ends–for example, Resolved or Closed.The end-of-conversation summary requires a disposition to appear and remain available. Without a disposition, the chat screen may close automatically when the conversation ends.
Validate the Digital Chat Integration
- Go to the NICE CXone home page.
- Select the Application Launcher.
- Select OMNICHANNEL ROUTING > Agent.
- Select Integrated Softphone > Connect.
-
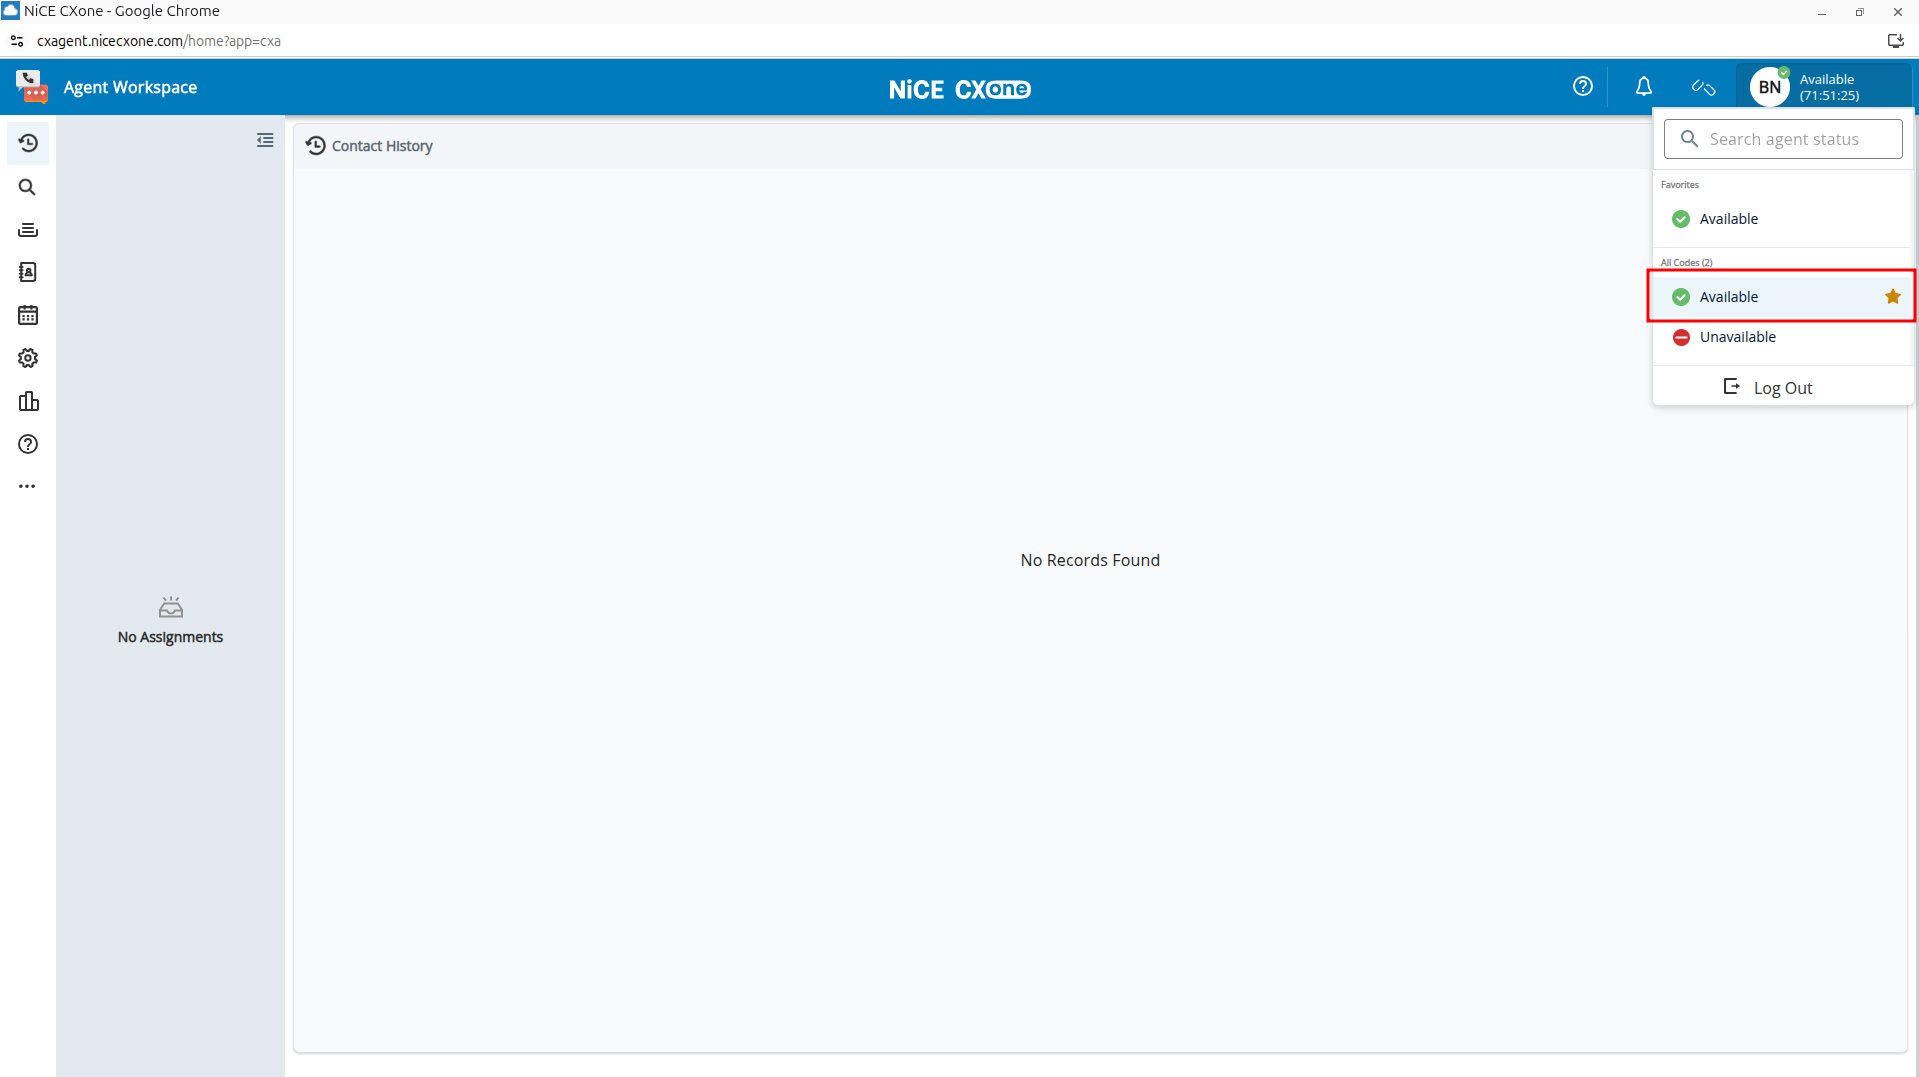
Set the agent status to Available.
- Return to the NICE CXone home page and select Application Launcher > ACD.
- Select Digital > Points of Contact Digital.
- Select the Chat tile.
-
Select Initialization & Test for your channel.
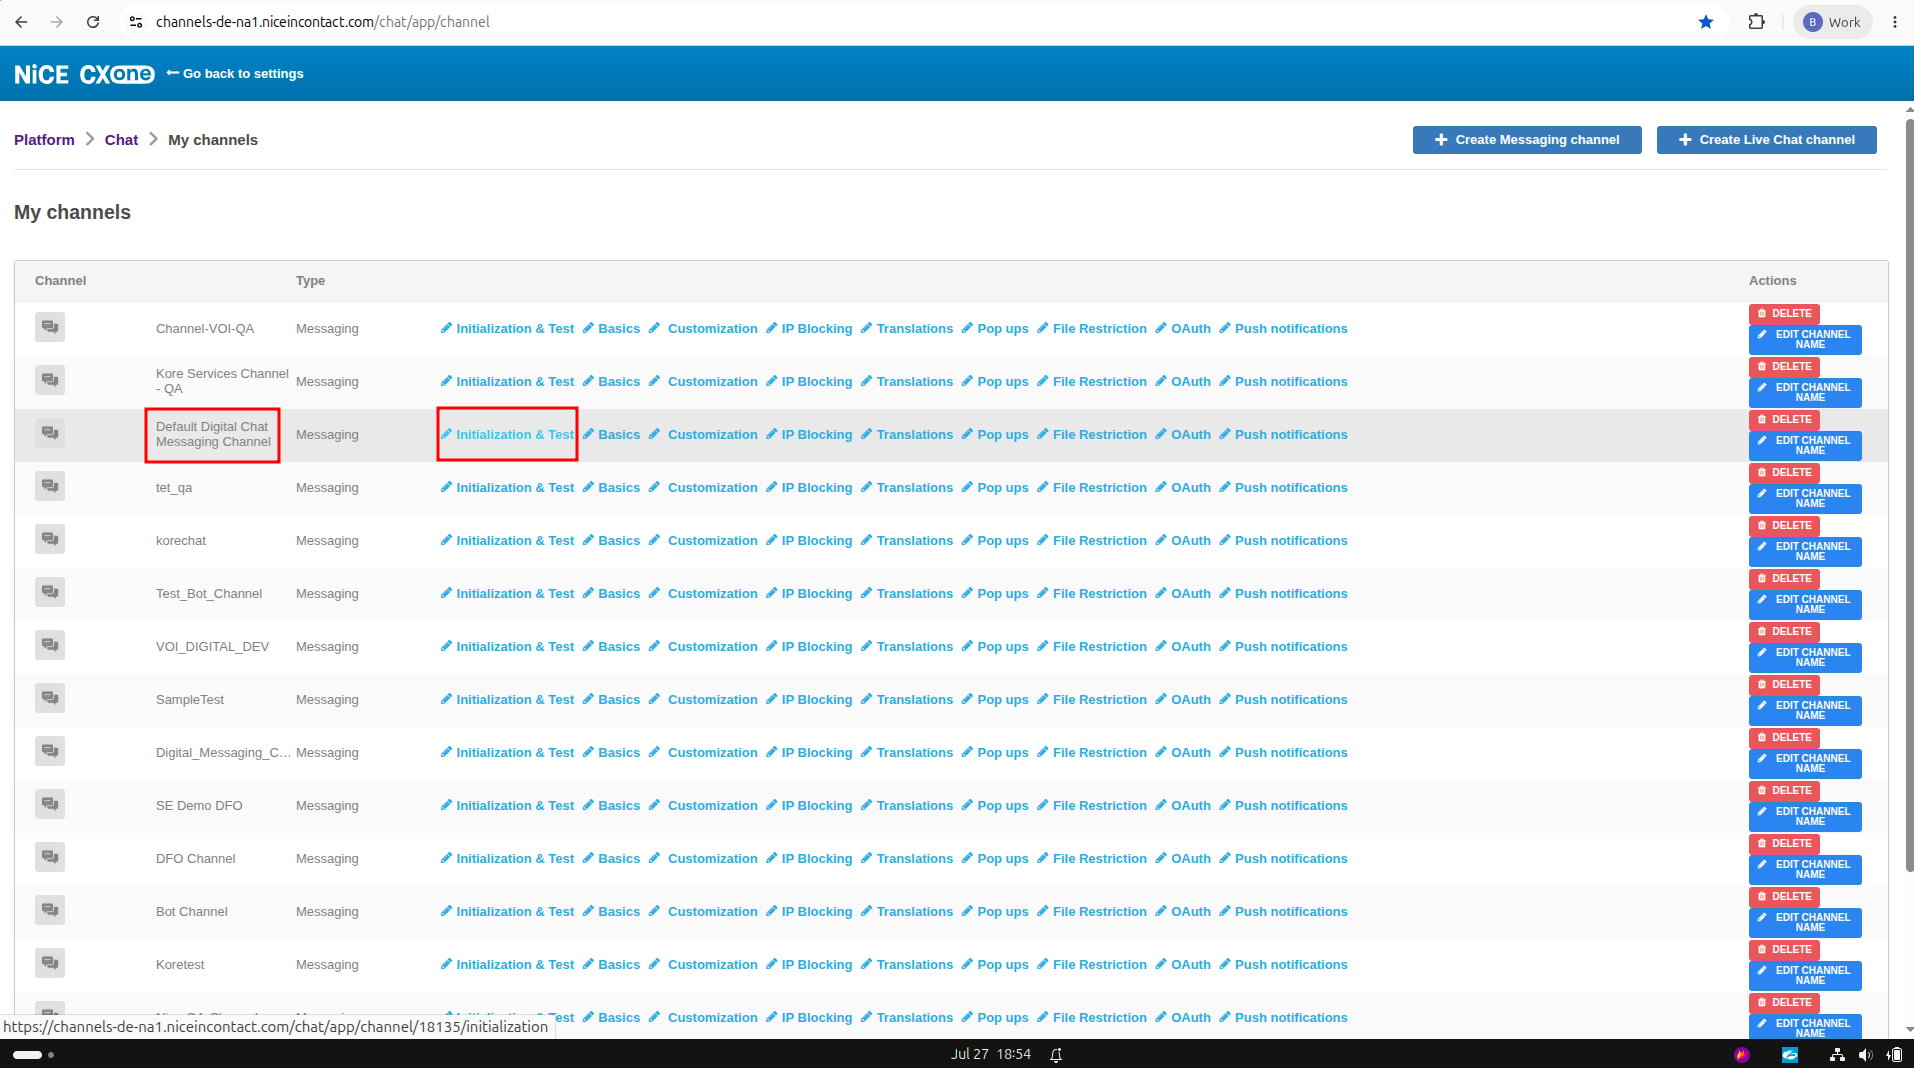
-
Select the chat icon in the lower-right corner of the initialization page.
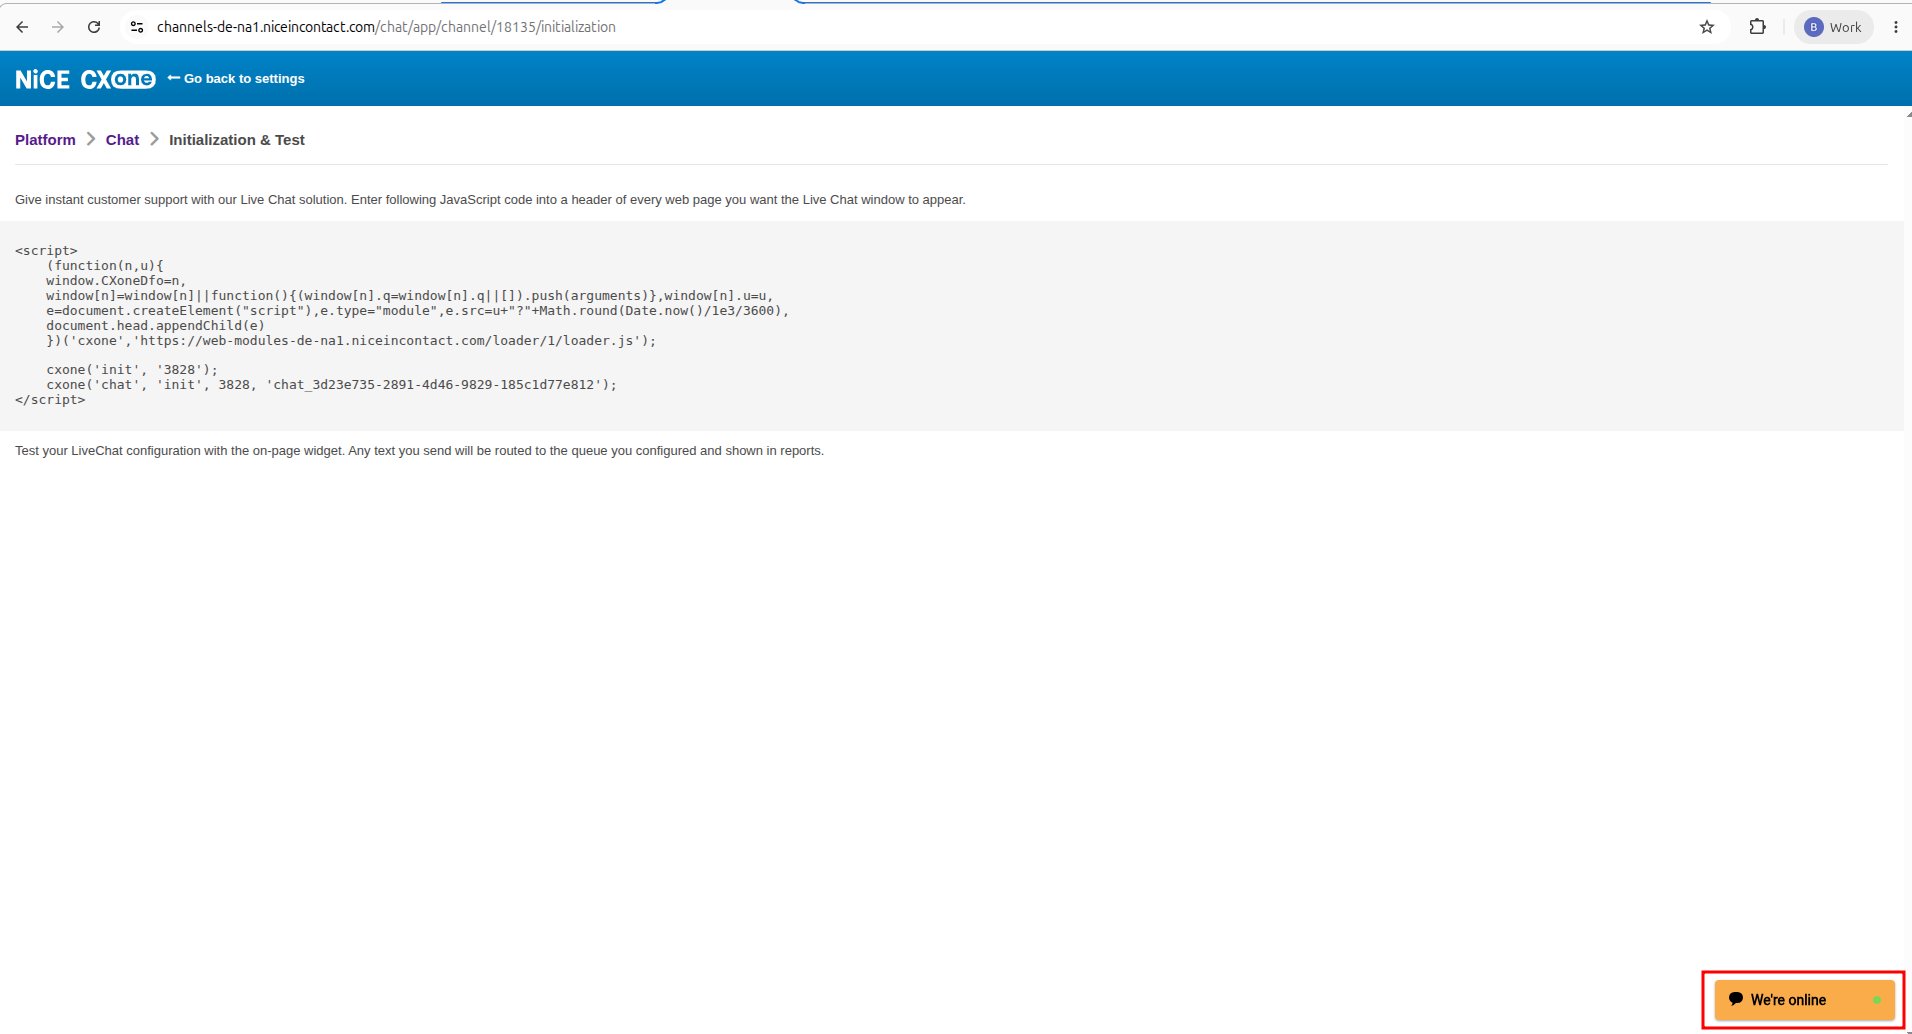
-
Enter your name in the message initialization form and send a greeting such as Hi or Hello to start a chat. A chat request appears in Agent Desktop.
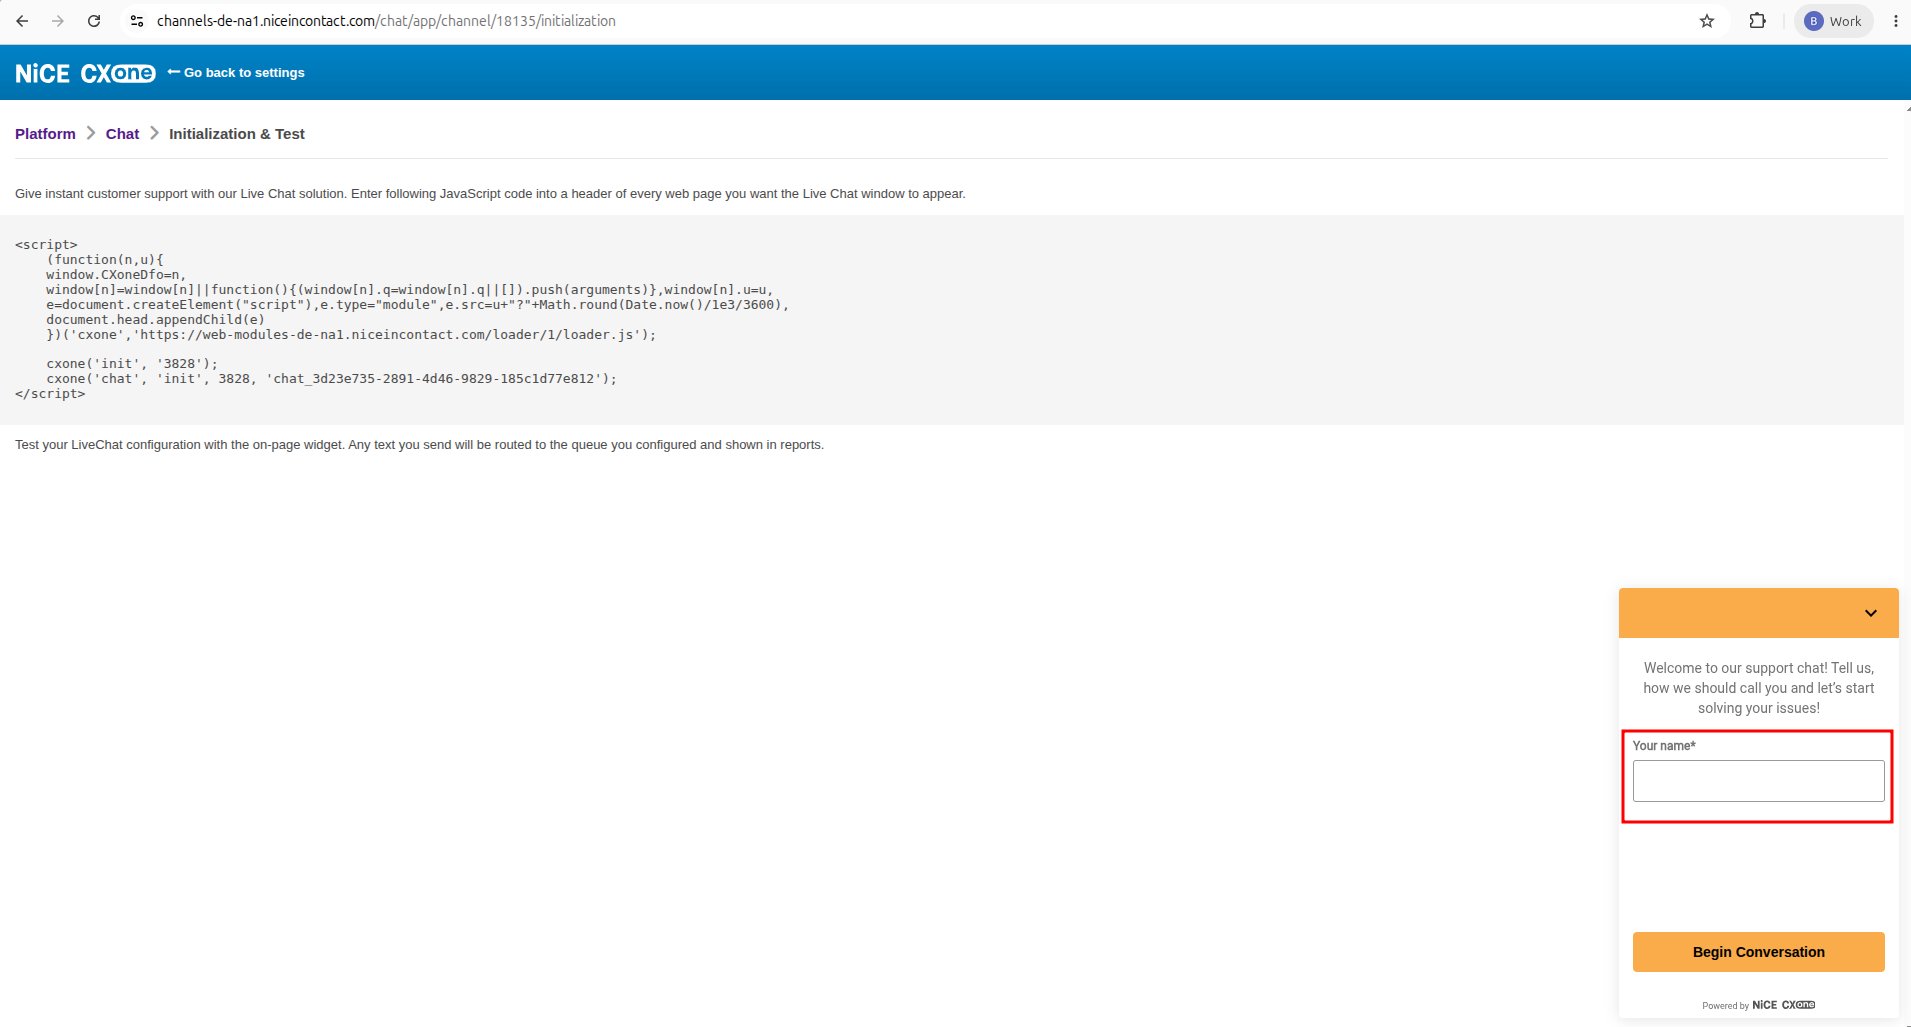
- Verify that Agent Desktop assigns the chat to you.
-
From the status menu, select Resolved or Closed to end the conversation.
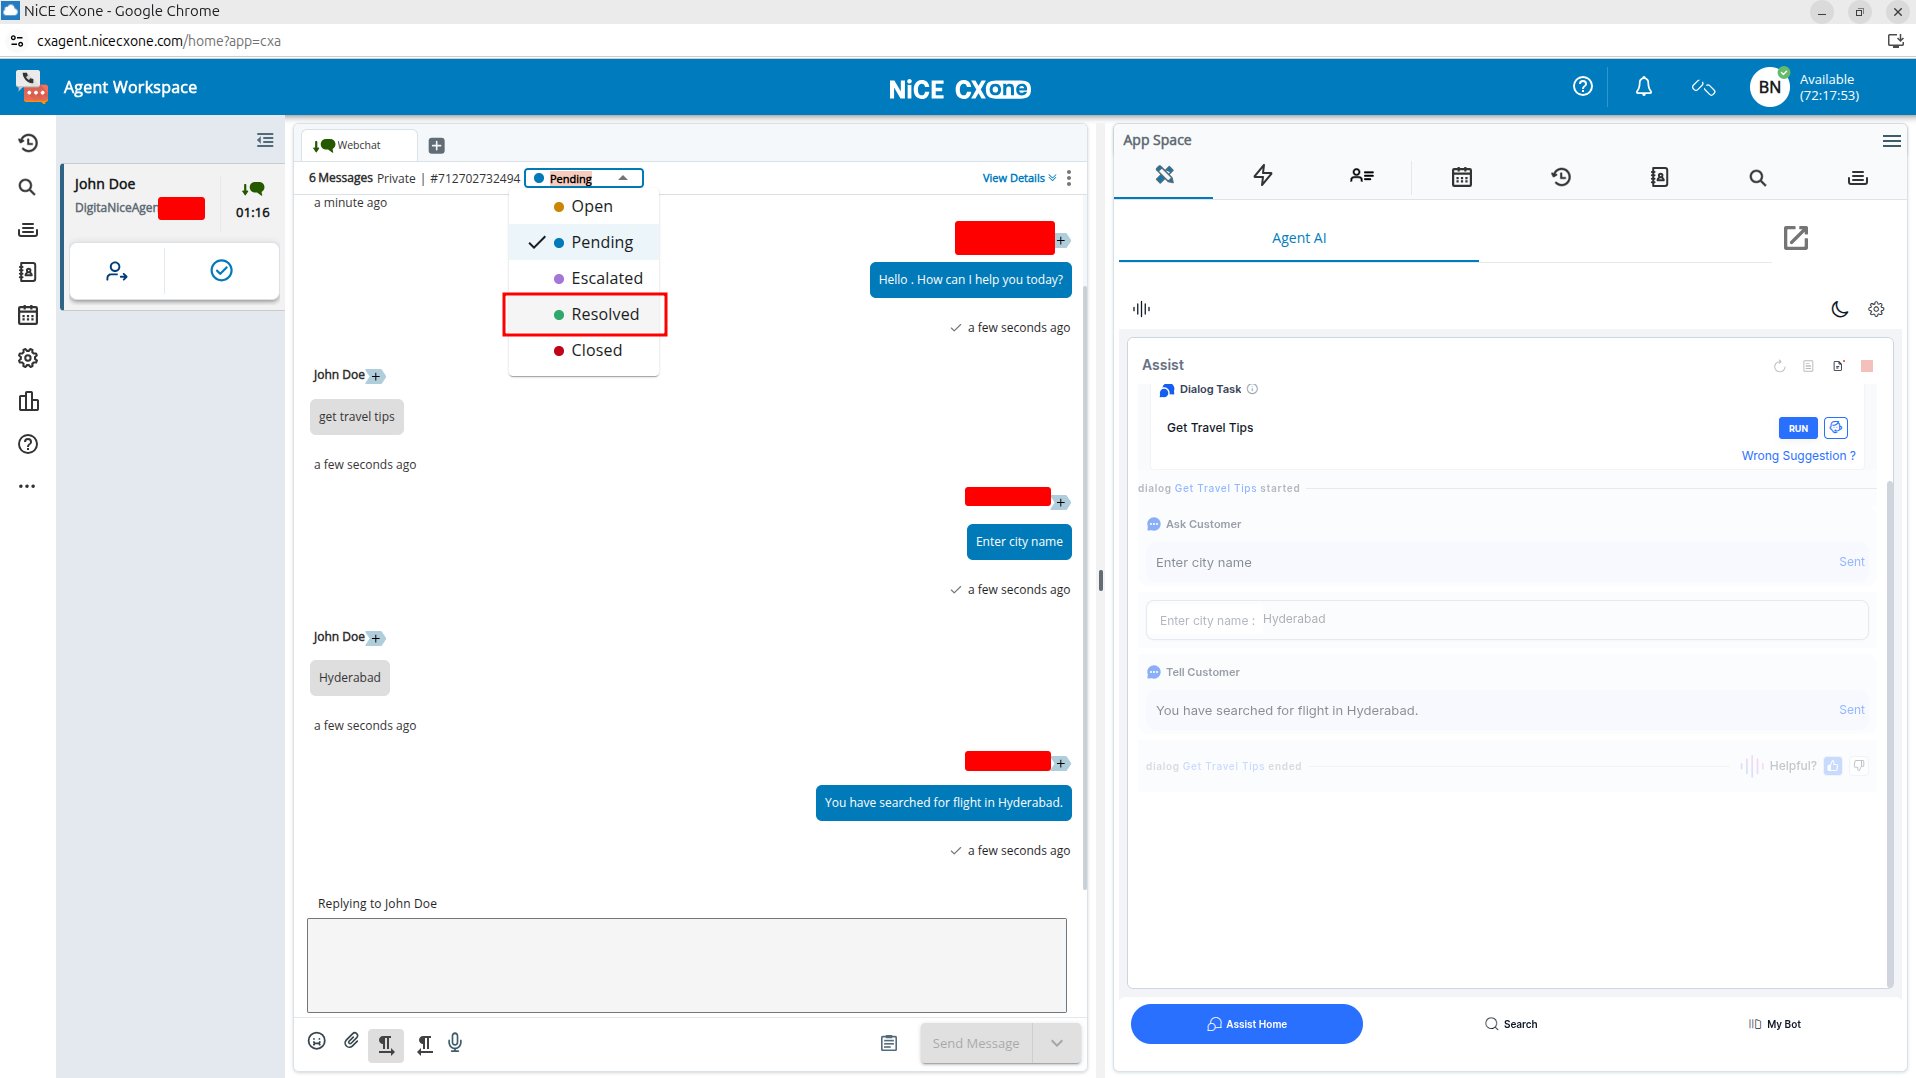
-
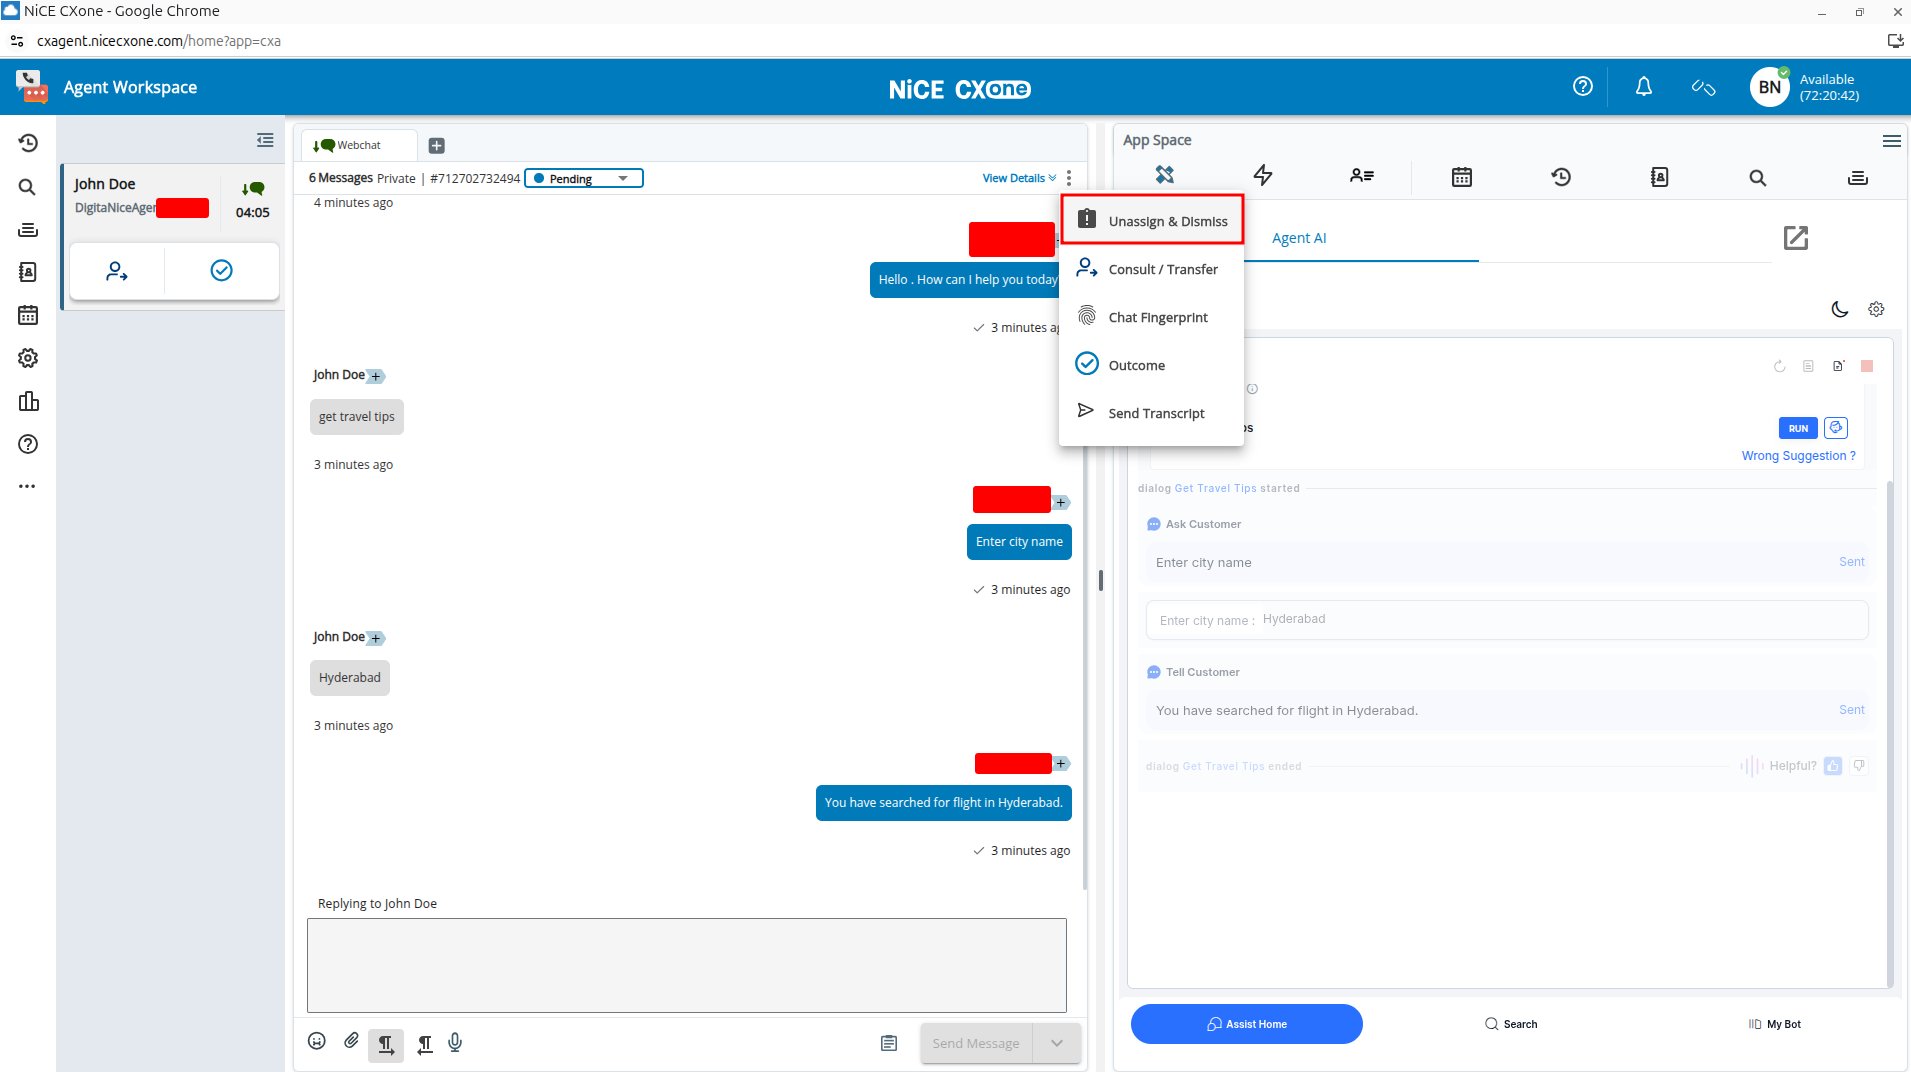
Select Unassign & Dismiss to disconnect the chat.
Validation Checklist
- Verify the Agent AI widget loads in Agent Desktop when an agent receives a chat.
- Verify customer and agent messages appear in the conversation transcript.
- Verify the AI agent receives the custom data you configured in itsUserContext.
- Resolve or close the chat and verify the end-of-conversation summary appears.
- Verify Unassign & Dismiss disconnects the completed chat.
Best Practices
- Use separate chat channels and skills for testing and live customer conversations.
- Verify the widget URL, Bot ID, Client ID, and Client Secret before saving the Studio script.
- Keep a record of each version of the Studio script and the changes you make to it.
- After changing the script, skill, or channel connection, start a new test chat. Existing chats may continue using the previous configuration.
- Assign a disposition to the skill so that the conversation summary remains available.
- Before turning on the integration for customers, test the complete process:
- Chat routing
- Agent AI panel opening
- Transcript updates
- Custom data transfer
- Summary generation
- Conversation closure
Troubleshooting
View Interaction Details in Kore
During and after a digital chat, agents can review the interaction in the Agent AI widget. The widget displays the conversation transcript, conversation summary, and customer interaction history. For additional conversation details, go to Kore Platform > Automation AI > Analytics > Conversations.Additional Notes
- The integration uses a screen pop-up to load the Agent AI widget in NICE CXone Agent Desktop; you don’t need Agent Assist Hub configuration.
- This guide supports digital chat only. Voice, SIP, Audio Relay Endpoint, and SIP URI settings do not apply.
- The Studio script passes NICE CXone conversation identifiers and custom data you configured to Agent AI.
- The summary pop-up requires you to assign a disposition to the digital ACD skill.
- After updating the Studio script or channel mapping, start a new chat session to validate the changes.