

With Browser Automation Deployment, you can:
- Deploy a pod for a browser automation experiment.
- Customize resource allocation for deployments.
- Set auto-scaling limits to ensure optimal performance.
- Review deployed and ready-to-deploy pods.
- View details of the latest and previous deployment versions.
- Redeploy pods that were previously undeployed.
- Undeploy or delete pods.
- Search for a deployment.
Billing and credit usage for Browser Automation are calculated based on the deployed pods and hardware configuration.
Deployment Dashboard
The Deployment page shows the following information for each pod:Deploy a Pod
Prerequisite: Ensure your account has sufficient credits to deploy a pod.- Click Deploy in the top-right corner.
- In General Settings, enter the Deployment name and Description.
-
In Resource allocation, configure the following:
Scaling parameters:
Hardware: Select a hardware profile (number of vCPUs) from the dropdown.Selecting a hardware profile displays the hourly credit consumption, profiling data, and the number of browser automations that can run in parallel on that hardware. Additional requests are queued.
- Review the deployment details and accept the terms.
- Click Deploy to proceed. You can also save the configuration as a draft or go back to modify details.
View Deployment Details
Click a deployment entry to see the following tabs: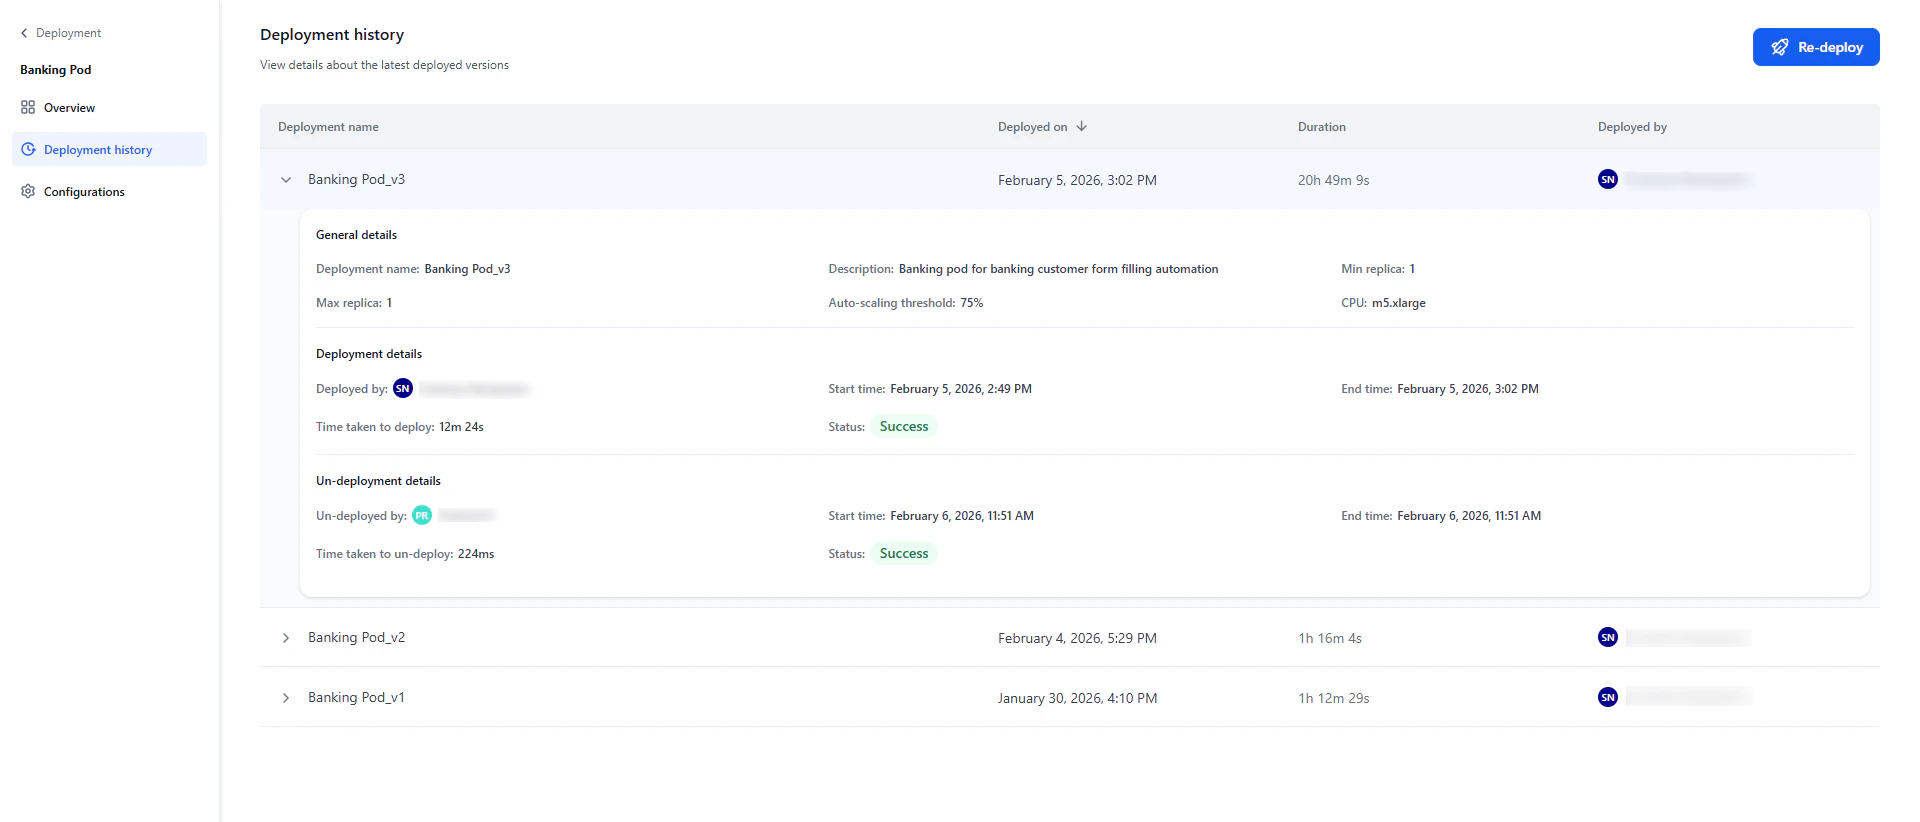
Delete permanently removes the pod and its data from all experiments where it is deployed. Only a Master Admin or Workspace Owner can delete a pod. Proceed with caution — this action cannot be undone.
Undeploy a Pod
Undeploying a pod temporarily disassociates it from all browser experiments. You can redeploy it later.- On the Deployment page, click the pod you want to undeploy.
- Click Configurations on the left menu.
- In the Danger Zone section, click Proceed to Undeploy.
- Click Un-deploy in the confirmation window.
Redeploy a Pod
You can redeploy an active or undeployed pod and optionally update the general and resource allocation settings before redeployment.- On the Deployment page, click the pod you want to redeploy.
- Click Re-deploy in the top-right corner, then confirm in the dialog.
- Modify any required parameters. See Deploy a Pod for configuration steps.
- Click Deploy on the Review page.