

| Specification | Details |
|---|---|
| Repository type | Cloud |
| Supported API version | REST API v1 |
| Supported content | Pages and attachments to the pages in the following formats: .pdf, .doc, .docx, .csv, .txt, .xls, .xlsx, .ppt, .pptx, Images (.jpeg, .png, .svg, .webp) |
| Access control support | Yes |
| Content filtering | Yes |
| Real-Time Sync | Yes |
Prerequisites
- An admin account in Atlassian Confluence Cloud
- A target domain
- Access to the Atlassian Developer Portal
- Space Admin access (minimum) or Site Admin access (for global rules)
Configure an OAuth Application
-
Sign in to your developer account at the Atlassian Developer Portal.
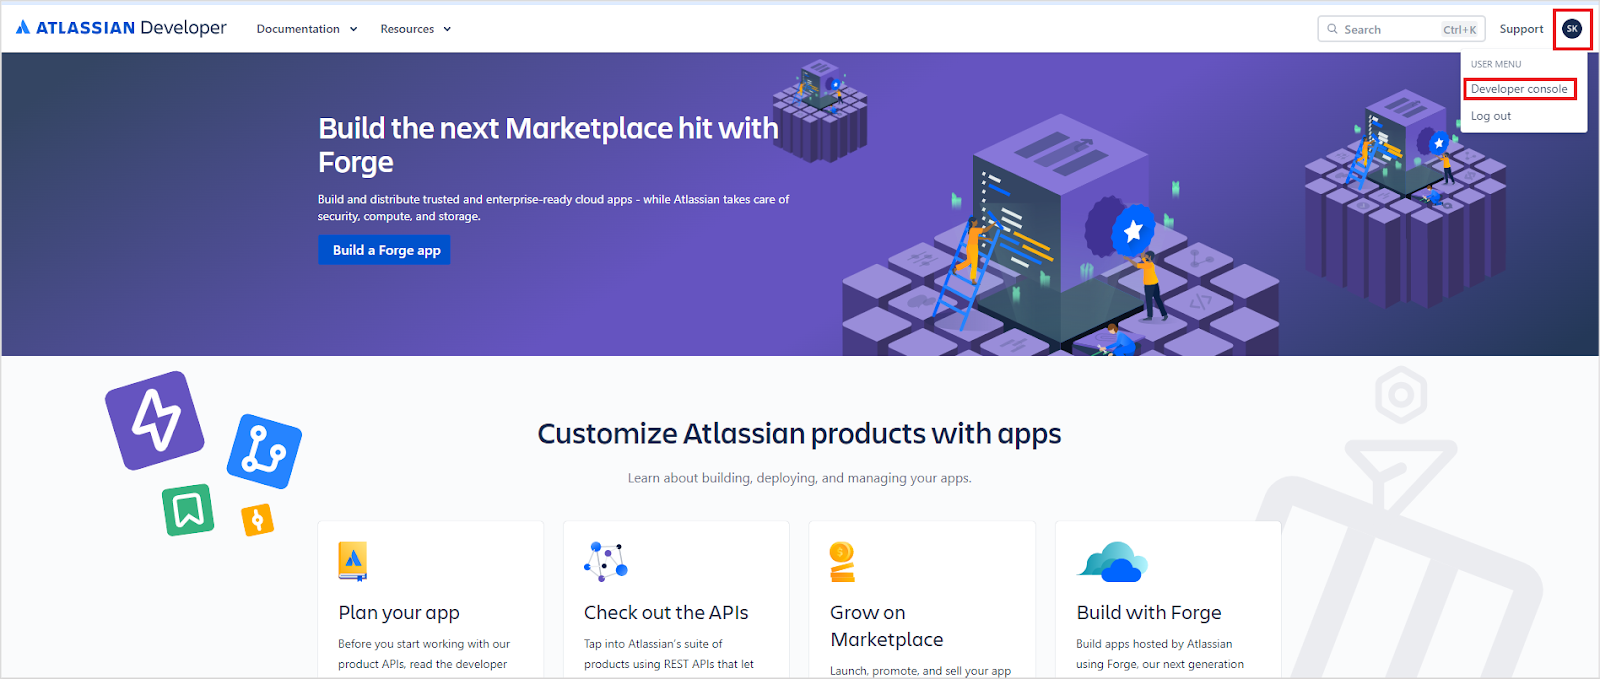
-
Click your profile name at the top right and navigate to the Developer Console.
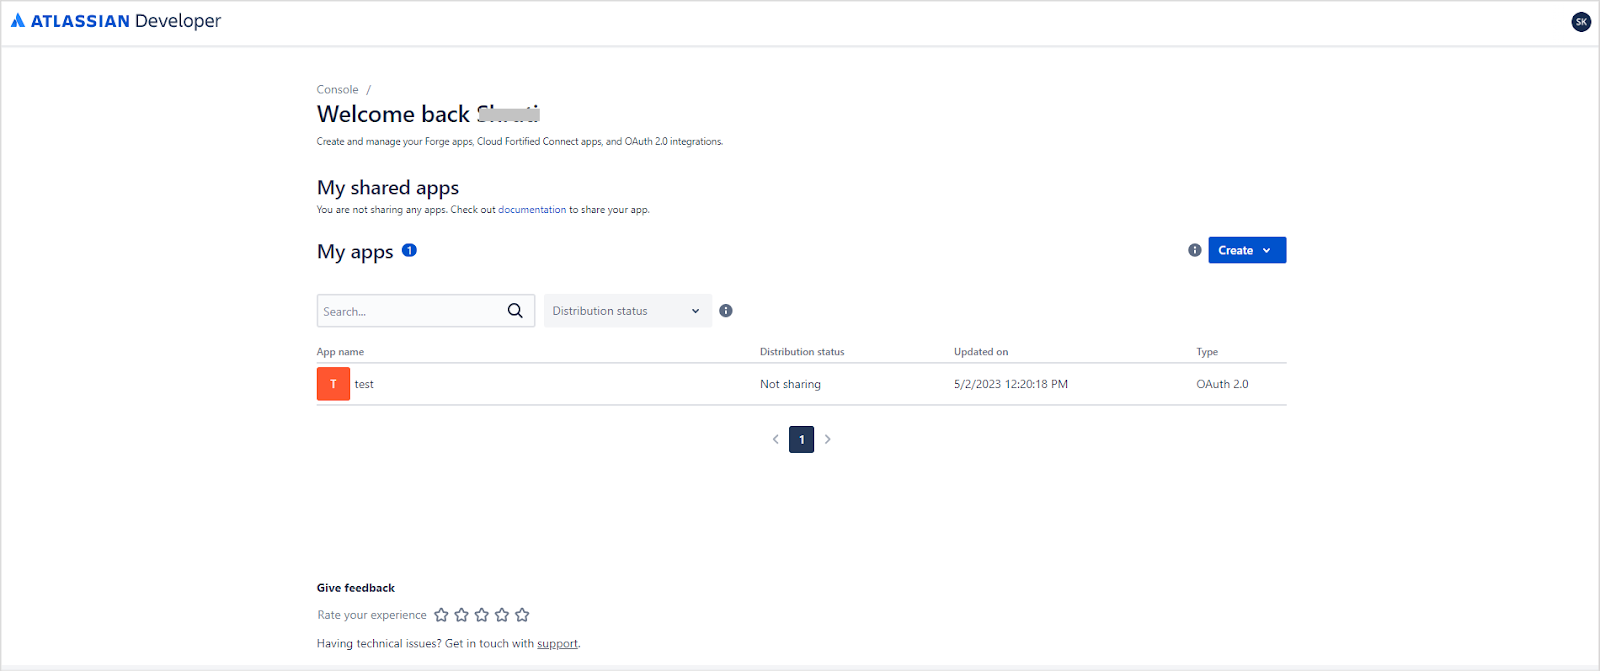
- Review the list of all your apps.
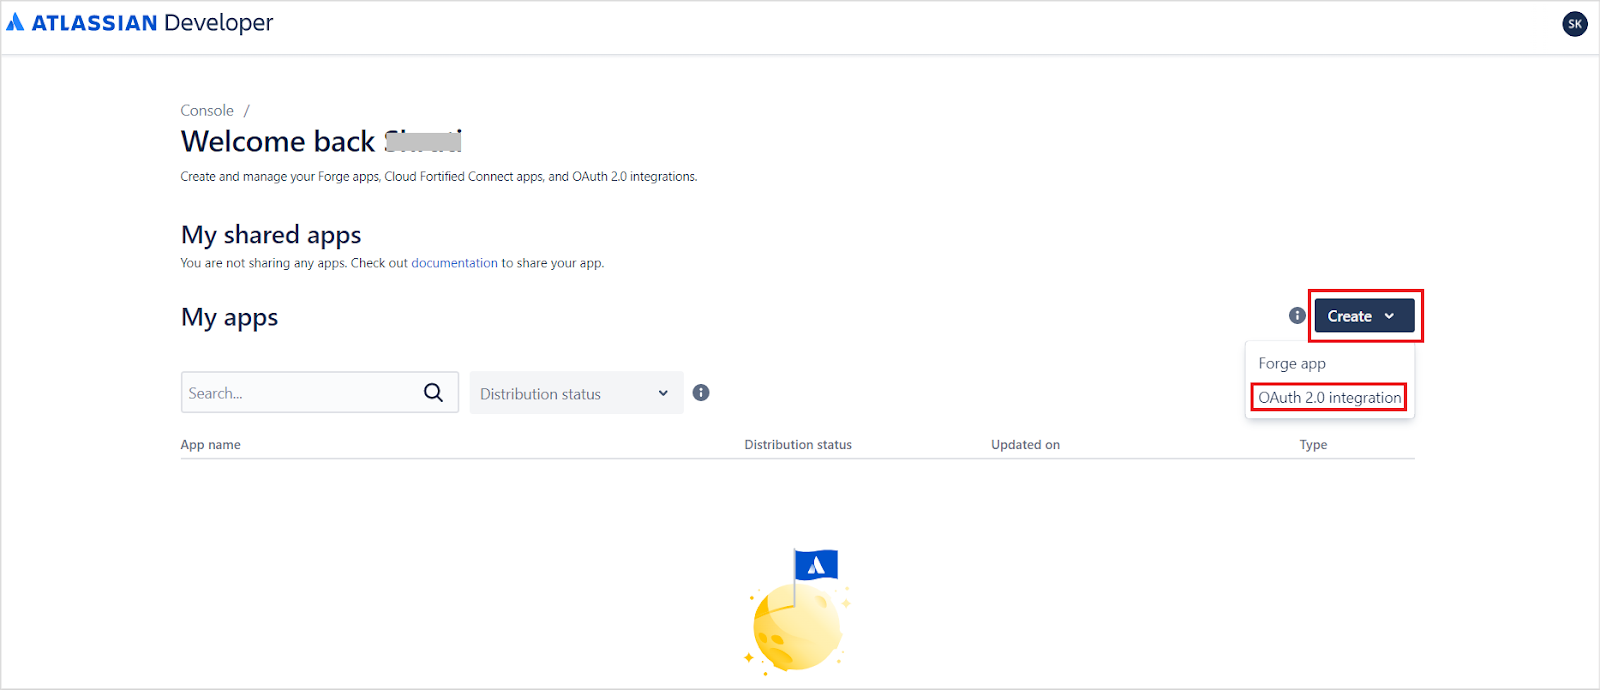
-
Click Create and select OAuth 2.0 Integration.
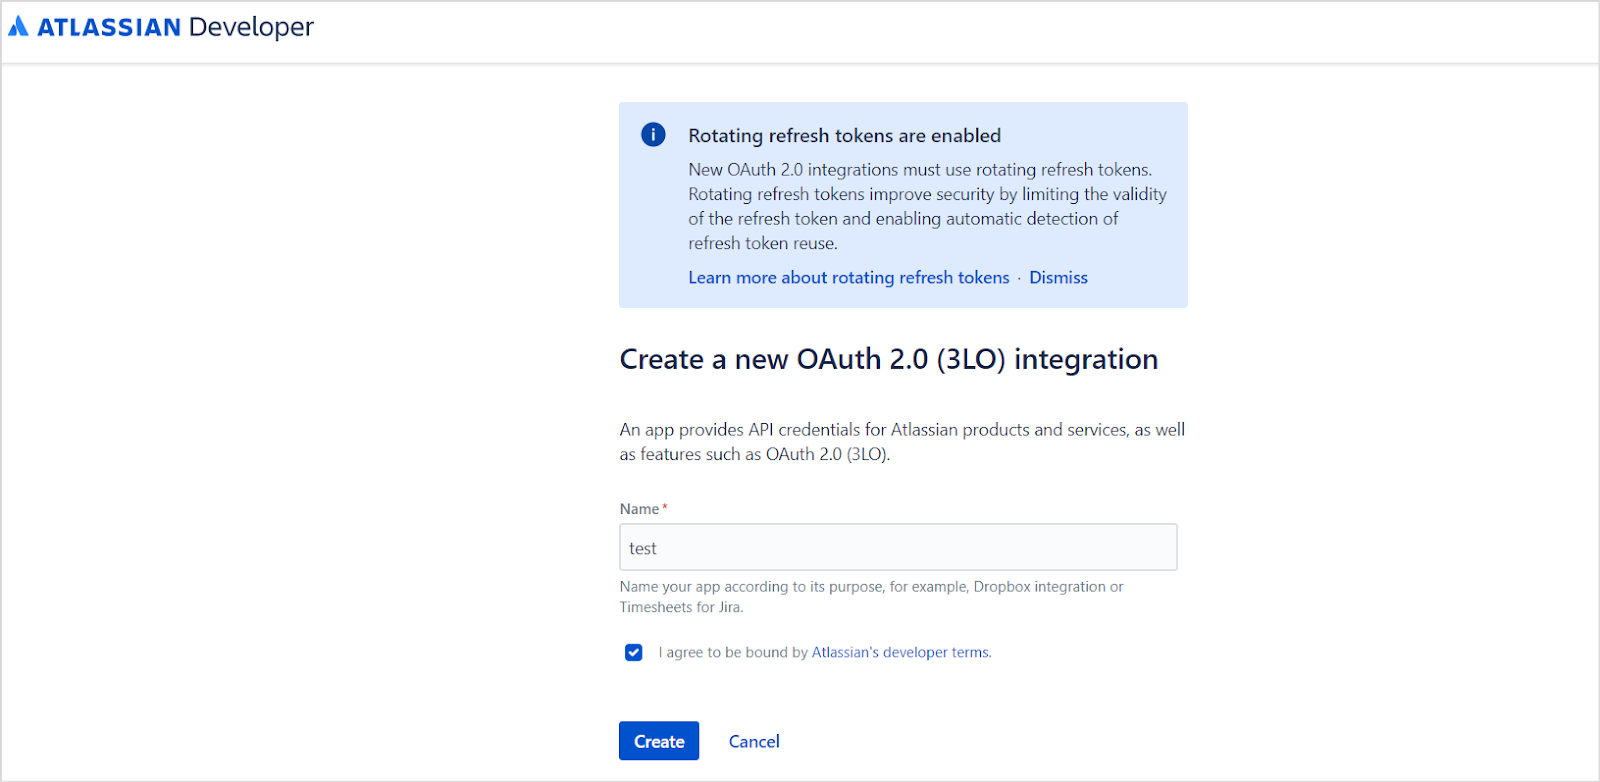
-
Provide a name for the application and click Create.
-
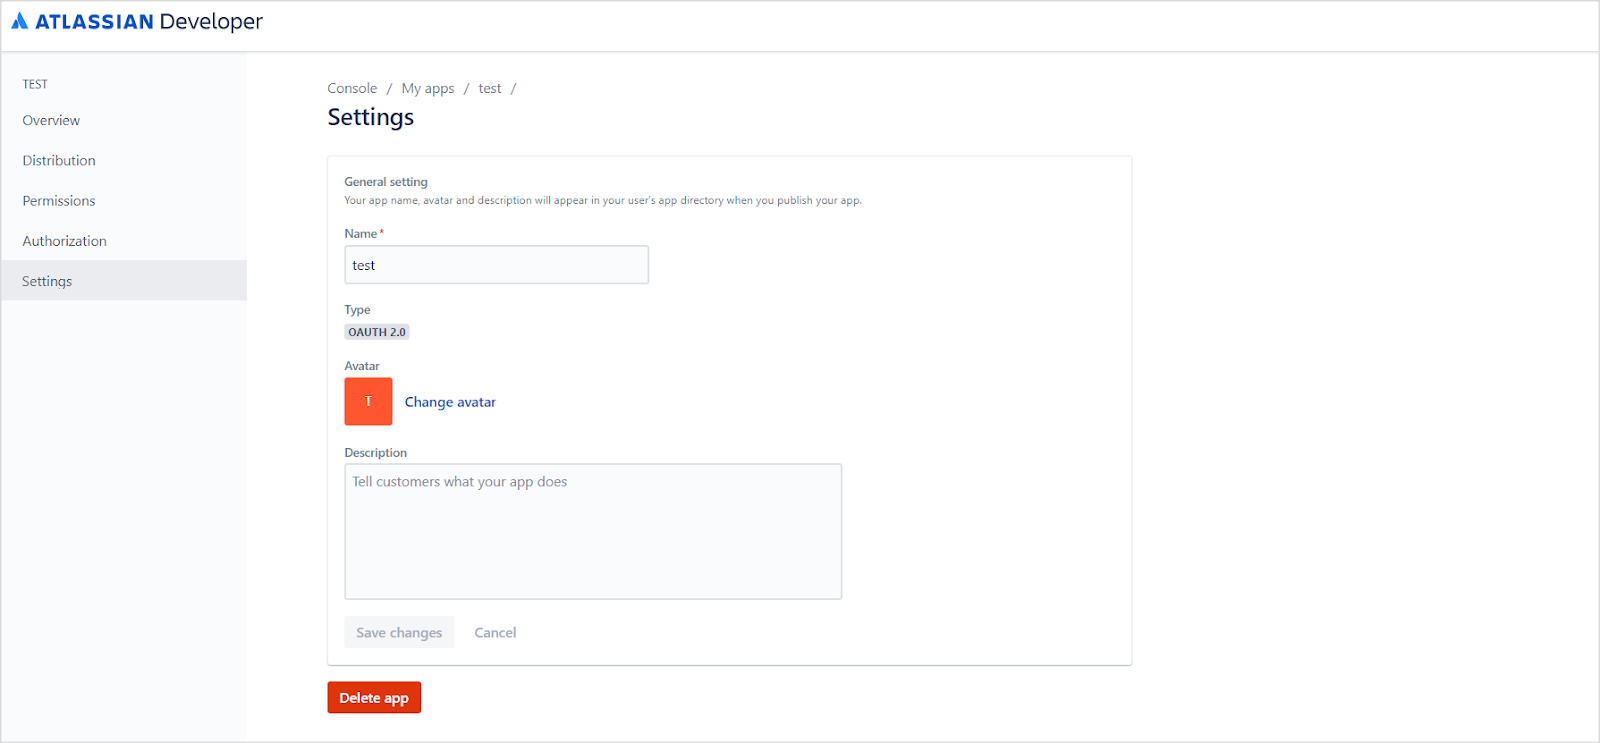
Open the Settings tab, update the application name and description, optionally add an avatar, and click Save changes.
-
Go to the Authorization tab and enter the Search AI callback URL for your region, then click Save changes.
Region Callback URL JP https://jp-bots-idp.kore.ai/workflows/callbackDE https://de-bots-idp.kore.ai/workflows/callbackProd https://idp.kore.com/workflows/callback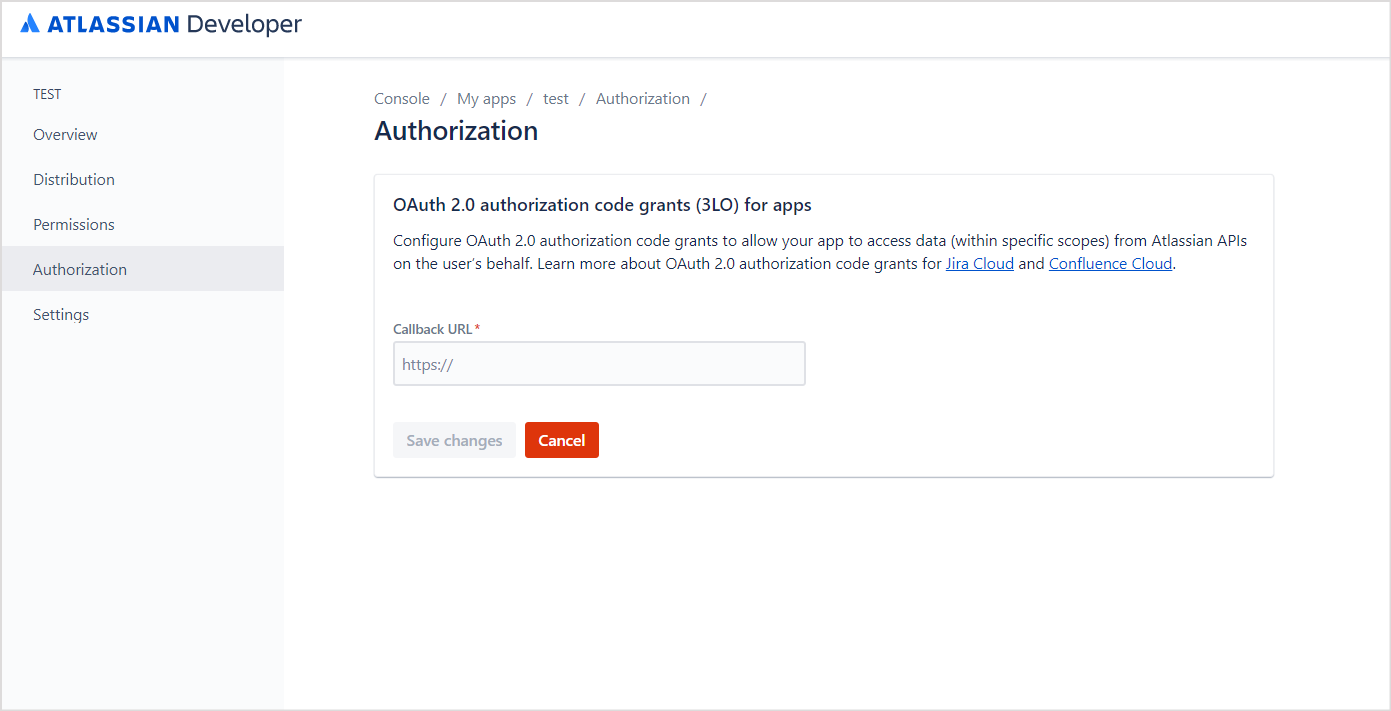
-
Go to the Permissions tab and add the following APIs:
User Identity API,Confluence API, andJira API.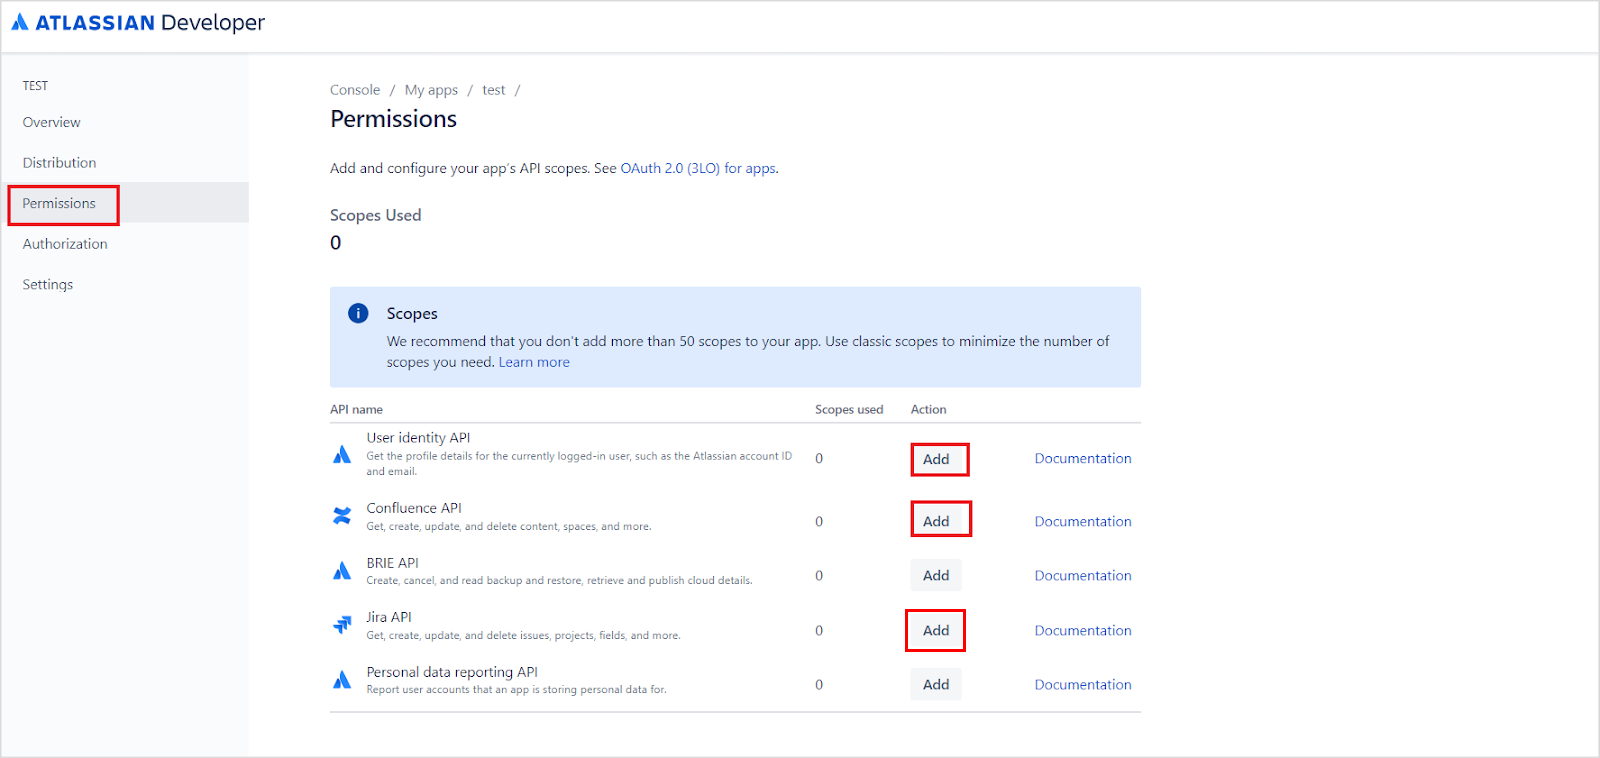
-
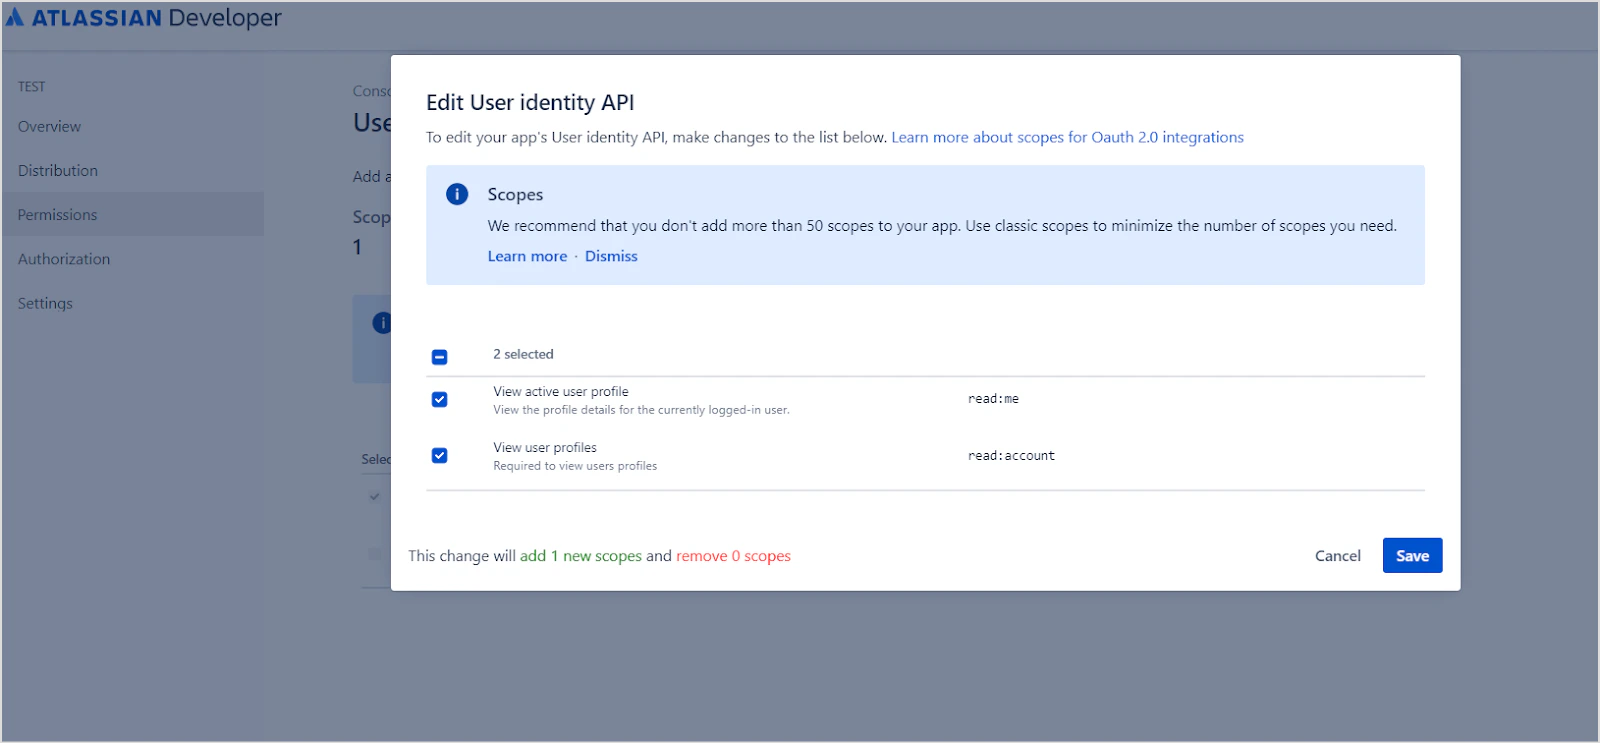
User Identity API - Click config, then Edit Scopes, grant the following permissions, and click Save:
read:meread:account
-
Confluence API - Go to Granular Scopes, select Edit Scopes, add the following permissions, and click Save:
read:analytics.content:confluenceread:content-details:confluenceread:content.permission:confluenceread:content:confluenceread:page:confluenceread:space-details:confluenceread:space.permission:confluenceread:space:confluenceread:user.property:confluencereadonly:content.attachment:confluenceread:confluence-groupsread:confluence-content.all
read:confluence-groupsand click Save.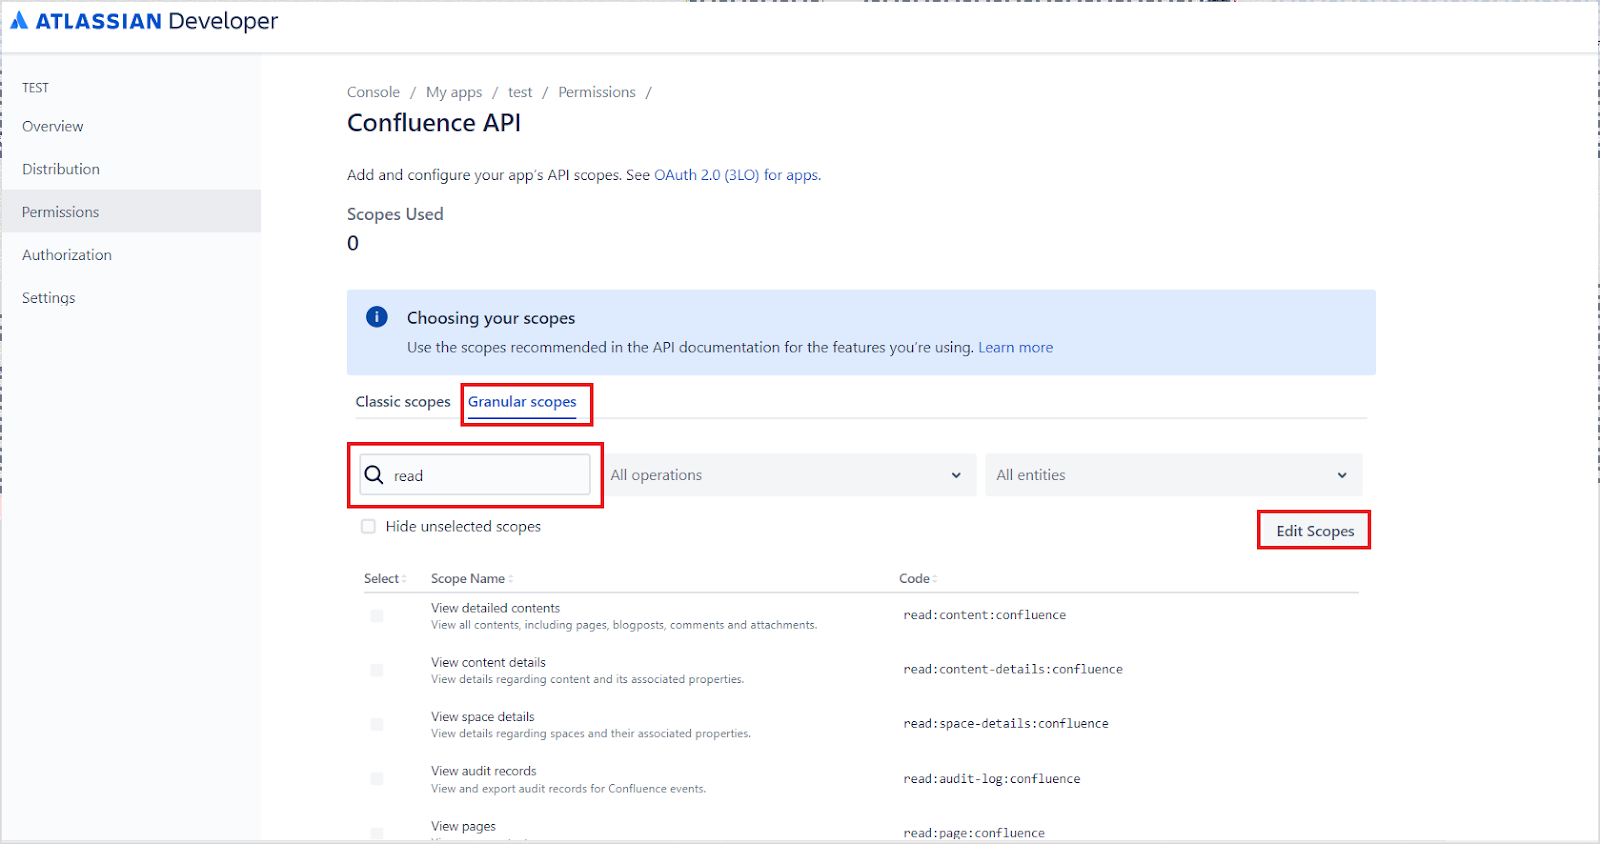
-
Jira API - Go to Classic Scopes, select Edit Scopes, add
read:jira-user, and click Save.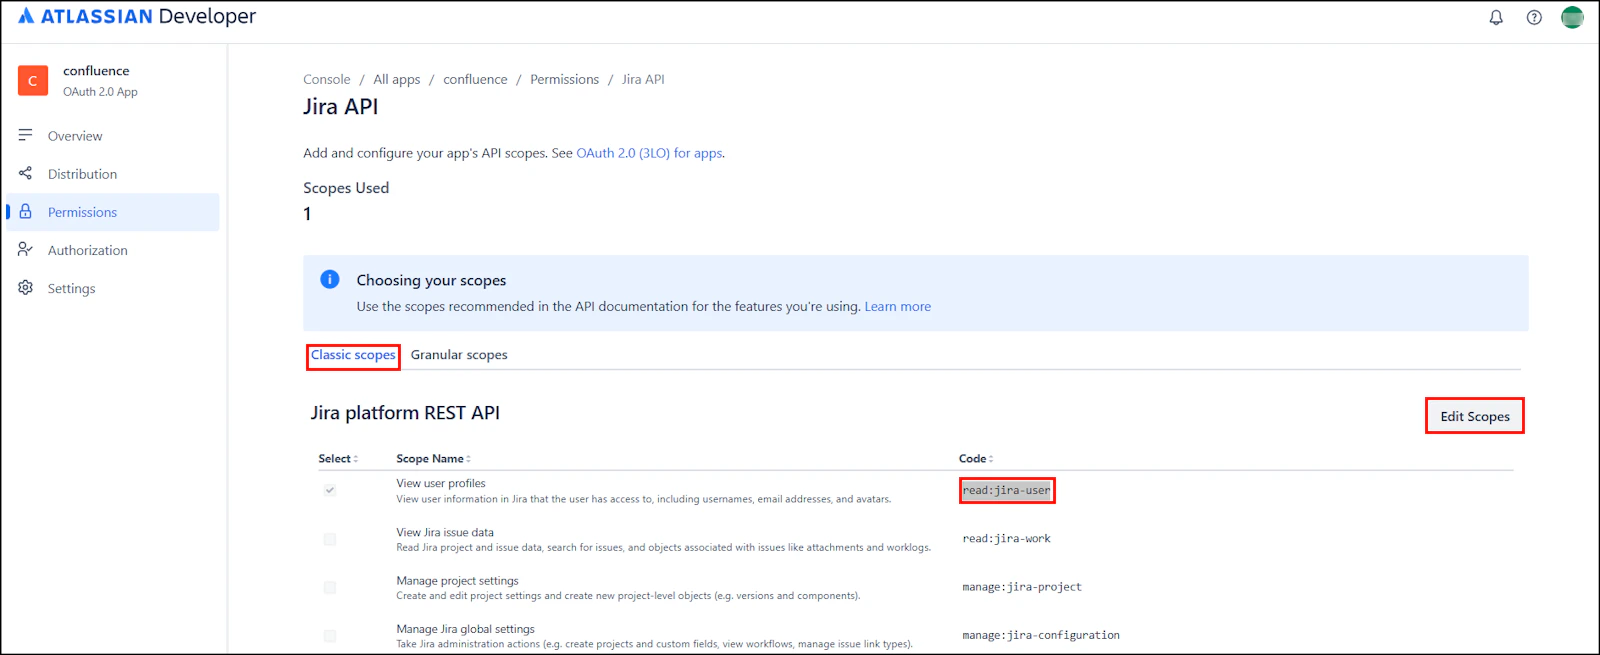
-
User Identity API - Click config, then Edit Scopes, grant the following permissions, and click Save:
-
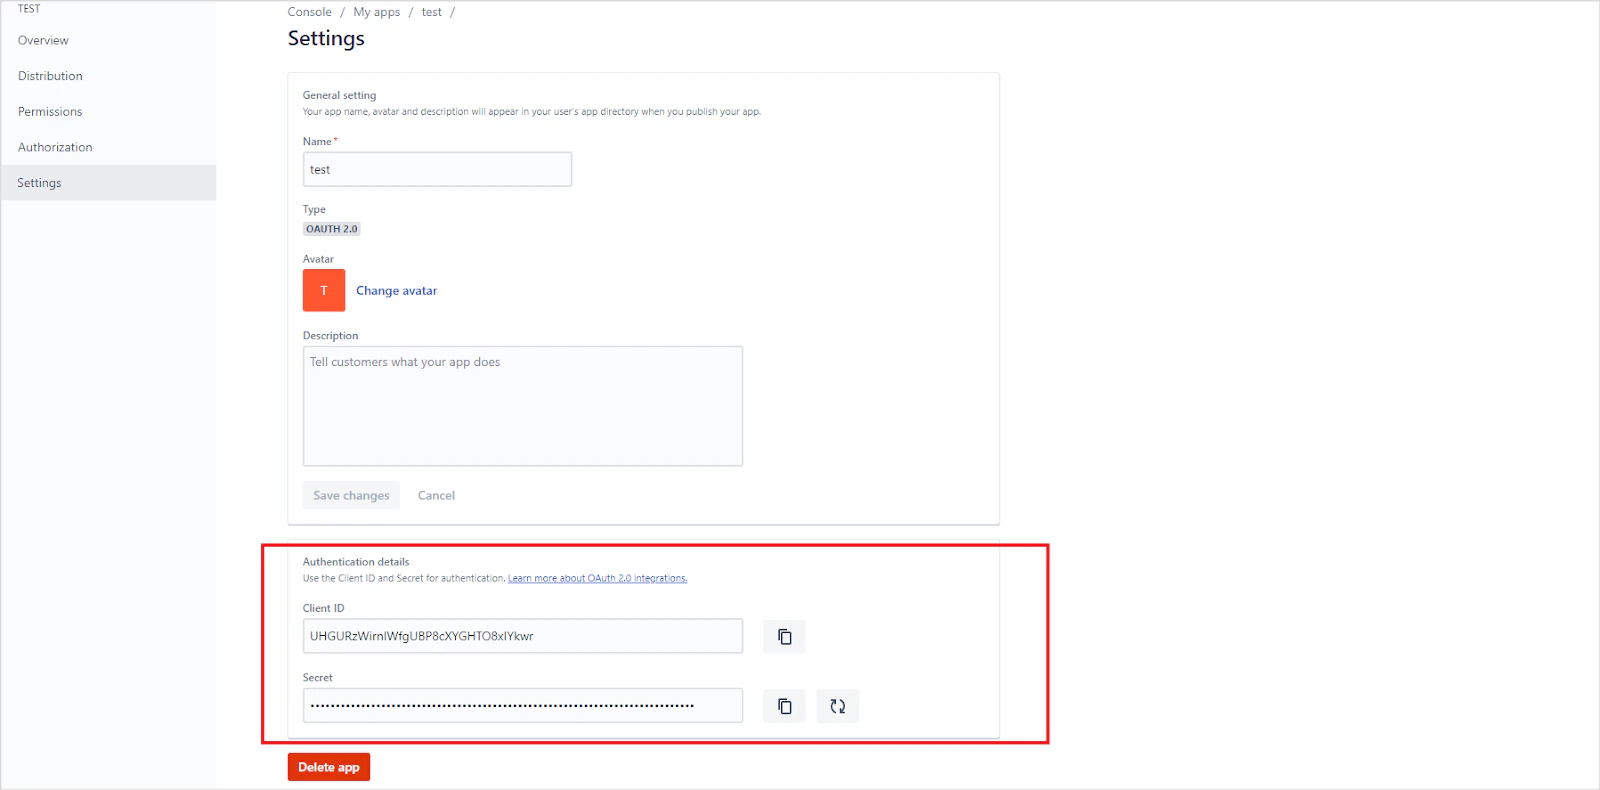
Go to Settings and locate the Client ID and Secret at the bottom of the page. Save these for use in the next step.
-
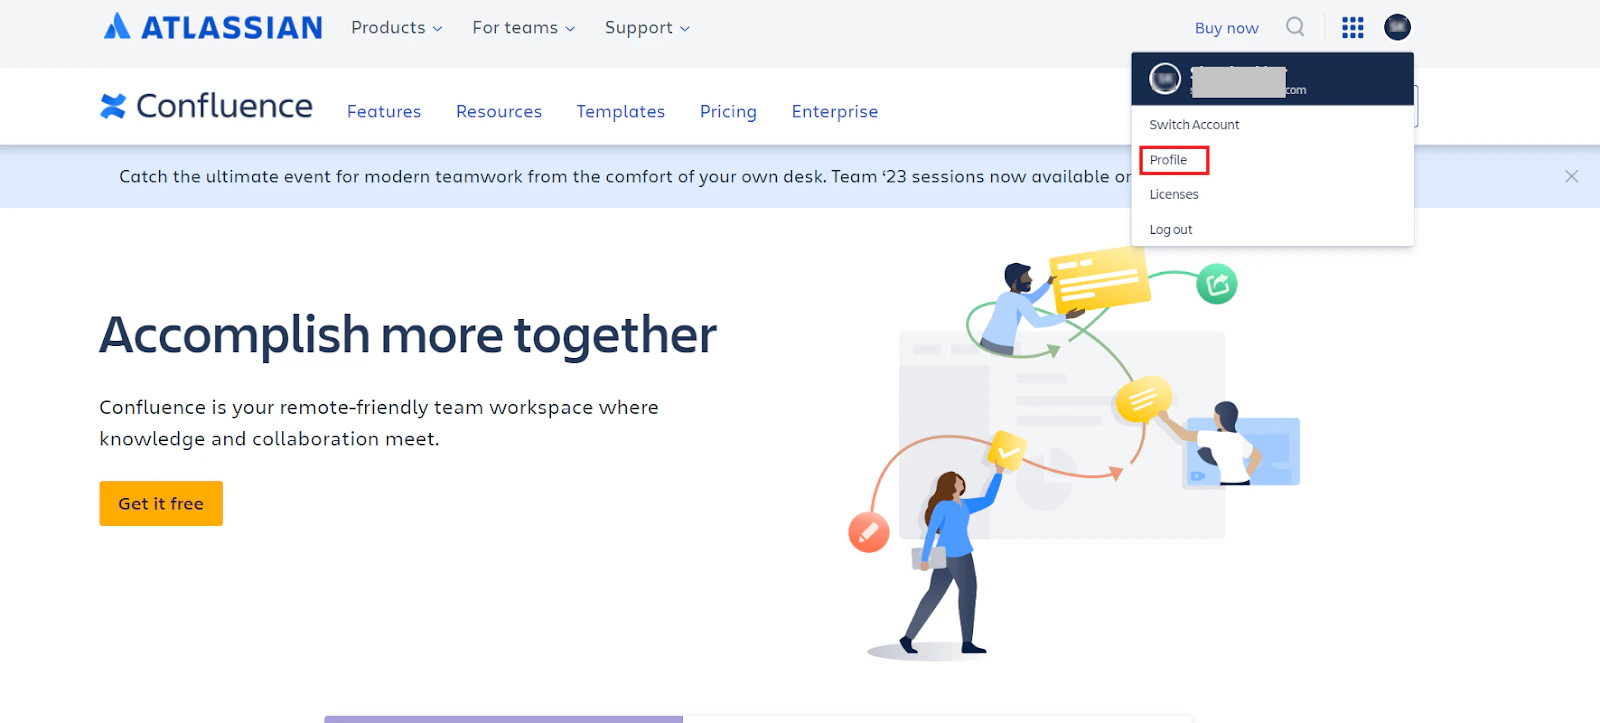
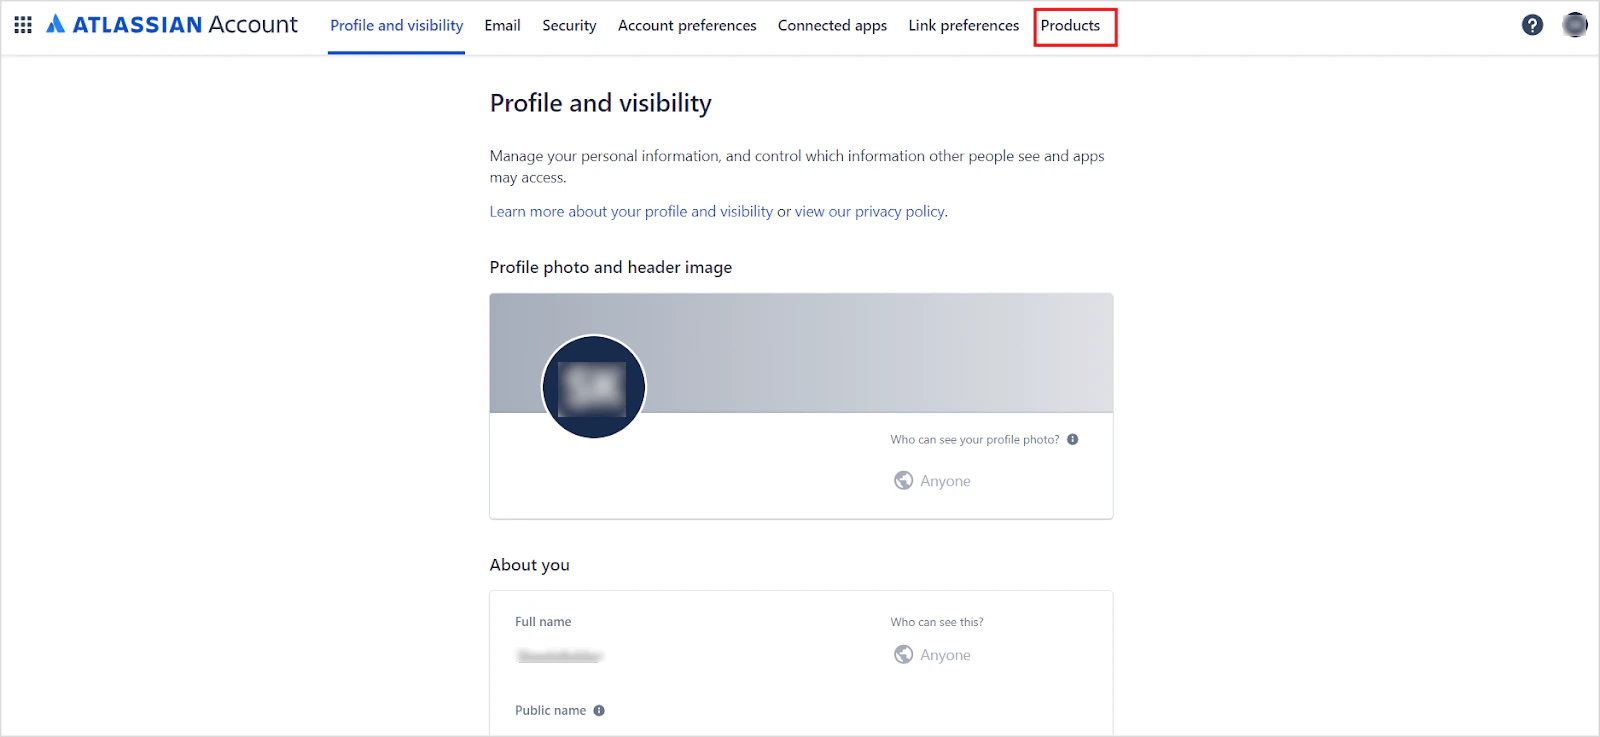
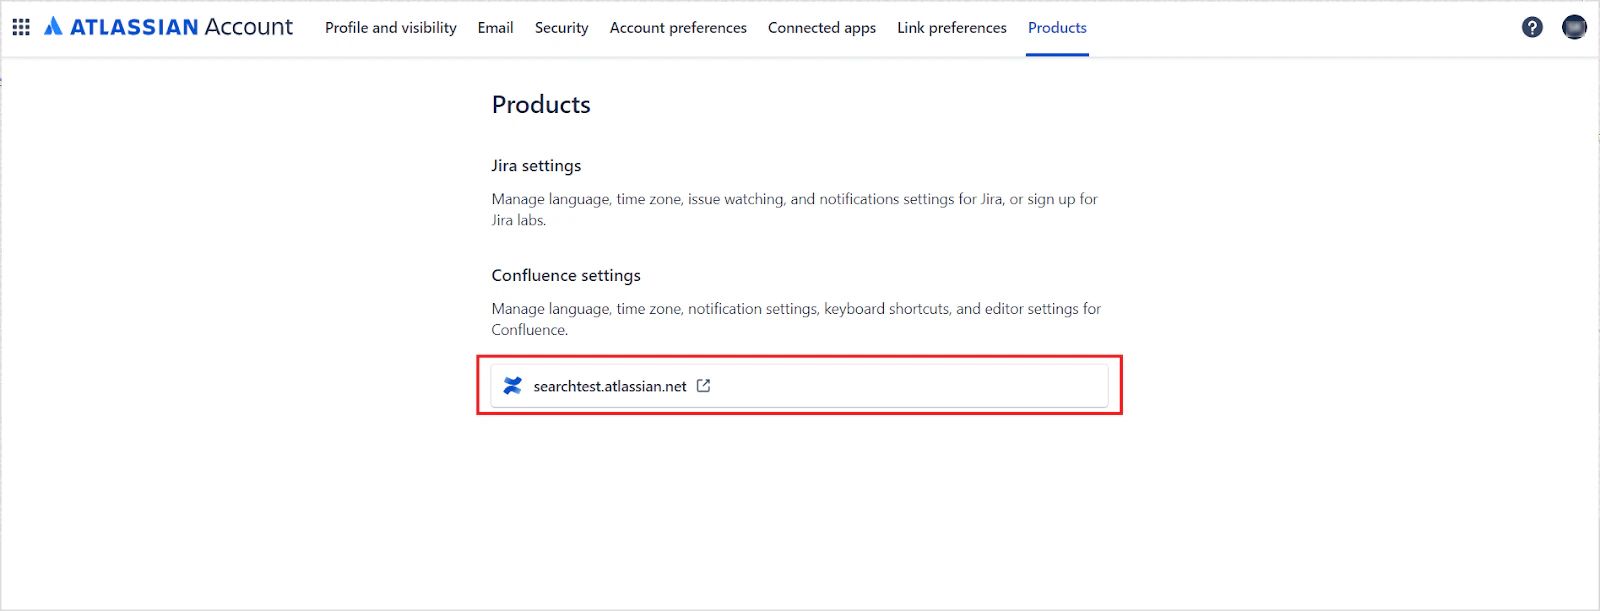
Go to the Confluence home page, click your Profile, and navigate to the Products tab. The host URL is displayed at the bottom of the page.
Configure the Search AI Connector
- Go to Content > Connectors and choose Confluence (Cloud).
-
Under Authentication, enter:
Field Description Name Unique name for the connector Authorization Type OAuth 2.0 Grant Type Authorization Code Client ID Client ID from the Confluence OAuth application Client Secret Client Secret from the Confluence OAuth application Host URL Confluence server base URL (without trailing slash) - To enable real-time synchronization, switch the Real-Time Sync toggle to On. Use this webhook client secret and URL to configure the trigger in Confluence Cloud.
- Click Connect to initiate authorization.
Configure Webhook Trigger in Confluence Cloud for Real-Time Sync
This is an optional step and is only required if real time sync is enabled.- Go to your Confluence space.
- Click Space Settings.
- Open Automation.
-
Click Create rule and add an Incoming Webhook trigger (or select Send web request as an action) for each of the following supported events.
- Page published
- Page updated
- Page deleted
- Add a Send web request action with ingestion endpoint URL and headers as in the Search AI authorization page. Add the HTTP header X-Automation-Webhook-Token and input your secret key (generated in Search AI) for secure authentication.
-
In the request body, select Custom data and add the following payloads per trigger.
Payload for Page_Published
Payload for Page_UpdatedPayload for Page_Deleted
- Add any additional conditions or branches as needed.
- Click Turn on to activate the rule.
- This rule sends outbound events from Confluence to Search AI each time the trigger condition is met. Site Admin access is required when creating a global rule that applies across all spaces.
- Real-Time sync updates document entities only. Associated users and permissions within those entities must be synchronized through regular incremental or manual sync.
Multiple Authentication Profiles
A single Confluence Cloud connector supports multiple authentication profiles.- Each profile authenticates independently using its own OAuth 2.0 credentials.
- Content accessible by multiple profiles is deduplicated automatically.
- Deleting a profile removes only content exclusive to that profile.
- Repeat the steps to create a new profile if needed.
Creating multiple authentication profiles is optional.
Content Ingestion and Filters
-
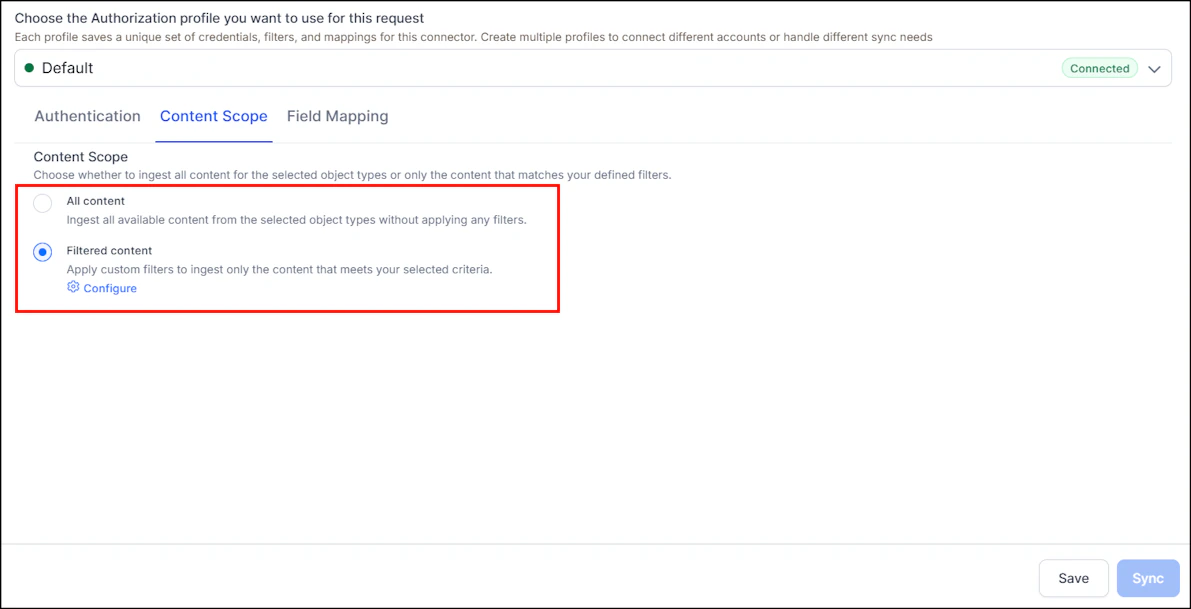
Go to the Content Scope tab and select the content to ingest. You can sync all content from the Confluence Cloud account or select specific content.
-
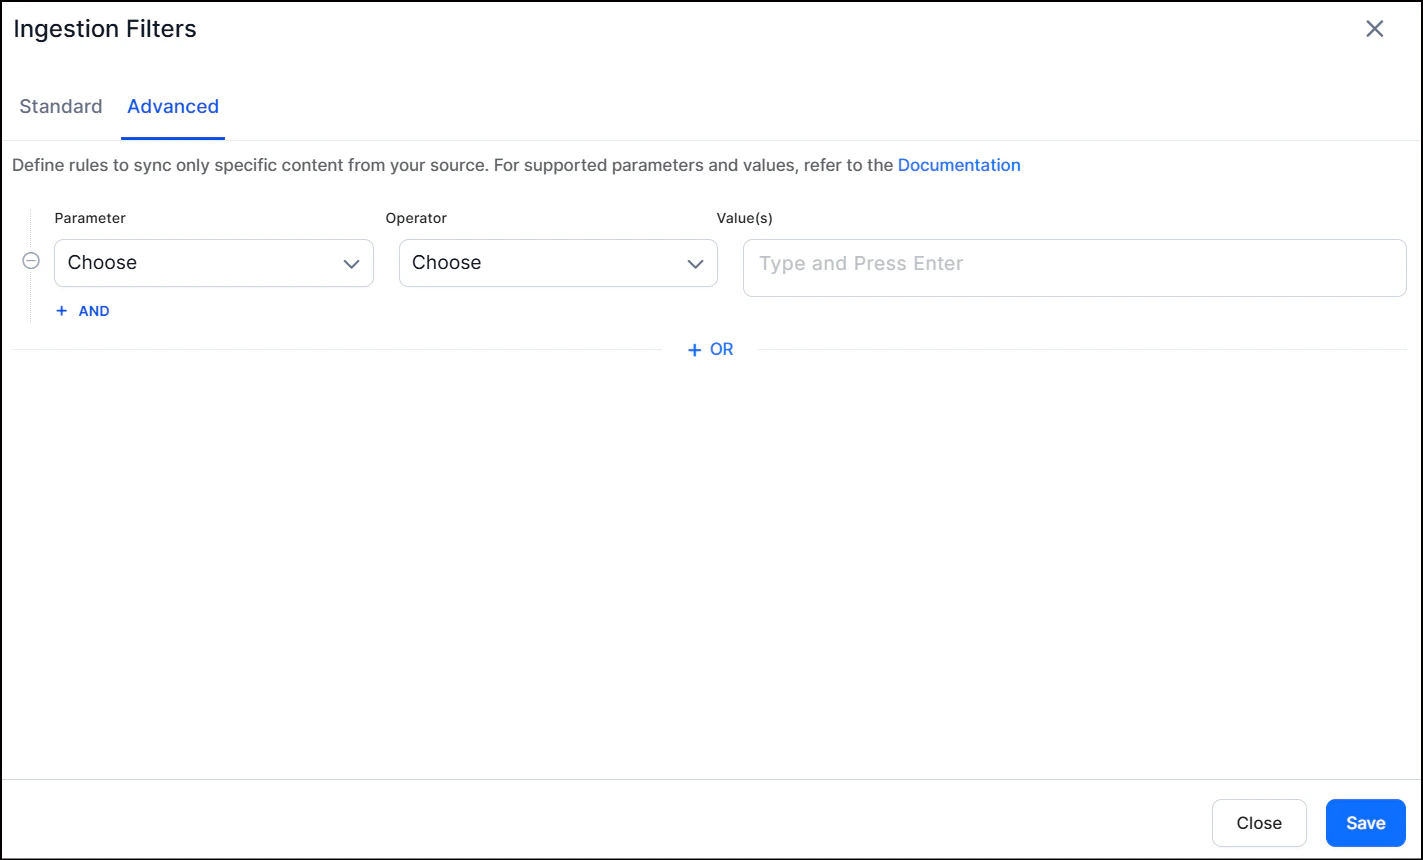
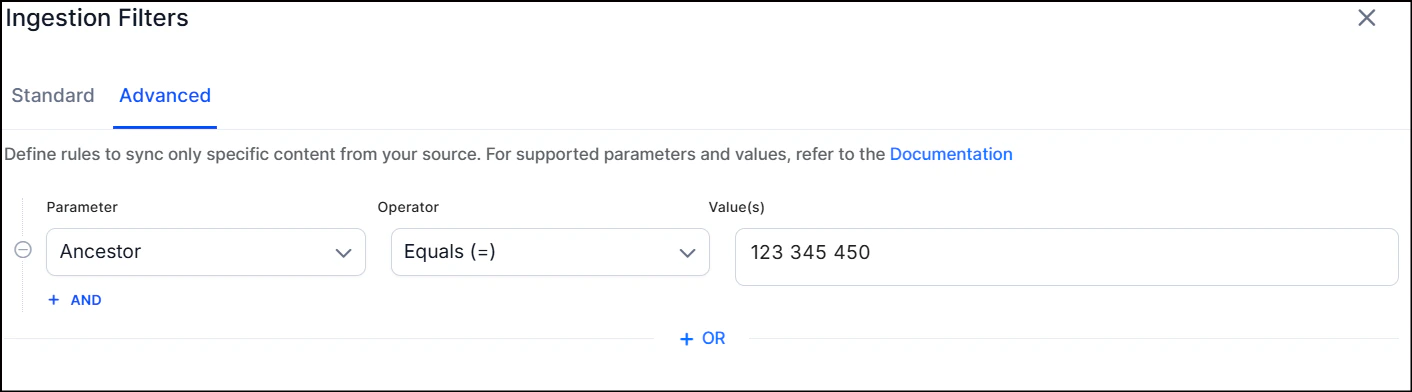
To selectively ingest content, select Filtered content and click Configure. Define rules using a parameter, operator, and value. Define separate filters for each of the accounts configured via different profiles.
Parameter Description Ancestor Direct child pages and descendants of given content IDs Content Specific content by content ID Created Content by creation date ( yyyy/mm/dd hh:mm,yyyy-mm-dd hh:mm,yyyy/mm/dd,yyyy-MM-dd)Creator Content created by specified user account IDs Label Content filtered by label Parent Content under a given parent ID Content by content ID Space Content in a specific space Title Content by page title User Content by user ID - You can also add custom CQL fields. Refer to the complete list of supported CQL fields.
- The Operator field accepts values such as equals, not equal, and contains, depending on the selected parameter.
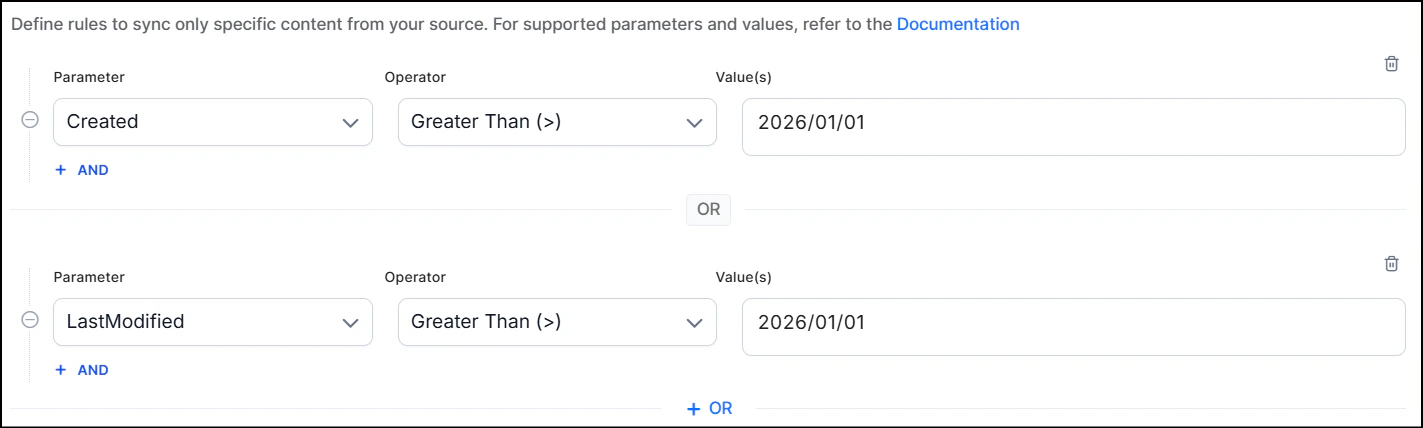
- Use the OR operator to combine multiple rules for different content types.
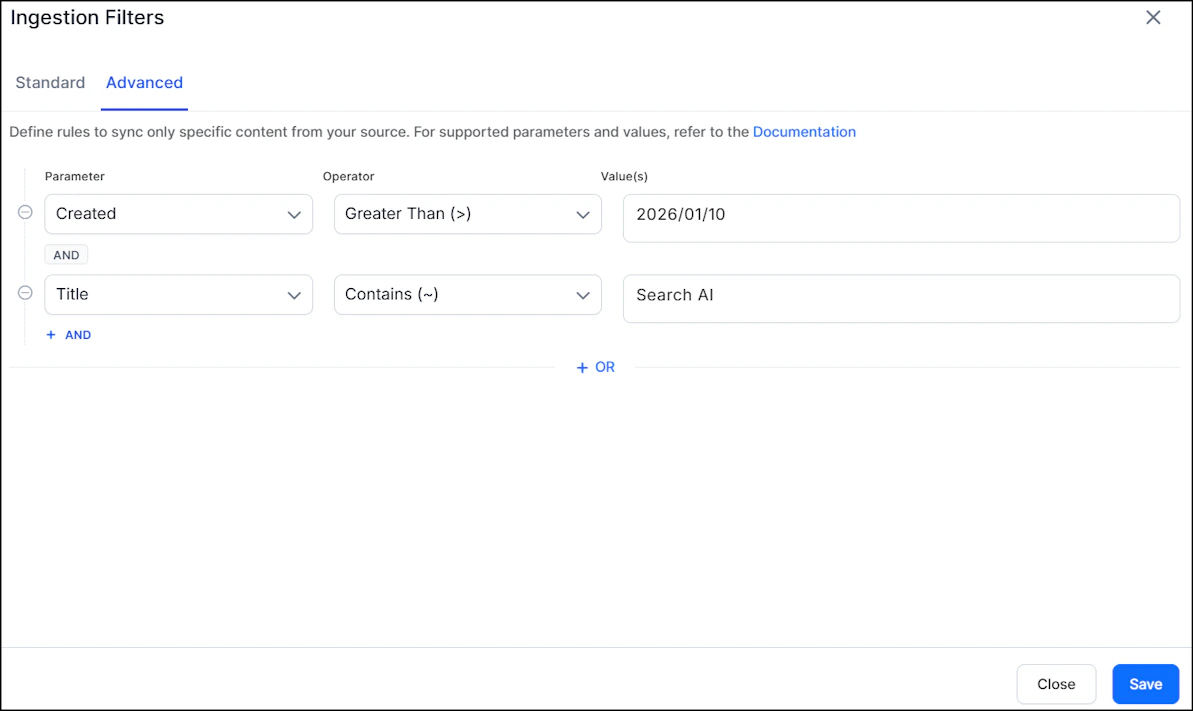
- Use the AND operator within a rule to apply multiple conditions. For example, to ingest content created after January 10, 2026 with “SearchAI” in the title:
Content Sync Schedule
Manual sync - Click Sync on the Configuration tab to immediately ingest all updates from Confluence Cloud.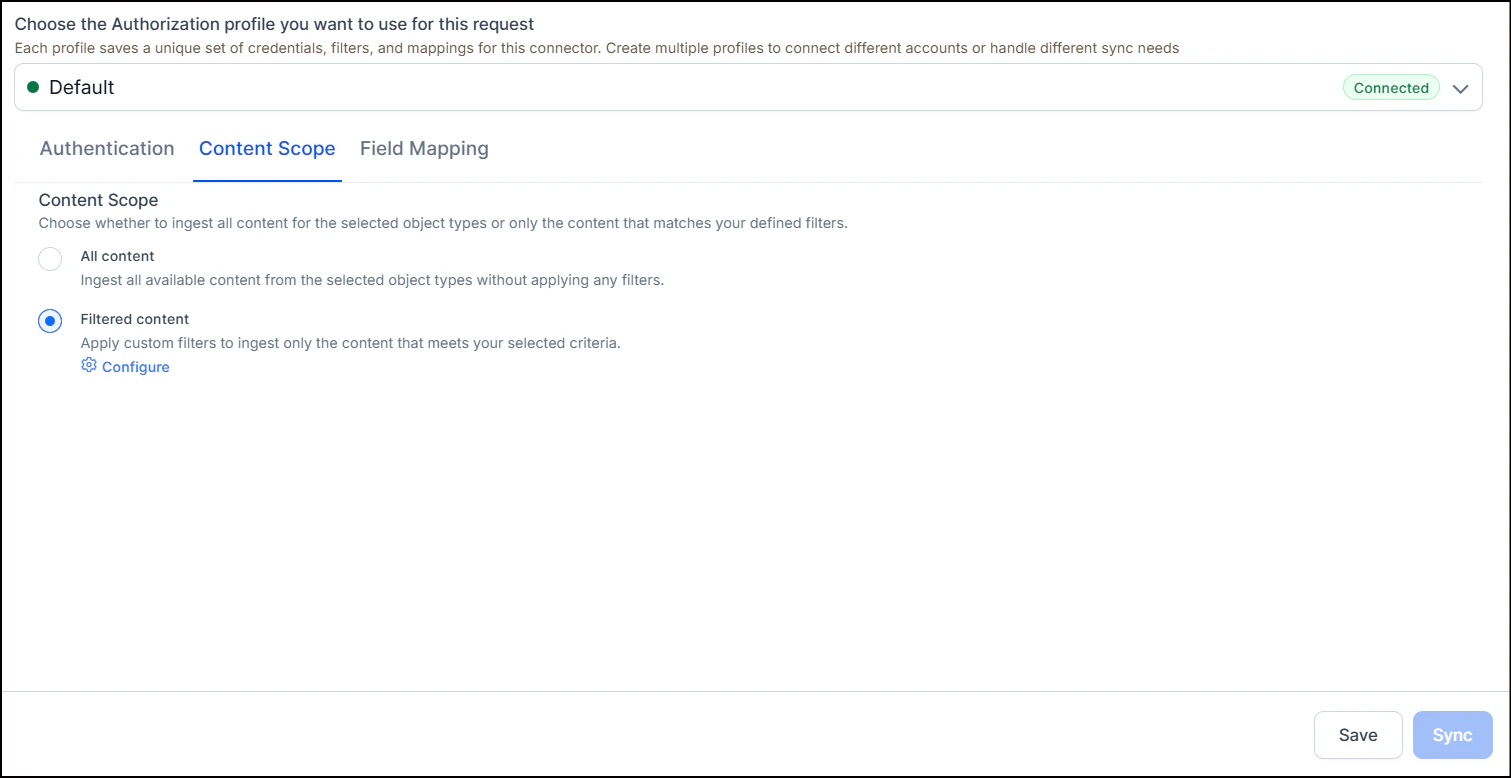
Incremental Sync
After the first full sync, subsequent syncs automatically fetch only content that has been created or modified since the last successful sync. This makes syncing significantly faster for large Confluence instances. Each authentication profile maintains its own independent sync cursor. A full sync is automatically triggered when:- It’s the first sync for a connector or profile
- A full sync is explicitly requested
- The connector’s ingestion script has been updated
- RACL configuration has been modified
Real-Time Sync
- The Confluence Cloud connector supports real‑time content updates via webhooks.
- When real time sync is enabled, content changes in Confluence Cloud are reflected in search results in near real‑time (typically within seconds), without any manual or automatic sync.
- Webhook events are profile‑aware - events are automatically routed to the correct profile based on the Confluence Cloud site.
Access Control
Search AI supports access control for content ingested via the Confluence Cloud Connector. Go to the Permissions and Security tab and select the access mode:- Permission Aware - Honors user permissions from Confluence Cloud. Users can only view search results for content they can access in Confluence.
- Public Access - Overrides Confluence permissions. All users can access all ingested content regardless of their Confluence permissions.
Prerequisites
Access control relies on user email addresses as unique identifiers. The account used to configure the connector must be able to view user email addresses. Use an admin account or ensure users have enabled the required settings in their Confluence profiles.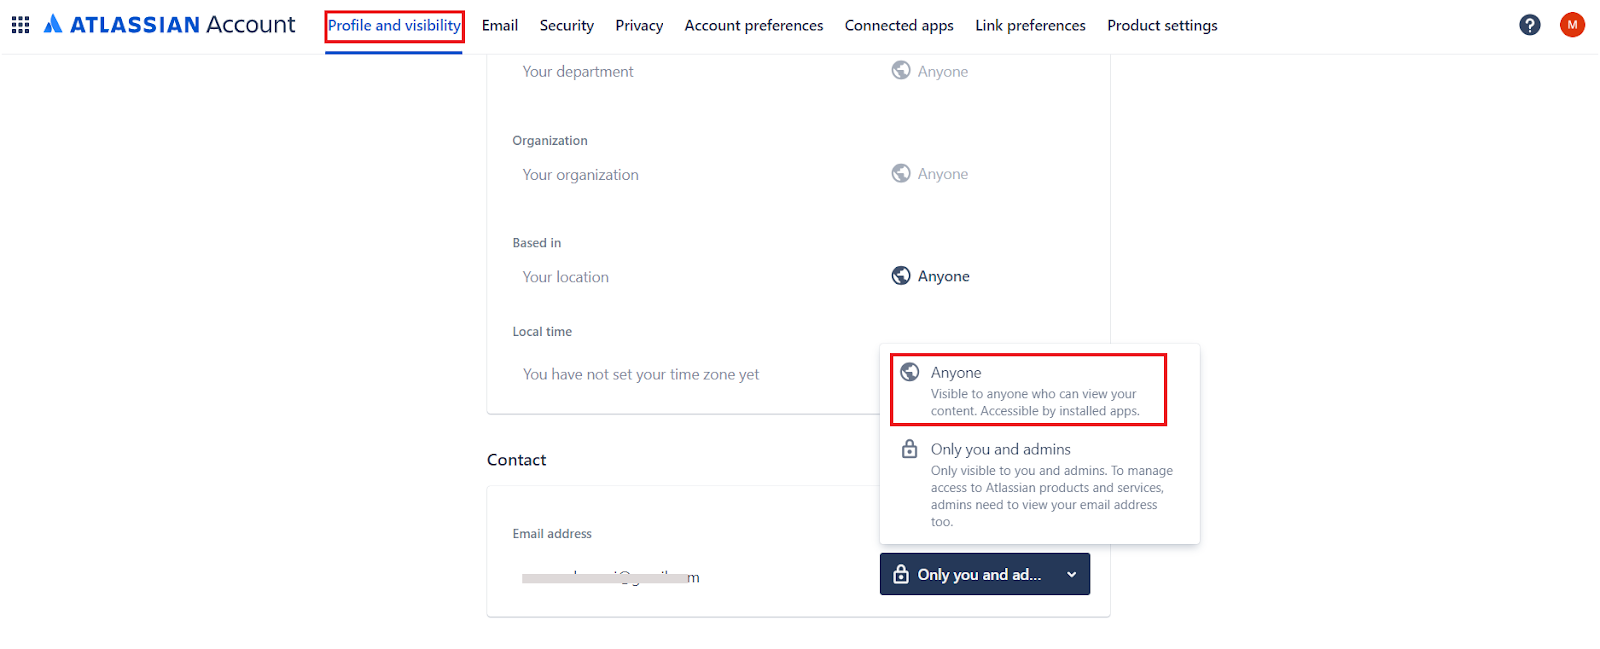
Permission Sets in Confluence Cloud
Space Permissions - Each space has an independent set of permissions managed by space administrators. Search AI requires at minimum view permission to allow a user to access the content.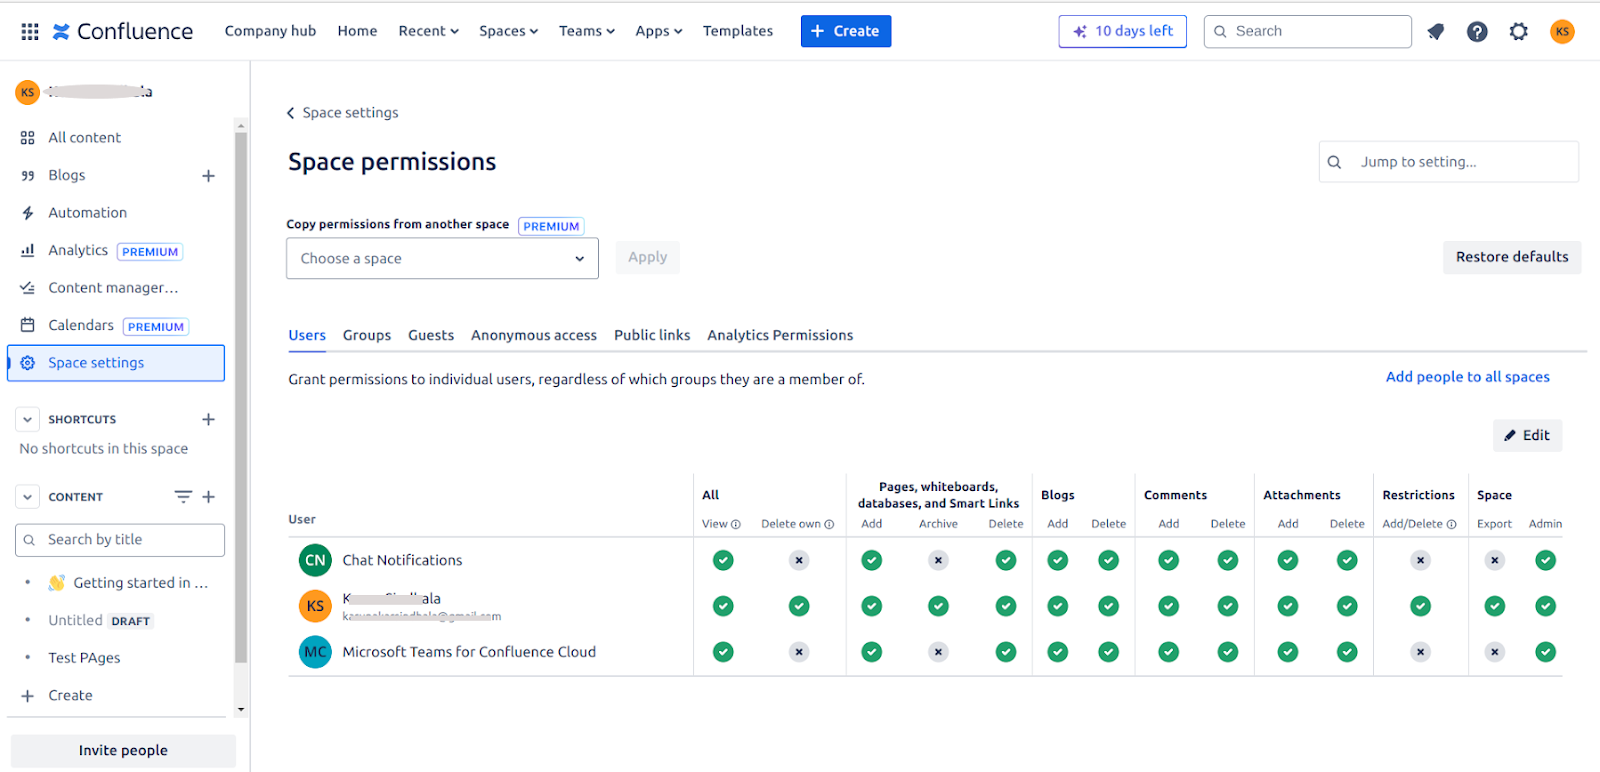
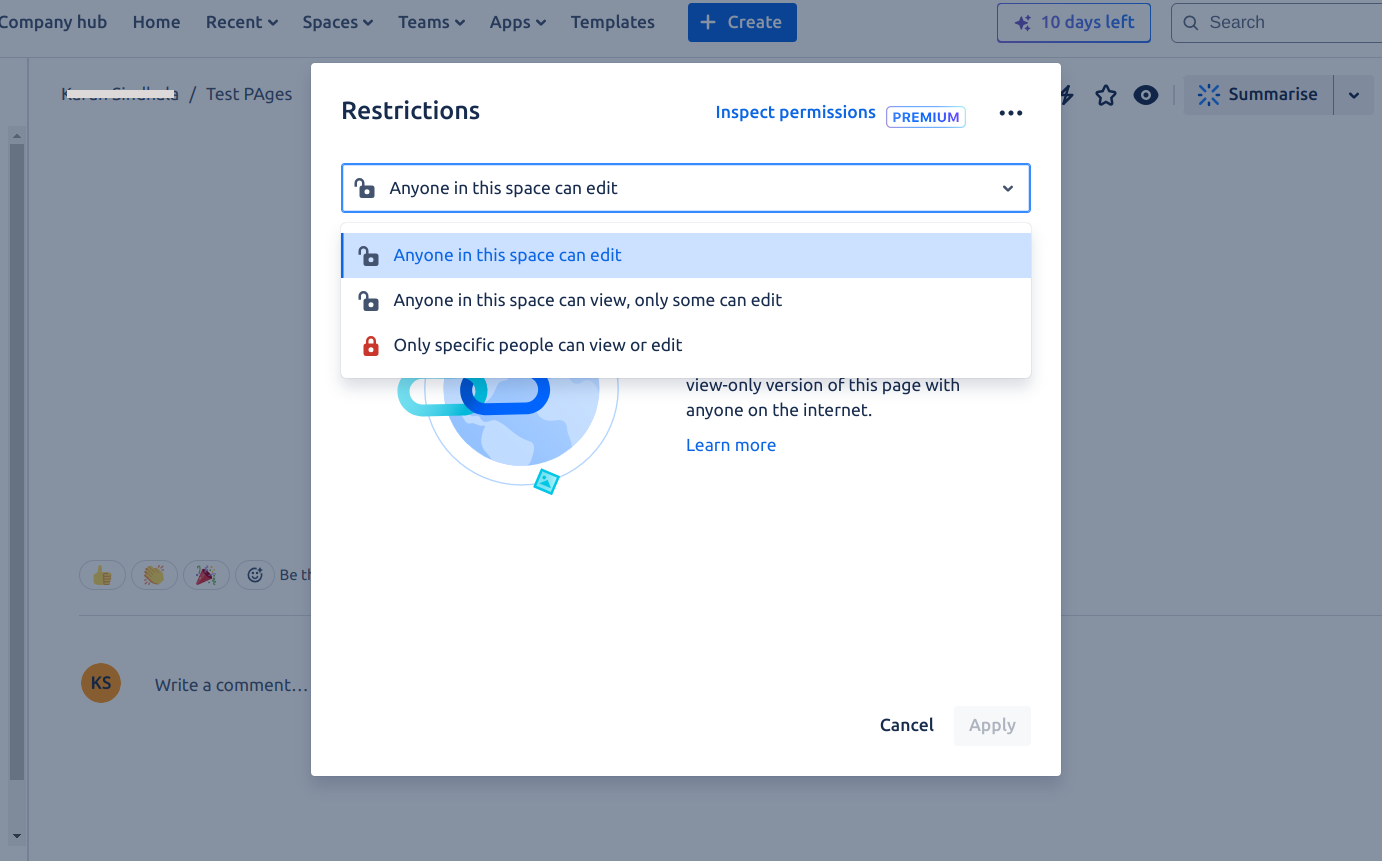
How Permissions Are Handled in Search AI
Search AI uses thesys_racl field to control who can access ingested content. The value stored in sys_racl depends on whether the document is public or private:
-
Public documents - The organization’s domain name is included in the
sys_raclfield. This ensures that only internal employees belonging to that domain can access the content, rather than allowing unrestricted public access. -
Private documents - The space name is included in the
sys_raclfield. Access is scoped to users who have permissions within that specific Confluence space. -
Individual access - Users added directly to a space or page are listed in the
sys_raclfield of the indexed content by their email address. These users can directly access the content based on their permissions. -
Group access - When access is granted to user groups, Search AI creates a corresponding permission entity for the group. The
sys_raclfield stores the permission entity IDs. Add users to the permission entity using the Permission Entity APIs to grant access. - User Onboarding - When onboarding users, all users must be registered with their associated domain name in Search AI. This ensures that domain-based access control for public documents functions correctly and that the right users are granted access to content scoped to their organization’s domain. Use the Permission Entity APIs to associate users with their domain and the appropriate permission entities for group-based access.