> ## Documentation Index
> Fetch the complete documentation index at: https://koreai.mintlify.site/llms.txt
> Use this file to discover all available pages before exploring further.
# Digital Views
AI Agents typically interact through chat, voice, or messaging channels, responding only when users ask for something — usually with a short reply, confirmation, or acknowledgment. As demand grows for more proactive updates and richer, less input-heavy interfaces, a visual layer becomes essential.
Using **Digital Views** from the Platform, you can design and launch rich visual experiences through interactive components, panels, and widgets, to proactively present relevant information to your users or customers. **Panels** hold one or more **Widgets**, which are individual components that display information to end-users. Users can interact with your AI Agent either in conversation mode or directly through the widgets.
This article gives an overview on the working and implementation of **Panels & Widgets**. For step-by-step usage instructions, click [here](/ai-for-service/automation/digital-skills/configure-digital-views).
## How It Works
1. Using Digital Views, an organization offers to its AI Agent end-users a single interface for various activities.
2. Multiple panels constitute a Digital View.
3. Each of the panels gives access to various functions.
4. The end-user accesses these panels for information pertaining to each of the functions and performs follow-up actions.
5. As an example, a Panel within a travel App could have multiple widgets showing:
* Upcoming Trips
* Completed Bookings
* Canceled Bookings
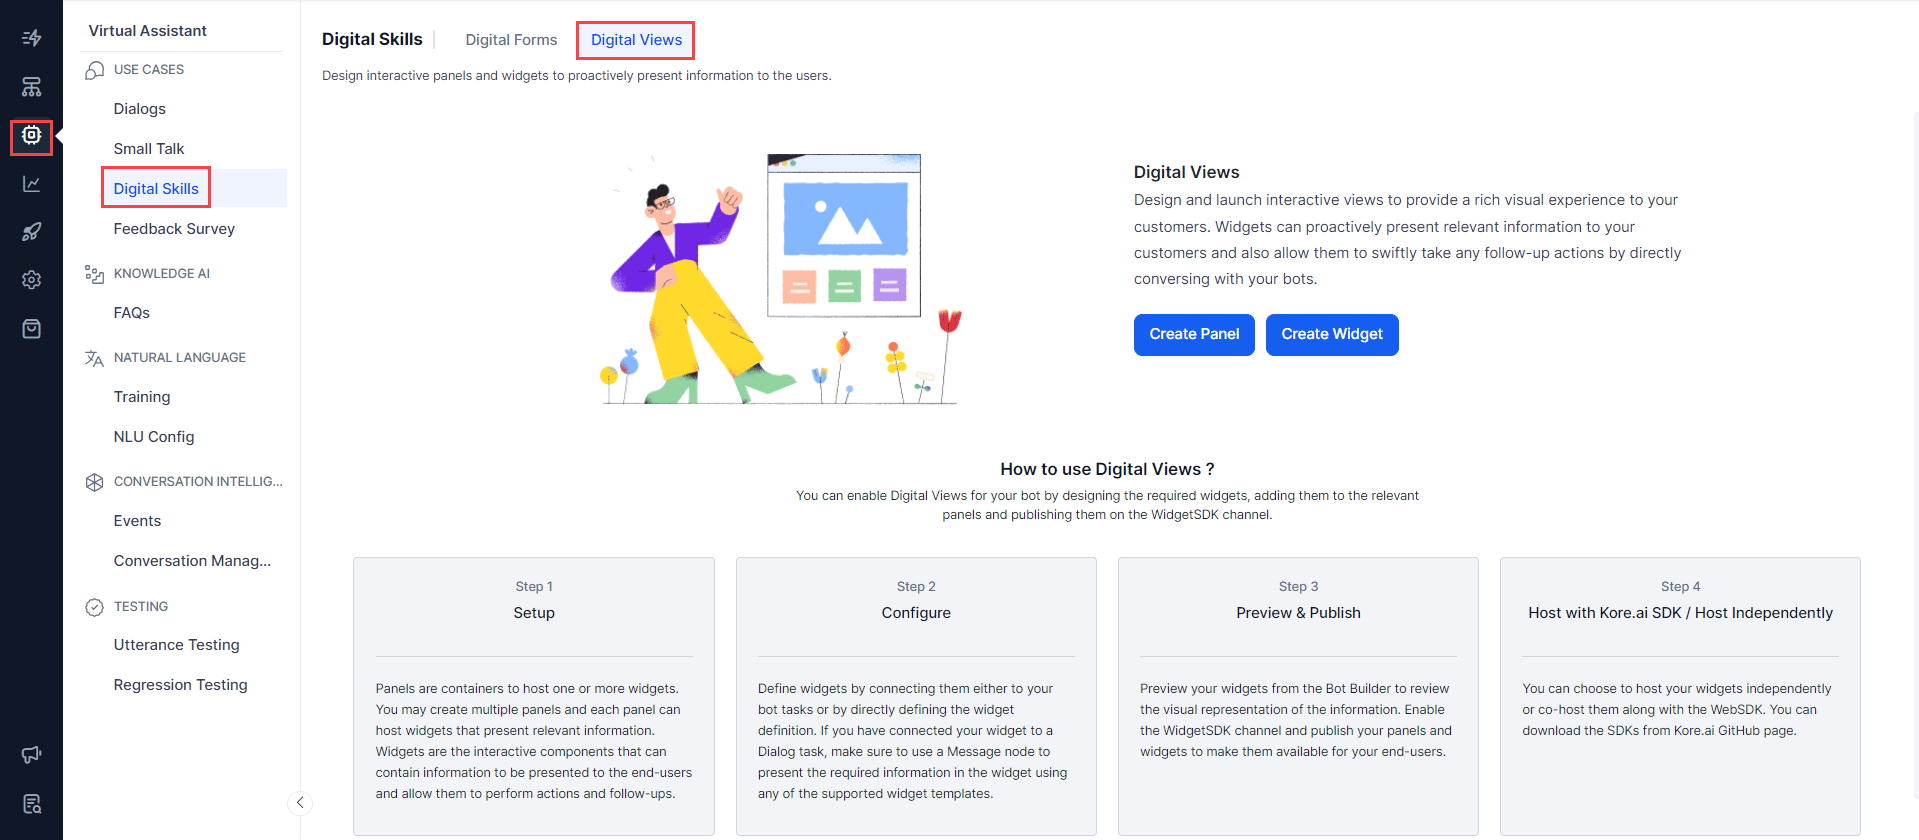 You can access Digital Views by selecting the App you want to work with then going to **Automation AI > Use Cases > Digital Skills > Digital Views**.
## Setup Process
You can enable Digital Views for your AI Agent by designing the required widgets, adding them to relevant panels, and publishing them on the Widget SDK channel:
1. **Configure Widgets**: Define widgets by connecting them either to a Dialog Task or another source, such as a JavaScript-generated JSON file. If connecting to a Dialog Task, use a Message node to present the required information via a supported widget template.
2. **Preview the Widgets**: Preview your widgets from the Platform to review how the information will be presented.
3. **Set up Panels**: Create one or more panels, each hosting the widgets relevant to that panel's purpose.
4. **Test the Panels**: Test how the panels and widgets render in the chat window.
5. **Publish**: Publish the App, and enable the Widget SDK channel, to make the panels and widgets available to end-users.
6. **Host**: Host your widgets independently or co-host them with the Web SDK. Download the SDKs from the [Kore.ai GitHub page](https://github.com/Koredotcom/web-kore-sdk).
## Configure Widgets
Widgets are individual components that can communicate with the App for presenting information to the end-users. The source of information for widgets is from a Dialog Task or a JSON using any of the predefined widget templates.
To configure widgets, follow the below steps:
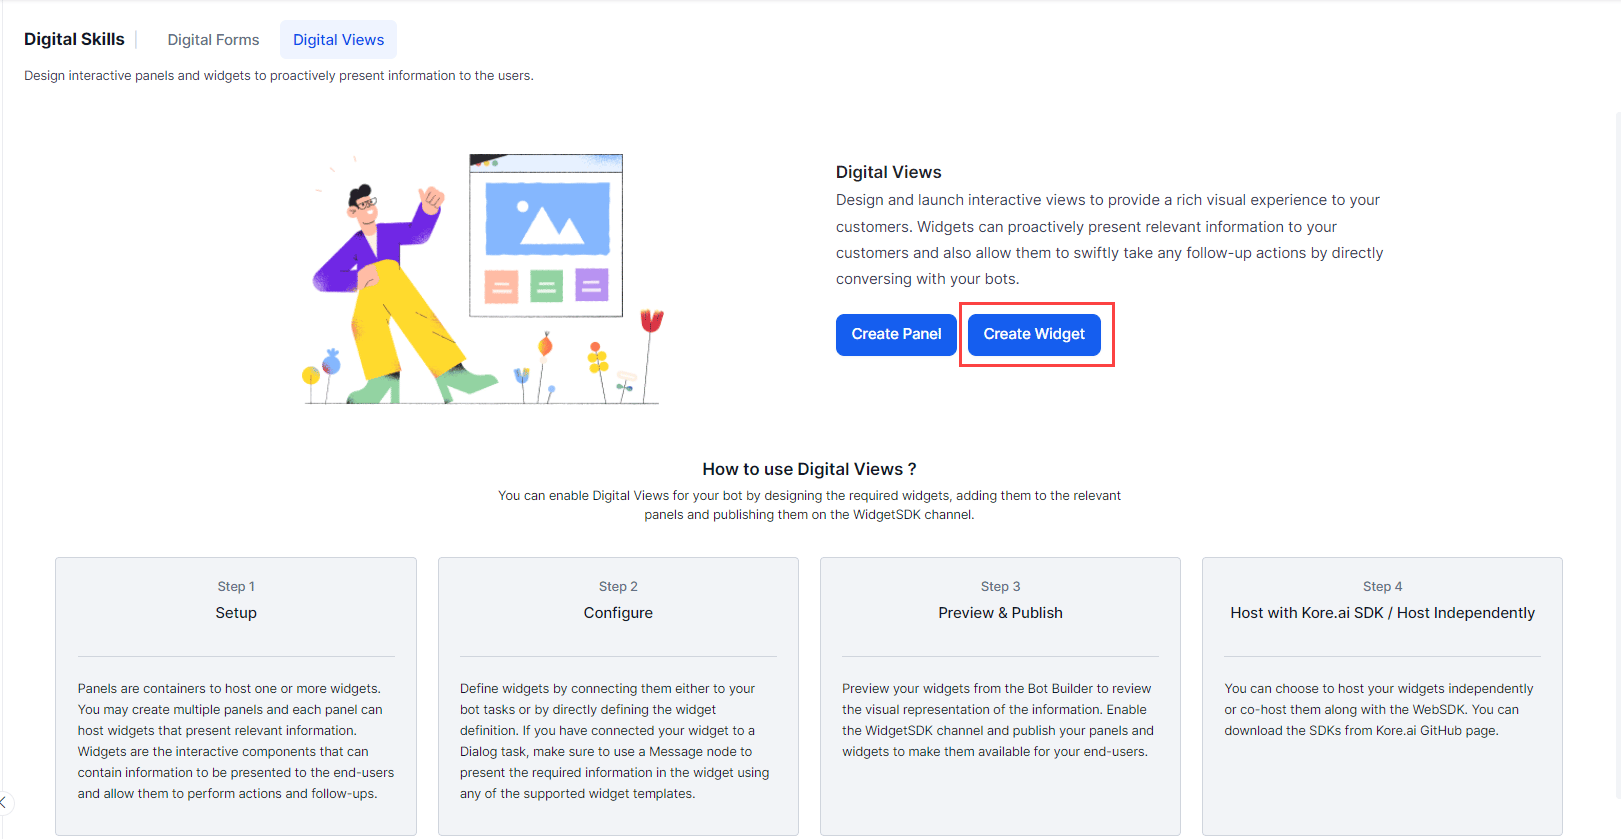
1. Click **Create Widget** to create a widget.
You can access Digital Views by selecting the App you want to work with then going to **Automation AI > Use Cases > Digital Skills > Digital Views**.
## Setup Process
You can enable Digital Views for your AI Agent by designing the required widgets, adding them to relevant panels, and publishing them on the Widget SDK channel:
1. **Configure Widgets**: Define widgets by connecting them either to a Dialog Task or another source, such as a JavaScript-generated JSON file. If connecting to a Dialog Task, use a Message node to present the required information via a supported widget template.
2. **Preview the Widgets**: Preview your widgets from the Platform to review how the information will be presented.
3. **Set up Panels**: Create one or more panels, each hosting the widgets relevant to that panel's purpose.
4. **Test the Panels**: Test how the panels and widgets render in the chat window.
5. **Publish**: Publish the App, and enable the Widget SDK channel, to make the panels and widgets available to end-users.
6. **Host**: Host your widgets independently or co-host them with the Web SDK. Download the SDKs from the [Kore.ai GitHub page](https://github.com/Koredotcom/web-kore-sdk).
## Configure Widgets
Widgets are individual components that can communicate with the App for presenting information to the end-users. The source of information for widgets is from a Dialog Task or a JSON using any of the predefined widget templates.
To configure widgets, follow the below steps:
1. Click **Create Widget** to create a widget.
 2. The New Widget dialog opens.
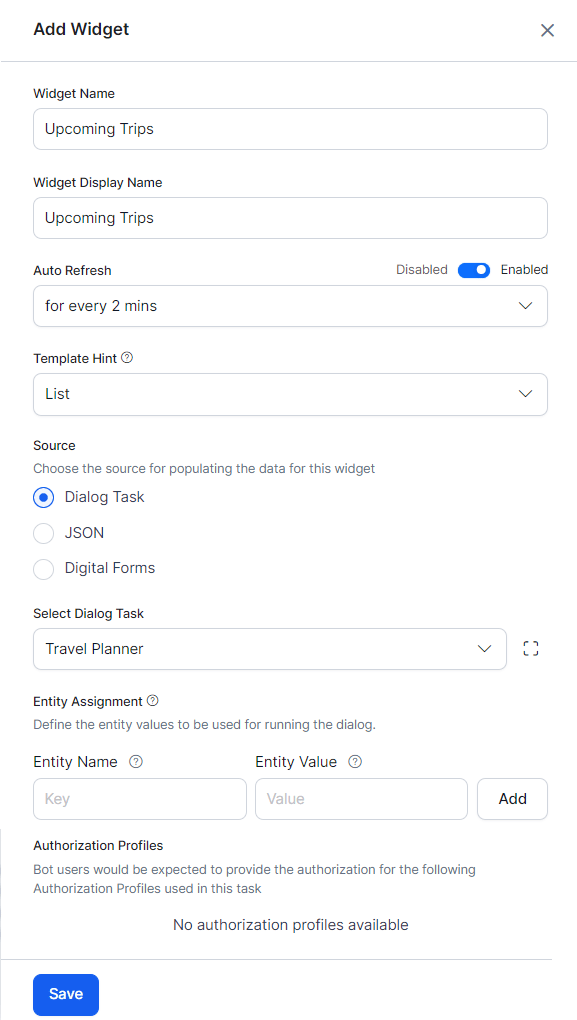 3. On the **New Widget** window, enter the following details:
* **Name** of the widget
* **Display Name** for the widget
* **Auto Refresh** to set the frequency with which this widget needs a poll for fresh data. The refresh is applicable only when the panel containing the widget is active.
* **Source** for a widget can be set either from the execution of Dialog Task, from JavaScript by defining a JSON, or by linking an existing Digital Form.
4. Click **Save**.
### Configure Widget Sources
For the widget input data, you must configure one of the following sources and complete the configuration.
### Dialog Task
The **Dialog Task** option allows you to trigger a task and present the output in the widget.
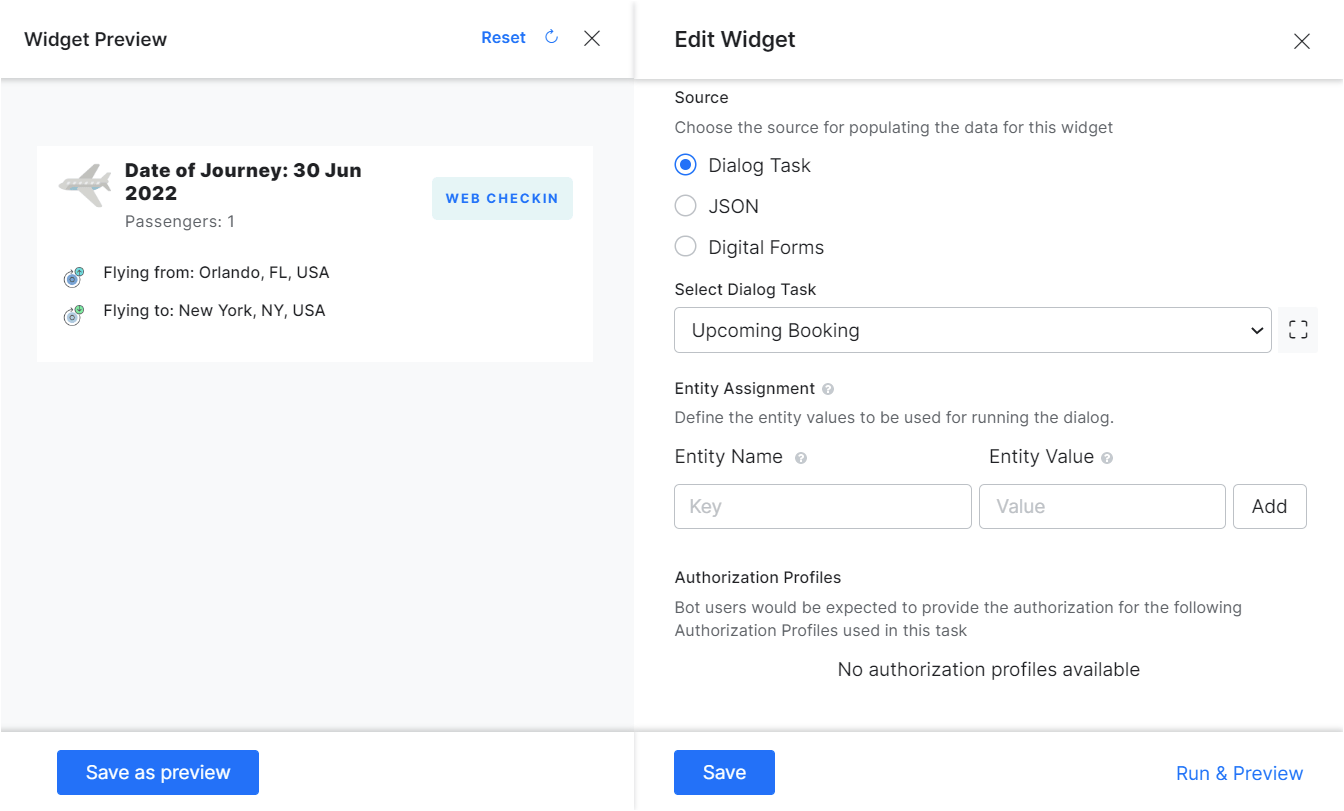
The **Select Dialog Task** drop-down will list all available tasks in the current AI Agent. Select the task you want to trigger using this widget.
In the connected Dialog Task make sure to use a Message node to present the required information in the widget using any of the supported widget templates.
You can use the icon next to the Dialog Task to open the Dialog Task for checking the task details like entity names etc.
Any entities used by the selected Dialog Task need to be pre-populated with values by mapping **Entity Name** with **Entity Values**.
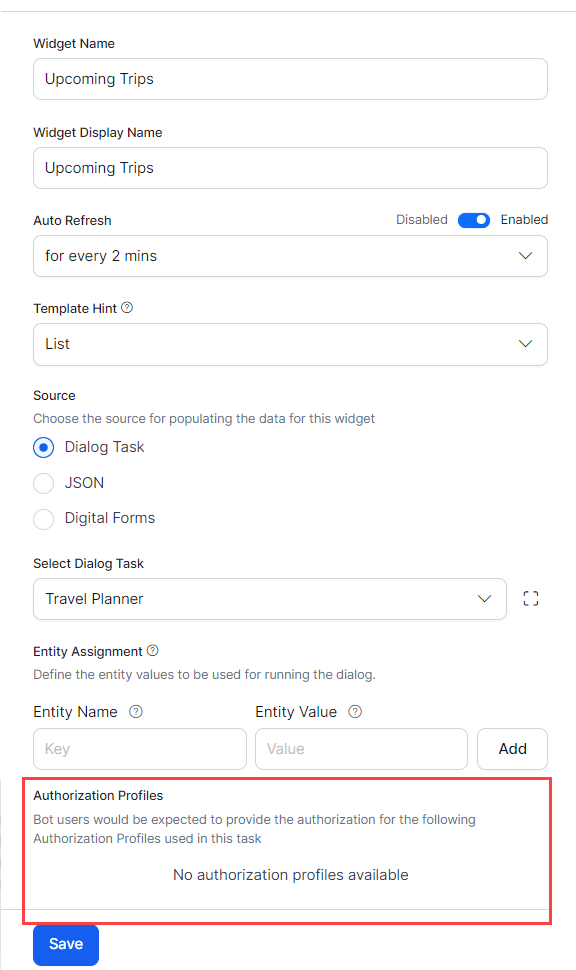
If the selected Dialog Task has any **Authorization Profile** defined, it's displayed here.
3. On the **New Widget** window, enter the following details:
* **Name** of the widget
* **Display Name** for the widget
* **Auto Refresh** to set the frequency with which this widget needs a poll for fresh data. The refresh is applicable only when the panel containing the widget is active.
* **Source** for a widget can be set either from the execution of Dialog Task, from JavaScript by defining a JSON, or by linking an existing Digital Form.
4. Click **Save**.
### Configure Widget Sources
For the widget input data, you must configure one of the following sources and complete the configuration.
### Dialog Task
The **Dialog Task** option allows you to trigger a task and present the output in the widget.
The **Select Dialog Task** drop-down will list all available tasks in the current AI Agent. Select the task you want to trigger using this widget.
In the connected Dialog Task make sure to use a Message node to present the required information in the widget using any of the supported widget templates.
You can use the icon next to the Dialog Task to open the Dialog Task for checking the task details like entity names etc.
Any entities used by the selected Dialog Task need to be pre-populated with values by mapping **Entity Name** with **Entity Values**.
If the selected Dialog Task has any **Authorization Profile** defined, it's displayed here.
 ### JSON
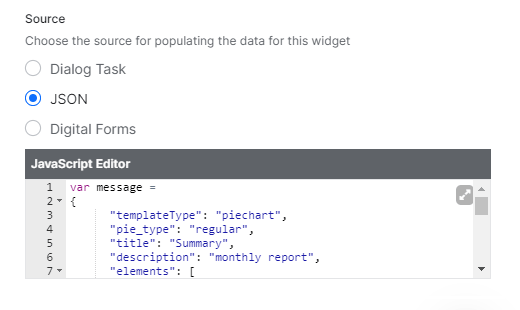
When selecting JSON as the source, you'll be presented with a Javascript editor, where you can add your code, as shown below:
### JSON
When selecting JSON as the source, you'll be presented with a Javascript editor, where you can add your code, as shown below:
 ### Digital Form
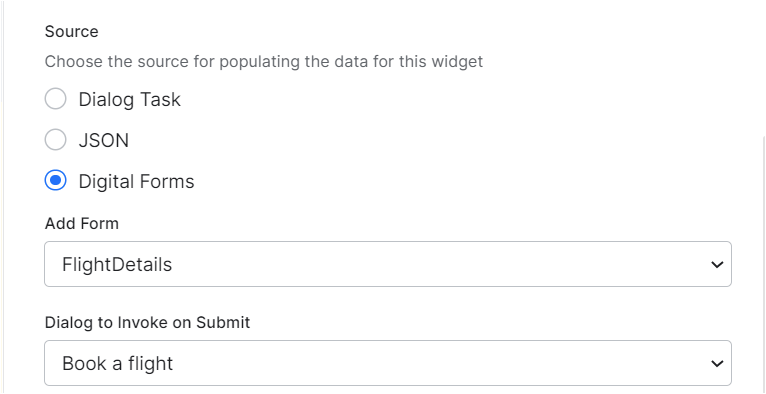
When selecting **Digital Form** as a widget source, you can select the Digital Form, and the Dialog Task to trigger on submission.
A Digital Form can be used to define multiple Widgets and can also be added to multiple Panels. However, it'll be associated with the same Dialog Task across all Widgets and Panels.
### Digital Form
When selecting **Digital Form** as a widget source, you can select the Digital Form, and the Dialog Task to trigger on submission.
A Digital Form can be used to define multiple Widgets and can also be added to multiple Panels. However, it'll be associated with the same Dialog Task across all Widgets and Panels.
 ### Edit, Run & Preview a Widget
After you save, the widget will be **In Development** state. You can **Edit** or **Delete** the widget.
### Edit, Run & Preview a Widget
After you save, the widget will be **In Development** state. You can **Edit** or **Delete** the widget.
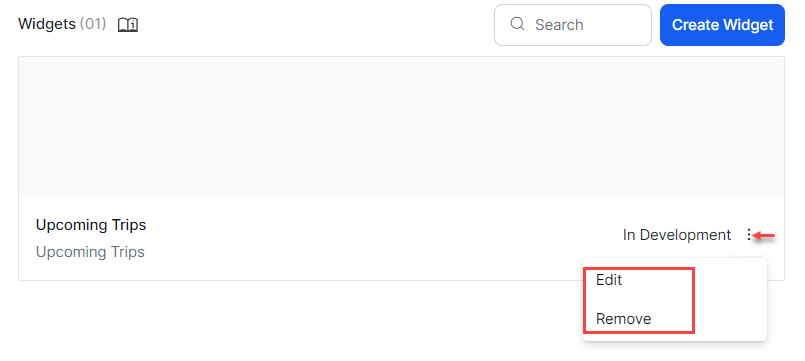 When you select **Edit** widget, apart from being able to modify any of the above fields, you'll have the option to **Run & Preview** the widget. You can save the preview as the thumbnail display for the widget.
 ## Configure Panels
Panel refers to containers that hold one or more widgets. You can add an existing widget to the panel or create new widgets within it.
### Create a Panel
To create a panel, follow the steps below:
1. Click **Create Panel** on the Digital Views screen to create a panel.
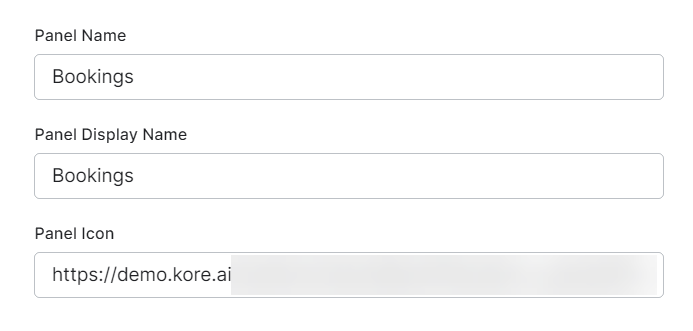
2. On the **New Panel** window, enter the following details:
* **Name** of the Panel.
* **Display Name** for the Panel.
* **Panel Icon** to display in the chat window (URL to the location).
* **Save** the Panel.
## Configure Panels
Panel refers to containers that hold one or more widgets. You can add an existing widget to the panel or create new widgets within it.
### Create a Panel
To create a panel, follow the steps below:
1. Click **Create Panel** on the Digital Views screen to create a panel.
2. On the **New Panel** window, enter the following details:
* **Name** of the Panel.
* **Display Name** for the Panel.
* **Panel Icon** to display in the chat window (URL to the location).
* **Save** the Panel.
 3. After you save, the panel will be **In Development** and will be displayed on your Digital Views screen.
### Add Widgets
1. Click **Add Widget** to add widgets to the panel.
3. After you save, the panel will be **In Development** and will be displayed on your Digital Views screen.
### Add Widgets
1. Click **Add Widget** to add widgets to the panel.
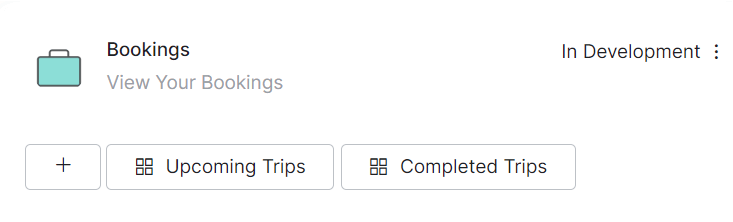
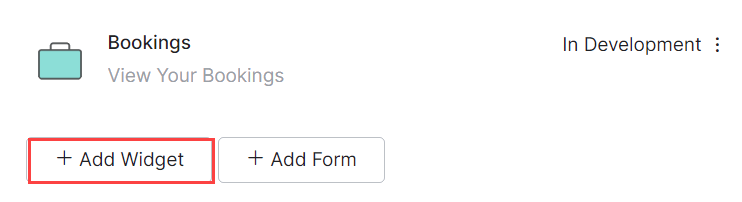 2. Select widgets from the drop-down list and click **Add**. You can add multiple widgets to the same panel.
 ### Panel Options
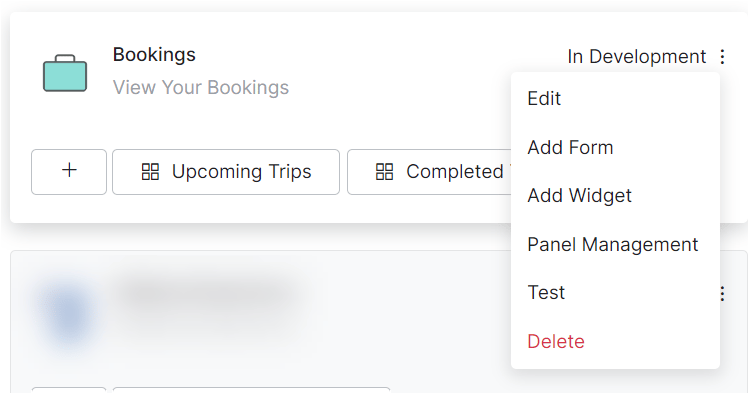
You have the following options for a given panel:
1. **Edit** the panel details;
2. **Add Form** to add existing forms to the Panel. Once added, forms will behave as a widget with the source set to Digital Form;
* **Add Widget** to add existing widgets;
* **Panel Management** to add existing forms/widgets, or remove already added forms/widgets from the panel.
* **Test** the individual panel – this opens the **Talk to App** window along with the panel listing with the current panel active and data presented. You can interact with the AI Agent and test the panel.
* **Delete** the Panel.
### Panel Options
You have the following options for a given panel:
1. **Edit** the panel details;
2. **Add Form** to add existing forms to the Panel. Once added, forms will behave as a widget with the source set to Digital Form;
* **Add Widget** to add existing widgets;
* **Panel Management** to add existing forms/widgets, or remove already added forms/widgets from the panel.
* **Test** the individual panel – this opens the **Talk to App** window along with the panel listing with the current panel active and data presented. You can interact with the AI Agent and test the panel.
* **Delete** the Panel.
 ## Publish
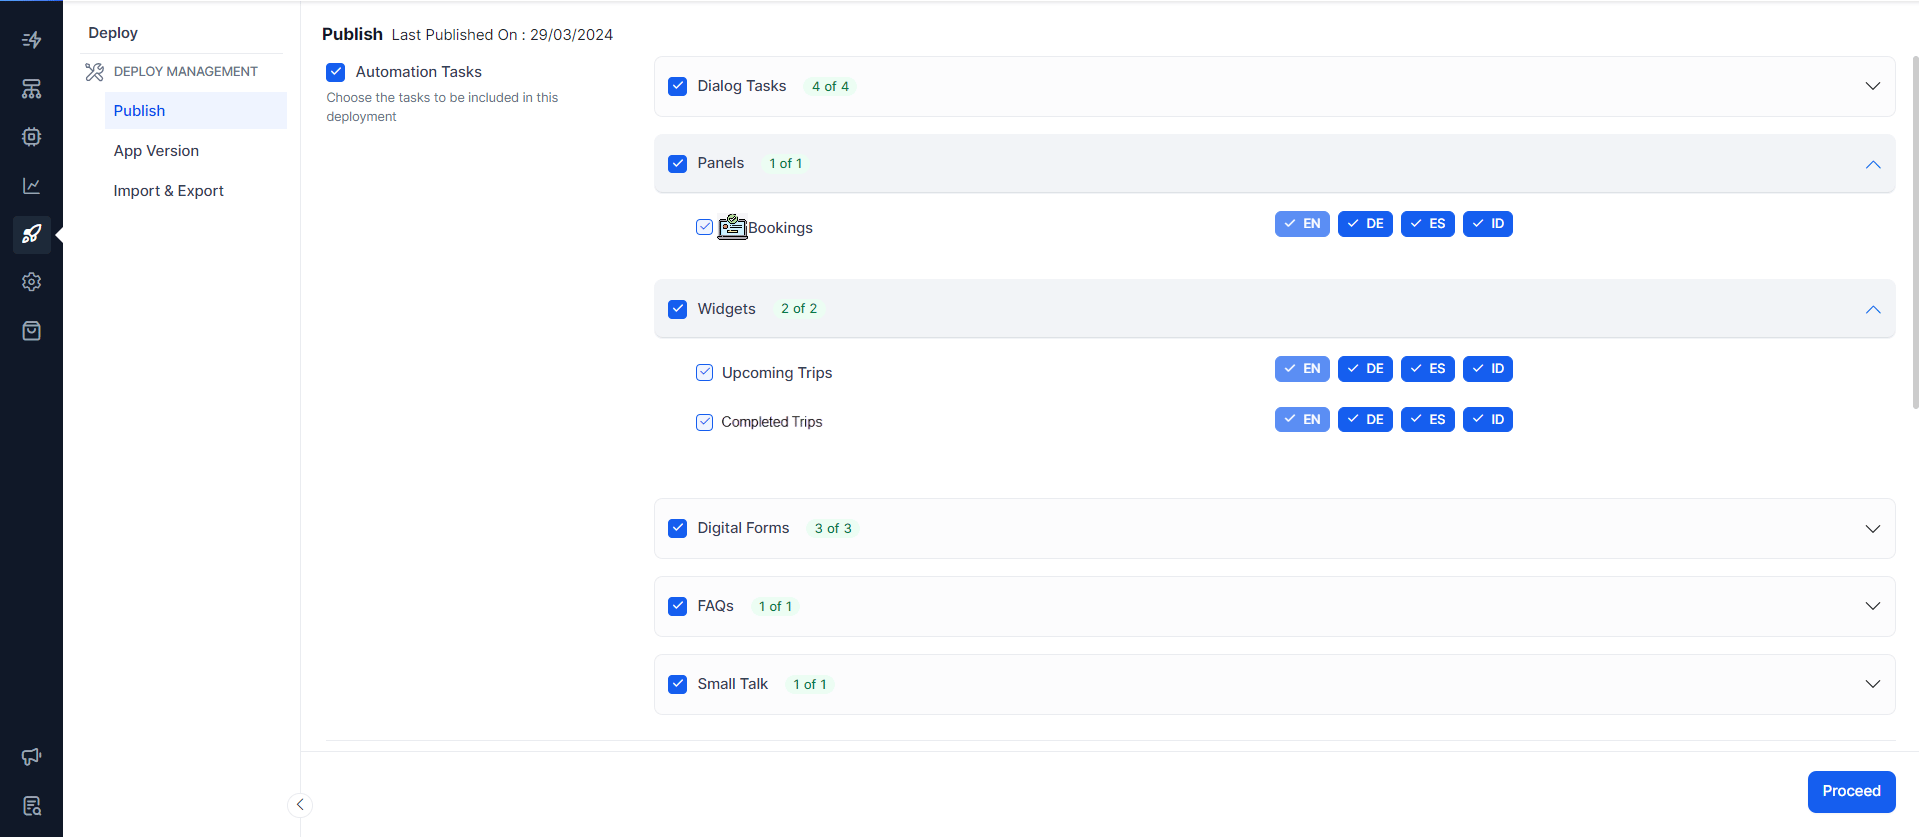
When you publish your App, please ensure that the panels and widgets you want to include are selected.
## Publish
When you publish your App, please ensure that the panels and widgets you want to include are selected.
 ## Host
The Platform provides the Widget SDK for hosting and managing panels and widgets. You can choose to host your widgets independently or co-host them along with the WebSDK. You can download the SDKs from the Kore.ai GitHub page. Do ensure to enable WidgetSDK as a channel. [Learn more](/ai-for-service/channels/add-widget-sdk-channel).
## Host
The Platform provides the Widget SDK for hosting and managing panels and widgets. You can choose to host your widgets independently or co-host them along with the WebSDK. You can download the SDKs from the Kore.ai GitHub page. Do ensure to enable WidgetSDK as a channel. [Learn more](/ai-for-service/channels/add-widget-sdk-channel).