> ## Documentation Index
> Fetch the complete documentation index at: https://koreai.mintlify.site/llms.txt
> Use this file to discover all available pages before exploring further.
# Configure Digital Views
In this how-to, we'll walk through a Banking App scenario where a user views account details through Digital Views — presented via Panels and Widgets, and hosted on a Web/Mobile Client using the Widget SDK.
For details on what Digital Views are and how they're implemented on the Platform, see [Digital Views](/ai-for-service/automation/digital-skills/digital-views).
## Illustration with an Example
Consider a Banking App trying to address the following scenarios:
This document gives a detailed step-by-step approach to achieving all the above-mentioned scenarios using – Digital Views (Panels, Widgets), Widget SDK and Web/Mobile Client.
## Prerequisites
* App building knowledge
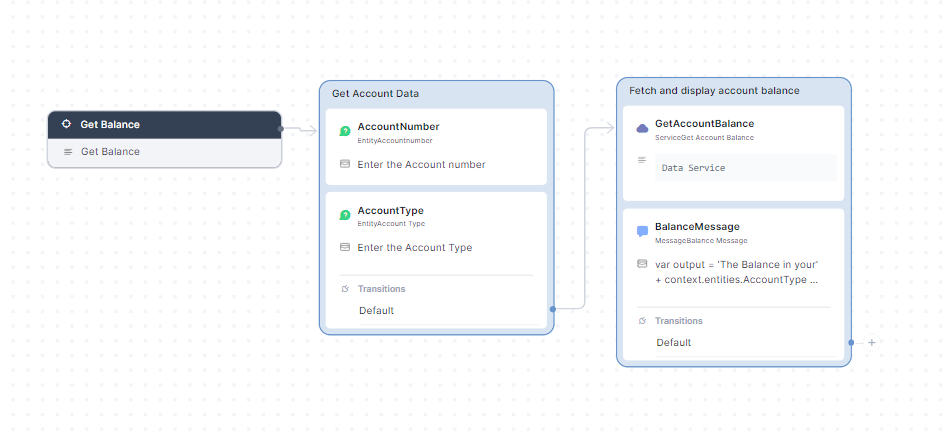
* A Banking App with a **Get Balance** dialog as mentioned below.
* Get Balance – Dialog task prompting the user for their Account Number and Account Type and displaying the available balance in the account.
 ## Configurations
Let's consider each of the following configuration scenarios:
1. Dialog Task to display balance in a given account using Widget SDK channel.
2. Widgets to trigger the above dialog task and a Panel set with the widgets.
3. Panel to hold a widget displaying static JSON template message.
### Message Template
First, the Dialog task which would be triggered from the Widget should have a message definition for the Widget SDK channel.
## Configurations
Let's consider each of the following configuration scenarios:
1. Dialog Task to display balance in a given account using Widget SDK channel.
2. Widgets to trigger the above dialog task and a Panel set with the widgets.
3. Panel to hold a widget displaying static JSON template message.
### Message Template
First, the Dialog task which would be triggered from the Widget should have a message definition for the Widget SDK channel.
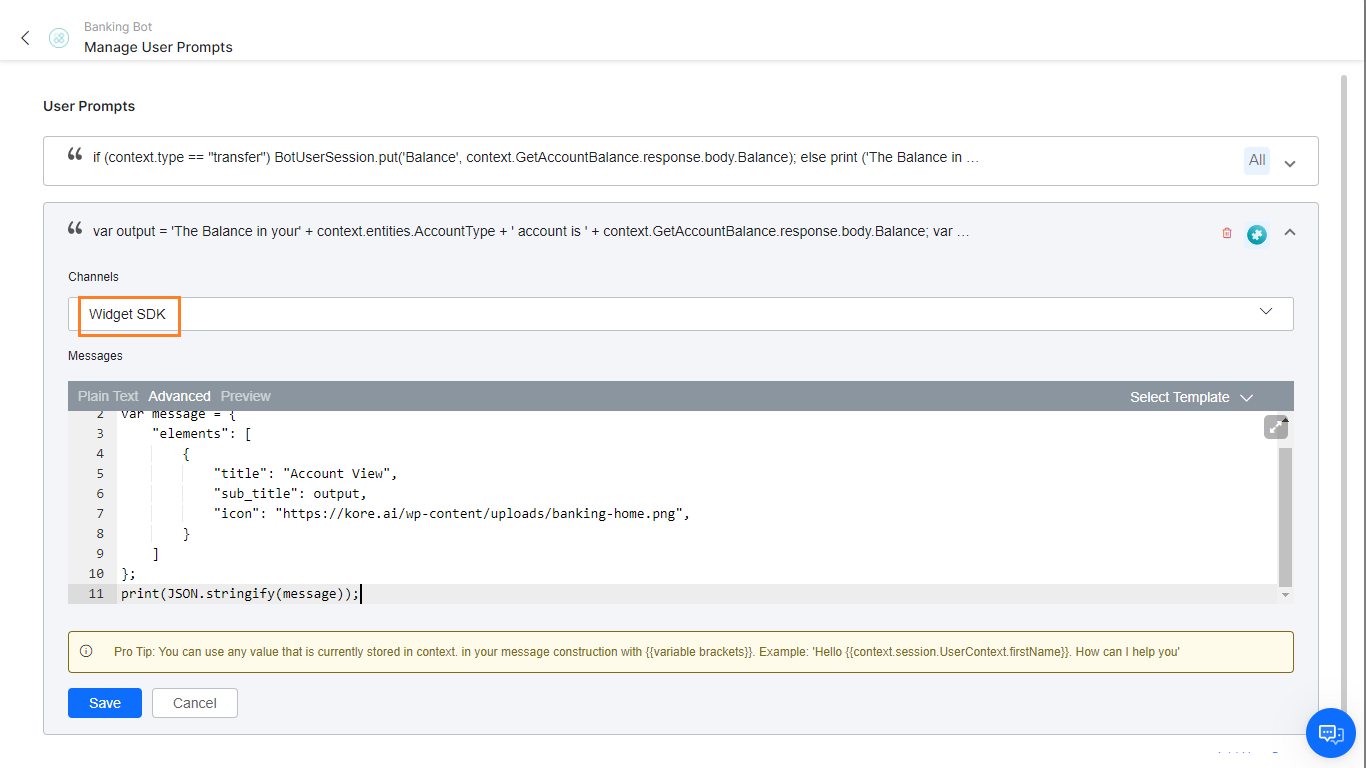 We use the following message to display the account details:
```
var output = 'The Balance in your' + context.entities.AccountType + ' account is ' + context.GetAccountBalance.response.body.Balance;
var message = {
"elements": [
{
"title": "Account View",
"sub_title": output,
"icon": `https://kore.ai/uploads/banking-home.png`,
}
]
};
print(JSON.stringify(message));
```
### Widgets Configuration
You can configure the following widget types:
#### Dialog Task Widgets
We'll be creating two Widgets to trigger a Dialog Task.
**Current Account:**
First, let's see how to configure a Widget to display balance from the current account of the user with the steps below:
1. Navigate to **Automation AI > Use Cases > Digital Skills > Digital Views**.
2. Click the **Create Widget** button.
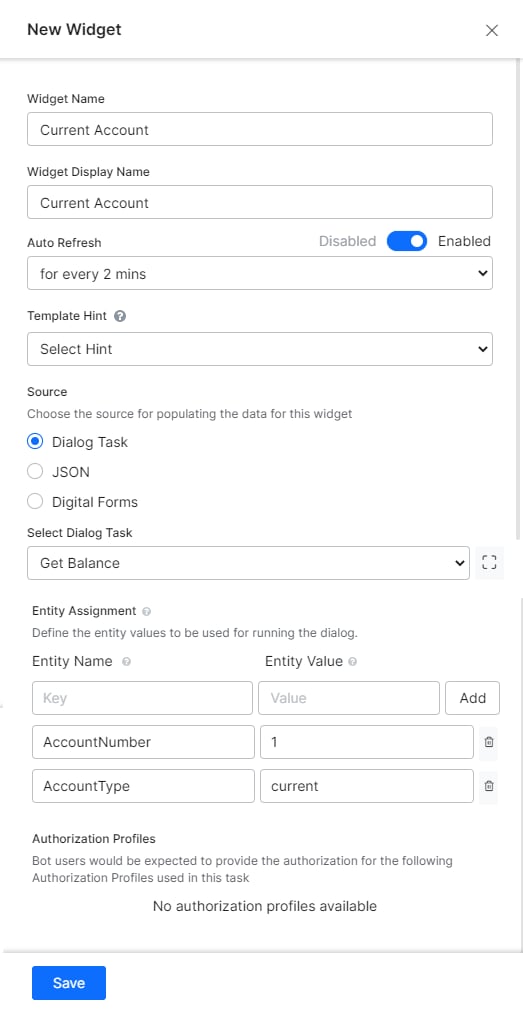
3. Give a Widget Name and a Display Name.
4. Set the **Source**, we're triggering Dialog Task, hence select *Dialog Task*.
* **Select Dialog Task** as *Get Balance*, as per our use case.
* In the **Entity Assignment**, set the following entities (you can select from the drop box that appears as you type) as per the Dialog Task requirement:
* **AccountType** to *current;*
* **AccountNumber** to *1*.
You can use the **Open Dialog Task** icon, next to the select Dialog Task drop down, to open the dialog and check the entities needed.
We use the following message to display the account details:
```
var output = 'The Balance in your' + context.entities.AccountType + ' account is ' + context.GetAccountBalance.response.body.Balance;
var message = {
"elements": [
{
"title": "Account View",
"sub_title": output,
"icon": `https://kore.ai/uploads/banking-home.png`,
}
]
};
print(JSON.stringify(message));
```
### Widgets Configuration
You can configure the following widget types:
#### Dialog Task Widgets
We'll be creating two Widgets to trigger a Dialog Task.
**Current Account:**
First, let's see how to configure a Widget to display balance from the current account of the user with the steps below:
1. Navigate to **Automation AI > Use Cases > Digital Skills > Digital Views**.
2. Click the **Create Widget** button.
3. Give a Widget Name and a Display Name.
4. Set the **Source**, we're triggering Dialog Task, hence select *Dialog Task*.
* **Select Dialog Task** as *Get Balance*, as per our use case.
* In the **Entity Assignment**, set the following entities (you can select from the drop box that appears as you type) as per the Dialog Task requirement:
* **AccountType** to *current;*
* **AccountNumber** to *1*.
You can use the **Open Dialog Task** icon, next to the select Dialog Task drop down, to open the dialog and check the entities needed.
 5. **Save** the widget.
6. **Edit** the widget and click **Run & Preview** to see the widget output.
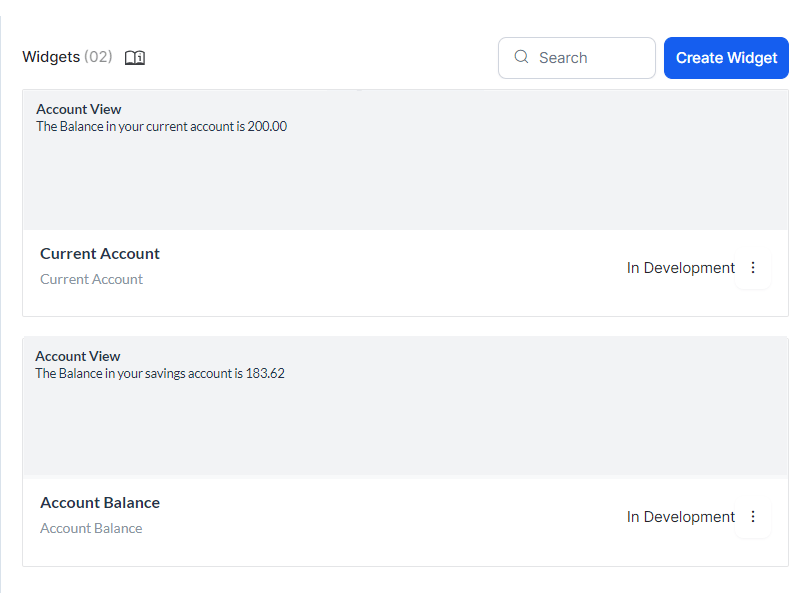
7. **Save as preview** will set the output as the thumbnail against the widget.
**Savings Account**
Repeat the above steps for Account View from *savings* account of the same account number.
5. **Save** the widget.
6. **Edit** the widget and click **Run & Preview** to see the widget output.
7. **Save as preview** will set the output as the thumbnail against the widget.
**Savings Account**
Repeat the above steps for Account View from *savings* account of the same account number.
 ### Panel Configuration
The Widgets thus created need to be attached to a Panel for runtime display and execution.
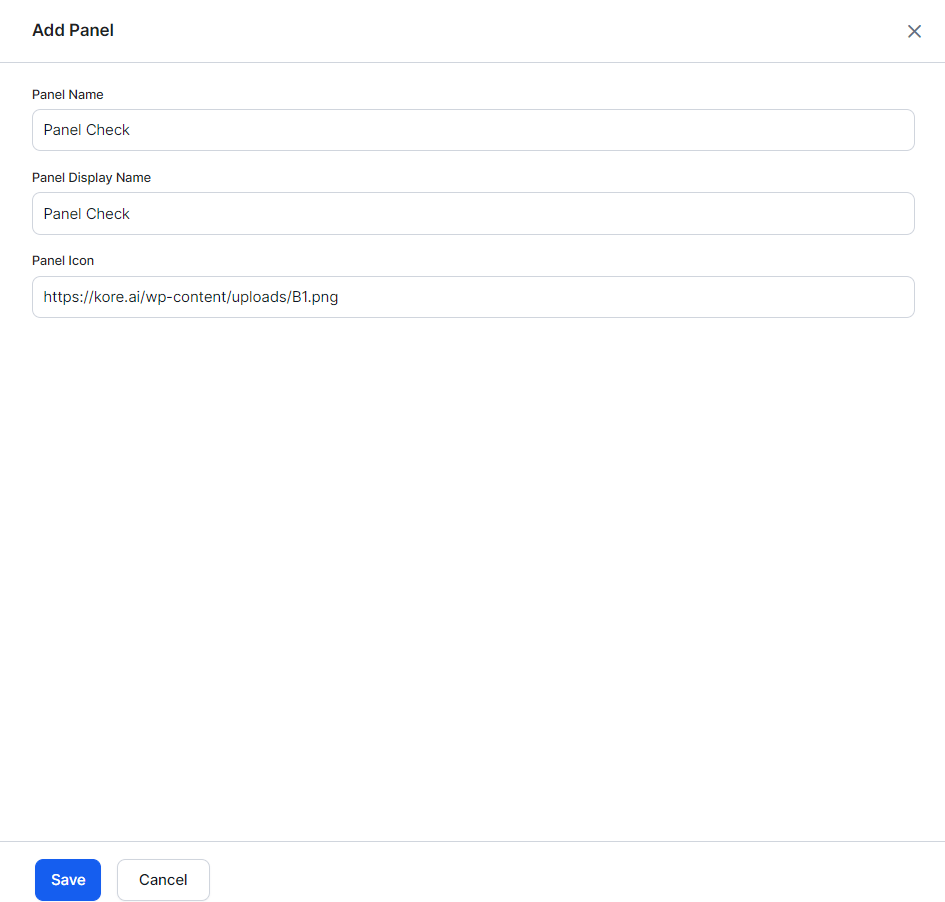
1. Click the **Create Panel** button to create a Panel.
2. In the **New Panel** window, enter Panel Name, Display Name and a URL for Icon.
### Panel Configuration
The Widgets thus created need to be attached to a Panel for runtime display and execution.
1. Click the **Create Panel** button to create a Panel.
2. In the **New Panel** window, enter Panel Name, Display Name and a URL for Icon.
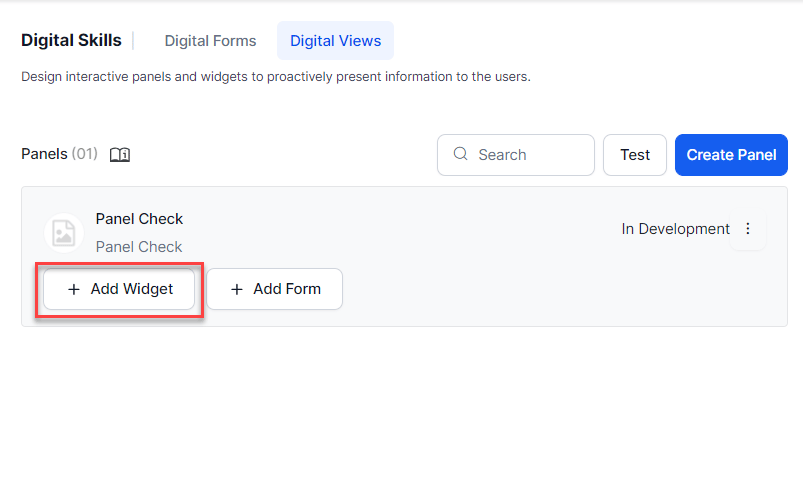
 3. Click the **Add Widget** button to open the **Panel Management** window.
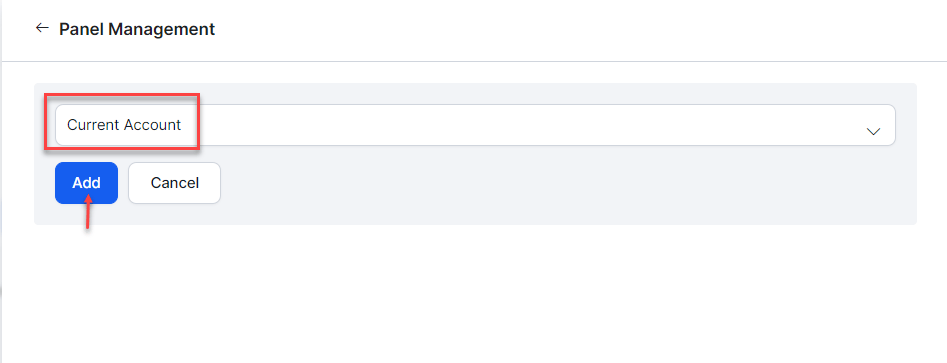
 4. Use the **Add Widget** to select and add the Widgets that we want to display, in this case Account Balance and Current Account widgets.
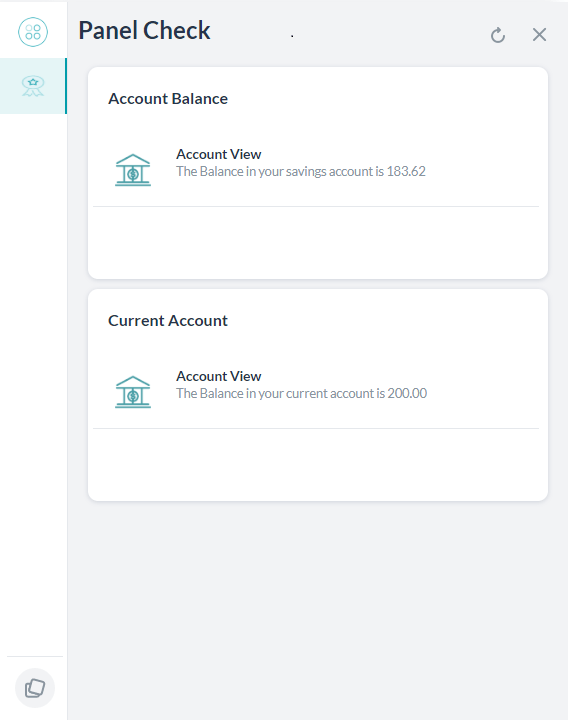
 5. Click the 3-dot menu icon on the panel, and select the **Test** option from the menu to see the widgets in action.
 ### Panel with JSON Widgets
We'll see how to create Widgets with static JSON content. We'll use a JSON to display a pie chart.
1. Click **Create Panel** to create a new panel and name it **JSON Example**.
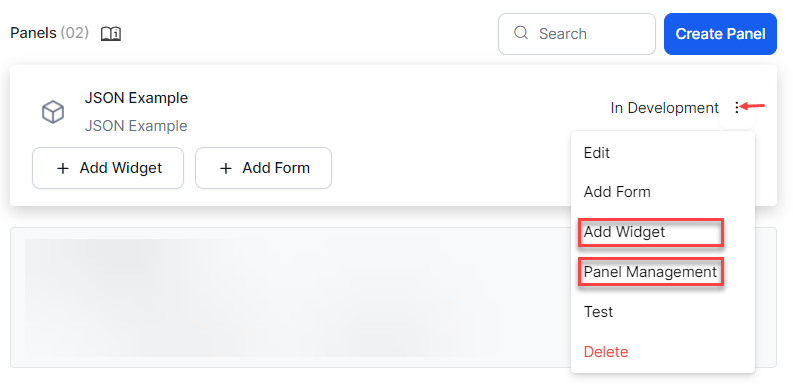
2. Use the **3-dot** icon and select **Panel Management** from the menu, there you'll find the option to **Add Widget**. Click on that.
### Panel with JSON Widgets
We'll see how to create Widgets with static JSON content. We'll use a JSON to display a pie chart.
1. Click **Create Panel** to create a new panel and name it **JSON Example**.
2. Use the **3-dot** icon and select **Panel Management** from the menu, there you'll find the option to **Add Widget**. Click on that.
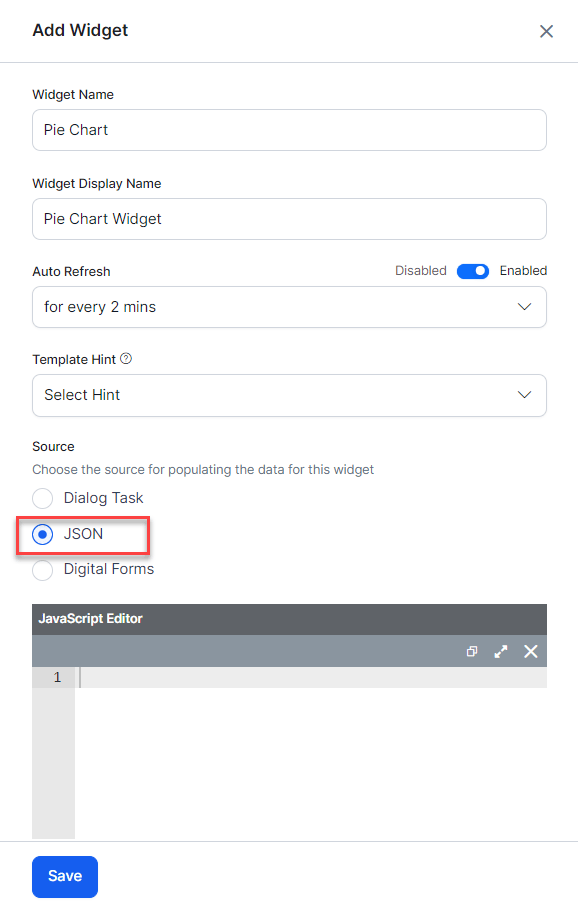 3. Enter the following in the JavaScript Editor. This is a message template to display a pie chart with a break up for amounts spent under various heads like travel, food, and accommodation. For more on supported message templates, [refer here](/ai-for-service/sdk/widget-sdk-message-formatting-and-templates).
```
var message =
{
"templateType": "piechart",
"pie_type": "regular",
"title": "Summary",
"description": "monthly report",
"elements": [
{
"title": "Airlines",
"value": "1264.0",
"displayValue": "$ 1,234"
},
{
"title": "Hotels",
"value": "568.10",
"displayValue": "$ 568"
},
{
"title": "Food",
"value": "324.50",
"displayValue": "$ 324"
}
]
};
print(JSON.stringify(message));
```
4. Save the new widget.
5. Click on **Create Panel** to create a new panel and name it *JSON Example*.
6. Click the **3-dot menu** icon on the panel. Select the **Add Widget** or **Panel Management** option and add the above created *Pie Chart* widget.
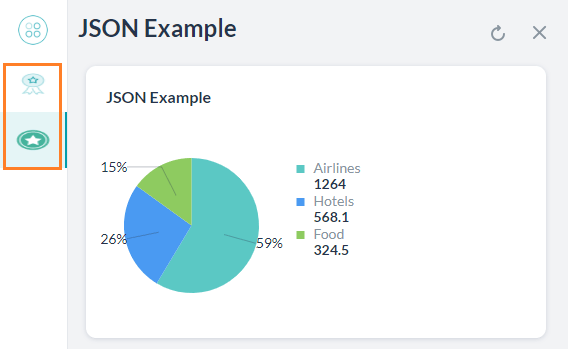
7. **Test** the panel and you'll see the panel icons, click on each to see the widgets within them in action.
3. Enter the following in the JavaScript Editor. This is a message template to display a pie chart with a break up for amounts spent under various heads like travel, food, and accommodation. For more on supported message templates, [refer here](/ai-for-service/sdk/widget-sdk-message-formatting-and-templates).
```
var message =
{
"templateType": "piechart",
"pie_type": "regular",
"title": "Summary",
"description": "monthly report",
"elements": [
{
"title": "Airlines",
"value": "1264.0",
"displayValue": "$ 1,234"
},
{
"title": "Hotels",
"value": "568.10",
"displayValue": "$ 568"
},
{
"title": "Food",
"value": "324.50",
"displayValue": "$ 324"
}
]
};
print(JSON.stringify(message));
```
4. Save the new widget.
5. Click on **Create Panel** to create a new panel and name it *JSON Example*.
6. Click the **3-dot menu** icon on the panel. Select the **Add Widget** or **Panel Management** option and add the above created *Pie Chart* widget.
7. **Test** the panel and you'll see the panel icons, click on each to see the widgets within them in action.
 ## Publish
To publish the App first enable channels:
1. From left navigation menu, select **Channel** for publishing. For our use case we'll select both Web/Mobile Client and Widget SDK channels.
2. Select the channels and from **Configurations** tab, make a note of the **Bot Name**, **Bot Id**, **Client Id** and **Client Secret**.
3. From left navigation menu, select **Publish** option. Under Tasks & languages section, ensure that the Widget and Panels we developed are selected for publication.
4. **Proceed** with the Publish.
## Hosting
We'll be hosting the Panels in the web/mobile client. Click [here](/ai-for-service/app-settings/dev-tools/kore-ai-web-sdk) for more details on the Widget SDK usage.
1. Download the Kore.ai Widget SDK, go to this [link](https://github.com/Koredotcom/web-kore-sdk), and then click **Download**.
2. Extract all files to the *…/SDKApp/sdk* folder.
3. Open the above SDK folder, and traverse to *UI* folder.
4. Open the `kore-config.js`
5. Configure your `botOptions` with the ‘*web/mobile client*’ channel configurations copied in above section.
* `botOptions.botInfo`
* `botOptions.clientId`
* `botOptions.clientSecret`
6. Make other changes as per your requirements.
## Publish
To publish the App first enable channels:
1. From left navigation menu, select **Channel** for publishing. For our use case we'll select both Web/Mobile Client and Widget SDK channels.
2. Select the channels and from **Configurations** tab, make a note of the **Bot Name**, **Bot Id**, **Client Id** and **Client Secret**.
3. From left navigation menu, select **Publish** option. Under Tasks & languages section, ensure that the Widget and Panels we developed are selected for publication.
4. **Proceed** with the Publish.
## Hosting
We'll be hosting the Panels in the web/mobile client. Click [here](/ai-for-service/app-settings/dev-tools/kore-ai-web-sdk) for more details on the Widget SDK usage.
1. Download the Kore.ai Widget SDK, go to this [link](https://github.com/Koredotcom/web-kore-sdk), and then click **Download**.
2. Extract all files to the *…/SDKApp/sdk* folder.
3. Open the above SDK folder, and traverse to *UI* folder.
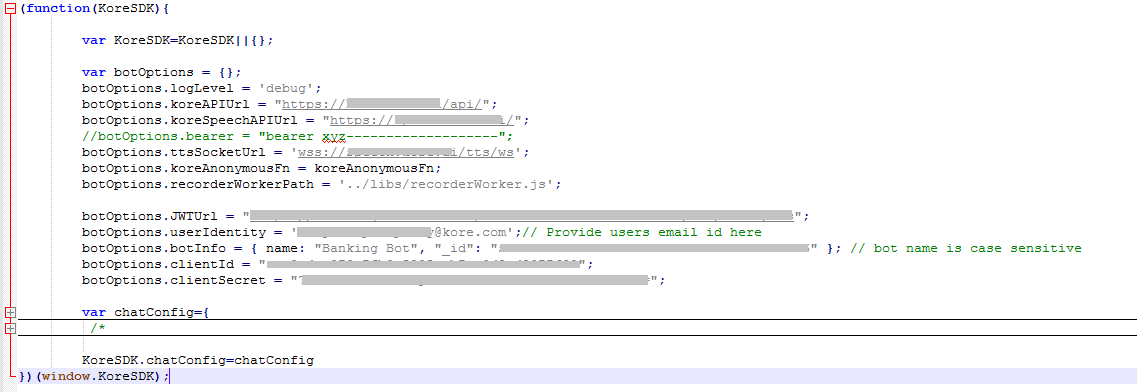
4. Open the `kore-config.js`
5. Configure your `botOptions` with the ‘*web/mobile client*’ channel configurations copied in above section.
* `botOptions.botInfo`
* `botOptions.clientId`
* `botOptions.clientSecret`
6. Make other changes as per your requirements.
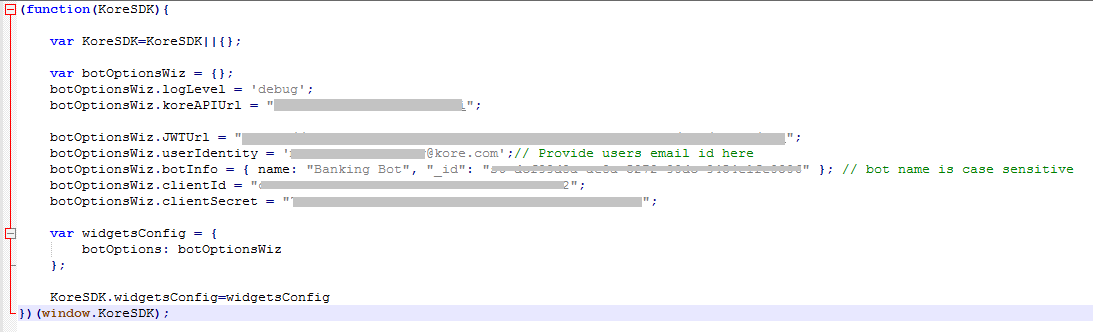
 7. Open the `kore-widgets-config.js`
8. Configure your `botOptionsWiz` with the ‘*Widget SDK*’ channel configurations copied in above section.
* `botOptionsWiz.botInfo`
* `botOptionsWiz.clientId`
* `botOptionsWiz.clientSecret`
9. Make other changes as per your requirements.
7. Open the `kore-widgets-config.js`
8. Configure your `botOptionsWiz` with the ‘*Widget SDK*’ channel configurations copied in above section.
* `botOptionsWiz.botInfo`
* `botOptionsWiz.clientId`
* `botOptionsWiz.clientSecret`
9. Make other changes as per your requirements.
 10. Open the `index_widgets_chat.html` file in the browser and see the chat window along with the widgets.
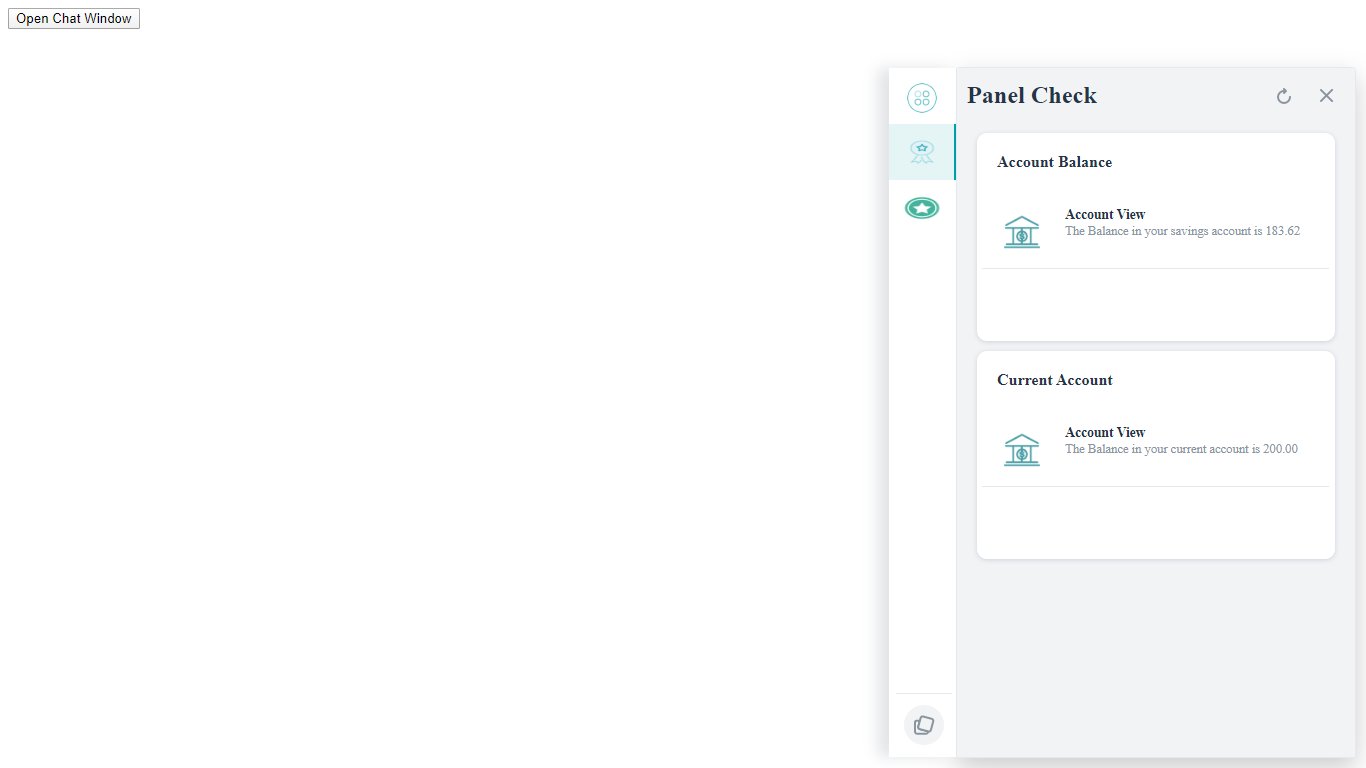 11. If you want to host the Panels individually use the `index_widgets.html` file. See the GitHub for hosting the same in your web site.