> ## Documentation Index
> Fetch the complete documentation index at: https://koreai.mintlify.site/llms.txt
> Use this file to discover all available pages before exploring further.
# Managing Translation Services
[Back to App Settings](/ai-for-service/app-settings)
The Platform offers multiple ways to train your AI Agent for language understanding. One of the ways is to use translation services to translate the user input. In this approach, you can train the AI Agent in a language (NLU Language) other than the interaction language. For example, you can enable Spanish as an interaction language but train the assistant using English language training data.
Translation services can also be used for translating the AI Agent responses if they're defined in a language other than the conversation language. The Platform allows you to define language-specific responses for each of the languages enabled for the assistant. However, you may choose to write responses in a language other than the enabled language.
The Platform provides out-of-the-box support for Microsoft Translator and Google Translation APIs. You can also use the Custom Translation Engine feature to integrate with any other translation services or your in-house translation services.
## Configure the Microsoft Translator Service
To enable automatic translation using Microsoft Translation Services, follow the steps below:
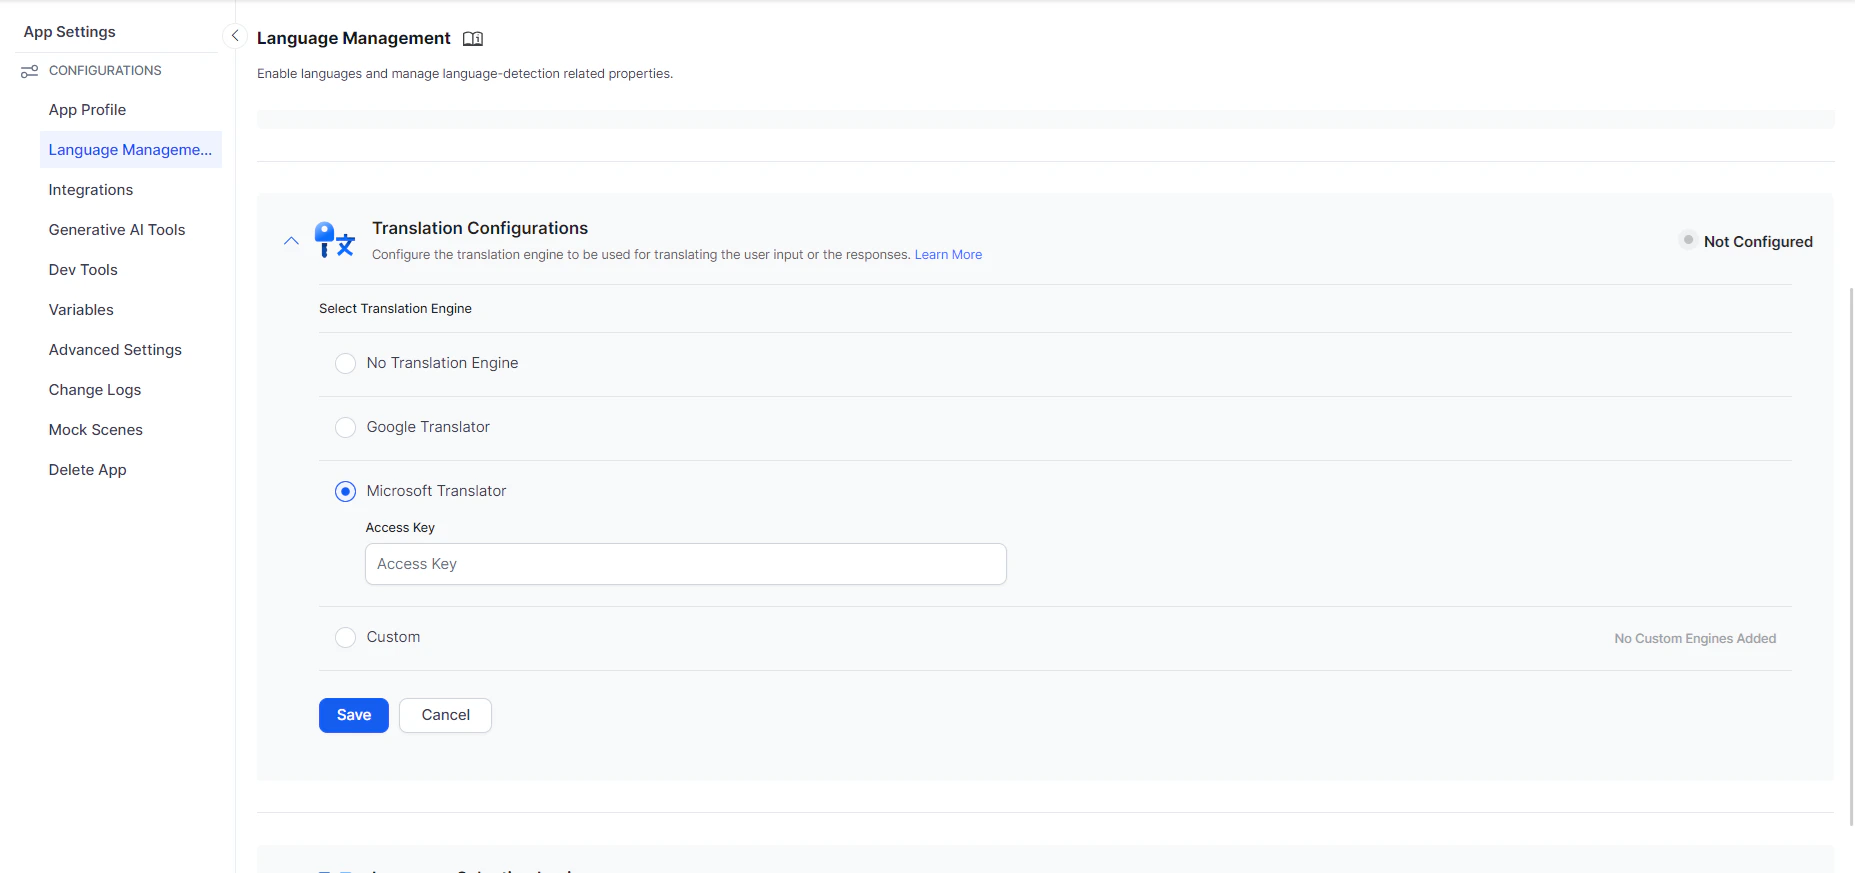
1. Go to **App Settings** > **Language Management** > **Translation Configurations**.
2. Select **Microsoft Translator** and enter the **API Key** of your Microsoft Translator API service. [Learn More.](https://www.microsoft.com/en-us/translator/business/)
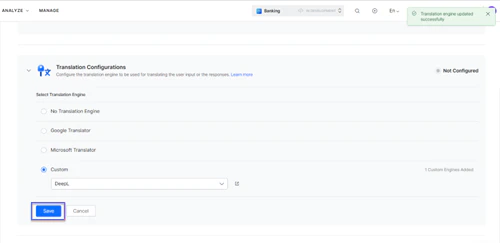
3. Click **Save** to complete the setup.
 ## Configure the Google Translation Service
To enable automatic translation using Google Translation Services, follow the steps below:
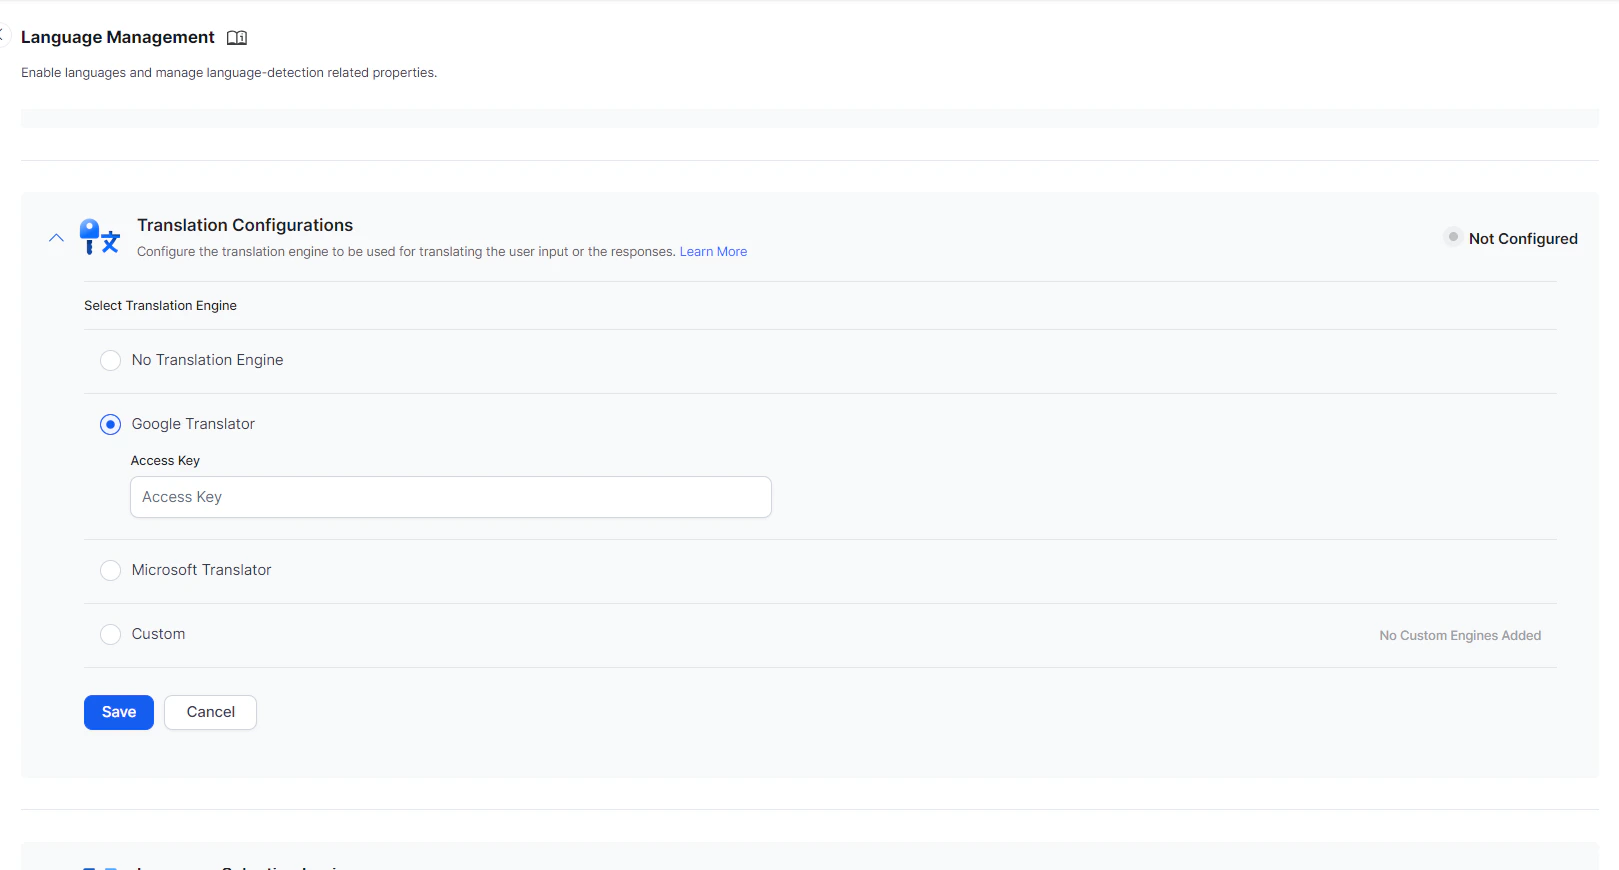
1. Go to **App Settings** > **Language Management** > **Translation Configurations**.
2. Select **Google Translator** and enter the **API Key** (Example, AIzaXXXXXXXXXXXXXXXXXXXEpeW4xa0) of your Google Translation API service. [Learn More.](https://cloud.google.com/translate)
As the Platform doesn't validate the key, it is recommended that you validate the API key beforehand to ensure it is active and working. You can use Postman to validate the key. Postman also lets you to save the translator key in an environment / content variable and provide that variable name enclosed in double curly braces while setting up the configuration.
3. Click **Save** to complete the setup.
## Configure the Google Translation Service
To enable automatic translation using Google Translation Services, follow the steps below:
1. Go to **App Settings** > **Language Management** > **Translation Configurations**.
2. Select **Google Translator** and enter the **API Key** (Example, AIzaXXXXXXXXXXXXXXXXXXXEpeW4xa0) of your Google Translation API service. [Learn More.](https://cloud.google.com/translate)
As the Platform doesn't validate the key, it is recommended that you validate the API key beforehand to ensure it is active and working. You can use Postman to validate the key. Postman also lets you to save the translator key in an environment / content variable and provide that variable name enclosed in double curly braces while setting up the configuration.
3. Click **Save** to complete the setup.
 To know how to use the service, visit [KoreUtil Libraries - autoTranslate.](/ai-for-service/apis/automation/koreutil-libraries#koreutil-autotranslate)
## Configure Custom Translation Service
The Custom Translation Service lets you to use translation services by integrating with other translation providers or to integrate with any in-house translation services you may have.
### How it works
Here is how custom translation services work:
1. Follow the instructions below to enable the **Custom Translation Engine** feature.
2. You can set up the integration with your translation service APIs using the **Get** or **Post** method.
3. Refer to your translation service documentation for the authentication mechanism, request payload, and response payload.
4. This integration is used for translating both the user input as well as the AI Agent responses. The platform avails the following information in the context during runtime.
5. It uses of the following functions while defining the request payload:
1. `koreUtil.conversation.sourceText()` - This function returns the text to be translated.
1. If the user's input is being translated, then the function returns the user's input.
2. If the AI Agent response is being translated, then the function returns the AI Agent response.
2. For translating user input, this function returns the user input. For translating the AI Agent response, the function returns the AI Agent response text.
3. `koreUtil.conversation.getSourceLanguage()` - This function returns the current language of the text to be translated.
1. If the user input is being translated, then the function returns the language in which the user is interacting.
2. If the AI Agent response is being translated, then the function returns the language in which the response is written.
4. `koreUtil.conversation.getTargetLanguage()` - This function returns the language to which the text must be translated.
1. If the user input is being translated, then the function returns the language to which the input must be translated.
2. If the AI Agent response is being translated, then the function returns the language to which the response must be translated. The platform invokes the translation service using the defined configurations.
6. The translation engine must share the translated text as part of the API response.
7. Map the relevant field from the response payload to be used as the translated text.
### Enable a Custom Translation Engine
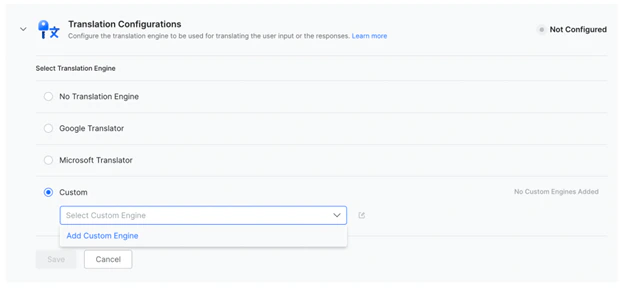
1. Go to **App Settings > Language Management > Translation Configurations**.
2. Select **Custom**, and choose **Add Custom Engine** from the dropdown.
To know how to use the service, visit [KoreUtil Libraries - autoTranslate.](/ai-for-service/apis/automation/koreutil-libraries#koreutil-autotranslate)
## Configure Custom Translation Service
The Custom Translation Service lets you to use translation services by integrating with other translation providers or to integrate with any in-house translation services you may have.
### How it works
Here is how custom translation services work:
1. Follow the instructions below to enable the **Custom Translation Engine** feature.
2. You can set up the integration with your translation service APIs using the **Get** or **Post** method.
3. Refer to your translation service documentation for the authentication mechanism, request payload, and response payload.
4. This integration is used for translating both the user input as well as the AI Agent responses. The platform avails the following information in the context during runtime.
5. It uses of the following functions while defining the request payload:
1. `koreUtil.conversation.sourceText()` - This function returns the text to be translated.
1. If the user's input is being translated, then the function returns the user's input.
2. If the AI Agent response is being translated, then the function returns the AI Agent response.
2. For translating user input, this function returns the user input. For translating the AI Agent response, the function returns the AI Agent response text.
3. `koreUtil.conversation.getSourceLanguage()` - This function returns the current language of the text to be translated.
1. If the user input is being translated, then the function returns the language in which the user is interacting.
2. If the AI Agent response is being translated, then the function returns the language in which the response is written.
4. `koreUtil.conversation.getTargetLanguage()` - This function returns the language to which the text must be translated.
1. If the user input is being translated, then the function returns the language to which the input must be translated.
2. If the AI Agent response is being translated, then the function returns the language to which the response must be translated. The platform invokes the translation service using the defined configurations.
6. The translation engine must share the translated text as part of the API response.
7. Map the relevant field from the response payload to be used as the translated text.
### Enable a Custom Translation Engine
1. Go to **App Settings > Language Management > Translation Configurations**.
2. Select **Custom**, and choose **Add Custom Engine** from the dropdown.
 3. Provide a name for the **Custom Translation Engine**.
4. Select the **Define Script link** under the **Pre-Processor Script**. This option helps in managing your input parameters and values from session variables before the API Request is made.
```
pre-processor script
var sourceLang = koreUtil.conversation.getSourceLanguage();
var targetLang = koreUtil.conversation.getTargetLanguage();
var langMap = {
"zh_tw": "zh"
};
var targetKey = typeof targetLang === "string" ? targetLang.toLowerCase() : targetLang;
var targetKey1 = typeof sourceLang === "string" ? sourceLang.toLowerCase() : sourceLang;
context.targetLanguage = langMap[targetKey] || targetLang;
context.sourceLanguage = langMap[targetKey1] || sourceLang;
context.sourceInput = koreUtil.conversation.sourceText();
```
5. Define the request payload for sending the text to be translated. Refer to the details provided above for defining the request payload.
6. Refer to the [Service Node](/ai-for-service/automation/dialogs/node-types/service-node#define-a-custom-service) documentation to learn more about how to configure service integrations.
3. Provide a name for the **Custom Translation Engine**.
4. Select the **Define Script link** under the **Pre-Processor Script**. This option helps in managing your input parameters and values from session variables before the API Request is made.
```
pre-processor script
var sourceLang = koreUtil.conversation.getSourceLanguage();
var targetLang = koreUtil.conversation.getTargetLanguage();
var langMap = {
"zh_tw": "zh"
};
var targetKey = typeof targetLang === "string" ? targetLang.toLowerCase() : targetLang;
var targetKey1 = typeof sourceLang === "string" ? sourceLang.toLowerCase() : sourceLang;
context.targetLanguage = langMap[targetKey] || targetLang;
context.sourceLanguage = langMap[targetKey1] || sourceLang;
context.sourceInput = koreUtil.conversation.sourceText();
```
5. Define the request payload for sending the text to be translated. Refer to the details provided above for defining the request payload.
6. Refer to the [Service Node](/ai-for-service/automation/dialogs/node-types/service-node#define-a-custom-service) documentation to learn more about how to configure service integrations.
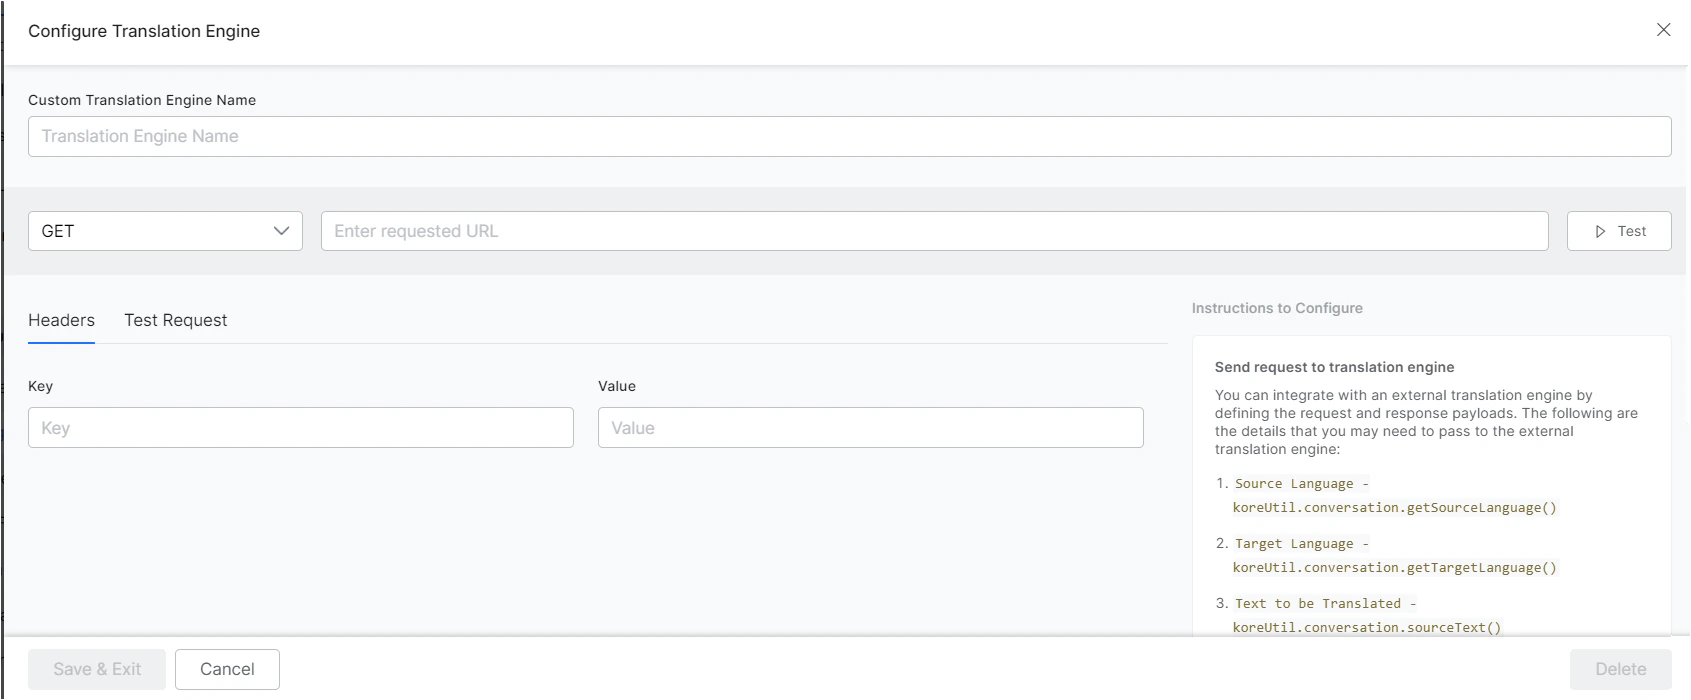 7. After defining the request payload, you can test the integration by providing the required details from the Test Request tab. Provide the sample values for the variables shown under the Sample Context Values sections, click **Test** to verify if the custom translation connection is established.
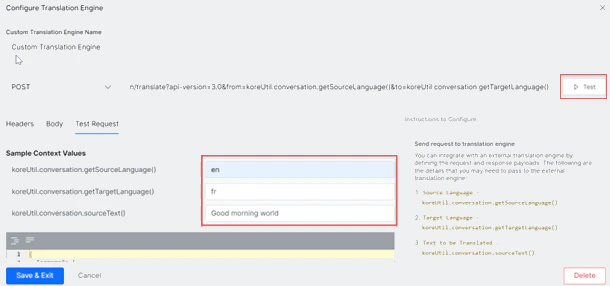 8. After a successful test, the platform displays the API response received from the translation service.
9. Verify the response payload and map the translated text from the payload in the **Translated Output** field.
8. After a successful test, the platform displays the API response received from the translation service.
9. Verify the response payload and map the translated text from the payload in the **Translated Output** field.
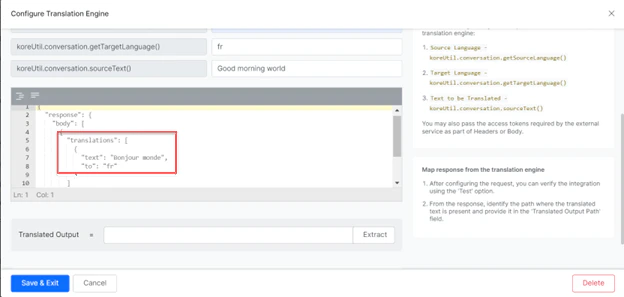 10. Click the **Extract** button to verify if the translation output is correctly mapped.
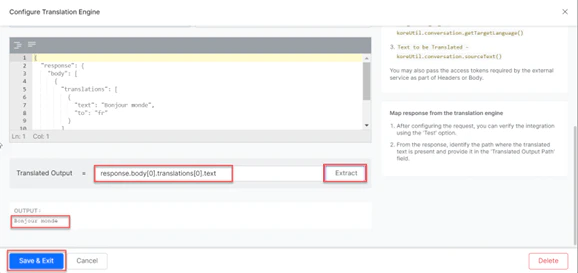 11. Click **Save & Exit** to return to the Languages page.
12. Click **Save** to complete the configuration.
11. Click **Save & Exit** to return to the Languages page.
12. Click **Save** to complete the configuration.