Back to Reports ListScheduled Reporting enables supervisors to create, schedule, and manage reports that analyze agent performance, interaction quality, evaluation metrics, and conversation insights. Supervisors can generate reports on demand or on a recurring schedule, apply filters to refine report data, deliver reports by email, and download report history for ongoing analysis and coaching.
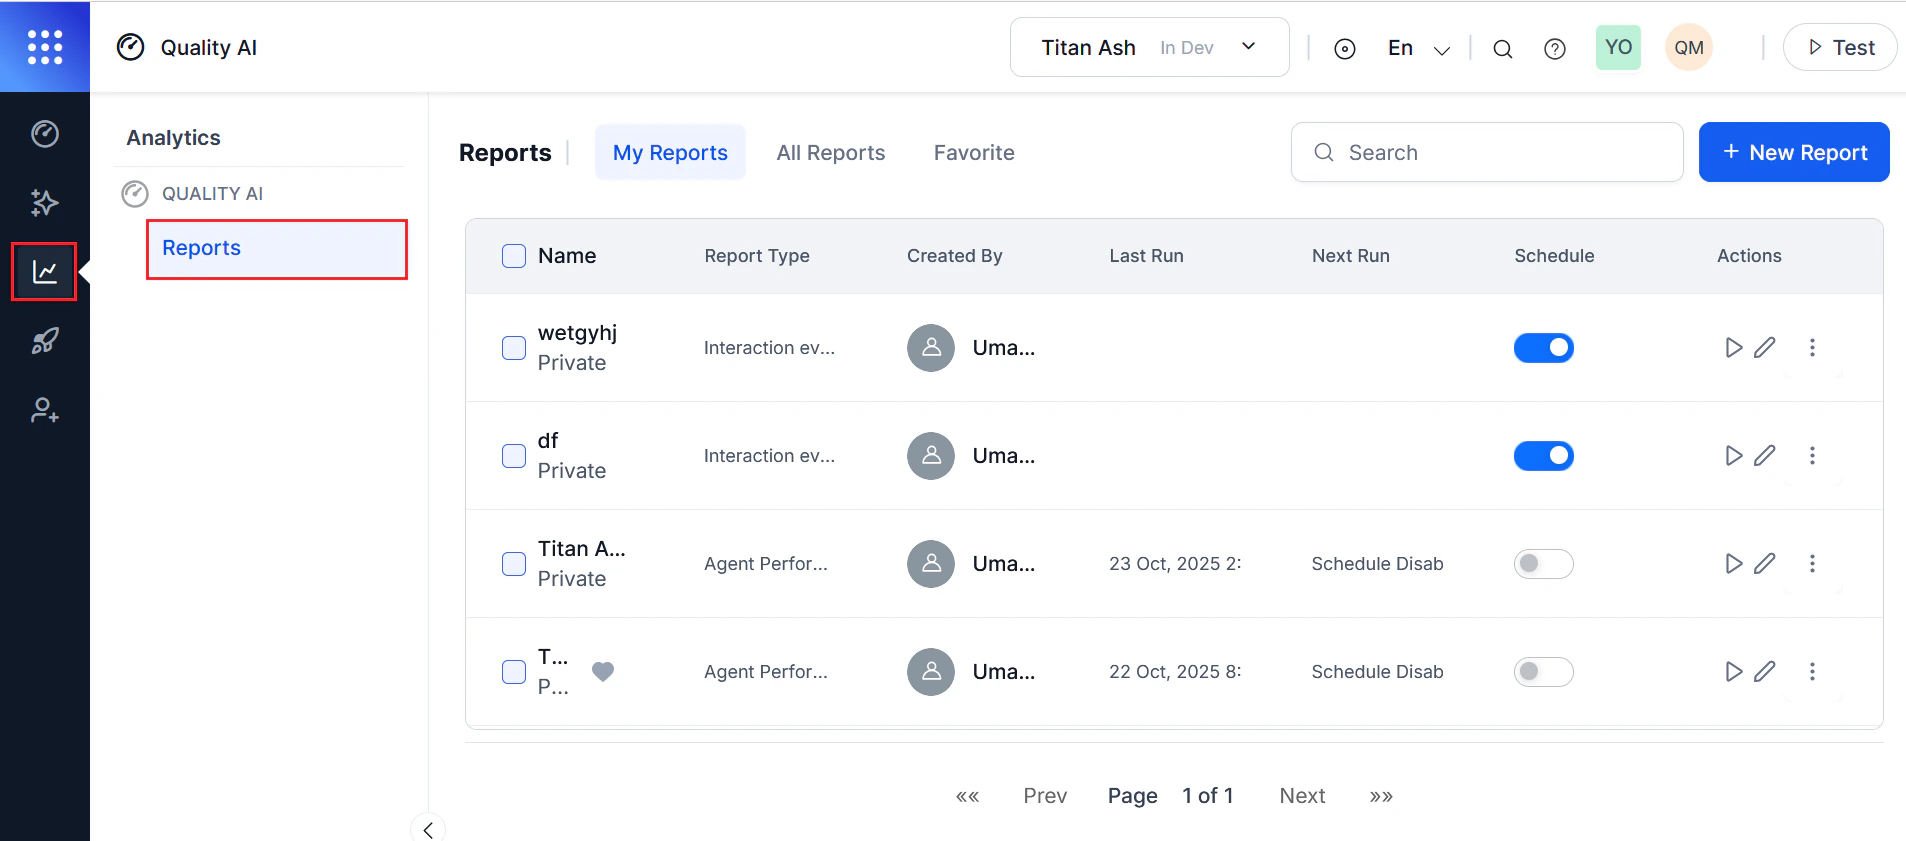
The Reports page provides a centralized view of all reports. You can search reports by name, view report details, and perform actions such as run, view, edit, clone, publish, download, or delete reports. Use tabs such as My Reports, All Reports, and Favorites to filter and manage reports.
Evaluation Form Summary, Interaction Evaluation, or Agent Performance.
Created By
Report owner or creator.
Last Run
Last executed or generated timestamp of a report.
Next Run
Next executed timestamp of a report.
Schedule Toggle
Enable or disable scheduling.
Actions
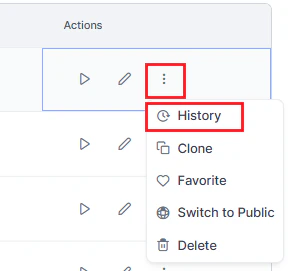
Includes options to Play or Run, Edit configuration, and a Menu (⋮) with additional actions such as viewing history, clone, favorite, by changing visibility, or deleting a report.
Select a report or use the reports search bar to find reports by name. Use bulk actions to run or delete multiple reports simultaneously.
Select one or more reports using the checkboxes.
Select Bulk Run or Delete from the top-left of the Reports page.
Confirm the action to complete the operation.
Deleting a report permanently removes the report and all associated data. You can’t undo this action, and the system requires confirmation before proceeding.
With Quality AI, you can create, filter, and schedule reports for automated or on-demand delivery with customizable formats, bulk actions, and secure, role-based access.
Defines the parameters specific to each report type, including data sources, filters, and time settings.
Select the required Evaluation Form or Agent Scorecard (as applicable) to determine the data scope.
You can select multiple scorecards for comparative analysis.
Includes only interactions evaluated using the selected forms or scorecards.
You must select at least one evaluation form or scorecard (mandatory). Only agents with assigned scorecards appear in the report.
Select a Date or date range:
Standard Ranges: Current day, Previous day, Last 7 days, Last 30 days, Last 90 days.
Custom Range: Select specific start and end dates.
Select a Timezone to match the reporting accuracy.
Choose the necessary Filters such as Channel, Queue, Language, and Agents, then set their corresponding values.
Filters Configuration
This allows you to add filters to refine report data.
Select +Add Filter to add filters and set their corresponding values. Available filters include:
Queues: Select one or more queues to evaluate workload distribution and queue-specific agent metrics.
Channel: Select Chat or Voice.
Agents: Select specific agents for agent-level performance tracking.
Agent Groups: Select the group or team of agents to include in the report.
Language: Select a language configured for Quality AI. Defaults to the application’s default language.
Duration Status: Filter by evaluation eligibility: Evaluated or Below Threshold.
Contact Direction: Filter by Inbound or Outbound to segment report data by contact direction. When applied, the report output includes only interactions matching the selected direction, and the exported file reflects the active direction filter.
Processing Status: Filter interactions by conversation processing state.
Reports exclude Below Threshold interactions by default. To include them, select Below Threshold in the Duration Status filter. Manually evaluated interactions are always included, and you can select Delete to remove a filter row.
Configure Optional Fields
Select Optional Fields to add additional columns to the report export.
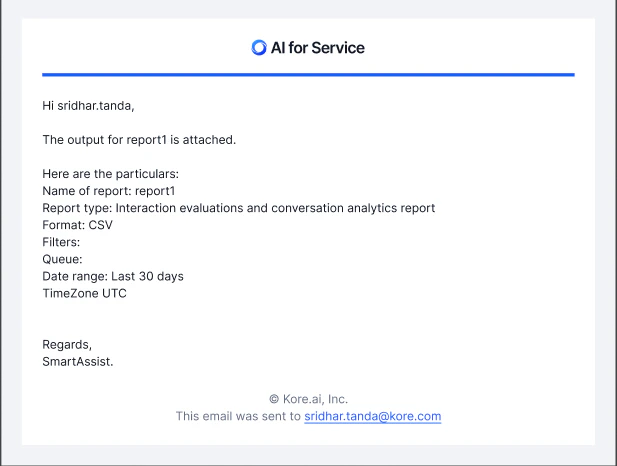
Enter recipient email addresses in the Send Email to (minimum one required to receive automated reports).
Select Delete to remove a selected filter.
Select Next to proceed.
Available fields vary by report type and are dynamically updated based on the selected date range, including custom metadata fields. Changing the date range may change the available custom fields.
Choose one execution method: Run on Demand (manual) or Schedule (automated).
Run on Demand (manual): Generates the report immediately using the current configuration. The Instant Run appears and the scheduling toggle is disabled.
Schedule (automated): Generates the report generation at a defined frequency. The scheduling toggle remains enabled, and the system turns on or off at any time.
Configure Schedule Frequencies
For scheduled reports, specify the frequency:
Hourly: Specify the minute of each hour (0-59). The system generates the report every hour at the specified minute.
Daily: Select a specific time in 24-hour format.
Weekly: Choose a specific day (Monday to Sunday) and time. The system generates the report every seven days.
Monthly: Select a day of the month (1-28) and time.
Quarterly: Select a day of the quarter (1-28/29/30/31) and time. The system generates the report every three months.
Yearly: Select a month, day, and time. The system generates the report once per year.
Additional Settings
Start Date: Select when the schedule begins.
Timezone: Sets the time zone for report execution (defaults to your device’s local time zone).
Instant Run: Runs the report immediately (available only in Run on Demand mode). To generate the report immediately, select Instant Run.
When you configure a recurring schedule (such as Daily or Weekly), the Instant Run button is disabled. The report runs automatically according to the schedule. In Schedule mode, you can toggle the schedule on or off at any time.
Select Save to confirm and activate the schedule. The saved report appears in the Reports > My Reports dashboard.
Enable scheduling by switching on the Schedule toggle.
From the Actions column, select Run to generate the report immediately.
When you proceed to disable a report, the system displays a pop-up confirmation before updating the report status.
Headers: Translated to the selected language with filtered data
The same three-step process (General > Configuration > Schedule) applies to all report types, with variations in the Configuration step based on the specific report requirements.
Partial Data: Report is generated with available data. The email includes a data availability summary.
No Matching Data: An empty CSV with header rows is generated, and the email indicates that no data matches the criteria with suggestions for alternative filter configurations.
The following table describes report-related permissions based on user roles:
Role
Create Report
Edit Own Reports
Edit Public Reports
Delete Own Reports
Delete Public Reports
Schedule Reports
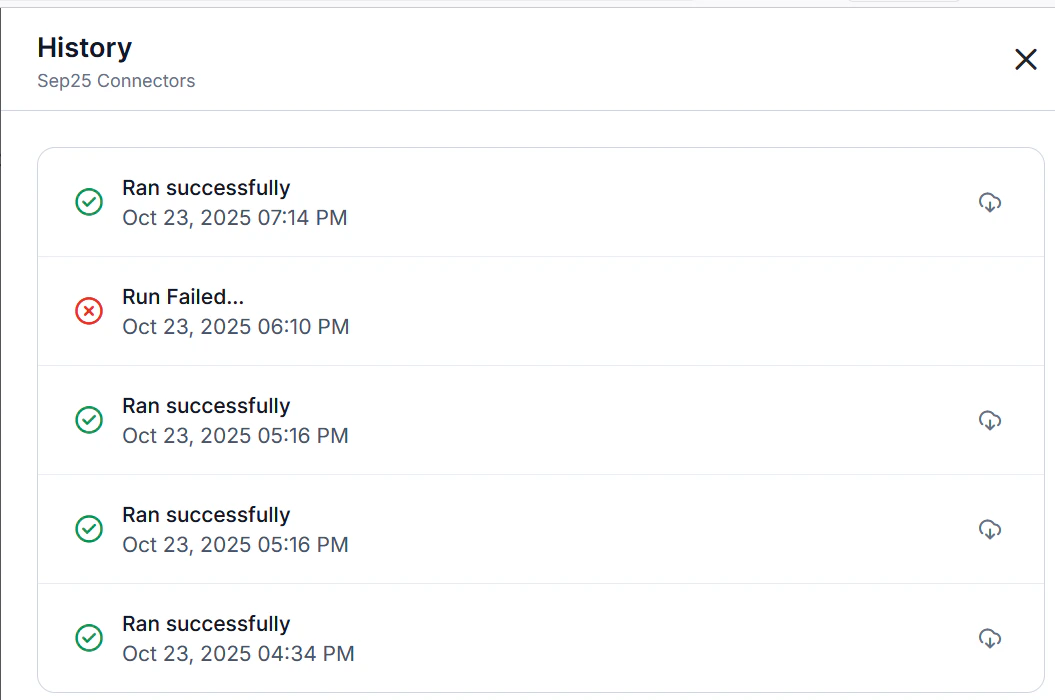
View Report History
App Owner
Yes
Yes
Yes
Yes
Yes
Yes
Yes
Supervisor
Yes
Yes
Yes
Yes
Yes
Yes
Yes
User with Quality AI Reporting Permission
Yes
Yes
Yes
Yes
No
Yes
Yes (own reports only)
User without Permission
No
No
No
No
No
No
No
Report data is based on the selected filters. Users with the Quality AI Reporting permission can access reports, create reports, receive report emails, and download report history.
For more information on role-based access control, see Other Modules under the Roles and Permissions.


 The same three-step process (General > Configuration > Schedule) applies to all report types, with variations in the Configuration step based on the specific report requirements.