> ## Documentation Index
> Fetch the complete documentation index at: https://koreai.mintlify.site/llms.txt
> Use this file to discover all available pages before exploring further.
# Forms
Forms let you collect structured information from users using reusable, project-level forms.
Use a form in a [Human Task node](/agent-platform/workflows#human-task-node) to collect information from an assignee, or use it as an [Intake form trigger](/agent-platform/workflows#intake-form-trigger) to start a workflow when someone submits the form.
You can create a form once and reuse it across workflows instead of creating the same fields separately in each workflow. This reduces duplication and simplifies form management.
Create and manage forms under **Resources > Forms**, where you define their structure.
Use forms in the **Human Task** node to configure how they are used in the workflow, including field values and access.
## Create a form
1. In the left navigation, select **Resources > Forms**.
2. Select **New form**.
3. Enter a name and description for the form.
4. Select **Create**. The form opens in the form builder.
5. Configure the fields you want to include in the form.
6. Preview the form to verify how it appears to users.
7. Publish the form.
 ## Configure a form in the form builder
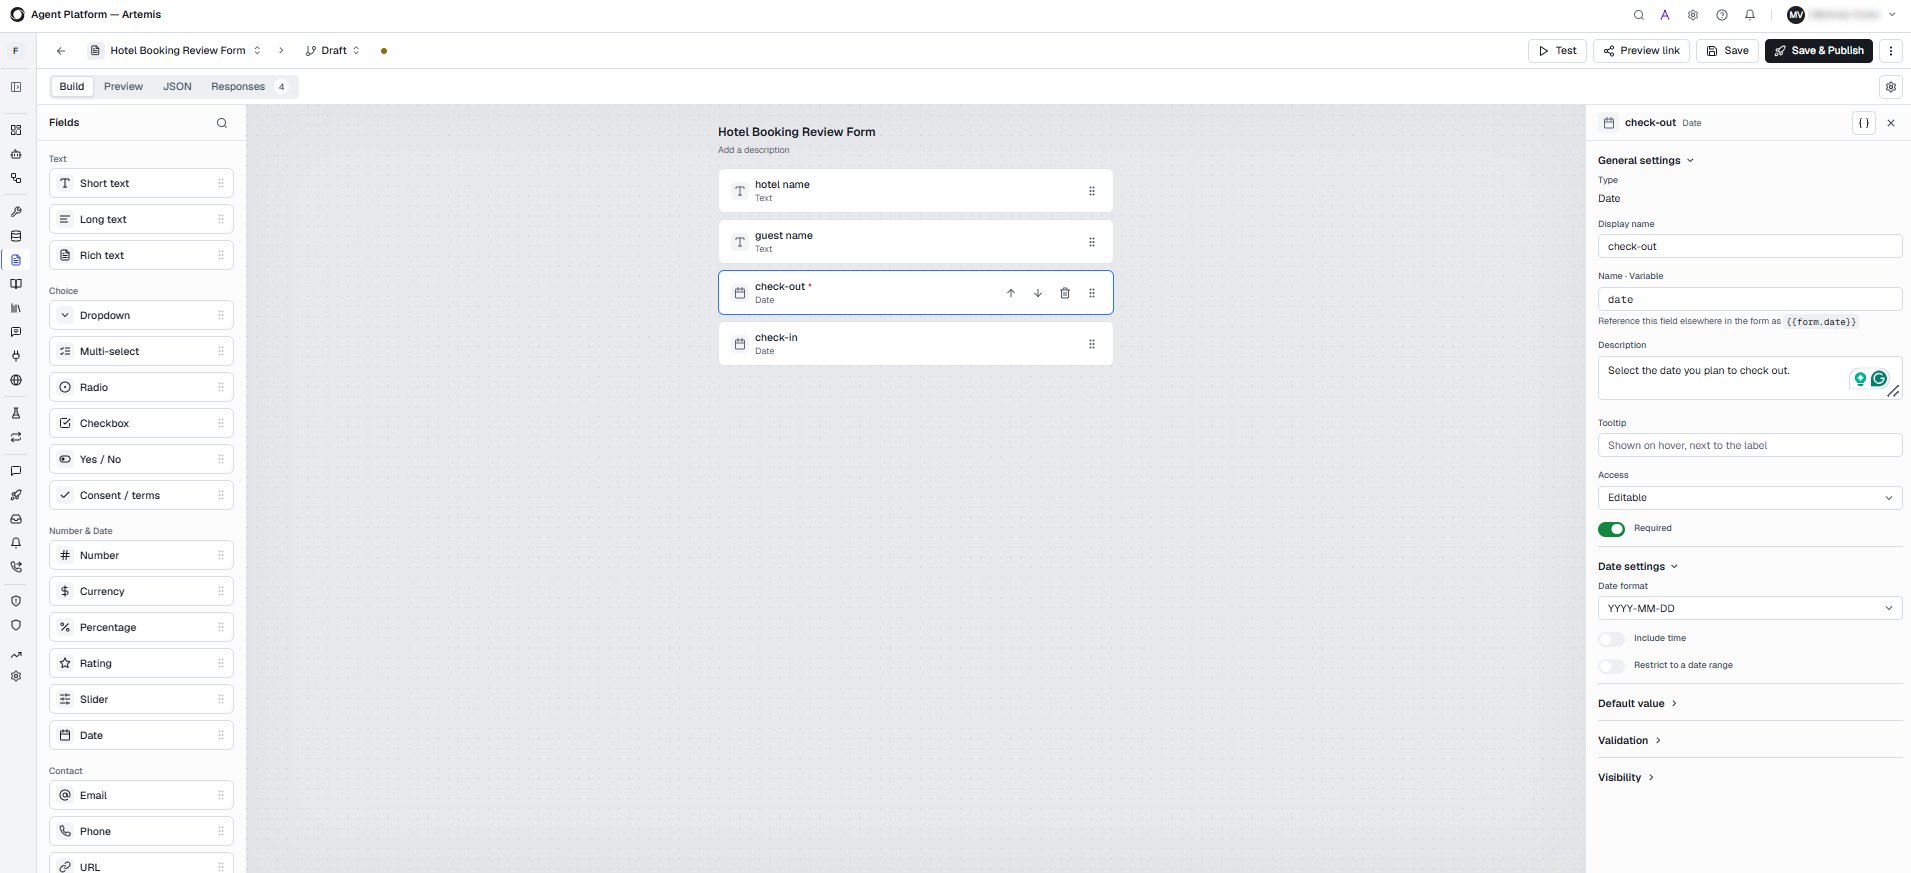
Use the form builder to add fields and configure their settings. Select a field from the field palette to add it to the form, then select the field to configure its settings.
| **Setting** | **Description** |
| :- | :- |
| **General settings** | Configure the field label, variable name, description, tooltip, placeholder, access, and whether the field is required. |
| **Field-specific settings** | Configure settings specific to the selected field type. |
| **Default value** | Specify a value to use when the form is initially displayed. |
| **Validation** | Define validation rules to ensure that submitted values meet the requirements of the form. Depending on the field type, you can configure options such as:
## Configure a form in the form builder
Use the form builder to add fields and configure their settings. Select a field from the field palette to add it to the form, then select the field to configure its settings.
| **Setting** | **Description** |
| :- | :- |
| **General settings** | Configure the field label, variable name, description, tooltip, placeholder, access, and whether the field is required. |
| **Field-specific settings** | Configure settings specific to the selected field type. |
| **Default value** | Specify a value to use when the form is initially displayed. |
| **Validation** | Define validation rules to ensure that submitted values meet the requirements of the form. Depending on the field type, you can configure options such as:
- Minimum and maximum values
- Regular expressions
- Timing
- Validation messages |
| **Security** | Configure how field data is protected. Use security settings when a field contains sensitive information. You can configure secure fields for **redaction**, **replacement**, or **masking**.
Secure-field protection applies at the data layer, not just when the field is displayed. |
| **Visibility** | Configure conditions that determine when a field is displayed. You can use **AND** and **OR** conditions to control field visibility based on other field values. |
## Configure form settings
Use the form settings to configure the form details, appearance, and reuse options.
| **Setting** | **Description** |
| :- | :- |
| **Form details** | Configure the form name, description, variable prefix, and tags. |
| **Theme & branding** | Customize the form appearance, including the header image, accent color, fonts, font sizes, and background. |
| **Reuse** | View where the form can be reused, such as a workflow intake trigger or in a Human Task node. |
## Preview a form
Select **Preview** to view how the form appears to users. Use the desktop and mobile options to preview the form on different screen sizes.
You can also select **Preview link** to generate a shareable preview link for others to review the form.
## Publish and version a form
Forms use draft and published versions so that you can update a form without unexpectedly changing forms already used by workflows.
When you publish a form:
* The first published version is **v1**.
* Subsequent publications create new versions, such as **v2** and **v3**.
* Published versions remain unchanged after they are published.
* A workflow can use a specific published version or the current draft.
* When a newer version is available, you can refresh the form configuration in the workflow and review the changes before adopting the new version.
* A workflow run uses the form version that was pinned when the run started.
This versioning ensures that changes to a form do not unexpectedly affect in-flight workflow runs.
## Use a form in a workflow
You can use a published form in a workflow to collect information from users or assignees.
1. Open the workflow and add the **Human Task** node.
2. In the **Task** tab, select a form. The fields defined in the form are presented to the assignee.
3. Select the form version to use.
4. Configure the field values and access for the task.
The selected form version is used by the workflow until you refresh the form configuration to adopt a newer version.
The form must have at least one published version before you can attach it to a Human Task node. If the form has not been published, publish it in the Form Builder first.
For information about using forms in a Human Task node, see [Human Task node](/agent-platform/workflows#human-task-node).
## Use a form as a trigger
Use a form as an **Intake form** trigger to start a workflow when a user submits the form.
For information about configuring an Intake form trigger, see [Configuring triggers](/agent-platform/workflows#intake-form-trigger).
## View form responses
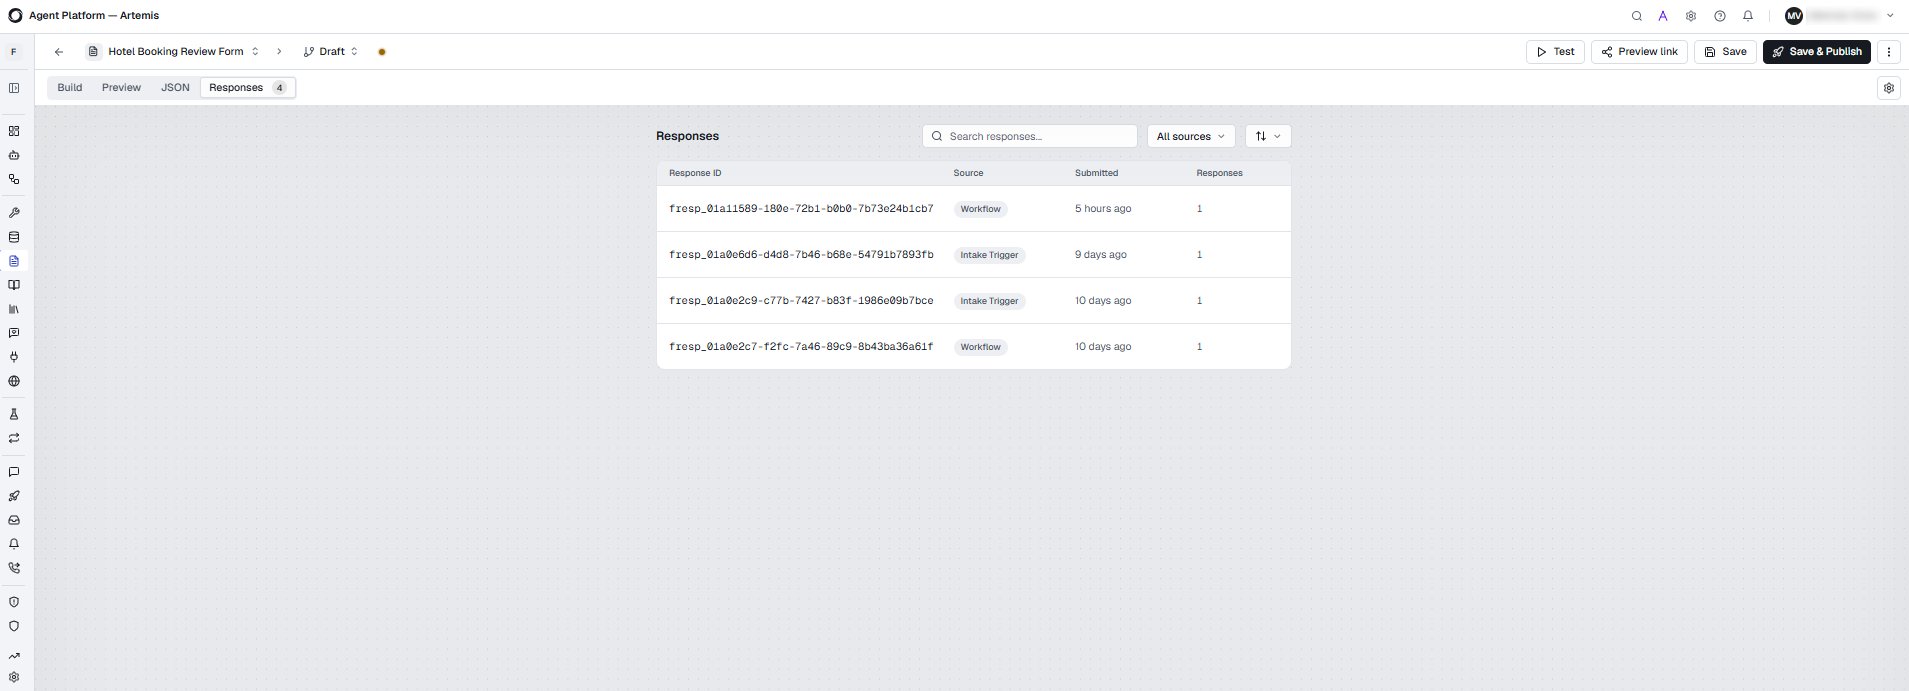
The Responses tab lists submissions received for the form. You can search and filter responses and view individual submissions.
Select a response to view its submitted values. You can view the submission in Form or JSON format.
 ## Import and export a form
You can export a form definition as JSON to reuse it in another project, or import a form definition into a project.
* **Export:** Select **Export** from the form's actions menu to export the form definition as JSON. The exported definition includes the form fields, validation, visibility, theme, and form settings.
* **Import:** Select **Import** and select the form definition to import it into the project. When you import a form into another project, project-specific settings, such as domain configuration, must be configured again after import.
This documentation is built and hosted on [Mintlify](https://mintlify.com), a developer documentation platform.
## Import and export a form
You can export a form definition as JSON to reuse it in another project, or import a form definition into a project.
* **Export:** Select **Export** from the form's actions menu to export the form definition as JSON. The exported definition includes the form fields, validation, visibility, theme, and form settings.
* **Import:** Select **Import** and select the form definition to import it into the project. When you import a form into another project, project-specific settings, such as domain configuration, must be configured again after import.
This documentation is built and hosted on [Mintlify](https://mintlify.com), a developer documentation platform.